

Drunken Master Monk - Hit & Run attacker - Baldur's Gate 3 (BG3)
Contents
Way of the Drunken Master
Monk is a relatively simple and  Reverberation and
 Elixir of Battlemage's Power and
 Gloves of Battlemage's Power easy to build class. Thanks to the innate movement speed bonus and various features like
 Step of the Wind: Dash or
 Step of the Wind: Disengage you can reach multiple enemies and run away to safety incredibly easy.
Drunken Master allows for an easy way to recover our Ki due to  Cheeky Tipple which will allow to use our features more often. On top of that we'll gain
 Drunken Technique which is an absolute core of the build and
 Intoxicating Strike - which we'll be using most often throughout the whole game. The ability to easily
 Disengage and debuff our enemies will be crucial as we also gain
 Life of the Party which will debuff us while we terrorize foes we fight. This will give us survivability + hit chance buff which I don't think I have to elaborate further on why this is good.
Due to our possible high AC we can also attack our foes back due to  Redirect Attack without the need of
 Vest of Soul Rejuvenation if you want to use something else. In this build I won't be going full 12 monk as some later level features of the Way of the Drunken Master aren't that great; However base Monk features and an additional feat may also be pretty useful anyway.
In this particular build I'll be going DEX weapon setup - Let's get into it.
[Video in progress]
Class Contribution
8 Way of the Drunken Master Monk
- 2 features at level 4 and 8 to customize the setup you want.
- Monks features like scaling unarmed damage, movement speed,
 Flurry of Blows,
 Deflect Missiles,
 Ki-Empowered Strikes etc.
- Easy way to recover KI points thanks to Cheeky Tipple.
- Drunken Technique which will give us more mobility and safety as it grants us Disengage.
- Intoxicating Strike which can be a nice setup for debuffing the enemies and will work perfectly with the next feature.
- Life of the Party which will increase our AC and hit chance for each
 Drunk foe thanks to Intoxicating Strike.
 Stunning Strike (Melee) to stun enemies so that they would skip their turns.
4 Thief Rogue
- Additional
 Expertise, which will be used to improve skills.
- Use a
 Sneak Attack (Melee) for a slight damage boost, once per turn.
- Special bonus action use -
 Cunning Action: Dash,
 Cunning Action: Hide, which help with engaging and running away.
 Fast Hands giving us an additional Bonus Action to boost action economy.
- Gives us a 3rd feat option.
Build Variations
| Setup | Description |
|---|---|
|
We'll lose a feat but will gain more movement speed and scaling unarmed strikes damage with increased Ki. We also get the |
|
Fighter dip is for the fighting style and ability to use all weapons. This setup is mainly for |


Synergy with other builds
As the Drunk Monk doesn't have a lot of specific synergies, I'll show you some general builds that will either give you passive buffs or help with control all over the battlefield.
Control Spells
| Synergetic Builds | Enabler | Description |
|---|---|---|
 Hold Person or  Hold Monster |
Enables to easily deal critical hits, which maximize possible damage, and disables key foes. The easiest way to apply is with caster or gish-type builds. |
Grouping
One technique that you can use is to group enemies. This is pretty easy to do, and a very powerful technique to buff yourself thanks to Intoxicating Strike or if you're going to use  Punch-Drunk Bastard.
| Synergetic Builds | Enabler | Description |
|---|---|---|
| Warlock builds |  Eldritch Blast +  Repelling Blast |
The Repelling Blast allows you to control the positions of the enemies and push them together. This makes Eldritch Blast a perfect tool for that |
|
Caster Builds like: |
 Thunderwave |
Using Thunderwave is a cheap and easy way to push enemies together. For example, you have two groups of two. So getting them together, and then letting you hit with a strong AOE attack, technically doubles total damage. |
| - |  Void Bulb |
These consumables are plentiful from  Omeluum in Act 1. They can be either thrown or destroyed with an archer or another AOE attack to pull enemies together. |
 Minor Illusion |
One of the most accessible cantrips in the game. You can use it to pull enemies together before combat. Once they are in place, use an attack to hit them all, or engage in combat so that they don't run away. | |
| - |  Black Hole |
Accessible in Act 3, once you unlock Astral-Touched Tadpole. Black Hole is one of the strongest grouping tools once you have it. It is simple to use, has a wide area of effect, and does not affect allies. |
Piercing Damage
In this specific build I'll be using Piercing weapons so the ability to deal double the damage is obviously very good.
| Synergetic Builds | Enabler | Description |
|---|---|---|
 Bhaalist Armour for the  Aura Of Murder |
Bhaalist Armour can apply easy piercing vulnerability thanks to Aura Of Murder. This is a very powerful buff that makes it easy to deal very high damage in Act 3. |
Build Overview
Here is a table with all the main picks during your leveling progression. For more detailed reasoning, I go further in the article. Also, do not forget to check the recommended gear as it is crucial.
Monks can effectively use both weapons and fists at the same time. The main hand attacks can use weapons while the bonus action effects like flurries, can utilize your fists. So you are not limited to just unarmed attacks.
The reason why the weapon setup multiclasses at 5 and unarmed setup at 6 is because of Ki-Empowered Strikes as there's ways to bypass weapon resistances easier than with unarmed strikes.
This will require you to get  Auntie Ethel's Hair with +1 Dexterity for the best setup of the build. If you don't plan to get the hair put the stats to 16 DEX and 12 STR.
| Level | Class | Selection |
|---|---|---|
| 1 | Monk 1 | STR - 10, DEX - 17 (15+2), CON - 14, INT - 8, WIS - 16 (15+1), CHA - 8 |
| Skills: Stealth, Athletics | ||
| 2 | Monk 2 | - |
| 3 | Monk 3 | Subclass: Way of the Drunken Master |
| 4 | Monk 4 | Feat: +2 Dex or  Savage Attacker |
| 5 | Monk 5 | - |
| 6 | Rogue 1 | - |
| 7 | Rogue 2 | Skills: Sleigh of Hand, Athletics, Stealth |
| 8 | Rogue 3 | Subclass: Thief |
| 9 | Rogue 4 | Feat:+2 Dex or Savage Attacker |
| 10 | Monk 6 | - |
| 11 | Monk 7 | |
| 12 | Monk 8 | Feat:  Mobile,  Sentinel Foe,  Alert |
The setup can use  Elixir of Hill Giant Strength and later from about level 6 you can jump to
 Elixir of Cloud Giant Strength.This setup allows you to keep high Wisdom to enhance your innate AC, DC of your actions and enhance some items like
 Boots of Uninhibited Kushigo
| Level | Class | Selection |
|---|---|---|
| 1 | Monk 1 | STR - 8, DEX - 16 (15+1), CON - 15, INT - 8, WIS - 17 (15+2), CHA - 8 |
| Skills: Stealth, Athletics | ||
| 2 | Monk 2 | - |
| 3 | Monk 3 | Subclass: Way of the Drunken Master |
| 4 | Monk 4 | Feat:  Tavern Brawler +1 CON |
| 5 | Monk 5 | - |
| 6 | Monk 6 | - |
| 7 | Rogue 1 | - |
| 8 | Rogue 2 | Skills: Sleigh of Hand, Athletics, Stealth |
| 9 | Rogue 3 | Subclass: Thief |
| 10 | Monk 7 | - |
| 11 | Monk 8 | Feat: +2 Wisdom Ability Score Improvement |
| 12 | Monk 9 | - |
The core in this one is to enable  Elixir of Bloodlust and use
 Mage Armour as with 16 DEX with the spell's passive and Monk's
 Unarmoured Defence you get the same AC bonus. What you lose out on is some minor ability damage and specific gear damage like Boots of Uninhibited Kushigo.
| Level | Class | Selection |
|---|---|---|
| 1 | Monk 1 | STR - 17 (15+2), DEX - 16 (15+1), CON - 14, INT - 8, WIS - 10, CHA - 8 |
| Skills: Stealth, Athletics | ||
| 2 | Monk 2 | - |
| 3 | Monk 3 | Subclass: Way of the Drunken Master |
| 4 | Monk 4 | Feat: Tavern Brawler +1 STR |
| 5 | Monk 5 | - |
| 6 | Monk 6 | - |
| 7 | Rogue 1 | - |
| 8 | Rogue 2 | Skills: Sleigh of Hand, Athletics, Stealth |
| 9 | Rogue 3 | Subclass: Thief |
| 10 | Monk 7 | - |
| 11 | Monk 8 | Feat: +2 Strength Ability Score Improvement |
| 12 | Monk 9 | - |
Starting the Game - Level 1
This section covers the creation screen and what would go into the best Races, Abilities, and Skills for the Drunk Monk. Some of these choices are impactful as you cannot respec them.
Races
Picking a race provides various benefits - abilities, dialogue options, looks, etc.
| Race | Features | Description |
|---|---|---|
 Dwarf Duergar |
|
One of the best race picks overall. The  Invisibility action allows you to enter combat with the best possible position and always activate the  Surprised round. Keep in mind you'll have slightly lower mobility as it is a shorter race. |
 Wood Half-Elf |
|
The build also utilizes melee attacks so it's great to have the speed boost. |
 Wood Elf |
|
|
| High Half-Elf |
|
These picks are relevant mainly for the  Booming Blade cantrip. This is especially relevant due to your mobility and free damage is always good. I will be going on with this one for this build. |
 High Elf |
|


Origins and Characters
Here are the Origin and character picks that have a slight advantage with this build:
| Origin | Features | Description |
|---|---|---|
 Karlach |
|
The main highlight is the  Soul Coin, which allows doubling the fire damage rider, giving a significant boost. One of the best characters for unarmed builds. |
 Astarion |
|
In Act 3, Astarion can obtain the  Vampire Ascendant buff, which gives a 1d10 necrotic damage boost. Sadly, this is tied to specific decisions that you will have to make. He also gets the  Happy from  Bite abilty which is pretty good itself. |


Class
| Overview | |
|---|---|
 Monk |
|
| Features | |
 Flurry of Blows |
Very powerful attack, allowing you to do two hits with a bonus action and Ki points. |
 Ki |
A unique resource for Monk actions. |
 Unarmoured Defence |
Allows getting the armor class from the Wisdom modifier. |
 Martial Arts: Dextrous Attacks |
Similar to how finesse weapons work, Monk attacks scale based on high ability between Strength and Dexterity. |
 Martial Arts: Deft Strikes |
Set the base attack of unarmed attacks to 1d4, later this becomes 1d6 and 1d8. |
 Martial Arts: Bonus Unarmed Strike |
Gives an option to attack with your fists using bonus action. |
Background
Backgrounds are mostly for role-playing and you can pick whatever you prefer.
| Background | Skills | Description |
|---|---|---|
| Folk Hero | Animal Handling Survival |
Both of these use Wisdom as the main ability. |
| Urchin | Sleight of Hand Stealth |
Effective combo to improve your chances of lockpicking and trap disarming. |
| Charlatan | Deception Sleight of Hand |
Mainly good for improved Sleight of Hand to unlock chests and pickpocketing. |
| Soldier |
Intimidation Athletics |
Mainly good for Athletics due to  Shove as it can sometimes help pushing your enemies for an insta kill or pushing them to your CC. |
Abilities
Ability scores for this build: starting values, bonuses and the changes to make while leveling.
Skills and Expertise
Overall, the skills should be impacted by your roleplaying and background decisions. However, you would still want those that will give you the best benefits. My recommendation would be to go for these, most relevant to the theme of the build:
- Stealth
- Athletics
Leveling Progression 2-12
Here is the detailed progression for the Drunken Monk to get you started. You can use it as a guideline because early games can be daunting and overwhelming. Later on, once you get a feel for the class, you can start picking your options
Levels 2-6
By this time, you should have landed on the Ravaged beach already and started exploring the initial area. You might need 1 additional encounter if you did not obtain enough XP in the Nautiloid.
This part of the progression covers 3 main areas. They are important both from an exploration and experience perspective. This is a huge swath of content, so missing any of the regions can negatively impact the game experience if you especially enjoy finding all the places
- Wilderness that encompasses - Druid's Grove, Goblin Camp, Sunlit Wetlands and The Risen Road
- Underdark - covering Ebonlake Grotto, Arcane Tower, Selûnite Outpost
- Grymforge - Underdark - Duergar Encampment and Adamantite Forge
Again, exploring them will give both awesome gear and a lot of experience, and of course, content with interesting quests.
For most of the builds, early levels are pretty simple, as there are minimal features that you can use. However, there are notable spikes at levels 5-6:
 Extra Attack
- Major class and subclass features
With these, you will feel how the game combat opens up, and with correct preparations, you can start eliminating foes with minimal preparations.
Level 2
| Feature | Description |
|---|---|
 Unarmoured Movement |
Makes it easier to reach and move between enemies. |
That is not all, by using Ki points you can get an improved version of some base actions:
| Action | Description |
|---|---|
 Patient Defence |
It's not something that I would use, as the bonus action has better uses. |
 Step of the Wind: Dash |
It can be used to reach longer distances or jump on enemies on higher grounds. |
 Step of the Wind: Disengage |
A disengage option that you can activate with Bonus action and a Ki Point. |
Steroids - Elixir of Hill Giant Strength
There is an easy way to get a big boost to your strength via Elixir of Hill Giant Strength. Why is this important? If you use Drunken Technique, your unarmed attacks can use Strength as the main stat. This is not all, at level 4, you can pick Tavern Brawler feat which gives an additional boost to attacks based on strength modifier.
After you reach the first settlement - Druid's Grove. There, you can stock up on elixirs for Acts 1 and 2 - Elixir of Hill Giant Strength. This is somewhat gimmicky; however, if you are interested, here is a guide on how to farm Elixir of Hill Giant Strength.
Drinking the elixir after each long rest will result in full combat potential of the build, making many encounters a breeze. You can even buy an improved version Elixir of Cloud Giant Strength with a fixed 27 strength stat or brew them from  Cloud Giant Finger prior to level 6.
For the weapon Monk use it solely for using Shove as it boosts your chance of succeeding the push or just for throwing and carrying enemies.
Level 3
This level unlocks subclass and additional class features:
| Feature | Description |
|---|---|
 Deflect Missiles |
A useful option for reaction when you are getting shot with a ranged attack, and there are no opponents close by for Attack of Opportunity. |
Subclass
| Overview | |
|---|---|
|
Way of the Drunken Master |
|
| Features | |
 Cheeky Tipple |
On top of Drunk immunity you can regain half your Ki points rounded down once per day by drinking alcohol. Very easy to regain your economy action. |
 Drunken Performance |
You gain proficiency in Performance skill, simple. |
 Drunken Technique |
You attack an enemy twice, gain bonus movement and the effect of Disengage, it also replaces Flurry of Blows. Great attack and escape tool. |

Level 4
Level 4 brings the first feat, it will be a huge improvement.
Class features
| Feature | Description |
|---|---|
 Intoxicating Strike |
It allows us to get our enemies Drunk which can prove helpful for some other control options or stuff like  Smokepowder Bomb. It's also crucial for the next feature. |
 Life of the Party |
For every Drunk target through Intoxicating Strike you gain +1 AC and +1 to attack rolls against Drunk targets, your best bet for buffing yourself. |
Feat
The pick depends on the setup you have and how you allocate ability points.
| Feat | Description |
|---|---|
| Ability Improvement - +2 Dex | For weapon monk take - +2 Dexterity for a bonus to AC, initiative, hit chance and dmg. |
 Savage Attacker |
Re-rolls our melee weapon damage dice counting damage riding effects. |
 Tavern Brawler |
Take the +1 Constitution option to round it to 16 for the Elixir of Hill Giant Strength, for the nat STR unarmed monk take +1 Strength to round it to 18. If you're playing the weapon setup you may take it and use the  Club of Hill Giant Strength as an off-hand. |
Level 5
Another major milestone for the build and unlocks great features:
| Feature | Description |
|---|---|
 Extra Attack |
An important feature, that will allow you to attack two times with the main hand. This will pair well with the next unlock -  Stunning Strike (Unarmed) to stun your targets. |
 Stunning Strike (Melee) |
It acts as a normal attack but can also stun enemies when attacking with a weapon. |
 Stunning Strike (Unarmed) |
It acts as a normal attack but can also stun enemies when attacking unarmed. |
Level 6 - Rogue Lv 1
As mentioned in the introduction, Rogue plays a pivotal role as Thief gives us bonus option for mobility and damage via Fast Hands. We can Drunken Technique for free mobility boost and run away option, attack twice with  Main Hand Attack and then Dash: Bonus Action to "cheese" enemies.
To multiclass follow these steps:
Class
| Overview | |
|---|---|
 Rogue |
|
| Features | |
 Sneak Attack (Melee) |
This can be exploited with weapon attacks for an additional 1d6 damage once per turn. Be sure to have an  Advantage or attack using  Hide. Later, more damage rolls are added. |
 Sneak Attack (Ranged) |
This can be exploited with weapon attacks for an additional 1d6 damage once per turn. Be sure to have an Advantage or attack from hiding. Later, more damage rolls are added. |
Abilities
To be fair, any picks are okay, but I would emphasise two:
- Sleight of Hand - if you need a dedicated lockpicker or trap disarmer
- Stealth - used for stealth based gameplay or stuff like
 Greater Invisibility
- Athletics - used for shoving.
Levels 7-10
Generally, this covers the Act 2 part of the game. This unlocks items that give a slight boost to a few builds, and you uncover a really interesting part of the story.
Level 7 - Rogue Lv 2
| Action | Description |
|---|---|
 Cunning Action: Hide |
Bonus action hide which can prove useful. |
 Cunning Action: Dash |
Cover more distance this turn: double your movement speed. |
| Cunning Action: Disengage |
Retreat safely: moving won't provoke  Opportunity Attack. |
Level 8 - Rogue Lv 3
Subclass
| Overview | |
|---|---|
 Thief |
|
| Features | |
 Fast Hands |
Allows another bonus action, in Monk's case this will be  Martial Arts: Bonus Unarmed Strike, Drunken Technique or cunning actions. |
 Second-Story Work: Falling |
Reduces fall damage. |
Level 9 - Rogue Lv 4
| Feat | Description |
|---|---|
| Ability Improvement - +2 Dex | Take - +2 Dexterity for a bonus to AC, initiative, hit chance and dmg. |
| Savage Attacker |
Re-rolls our melee weapon damage dice counting damage riding effects. |
Level 10 - Monk 6
A new subclass and class features are unlocked:
Drunk Monk features
| Feature | Description |
|---|---|
 Leap to Your Feet |
When you are under the  Prone effect you stand up with a lot less movement speed. |
 Redirect Attack |
With a reaction and using 1 ki point you can attack an enemy with an unarmed attack if they miss you. This works great with the Tavern Brawler. |
Monk features
| Feature | Description |
|---|---|
 Ki-Empowered Strikes |
You can now overcome physical resistances, as your fists count as magical attacks. |
| Improved Unarmoured Movement | Significantly increases movement speed by 4.5 meters. |
Levels 11-12
This is where you will spend most of the time in Act 3. There will be an immense amount of content, and you can finish your builds and unlock extremely powerful gear.
Level 11 - Monk 7
The level unlocks a few class features
| Feature | Description |
|---|---|
 Evasion |
Gives a huge survivability boost against spells and effects like bombs which can be easily exploited. |
 Stillness of Mind |
Allows for avoiding  Charmed and  Frightened conditions, making many combat encounters easier. |
Level 12 - Monk 8
The Third feat of the build is unlocked, and an additional Ki Point has been added.
| Feat | Description |
|---|---|
 Sentinel: Vengeance |
As this is a skirmisher type build it may seem an anti-synergy but the feat can be exploited as it is able to "proc" extra attack if you're standing near an ally. |
 Alert |
If you're a sucker for initiative and anti-surprise utility, pick this one. |
| Ability Score Improvement, Savage Attacker, Tavern Brawler |
Ability score improvement, re-rolling melee weapon damage dice and bonus unarmed damage bonus with accuracy are still viable. |
Equipment Recommendations
Here are some recommendations on how to follow the gear picks:
- I recommend checking the Item Checklists or Interactive Map, depending on which is easier to use for you. This will help you track which items and when you should pick them.
- I mention Stat Sticks. These are items that you do not use directly (like Club of Hill Giant Strength,
 Knife of the Undermountain King,
 The Dead Shot, etc.), but their bonuses still apply to other weapon attacks or actions.
- If an item is taken by another character, use the one with lower priority or even those from previous acts. If you want to have the best items for all builds, this will require planning, which is not for everyone.
- For the Unarmed setup I recommend checking the Open Hand Monk item recommendations as the items aren't much different.
Act 1
 Plan the rest of your party around this gear in the Party Gear Planner
 Main HandHunter's Dagger
Absolute beast combined with
Booming Blade and your high mobility. The tool-tip in the game lies and the passive  Ruptured is always applied.
Alternatives
- Mourning Frost
Even though it looks caster-focused it's actually great at being a martial weapon, the 1d4 Cold damage can easily be doubled with
 Wet. This can also lead to
 Frozen which will make enemies Vulnerable to Bludgeoning.
- Nature's Snare
Can be found very early on and CC our enemies with a great condition, combined with
 Gloves of Power it's a great weapon.
- Hamarhraft
Can be exploited due to
Step of the Wind: Dash as jumping won't cost a bonus action which translates to free 1-4 damage every jump. It is a 2 handed weapon though so forget about an off-hand.
- Off HandSpeedy Reply
Can give us bonus
 Momentum if needed, decent before Rogue multiclass.
Alternatives
- Club of Hill Giant Strength
Great for
Tavern Brawler or bonus jumping distance.
 Ranged Main HandHunting Shortbow
Due to our high mobility, survivability through features like
Deflect Missiles we can maintain our  Concentration on free
 Hunter's Mark provided by the bow.
Alternatives
- Bow of the Banshee
Great bow that will add bonus 1-4 damage on every
Frightened not only afflicted by the bow. The bonus is applied regardless of Frightened target meaning you don't have to shoot the bow to get the benefit. - Bow of Awareness
Gives us a bonus initiative, if you want to win an initiative battle this is a good stat stick. Due to it being a DEX build it won't be that huge of a change early game.
 HelmetHaste Helm
Gives us even more
Momentum which we want every time.Alternatives
- The Lifebringer
Somewhat of an okay option if you're going to use
 The Sparkle Hands for some bonus HP bonus.
 CloakThe Deathstalker Mantle
Dark Urge specific.
 ChestPoisoner's Robe
Works great with
Booming Blade and  Broodmother's Revenge, the only downside is that you're going to have to use some sort of healing for the best value.
Alternatives
- Infernal Robe
Good defensive robe with some sort of retaliation, comes at the cost of killing Karlach though.
- The Protecty Sparkswall
Okay defensive option although I'd only use it if you won't use it on any caster.
- Armour of Uninhibited Kushigo
Better than nothing, the passive may come useful in some situations.
 GlovesThe Sparkle Hands
BiS for damage and some item interactions, you'll be able to quickly stack up on
 Lightning Charges.
Alternatives
- Bracers of Defence
Flat bonus to our Armuor Class as we won't be using any armour.
- Gloves of Power
Good opiton to debuff your enemies, works only on weapon attacks.
 BootsLinebreaker Boots
As we will be using
Dash and similar actions a lot they will give us a great damage boost to our attacks, they may even stay until the endgame.Alternatives
- Disintegrating Night Walkers
Great pair of boots if you have any CC casters, situational
 Misty Step can also prove useful
- Boots of Speed
Okay option before the Thief Rogue dip.
 AmuletBroodmother's Revenge
Great damage amulet that can stay with you until endgame.
Alternatives
- Moondrop Pendant
If you don't mind risky play or if you make a mistake this can be pretty useful without using
Drunken Technique or  Disengage to run away.
- Amulet of Misty Step
Once per Short Rest get out of danger free card via
Misty Step.
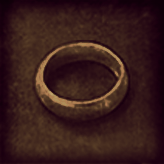 RingCrusher's Ring
Gives us even more mobility which we like.
Alternatives
- Spurred Band
An okay option for risky playstyle and good combo with
 Moondrop Pendantr
- Ring 2Ring of Protection
Not many great options early game, +1 AC and Saving throws is very good to have.
Alternatives
- Caustic Band
Flat +2 damage bonus to weapon attacks,


Act 2
Plan the rest of your party around this gear in the Party Gear Planner- Main HandKnife of the Undermountain King
Still remains a great damage option.
Alternatives
- Render of Mind and Body
If you're not going to use
Knife of the Undermountain King this can be a pretty good option since we'll be unlocking lots of easy Advantage options like Cunning Action: Hide or spells like Greater Invisibility. - Drakethroat Glaive
Use this to buff your weapon, with
 Draconic Elemental Weapon after each long rest, on top of free damage it will also enable our Booming Blade to work with
 Ring of Elemental Infusion
- Off HandSword of Clutching Umbra
 Shadowsoaked Blow can still be used in off hand which can be pretty useful if you're not going to use other weapons.
Alternatives
- Club of Hill Giant Strength
Still a good stat stick if you take
Tavern Brawler.
- Ranged Main HandDarkfire Shortbow
Gives free Cold and Fire resistance on top of
 Haste which can be safe to use due to your high mobility
Alternatives
- Bow of the Banshee
Great bow that will add bonus 1-4 damage on every
Frightened not only afflicted by the bow. The bonus is applied regardless of Frightened target meaning you don't have to shoot the bow to get the benefit. - Ne'er Misser
Good option vs Piercing resistant enemies although I'd give it to your archer if you have one.
- Bow of Awareness
Free initiative option.
- HelmetDiadem of Arcane Synergy
As activating
 Arcane Synergy is really easy (applying any condition works), you can use this to improve your damage based on the spellcasting modifier
Alternatives
- Haste Helm
Bonus mobility through
Momentum is still great
- CloakVivacious Cloak
Great defence option if you're going to use
Booming Blade as you can get free 8 TEMP HP every turn.Alternatives
- Cloak of Protection
Okay option with minor boosts is better than nothing.
- ChestThe Graceful Cloth
Great cloth which can elevate our Dexterity to 20 with
 Auntie Ethel's Boon giving us +5 AC, initiative, damage and hit chance. Bonus jump distance and Advantage on Dex skill checks through
 Cat's Grace is great too.
Alternatives
- Poisoner's Robe
More enemies are poison resistant or immune meaning this won't be as good.
- GlovesFlawed Helldusk Gloves
Gloves that will benefit both your weapon and unarmed attacks, bonus to apply
Bleeding is also pretty okay.Alternatives
- The Sparkle Hands
They still remain a great damage option, better option than
 Flawed Helldusk Gloves if you're going for pure unarmed.
- Dark Justiciar Gauntlets
Better than nothing damage boost option for your weapon monk.
- BootsLinebreaker Boots
Still your BiS damage option.
Alternatives
- Disintegrating Night Walkers
Great pair of boots if you have any CC casters, situational
Misty Step can also prove useful - Evasive Shoes
Flat +1 AC bonus is somewhat okay.
- AmuletBroodmother's Revenge
Remains your best bet damage option.
Alternatives
- Amulet of the Harpers
Pretty good saving throws option vs mental save spells as we already use high Wisdom, free
 Shield is also a nice addition.
- RingShadow-Cloaked Ring
Great damage ring as you can proc it very often AND it adds an additional 1-4 damage to unarmed attacks.
Alternatives
- Ring of Elemental Infusion
To use this ring you have to apply
Elemental Weapon spell or effect from  Drakethroat Glaive and use Booming Blade. It's a damage riding effect which means it can proc multiple times.
- Ring 2Strange Conduit Ring
Still remains a good damage option ring if you use
Concentration often.Alternatives
- Ring of Free Action
It doesn't state so but the ring also prevents you from getting immobilzed by a condition like
Hold Person, great utility anti-debuff ring. - Ring of Arcane Synergy
Alternative to
 Diadem of Arcane Synergy


Act 3
Plan the rest of your party around this gear in the Party Gear Planner- Main HandCrimson Mischief
One of the best dual-wielding weapons. Given how easy you can activate it's features at this level it's an extremely good damage option.
Alternatives
- Dolor Amarus
Free damage on crit and with
Bhaalist Armour's Aura Of Murder or due to  Bloodthirst's ability it's easy double damage. To utilize it best you have to crit often.
- Bloodthirst
Can provide an easy piercing vulnerability to piercing damage allowing to deal double damage of that kind, -1 to crit is also an okay buff.
- Off HandDolor Amarus
Free damage on crit and with
Bhaalist Armour's Aura Of Murder or due to Bloodthirst's ability it's easy double damage. To utilize it best you have to crit often.Alternatives
- Bloodthirst
Can provide an easy piercing vulnerability to piercing damage allowing to deal double damage of that kind, -1 to crit is also an okay buff. Reason it's lower is because you have much more contested Bonus Action slots.
- Knife of the Undermountain King
-1 to crit and passive damage re-roll still remain good buffs.
- Ranged Main HandVicious Shortbow
Good stat stick damage bow giving you free damage on crit, deals double damage to piercing vulnerable targets.
Alternatives
- Hellrider Longbow
Since you can reach +6 to initiative by just leveling up DEX this bow won't be that good especially if you take
Alert. However there's some Honor Mode bosses with incredibly high initiative where using it as a stat stick might be helpful. - Gontr Mael
Gives you an upgraded version of
Haste which can help you in dangerous fights. - The Dead Shot
Use it just for -1 to crit, not my favourite choice but it's still something
- HelmetHorns of the Berserker
Gives a free bonus to attack rolls on top of a lot of potential damage to all of your attacks.
Alternatives
- Helmet of Grit
Good for risky gameplay giving you another Bonus Action to use for attacks or utility
- Diadem of Arcane SynergyArcane Synergy is still a good option although it only works on weapon attacks.
- CloakCloak of Displacement
Gives you free
 Blurred effect until you take damage.
Alternatives
- Wavemother's Cloak
Gives you a good plentiful of buffs thanks to
Water Layer Protection until you take damage. - Vivacious Cloak
Still remains a great option if you have access to
Booming Blade
- ChestBhaalist Armour
Great piece offering you
Aura Of Murder that can double your piercing damage although it comes at a price of losing bonus innate monk movement.Alternatives
- Mutilated Carapace
The tooltip of this piece lies as the +1 damage to damage rolls applies to multiple damage rolls.
- Garb of The Land and Sky
Great defensive option that can give you damage boost or insane survivability.
- GlovesCraterflesh Gloves
The tooltip also lies as they deal 2-6 bonus damage instead of 1-6, the damage boost also can stack on many damage rolls.
Alternatives
- Helldusk Gloves
On top of giving a lot of benefits, they're a direct damage upgrade to
Flawed Helldusk Gloves. - Gloves of Soul Catching
Even though it's a weapon setup they still can add respectable damage from your mixed combo of weapon attacks and
Drunken Technique or Intoxicating Strike. - Flawed Helldusk Gloves
1d4 damage boost on both unarmed and weapon attacks is still a decent option with possibility to apply
Bleeding.
- BootsLinebreaker Boots
They still remain one of the best damage options.
Alternatives
- Helldusk Boots
Improved version of
 Disintegrating Night Walkers, one of the best footwear picks in the whole game.
- Boots of Uninhibited Kushigo
Unarmed focused option.
- AmuletBroodmother's Revenge
Still remains a nice damage boost.
Alternatives
- Amulet of Greater Health
Boosts your Constitution to 23 giving you a lot of hit points and a possibility to respec and allocate your stats differently, I personally put it into Strength for
Shove or  Jump distance.
- Amulet of the Drunkard
Since you're immune to negative effects of
Drunk it's a good HP regeneration piece. - Fey Semblance Amulet
Quality of life boost to your mental saving throws, it's a good negation effect if you decide to take Resonance Stone from Act 2.
- RingStrange Conduit Ring
Great damage ring if use your
Concentration.Alternatives
- Ring of Elemental Infusion
To use this ring you have to apply
Elemental Weapon spell or effect from Drakethroat Glaive and use Booming Blade. It's a damage riding effect which means it can proc multiple times. - Ring of Arcane Synergy
Alterantive to
Diadem of Arcane Synergy if you have Booming Blade
- Ring 2Shadow-Cloaked Ring
Still one of the the best damage rings for your style of gameplay.
Alternatives
- Ring of Free Action
Utility ring to prevent CC effects.


Build Mechanics
In this section, I would like to dive deep into how to play the Drunk Monk. This will help you utilize it to the fullest and correctly use various actions and spells throughout the game.
Important Mechanics and Combos
Let's go through key mechanics and tips on how to effectively use the build.
Hit 'N Run
Due to your high mobility and Drunken Technique we're incredibly difficult to catch, try to break the line of sight with enemies for them to seek you out or avoid taking ranged damage. It's especially good when we take the Rogue dip thanks to Cunning Action: Hide as this can break the enemy AI making them skip their turns
I recommend looking at how much movement you have by checking this bar over your turn action bar.

Stunning Strike to disable foes
Although this might not be the reason why you go with monk, it has decent control capabilities thanks to Stunning Strike (Unarmed). It is a very powerful tool in the arsenal, and if successful, can for enemies to skip their turn. Using this together with flurries can eat up the ki-points pretty fast.
Evasive evasion
As I mentioned previously,  Evasion allows you to cheat out some ridiculous strategies as bombs use Dexterity Saving throws as a factor. Thanks to our high Dex and ability to buff our saving throws we may put bombs under ourselves and detonate them causing an explosion that may not even damage us.
This proves useful versus enemies with low Dexterity Saving Throws, crowded areas and in situations where you're the only one safe within the bomb vicinity. My favourite combination is placing a bunch Smokepowder Bombs and shooting them with an  Arrow of Fire.
How do crits, resistance and immunities work?
Throughout the game you can see a lot of items that can enhance your damage by d4, d6, d8 etc. and items that increase it by flat amount like  Caustic Band. Critical strikes make it so grand majority of our damage from items that increase it by some kind of dice (like d6) gets doubled, while flat numbers stay the same (1d6 turns into 2d6 while 2 stays as 2).
Vulnerability is also another mechanic that enhances our damage AND stacks with crits; it makes it so a target takes twice the amount of damage from a certain damage type. Let's theorize our enemy has a Vulnerability to fire and acid and we crit them while using  Helldusk Gloves and Caustic Band.
The Helldusk Gloves deal an initial damage of 1d6 which turns into -> 2d6 on crit which also turns into -> 4d6 Vulnerability
The Caustic Band deals an initial damage of 2 acid -> which turns into 2 on crit which turns into -> 4 damage from Vulnerability
You can check if a target is Vulnerable (red arrow), Resistant (white/blue arrow) or Immune (yellow outline) by inspecting an enemy.

Vulnerability: Means that the target takes 100% more damage from a given damage type. Making an already resistant target vulnerable to a certain damage type will make them take normal damage instead.
Resistance: White arrow means that the target takes reduced Non-Magical damage by 50%. Blue arrow indicates that the target takes reduced Magical damage by 50%.
Immunity: Means that the target is completely immune to the given damage type.
Elemental infusion ring
As mentioned in the Act 1.5 Equipment section, Ring of Elemental Infusion works wonky with Booming Blade (BB). To properly activate the ring with BB you need the Drakethroat Glaive from Act 2 (map below) or the Elemental Weapon spell. BB isn't properly coded as a Thunder spell so you need to imbue your weapon with any element to activate it without using a dedicated cantrip or a spell. This ring's damage can also apply multiple times as it is a Damage Rider. Drakethroat Glaive
Combat tactics and rotation
- Flurry of Blows Is your bread and butter for the early 1-3 levels.
- You can use your Main Hand Attack using a weapon and combine it with your unarmed techniques, remember to utilize it. Using Booming Blade and following it up with Drunken Technique and
 Hunter's Dagger is a great combination.
- If you took Booming Blade use this every turn you possibly can as it is free damage.
- Drunk Monk chugs through Ki points very quickly. Use alcohol often to restore your
 Ki thanks to Cheeky Tipple
- Drunken Technique - Flurry of Blows get's replaced for this technique. This is your mid-combat preperation tool and skirmish engine. You can use your high mobility to run around multiple opponents with the help of bonus Disengage.
- Intoxicating Strike - This is the core engine of your general turn combat. Punch a target - inflict the Drunk debuff, and instantly skyrocket your own defensive capabilities with Life of the Party. This pairs well with
 Difficult Terrain like greased up floor or icy floors from your casters.
- Stunning Strike (Unarmed) - is a powerful action that can stun and weaken enemies.
- Your combat loop from level 1-5 isn't much different.
- When melee attacking, always first hit with Booming Blade. This can be a source of extra damage and activate items like the Diadem of Arcane Synergy.
- Remember about using Booming Blade and Sneak Attack as you can use both. Just remember to check Sneak Attack in the reaction tab in-game.
- Use your cunning actions to your advantage as they allow a lot of various plays like chasing an enemy, running away from archers or melees, hiding and breaking enemy AI and many more.
- Thanks to
 Leap to Your Feet you don't have to fear much about Prone as you'll be able to quickly get up and not waste as much movement
- Use your high potential Stealth score to eliminate enemies before the combat even starts or sneaking up on them.
 Scroll of Greater Invisibility is a great option to utilize it.
- If using Strange Conduit Ring use various simple buff spells from scrolls like
 Scroll of Magic Weapon
- Your combat loop from level 6-10 isn't much different
- Your Sneak Attack has a respectable damage, especially if someone in your team has Aura Of Murder or you use Bloodthirst
- Remember to check if you have Evasion toggled, it's another bonus of your sturdiness.
- Thanks to your mixed damage remember to Inspect enemies to deal damage they're possibly weak to.
Maximizing the Build - Abilities, Illithid, Consumables
In this section, I would like to dedicate to various optimizations that you can do to further empower your build. Various things like Illithid Powers and consumables can make the build from powerful to totally overpowered, trivializing the hardest game encounters
Maximizing Ability Scores
Ability Scores play an important role both in terms of how your attacks land. Moreover, these can help to also reach extremely high skill rolls needed for a few checks.
- Act 1 - Auntie Ethel's Hair - you will want to get +1 Dexterity if you pick this choice.
- Feat - Ability Improvement - +2 Dexterity or +2 Strength for NAT STR setup.
- Act 3 - Mirror of Loss - pick +2 Dexterity or +2 Strength for NAT STR setup.
This will allow you to reach 22 natural Dexterity. This is the maximum value. Without Auntie Ethel's Hair, you will reach 20.
You can also get 24 natural Strength that way, what you have to do though is use  Potion of Everlasting Vigour from Araj Oblodra.
Illithid Powers
This special mechanic in Baldur's Gate 3 allows you to consume tadpoles and unlock special Illithid Powers.
At first, you can only use the base powers. As you move to Act 3, you will be able to unlock the outer ring powers.
| Illithid Power | Type | Description |
|---|---|---|
 Favourable Beginnings |
Base | Beneficial power to take as it does not have any costs and provides only benefits on the first hits. |
 Luck of the Far Realms |
Base | Guarantees a critical hit, use it on important targets that you want to make sure are killed. |
 Psionic Overload |
Base | As this is Psychic damage, you will double it to 2d4 thanks to Resonance Stone. |
 Psionic Backlash |
Base | A decent use for reaction to deal some bonus psychic damage. |
 Ability Drain |
Base | As you will be using Dexterity, this can help you to reduce enemy Armor Class and give an increased hit chance on the next attack. |
 Cull the Weak |
Base | Can help to kill an enemy faster if it is left with a few HP. |
 Illithid Expertise |
Elite | As you are not a charisma-based character, these proficiencies help with dialogue checks. |
 Psionic Dominance |
Elite | Can be used to save yourself from a deadly spell. This is especially relevant as you will have a  Disadvantage on mental saving throws. |
Potions, Elixirs and Consumables
Let's take a look at what consumables you can use to further empower the build.
Potions
These are general consumables, and most of them are activated for a few turns. Potions are separate from Elixirs and can be active together.
| Consumable | Description |
|---|---|
 Potion of Speed |
You can chug this potion before combat, or during combat using a bonus action. It gives another action point that gives an additional attack or one more spell cast. Sadly, its duration is only 3 turns. |
 Potion of Animal Speaking |
Although not something powerful, it is worth stocking up and saving a spell slot. |
 Potion of Invisibility |
Can be used to get a perfect position before the encounter starts. It can also help trigger Surprised rounds. |
 Terazul |
Gives Hastened and stacks with other sources of it. This is a late-game consumable. |
Coatings
These are applied directly on weapons, and usually have a 10-turn duration:
| Consumable | Description |
|---|---|
 Oil of Accuracy |
The attack roll bonus is pretty good, which improves your chances of hitting. |
 Diluted Oil of Sharpness |
Helps with attack and damage rolls. |
 Crawler Mucus |
This is a very powerful debuff that applies  Paralysed on an enemy if they fail a  Saving Throw. This then guarantees critical hits. |
Has a chance to put an enemy to  Sleeping condition, giving a guaranteed critical hit option. |

Elixirs
Unfortunately, only one Elixir can be active at a time. However, the good thing is that they last until a long rest, making them very useful and economical.
Be sure to activate them before combat, as otherwise, you will need to use a Bonus Action.
| Consumable | Description |
|---|---|
 Elixir of Hill Giant Strength |
Setup only to unarmed OR to carry or Shove your enemies easier. Elixir of Hill Giant Strength can be found very early into the game while Elixir of Cloud Giant Strength; you can start buying Cloud Giant Finger to brew it prior to level 6. |
 Elixir of Cloud Giant Strength |
|
 Elixir of Bloodlust |
The elixir gives an easy option to get an additional action point - just kill a foe. This can then be used to attack one more time or cast a full spell. |
 Elixir of Vigilance |
For some encounters, you will want to go first. This elixir will ensure that it overcomes even Surprised mechanics. |
 Elixir of The Colossus |
Provides bonus damage of 1d4 and some other good bonuses. |
 Elixir of Heroism |
Boosts attack rolls by 1d4; this is a good boost to increase the likelihood of landing attacks. |
Conclusion and Credits
Thank you for reading the Drunk Monk build for Baldur's Gate 3. It uses both weapons and unarmed attacks with the chaos it causes to wreak havoc across the battlefield. It's both dangerous, eluvise and mobile. I'll happily answer to any questions.
Your turn: Like, Dislike, comment, or share!


Join the Discussion