
New Run Early Game Guide - Blood Omens - Stoneshard
Introduction
This guide is split the strategies into 3 categories - Gold Acquisition, Gameplay, and Quest Sequencing.
Understanding Osbrook
Osbrook with its Tier 1 dungeons, are the tutorial area of the game. By adequately preparing yourself before your first trip to Brynn, you can hit some major gear and skill powerspikes that may not only empower your current build, but open up the possibilities to new builds and their entirely new variants.
Not every character starts with the right skill trees for a given build. Fortunately, any character can unlock any skill tree within a couple hours of starting a new run via the tutors and beginner skill books. For such creative builds, making the most out of the early game is that much more important.
It is theoretically possible to safely walk to Mannshire or even Brynn right at the start of the game, by following the edges of the map tiles. Doing so allows you to buy any book or tutor training immediately at the start of the game. However, I consider this to be an exploit of a technical limitation within the game's engine, not to mention extremely boring.
For that reason, no strategies mentioned here or build guides posted thereafter will make use of it.
Gold Acquisition
Loot - What to take?
The developers of Stoneshard have put in place extensive measures to prevent hoarding behaviour in players. Being limited by the size of your inventory is an integral part of the gameplay. There are options to expand your inventory, but they are few and far between, and often come with downsides. As such, it is important to make the most out of what we have.
Items to Avoid
- Broken weapons you will not use yourself.
- "Junk' items, not used for caravan upgrades (mugs, plates, candlesticks, candle ends, combs, etc.)
- Caravan upgrade items in excess of what is needed to fully upgrade the caravan.
Low Priority - Not Ordered
- Intact weapons and armor you will not use yourself
- Damaged armor you will not use yourself in your current tier or better.
- Enchanted items, the base version of which you are not interested in.
- Bandages (if you carry an excess. Always carry at least 4 charges)
- Food & Vegetables.
- Unidentified Potions
- Folios
High priority - Not Ordered
- Gear that can serve as an upgrade to what you have currently.
- Skins & pelts
- Trade Goods
- Gemstones
- Precious metals
- "Valueable" item class
- Viviying essense & Gwynnel's elixir
- Non-perishable meats
- Old coins
- Skill books
- Animal trophies
- Casket & exquisite casket.
Loot - Where to sell?
| Items | Vendors |
| Pelts, cloth & leather armor | General Merchants |
| Combat staves, bows, crossbows, wooden shields | Carpenter in Osbroook or Mannshire or General Merchants |
| Intact metal weapons and armor | Smiths in Osbrook or Manshire or General Merchant |
| Gemstones & precious metals | Brynn Jeweler |
| Old Coins | Do not sell. Convert at a 1:4 rate to modern crowns in Brynn bank. |
| Non-Gemstone valuables | General Merchant, Brynn Jeweller |
| Skill Books and Folios | Printing press in Brynn. |
| Magic staves and mage armor | Alchemical Emporium in the port quarter, Brynn |
| Animal Trophies | General Merchants |
Trade Goods Sale Locations
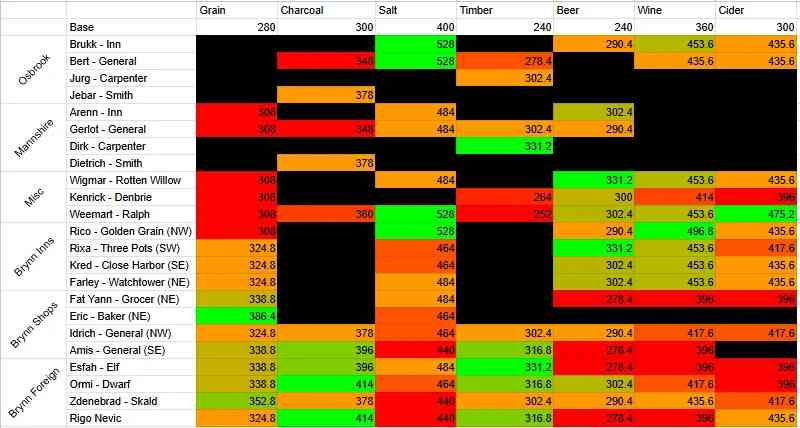
It is generally worth buying trade goods regardless of the asking price, assuming you have space to store them, as with the correct selling strategy you will always make some profit. Overall, buying and selling trade goods is a complementary source of income, not a primary one.
Thievery
The most effective way to make a profit off a valuable item is by not paying for it in the first place. Though the game has a crime system which will see your character jailed for many days if caught, there are also many opportunities for a knowing player to steal goods without being caught or noticed.
A theft is detected if the player removes an item from the floor, or container marked in red, and places it within their inventory while within line of sight of a witnessing NPC. Solid walls, smoke bomb smoke, and sufficient distance can interrupt line of sight, allowing theft to be done.
Stolen items are marked with a small red hand icon, which decays over a period of time proportional to the item's value. Gold can be safely stolen by merging into your coin pouch. Most merchants apply a negative modifier to the prices of stolen items. While the player has stolen items in their inventory, guards that are actively walking on patrol can randomly stop and interrogate you. This occurs only while the player is within ~8 tiles or closer to the guard.
Safe loot stashes
The following places can be used to safely store items indefinitely, as they are treated as a player's personal stash. Items stored here will gradually lose their stolen tag. Items stored elsewhere will be lost the next time the tile is reset (usually at midday) while the player is elsewhere.
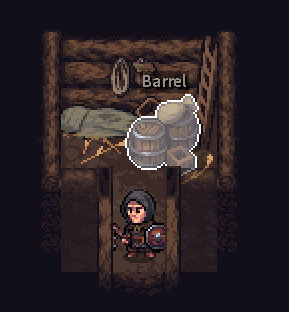
- Barrels within the sleeping spot in the Mill shed
- Any Tavern sleeping room chest (safe even without paying for a room)
- Both barrels on the exterior of the Lone Farmstead ~ credit to okmall on twitch.tv and Youtube
- Caravan storage
Osbrook Tavern
You can safely rifle through the barrels on the top floor while no one is in the room with you, or while the innkeeper is sleeping. You can check the barrels on the second floor while the magister is asleep in his room and no one is in the stairwell.
The Drunken Woodsman Inn
The deer antlers lying on a bench outside can be taken at night. With a crowbar, during afternoon hours when the Brynn representative is away, you can break into the back door on the right side of the house and pilfer pelts and antlers, as well as a claw trap.
Osbrook Watchtower
During the day, you can go upstairs and steal some caltrops. During the night, you can steal a tier 2 wooden round shield on the ground floor, which can be useful, or sold at the carpenter for ~40 gold. ~ credit JesusDust on twitch.tv
Odar the Elder's house
Odar's quarters can be pilfered while he is out drinking in the tavern in the evening or is asleep.
Guard House
The weapon rack furthest away from the guards can be checked and stolen from safely. The others require a smoke bomb to be safe.
Oaken Barrel Brewery - Important
If you do the latter, you must not carry the grain into the city. Instead, stash it within the barrels found within the tile you spawn in when you arrive in Brynn. Once you have the caravan, you can move the grain to the caravan stash, and trade the grain to the baker directly from your caravan, therefore not risking being caught as you are never bringing stolen goods into the city yourself.
Gameplay
There are many ways to leverage the various systems of the game to your benefit when starting out. What might be perceived as inconsequential decisions can add up to save you time, money, and personal frustration. By implementing these strategies into your gameplay, you are practicing good fundamentals and will be more likely to succeed in your permadeath runs.
Exploration and Survival
Harvesting and Cooking
Keep a lookout for leeks, which can be used as vegetables in cooking, or lentils, which can be harvested as a non-perishable food source. Together, they can be used to cook Lentil soup. Additionally, look out for berries and edible mushrooms, and useful herbs like hemp, fleawort, and agrimony.
Approaching POIs
It is important to approach every POI carefully, as many can be too hard for you to deal with despite being close to the tutorial area of the game. Know what you are dealing with before you engage.
Examining Surroundings
Examine surroundings is a basic skill that every character starts knowing. It is most commonly used to detect traps in dungeons, but can also be used to spot secret rooms (1/20 dungeons have one), or detect snakes hiding in the grass or the detritus of the forest.
Global Map Pathing
Time is money, and good pathing means time well spent. Whenever you are not completing a contract, consider what quests, points of interest, and self-assigned objectives might be available, so you can connect them into a single path that starts and ends at your base of operations. Keep in mind the fullness of your inventory, and adjust your path accordingly.
An example is the carpenter's quest to retrieve his plane. This quest takes you a full day's travel southwest from Osbrook, away from any other quests. Other things that you could consider doing include:
- Discovering nearby points of interest
- Collecting food such as eggs, berries and mushrooms
- Robbing the Drunken Woodsman storage room
- Harvesting fleawort to use as healing, or crafting fodder for your caravan.
Starting Equipment
Besides the unique trait and available skill trees, every character starts with a unique set of starting gear, which can bring ups and downsides. If your starting weapons do not match your desired playstyle, you can request a different tier 1 weapon from the guards on the first floor of the elder's house.
Choosing Your Free Starter Weapon
Every character can benefit from receiving a tier 1 weapon from the guardhouse, even if it means selling it immediately for easy coin. However, certain builds may consider delaying investing in a weaponry branch and using one of these weapons with utility skills instead.
Some of the more notable weapons are:
| Item | Stats | Reason |
 |
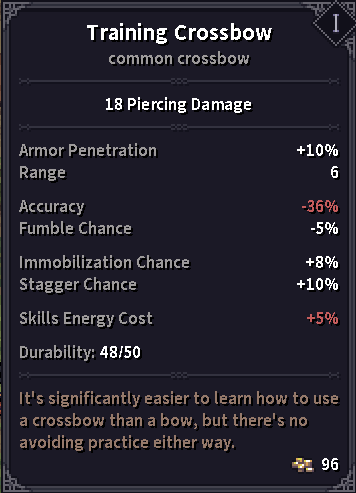 |
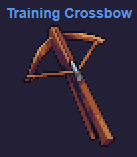
Free damage at the opportunity cost of your secondary weapon loadout. This weapon grants you 2-3 chances to inflict noticeable damage on an approaching enemy before the fight ever starts, giving you the upper hand. It also sells for the most gold of any starter weapon. |
 |
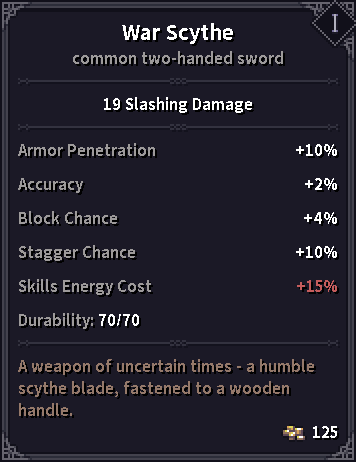 |
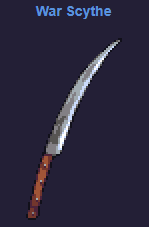
Likely the strongest early game melee weapon. It offers the highest base damage among the available weapons, and the bonuses to block chance and accuracy are very useful. |
 |
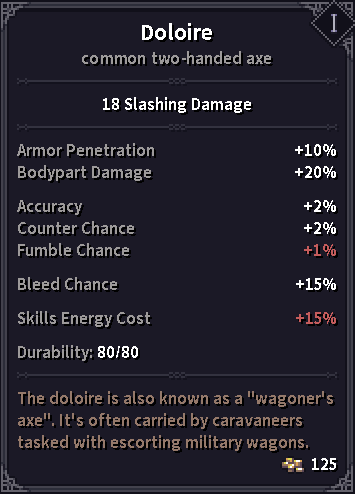 |
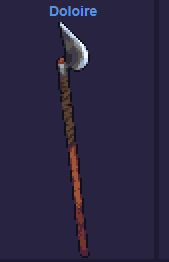
Similar to the War Scythe, the Doloire is a very strong offensive weapon choice. It trades bonus body part damage and bleed chance for +1% fumble chance. It is marginally better than the war scythe on characters that start with 11 agility. |
Shoring Up Weaknesses
Every character starts with a couple of items that are above tier 1 equipment in quality. However, each character typically also has weaknesses within their equipment, so it can be worthwhile to shore up using your starting gold before you start getting into trouble. The most important things include:
- Something with protection in each armor slot (Head, Torso, Arms and Feet)
- A way to open locks and pry open crypts (crowbar strongly recommended)
- Enough food to last a day (~25 total hunger replenishment)
- At least 2 healing salves (ideally 3-4), 1 splint, and 2 bandages
- Pain medecine - I recommend 1-2 soporific sponges
If your character starts with broken equipment (such as Arna's metal chestplate), it is generally worth it to spend the money to repair and maintain it, as it will serve you for your entire time in Osbrook, and maybe even beyond.
Items to Look Out For
- Drinking horn - better waterskin due to inventory shape (also stylish!)
- Casket - extra inventory space for gems, gold and jewelry
- Exquisite Casket - A rare source of extra inventory space. Salves and bandages stored within can be used directly through the character menu, without opening the casket. Must have.
- All books - always read new ones for free exp.
Noteworthy Skills
These are powerful skills that could help you be strong early on, listed in no particular order. No good build will ever take all of these; however, if your desired build includes any of these, or you plan on using the relevant weapon class, consider taking at least one of these at level 1.
| Skill | Effect | Use case |
|
|
Applies a powerful debuff to the enemy's defences, and delivers a strike with bonus accuracy against the target's most vulnerable body part (usually head). If it deals damage, it perpetually debuffs the target's accuracy against you while buffing yours against them by the same amount. |
Very strong skill for a 1v1 scenario, capable of securing victory single-handedly against every tier 1 dungeon boss. Works with any melee or ranged weapon. Has extra range with spears. |
|
Setup
|
Passive ability. Standing still, swapping loadouts or using Maneuvers buffs your accuracy and reduces incoming damage, which stacks up to 2 times, and lasts 2 turns. | Seamlessly blends into desired gameplay - letting enemies come to you, to fight them on your terms. Works extremely well if you can funnel enemies in 1 by 1. Synergy wth ranged weapons. |
|
Leg Sweep
|
Maneuver. strikes up to 3 adjacent tiles, and repositions you 1 tile in any unoccupied direction. Any enemies hit are likely to be immobilized and have their attacks debuffed for 3 turns. | Allows escaping being surrounded. Offers an extra free strike on the enemy. |
|
|
Maneuver. Potentially knocks an enemy back and Staggers them. Essentially free damage. Stagger is a powerful debuff, and can cause the enemy to fumble a dangerous skill. Low Cooldown. | Free damage, great way to open the fight. Can be used to deny the enemy a powerful skill, such as Hewing Strike, or the extra damage from Mighty Swing. |
|
Flurry of Strikes
|
Attack Skill. Requires you to be dual-wielding. Deliver 4 rapid attacks with reduced hand efficiency. Each successful hit buffs hands efficiency for 2 turns. If all strikes are non-fumbled hits, deliver 2 more attacks with the same debuff. | Subjects 1 enemy to a death by a thousand cuts. Weak against armour. Final damage strongly depends on the weapons used. Overall, very high damage. |
|
Seal of Power
|
Buffs spell, increasing Magic power, Weapon damage (dealt as Arcane) and gives +1 range. Casting other magic spells extends its duration by 3 turns, and transforms this buff to give bonuses focused on the school of the spells. | Core mage and spellblade ability. used before combat |
|
Fire Barrage
|
Spell. Shoots 3 fire projectiles at reduced accuracy. Can set targets on fire. | Basic pyromantic offensive damage spell. |
|
Jolt
|
Spell. Shoots lightning at a single target, dealing Shock damage, and applying resonance. 2 turn cooldown. | Basic Electromancy spell. Long range and Low cooldown allow it to be spammed. |
|
Runic Boulder
|
Spell. Raises a Boulder from the ground, creating a sight-blocking, durable barricade, and damaging nearby creatures, with a chance to knock back. Each active boulder buff magic power, Geomantic power, reduces damage taken and ability energy cost. | Very versatile offensive and defensive tool. Knocking enemies into walls can daze them. Blocking sight can disable ranged units. Barricades can split groups of enemies, allowing to fight 1v1. |
|
Stone Armor |
Spell. Coats the player in rocks, which absorb damage from incoming attacks. Upon expiring, the armor will explode, dealing damage proportional to the damage absorbed during its duration, and potentially knocking enemies back. | Pre-combat buff. helps mitigate some damag and provides a burs of damage upon expiration. |
|
Wormhole
|
Spell. Marks a target with Wormhole, and remembers its current tile. After 3 turns, teleports the target back to the remembered tile, dealing damage. if the tile is occupied, the target is teleported to the nearest unoccupied tile, and suffers further arcane damage and is likely stunned. | Core Arcanistics damage spell. great tactical versatility, and opportunity for synergy with Dimensional Shift by first marking the approaching enemy with Wormhole before using Dimensional Shift to swap their and your positions, and then stepping onto the tile that is remembered by the spell. |
|
Keeping Distance
|
Maneuver. Reposition to an adjacent tile. Next turn, deliver a strike to a random adjacent enemy unit with increased Crit chance and a chance to stagger. | Allows escaping being surrounded. Offers an extra free strike on the enemy. |
|
Cut Through
|
Attack. Debuffs the enemy's block chance and block power for 3 turns. Delivers a strike with increased damage, armor penetration, and armor damage. Each injury and instance of bleeding further increases damage. | Very powerful damage skill, focused on inflicting injury. |
|
Onslaught
|
Attack/Maneuver. Debuffs enemy Control Resist. Delivers a strike with added Knockback Chance. On enemy knockback, reposition toward enemy and deliver a second strike with added daze chance. | Powerful attack aimed at temporarily disabling a single foe. Knocking back into walls or solid barriers can stun the enemy. |
|
Double Lunge
|
Attack. Delivers 2 strikes with bonus damage and body part damage. If both strikes hit, or the target dies, reduce cooldown by 3. Very low cooldown. | Very high dps ability. Primary offensive dagger skill. |
|
Hewing Strike
|
Attack. Delivers a strike to an adjacent target, targeting the hands. deals bonus bodypart damage and has a bonus bleed chance. if the target was damaged, debuff target's move and bleed resist. More effective against staggered targets. | The combination of added body part damage, targeting the hands, and bleed chance works together to injure enemy arms, which greatly reduces combat effectiveness. |
|
|
Attack. Range 2. Inflicts an attack with reduced damage, very high bleed chance, and armor penetration. Has a high chance to pull the target closer if it is 2 tiles away. Deals damage to an additional body part. | Can be used to negate the range advantage of spears, securing first strike against them. Solid offensive skill, as bleed is very strong. |
|
Mighty Swing
|
Maneuver. Very powerful buff, lasting 1 turn. Greatly increases weapon damage, Stagger Chance, Stun Chance, Bodypart damage, Armor damage, but completely removes your Counter chance. | Mighty skill aimed at ending the fight in one swing. Innate synergy with Setup. Not necessarily optimal to use before every single attack. |
|
Impaling Lunge
|
Attack. delivers a strike in a 2x1 area with bonus bleed chance, bodypart damage, and armor penetration. Effectively range 2. If the target is immobilized, deals reduced damage and halves all other bonuses, but instantly resets cooldown. | In tandem with Nail down, it enables you to damage enemies from 2 tiles away, not allowing them to fight back. On its own, a powerful offensive skill, while range 2 gives a free strike afterward. |
|
Nail Down
|
Attack. Range 2. Deals a strike to the legs with bonus Crit Chance. If the target is adjacent, deal bonus damage with increased knockback chance. If the target is 1 tile away, deal bonus bodypart damage, with bonus immobilization chance | Powerful offensive skill. Injuries to the legs can cause further immobilization. Best used at a 2 tile range, before Impaling Lunge. |
|
Taking Aim
|
Maneuver. Buffs accuracy to negate the accuracy penalty of ranged weapons for one turn. Also buffs weapon damage and targeting range. For every enemy within 4 tiles, add bonus knock back, immobilization and stagger chances. | Core ranged weapons skill. Allows for reliable skirmishing at range. |
|
Dexterity
|
Killing enemies in melee will trigger take aim the next time you switch to a ranged weapon, and if that ranged weapon is a crossbow, will also reload it. While equipped with a ranged weapon, switching to another loadout does not take a turn. | Taking Aim + Dexterity are the bare minimum needed to make use of ranged weapons on most characters, and form a very effective 2-level investment on most melee builds. |
|
Hail of Blows
|
Attack. Delivers 2 strikes with reduced damage and accuracy, but increased stagger chance. If both strikes hit, deliver a third strike with the same debuffs. The first strike has bonus energy drain, while the second has bonus daze chance. | Very powerful attacking skill, equally useful as a backup melee option for a mage, or for a dedicated staff melee fighter. |


Combat Strategies
Practicing good combat fundamentals is most important in the early game, where an extra attack inflicted or an attack avoided can make all the difference. Taking less damage means spending less on medical supplies and requiring less effort to restore morale and sanity after sustained injuries. Here are some basic tactics that you may want to employ.
Letting the Enemy Approach
Being able to attack first is very important as it will allow you to kill the nemy faster, reducing the amount of turns they'll get to swing at you. Additionally, your first attack could score a debilitating injury, winning you the fight. Passing your turn by waiting is a core mechanic of the game.
Using Corners to Negate Range
By hiding behind corners and sight-blocking objects, you can counter not only archers, but also enemies with Charges, and 2 tile range attacks, as enemies need to see you to target you with skills.
Shouting to Lure Enemies
Early on, fighting more than 2 of even the weakest enemies can be dangerous. By opening the states menu, or right-clicking on your character, you can shout to attract enemies to your last known location. The shout can be heard from 10 tiles away, which, during daylight, is as far as most enemies can see.
Starting a New Run
Osbrook presents an open toolbox of quests and contracts that you can mix and match to best suit your needs. The 2 most common scenarios that most builds face are whether or not they need to go to Mannshire, or Brynn, to acquire their main skill branch. Depending on your situation, you may want to leave Osbrook sooner rather than later.
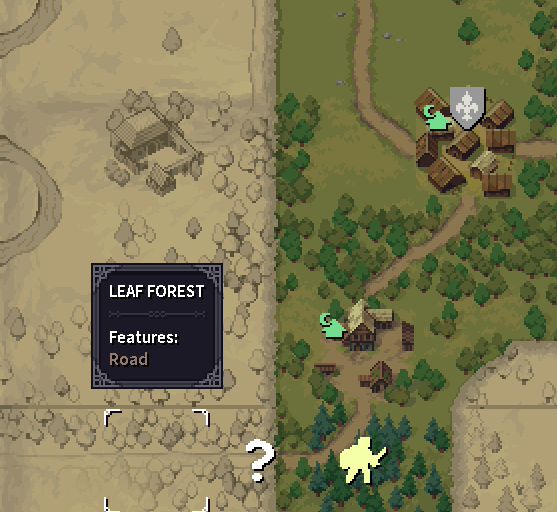
Reading the Map
The first thing you should do when starting a new run, is read the map of the local area given to you by Verren. What you see on it can sometimes change how you want to begin your adventure. The main things you want to look out for are:
- Lebron's Manor
- Leprosarium
- Watermill
- Distant Undead / Proselyte Dungeons
These are unique locations that spawn randomly across the world, and have some valuable and useful loot. The Leprosarium and Watermill are unguarded. You can safely search the tombs and dig up graves at the entranceto an undead dungeon for a chance at late game loot, or search the corpses litering the chapel standing above late game Catacombs.
Lebron's manor will generate a group of 4 brigands some distance away when you exit the cellar. They start far enough away for you to be able to flee the tile without being followed if you do not waste any turns due to inefficient movement.
Before First Contract
Between the experience received for entering Osbrook when leaving the tavern, discovering the Mill, the Drunken Woodsman Inn and reaching the first bandit contract site, you only need 50 more exp to reach level 2. To gather the needed exp, and earn some gold and resources, I recommend completing the quests "Frid the Herbalist's request" and finding the "Lost Key" over at the mill to unlock a free sleeping spot, before journeying southeast of the Drunken Woodsman Inn and finding the carpenter's plane.
It is not necessary to speak to the quest-giving NPC to be able to complete their mission. If you know what the quest requires of you, it is possible to do what is necessary to meet the requirement, and then talk to the NPC, accept their quest, and immediately hand it in.
This is generally the more efficient way of completing quests, as it eliminates the need to do a second trip to their location.
Frid the Herbalist's Request
This mission requires you to find 3 herbs: Fleawort, which grows along roads, Spearmint and Agrimony, both of which grow on the open grassland around the village. This is a low-risk mission which rewards the player with 2 sets of healing salves. It is possible to complete by simply walking to the mill on your way to complete "Lost Key", while keeping your eyes open for the relevant herbs.
Lost Key
Completing this quest unlocks your first place of permanent storage - the barrels in the shed at the mill. To complete the quest, simply walk around the wheat fields with the ground item names displayed, checking the outer edges, until you find the shed key and talk to the owner. Within the barrels, you will find a sleeping bag. It's best to sell it to the seamster. You can throw away the key after.
Carpenter's Plane
The last thing I like to do before embarking on the first contract is to collect the Caprenter's plane. It always spawns southeast of the Drunken Woodsman Inn, within a destroyed and raided caravan lying on the side of the road. It is always guarded by 2-4 bandits, so be ready for combat. They do not pose a threat if you can lure them into 1 on 1 fights with shouting.
 It is best to spend the night at the mill and begin this trip the next morning. That way, you can rob the Drunken Woodsman Inn by prying open the back door with the crowbar, to steal 3 pelts and a claw trap. This can only be done during the day.
Be sure to have lock picks or a crowbar - you can buy them from Jebar the smith before heading out for the plane. Also, keep your inventory light to you can carry pelts on the way back.
Jebar the Smith's Request
Jebar wants you to bring him 3 homemade swords or battle cleavers, which are sometimes carried by the weakest type of bandit found roaming the map. While bandits are fairly common, there is no reliable way to complete this quest before the first contract. Keep this mission in the back of your mind when doing the first contract.
Rushing Tier 2 Gear
It is possible to reach 3000 Osbrook Reputation after a single contract, Which upgradesthe merchants' inentorties, allowing you to upgrade your weapon and armor to Tier 2.
To do this you must:
- Complete Frid the Herbalist's Request
- Complete Jebar the Smith's Request
- Complete the first contract and hand it in to Odar
You can haggle for a better reward and still get to 3000 rep. Odar is the local elder, meaning that by handing in the contract to him will award extra local reputation, which is just enough to get you to Tier 2.
Fate of the Brewery
I prefer doing this quest immediately and siding with the brewery (using the intel received from the carpenter in exchange for the plane). This is because doing so allows you to unlock more places of permanent storage at the Lone Farmstead, as well as letting you steal the grain sooner, meaning that it will sooner lose its stolen modifier.
When confronting Odar about his deceit, it is recommended to take the 500 crowns, as that is the easiest way to reach 3000 crowns before going to Brynn for the first time.
Osbrook First
If your build is not in great need of skill books or Mannshire tutors, it is best to complete all of Osbrook contracts and hand them in to the Brynn bailiff to start increasing your Brynn reputation immediately. This will usually get you just shy of level 5, and earn you between 2 and 2.5 thousand gold.
Caravan First
If your build is in desperate need of skill books to avoid taking suboptimal skills while in Osbrook, you may decide to leave the Osbrook contracts for later. If you do so, I recommend you leave behind all the grain you stole for its stolen timer to expire, and instead purchase 2 barrels of beer from Kromm (You can sell the one he gives you for free at the Osbrook tavern, before confronting Odar).
Final Preparations
Before heading off to Brynn, there is a short checklist of things I like to have done beforehand:
- 2 trade goods in my inventory. 2 barrels of beer bought from Kromm, or if you finished all the contracts, the grain (which hopefully no longer counts as stolen).
- A surplus of healing salves. They are more expensive in Brynn & Mannshire.
- 1500, or 3000 crowns, depending on when you leave Osbrook, including the sale value of the trade goods and jewelry as well as the converted value of ancient coins.
Brynn
Try not to spend too much time in Brynn. No more than 2 days. Food prices are sky high, meaning waiting for prices to change for the better before selling trade goods is usually not worth it. Selling your inventory to the right vendor is enough.
Do not forget to check the auction house for a useful tier 3 armour or weapon. These are usually worth buying if you can afford them.
If you are bringing stolen grain with you, do not carry it into the city. See the Thievery section on the Oaken Barrel brewery.
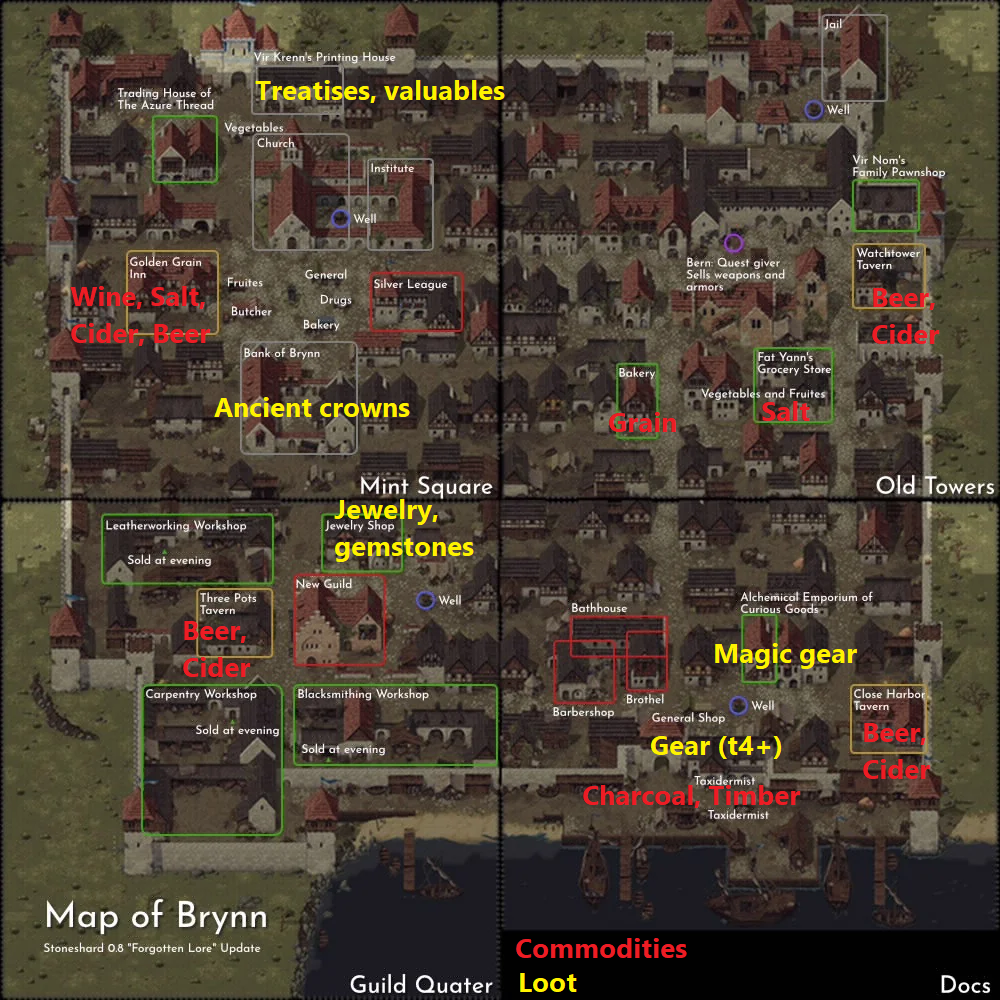
Brynn Vendors
The top-left quarter houses the printing press (skill books), Elven Goods store, general merchant, Golden Grain Inn and the Bank. Bottom-left houses the guild quarter and the Jeweller. Top-right is home to the Brynn Baker, city guard quartermeister, who has a limited inventory, and the auction house, which is by the east gate. In the bottom right quarter, beyond the wall, is the port, where 4 merchants cycle daily, selling foreign goods. Each quarter houses a different Tavern.
The inventory of all merchants resets at 10 am.
Be sure to check the port merchant every day, as some of them can sell Salt, which can be immediately resold at the Golden Grain, for 100-200 crowns of profit.
Progressing the Story
To progress the story and unlock the caravan, meet Verren after dusk by the portside tavern, in the bottom right quarter of the city. He stands by the entrance to the tavern. Read his dialogue, and follow him where he leads you.
Good luck on your adventures, Mercenary!
Like, Dislike, comment, or share!
Join the Discussion
0 commentsNo comments yet.
Be the first one to leave a comment!