
Spear and Ranged Build - Landsknecht Velmir - Stoneshard
Contents
Overview
This is a light armour spear and crossbow hybrid which relies on the (frankly overtuned) crossbow for its primary damage output, switching to spear to clean up the remaining enemies. It relies on perception to increase its accuracy, range and crit chance. It excels at exploring the overworld, killing dungeon bosses, and is capable of strolling through tier 5 proselytes with 0 pushback.
Character Choice
Character Trait
Velmir's trait "With Great Vengeance" perfectly synergizes with the pike and shot playstyle.
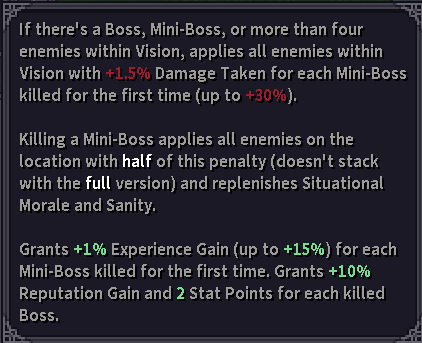
By increasing our vision range through perception, we can more often capture 4 or more enemies within our vision. Alternatively, we can spot dungeon Mini-Bosses from further away, meaning that we have more time to capitalise on the increase in damage output, before they reach us in melee. As such, this build can kill most dungeon Mini-bosses without ever going into melee.
Starting Attributes
This build perfectly makes use of Velmir's starting attributes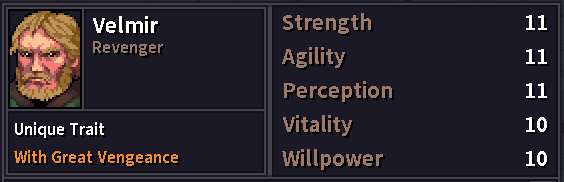 11s in Strength, Agility, and Perception is one of the strongest arrays of attributes for a melee weapon user. This build increases each of them at least to 15, meaning that this array is incredibly efficient.
Accelerated Progression
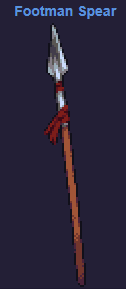
Additionally, spear is one of the best weapon classes to kill the first Boss of the game - the Ancient Troll. Impaling Lunge's high bleed chance and 2 tile range make it very good at dealing damage to the troll, as well as being able to interrupt his healing. Meanwhile, Determination gives us reliable energy regeneration, and plenty of bonus damage, allowing you to kill the troll in a fraction of the time required by other builds at this level.
These features allow the build to safely take on the Ancient Troll as early as level 7, which in turn rewards you with bonus attribute points from Velmir's passive. Doing so also increases the rate we can accumulate Brynn reputation.
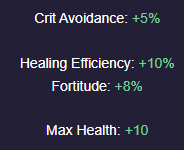
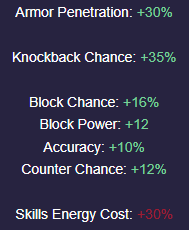
Endgame Attributes

This build requires 30 perception to maximize crit chance and vision radius. 15 agility is needed to minimize fumble chance on our endgame weapon of choice. 20 Strength increases our weapon, body part, and armour damage as well as crit efficiency, which very often becomes relevant.
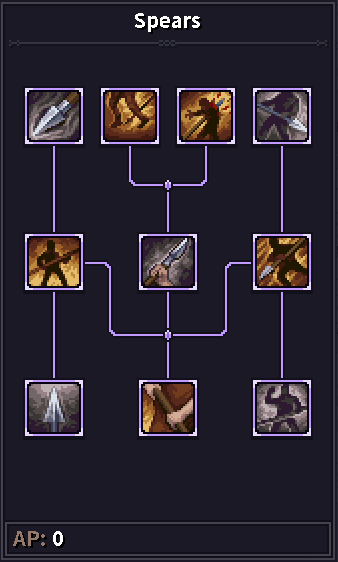
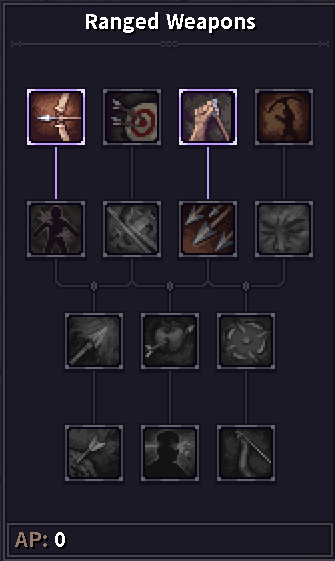
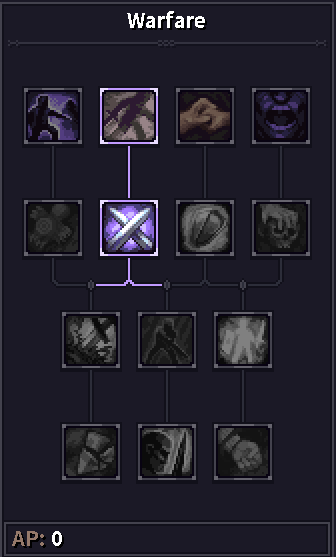
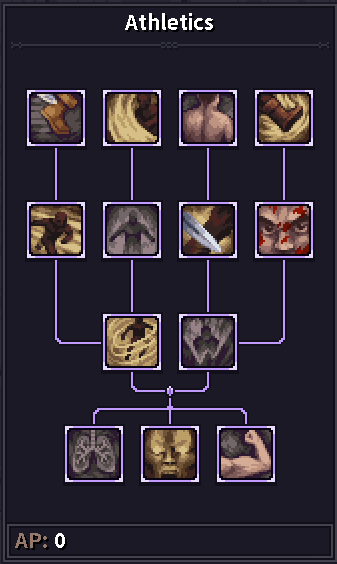
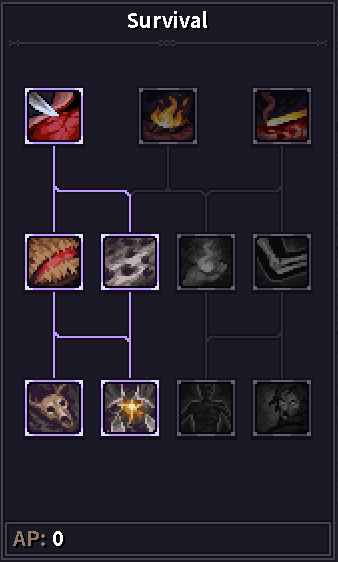
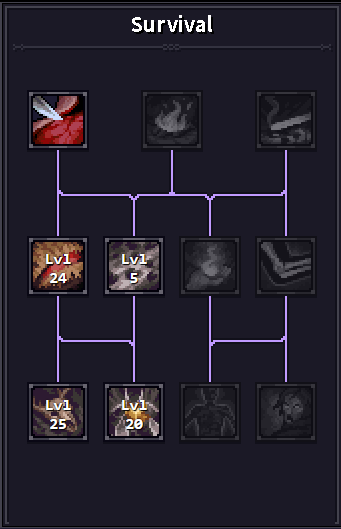
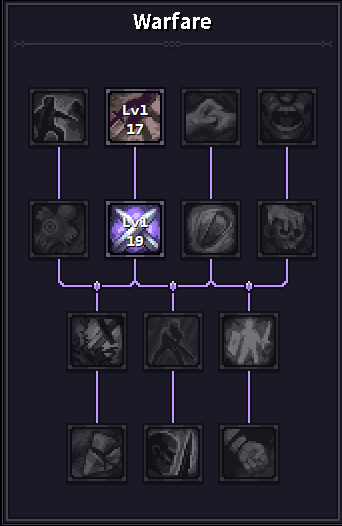
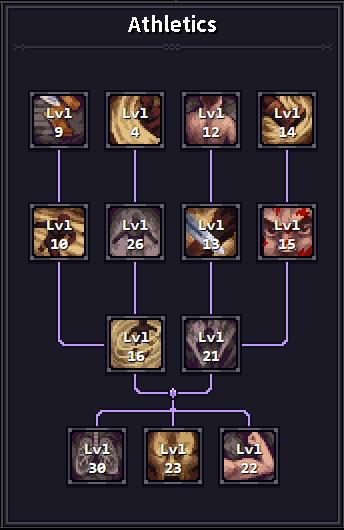
Final Skills
 |
 |
 |
 |
 |
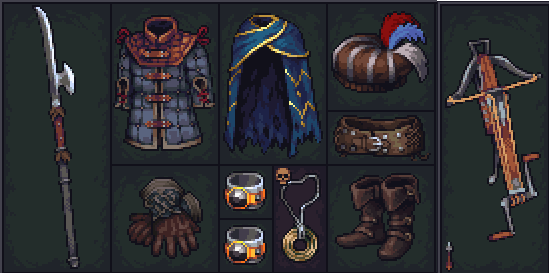
Final Gear
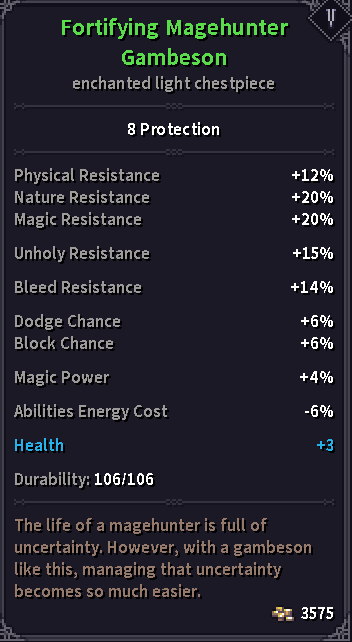
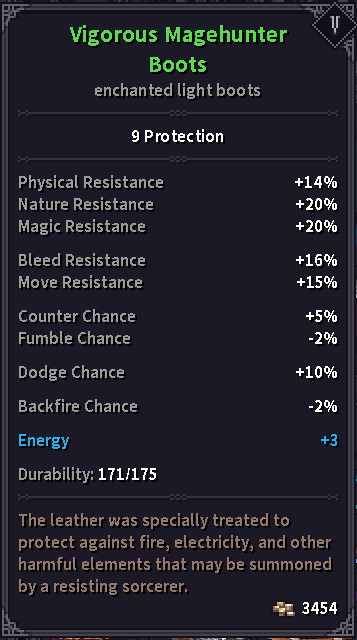
This build uses light armour to reduce energy costs, as spears are very energy hungry, and our primary safety tool is range. Dodge is our primary defence, though late game, our best defence becomes our offence.
| Item Name | Image | Contribution |
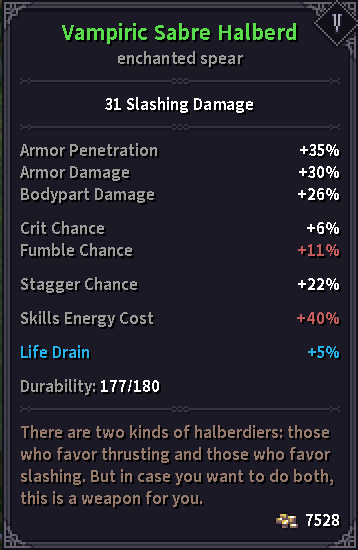
| Sabre Halberd | 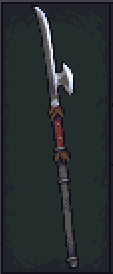 |
 |
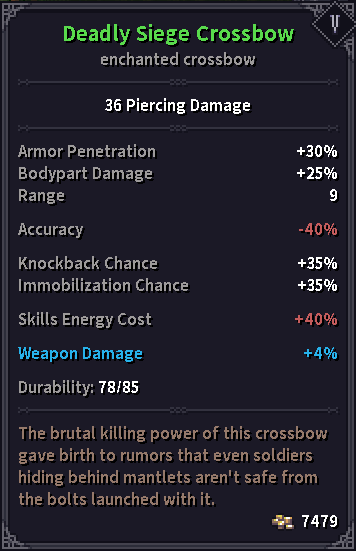
| Siege Crossbow | 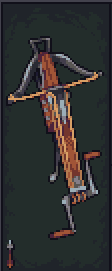 |
 |
| Magehunter Gambeson |  |
 |
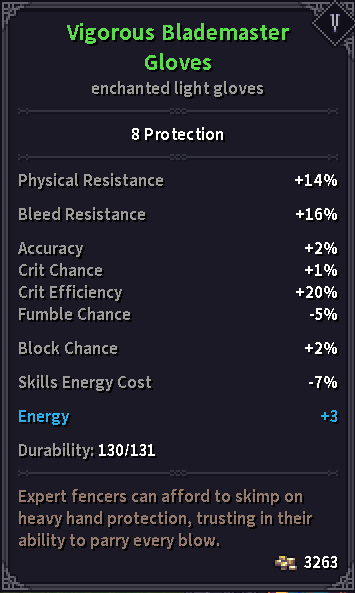
| Blademaster Gloves |  |
 |
| Jibean Cape | 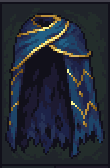 |
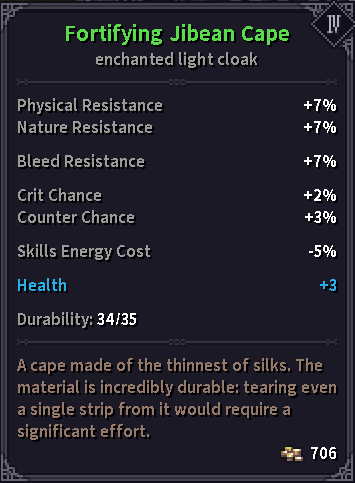 |
| Mercenary Captain Headwear |  |
 |
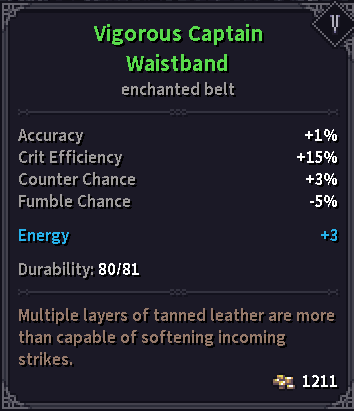
| Captain Waistband |  |
 |
| Magehunter Boots |  |
 |
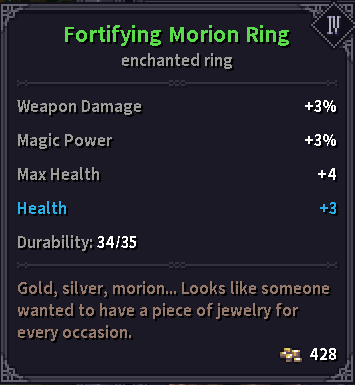
| Morion Rings |  |
 |
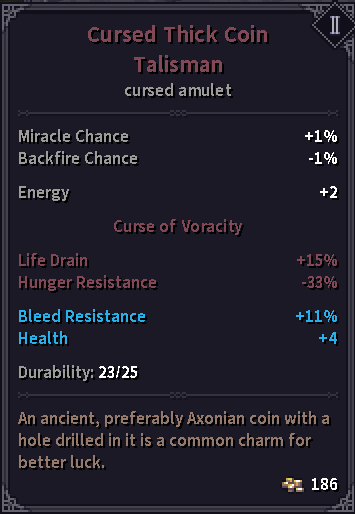
| Amulet- Curse of Voracity |  |
 |
All of our gear is focused on offence, while our enchantments and amulet shore up our energy and defences. Morion Rings are BIS, though Velmir's ring and Berserker Ring are very acceptable alternatives until the late game. This halberd is chosen due to its high base damage, crit chance, and slashing damage type. Investment in Agility 15 is done exclusively to counteract it's high fumble chance.
We want to use Broadhead arrows in all circumstances.
Notable Alternatives
| Item | Image | Contribution |
 |
29 Piercing Damage
|
Sacrifices raw damage and crit chance in favour of better defence through block. Best Paired with Knight Belt. This version does not need investment in agility, and the extra attribute points can be split between Strength and Willpower instead. Either 22/13, or 24/11. |
 |
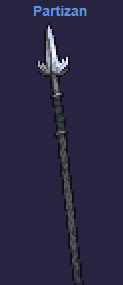
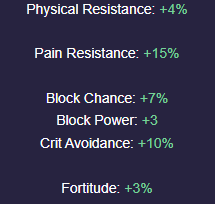 |
BIS, when paired with the partizan and 24 Strength. |
 |
 |
BIS for the crit-focused version of the build. |
 |
 |
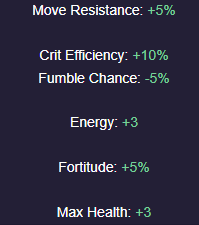
On this build, it presents as a viable sidegrade to the Mercenary Captain belt, despite being a tier lower. I would not spend money on the mercenary captain belt if I already had this one. |
 |
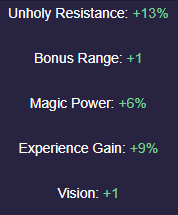 |
The bonus vision and range naturally synergize with our playstyle. |
 |
 |
Very strong defensive amulet. All of these stats are desirable. |
Enchantments
This build wants exclusively max hp, and energy enchantments on the rings and armour, with Life Drain on the spear, and ideally % weapon damage, crit chance, or flat elemental damage on the crossbow.
Progression
This part of the guide will focus on how to recreate this build in your own game.
Attribute Order
The order in which you increase your attributes is important, as it will affect which higher-level skills become unlocked first.
- 1. Perception -> 30
- 2. Willpower -> 11
- 3. Agility -> 15
- 4. Strength -> 20
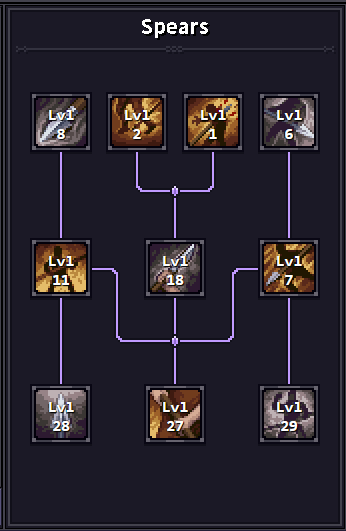
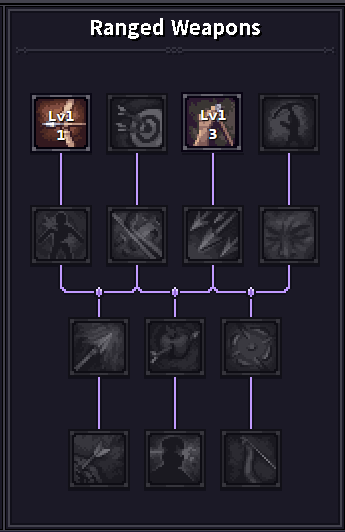
Skill Order
Collective
|
|
|
|
|
|
|
Individual
| Order | Skill | Contribution |
| Level 1 |
Impaling lunge |
2 tile range attack, with bonus bleed chance. |
| Level 1 |
Take Aim |
Core ability, giving accuracy and damage boost for our crossbow shots. |
| Level 2 |
Nail Down |
2 tile range attack with either knockback or immobilization chance, often giving an extra free attack. synergy with Impaling Lunge. In a 1v1, Impaling Lunge -> Nail Down, otherwise Nail Down -> Impaling Lunge. |
| Level 3 |
Dexterity |
Last core passive. Facilitates hybrid playstyle by improving the action economy of swapping weapon loadouts. |
| Level 4 |
Leg Sweep |
This skill allows you to reposition 1 tile and immobilize the enemy. Buy space to retreat to better terrain, extend the immobilization with Nail Down, or combo with Impaling Lunge. |
| Level 5 |
Pathfinder |
This passive gives you wallhacks. Make sure to examine the surroundings often while in dungeons. |
| Level 6 |
No Retreat |
A passive that boosts our offence. remaining on a single time gives bonus damage, counter chance, and CDR. |
| Level 7 |
Determination |
Powerful Maneuver that recovers energy and gives us free attacks against approaching enemies. |
| Level 8 |
Precise Hits |
Offensive passive with immobilization synergy. Start prioritizing the use of Impaling Lunge against immobilized targets. |
| Level 9 |
Disengage |
A passive skill that improves our evasion and makes attacks of opportunity less likely. |
| Level 10 |
Dash |
Last core skill. Lifesaving mobility to get you out of danger. Use preemptively. |
| Level 11 |
Pikeman Stance |
This stance provides us with bleed, immobilization and knockback chance. |
| Level 12 |
Not This Time |
A passive to protect us from CC. |
| Level 13 |
Sudden Lunge |
Very strong source of CDR, and antivenom to enemies with dangerous skills such as casters. Ideal counter to enemies with Raise Shield. |
| Level 14 |
Might Kick |
A source of free damage, which afterwards debuffs the enemy's crit avoidance and control resist. |
| Level 15 |
Push the Falling |
A passive providing potent energy regeneration. energy regeneration scales with willpower, with the next breakpoint at 11. |
| Level 16 |
Elusiveness |
Very potent defensive " Last Line of Defense" tool. Use only when the dangerous enemy is already in melee. Reserve energy for it's use. |
| Level 17 |
Opportune Moment |
Powerful energy regeneration on crits and counters. |
| Level 18 |
Wounding Spearhead |
Very powerful DPR boost scaling with crits. |
| Level 19 |
Offensive Tactic |
Very Powerful Offensive buff. Reserved to be used in melee, along with elusiveness. |
| Level 20 |
Ever Vigilant |
Debuffs the enemy's hit chance and allows you to extend Vigor by killing enemies. +5% dodge chance. |
| Level 21 |
No Time to Linger |
Offensive stat buff against controlled enemies. Strong damage buff to Sudden Lunge. |
| Level 22 |
Peak Performance |
Always works on our crossbow. Usually disappears after elusiveness. |
| Level 23 |
Adrenaline Rush |
Very Powerful emergency button. "Last Last Line of defence. |
| Level 24 |
Resourcefulness |
Necessary stepping stone toward Huntmaster. |
| Level 25 |
Huntmaster |
Passively increase damage against beasts. permanent -5% fumble, and almost permanent 4% crit chance. |
| Level 26 |
Inner Reserves |
Fills any remaining energy defecit. |
| Level 27 |
Regroup |
More CDR, and defensive buff. |
| Level 28 |
One at a Time! |
Spear damage buff. |
| Level 29 |
Stay Back! |
A passive that increases knockback chance. |
| Level 30 |
Sprint Training |
Extend range on Dash, and reduce cooldown and stamina consumption. |


Early & Budget Gear Options
| Item | Stats | Contribution |
 |
17 Piercing |
Daze chance is very strong. Can be looted from enemies in Tier 1. |
 |
22 Piercing |
Good option to fix fumble chance before we can fix it through other gear and stats. |
 |
22 Piercing Tier 3  |
Can be acquired for free, slightly damaged, by killing the Ancient Troll. |
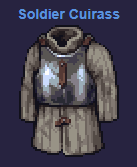 |
12 protection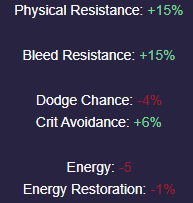 |
Light Armor is too weak until tier 4-5. This armor has great protection for it's price. |
 |
+2% crit chance +10% crit efficiency + 4% damage taken |
Solid option until tier 5. +4% Damage taken means little when fighting at range. |
 |
32 Piercing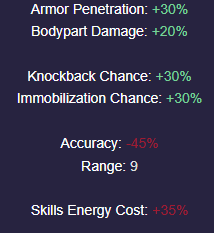 |
Longest range available on a Crossbow. Allows firing anywhere within sight. |
Gameplay
When playing this build, the most important thing is to be patient. Fundamentally, you are a glass cannon, which means the build can feel deceptively untouchable until it is too late. You should never find yourself engaged by more than 2 enemies at once, and if you are, you likely made a mistake earlier on in the battle.
When played correctly, your only expense on armour repair should be your boots from walking. Being in danger does not mean being locked in a brawl, at half health. Being in danger could instead mean accidentally pulling a large, tight group of enemies from behind an awkward corner where you cannot make maximum use of your range. You must respect the danger of your enemies to overcome it.
Generally, the gameplay can be compared to being a rapidly deployable mobile sniper turret, as over 70% of all damage dealt, after the early game, is done with the crossbow. It is therefore the most important piece of your equipment, and is the highest priority to upgrade. Your goal is to thin the approaching enemy wave such that the remaining enemies are far enough apart for you to deal with them individually using the spear, ideally without letting them touch you in melee.
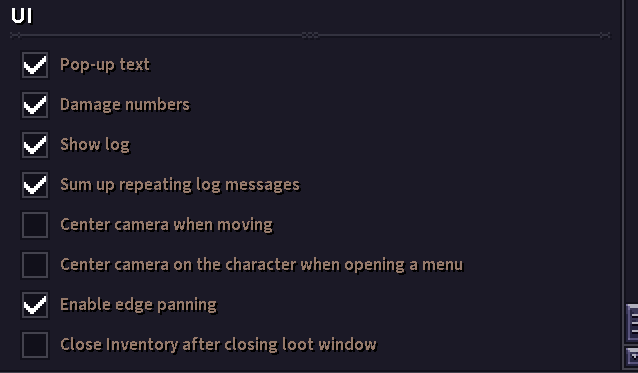
Quality of Life Settings
Once your vision range starts to outgrow your screen, I advise switching to a higher screen resolution, as that will effectively zoom the camera out. Additionally, you can disconnect your character from the camera by disabling both the "Centre Camera" options and ticking "Enable Edge Panning" In the settings.
Early Dungeons
Make sure to make the most of your range with the crossbow. Having ranged damage at this level is extremely powerful. Lure enemies out by shouting if necessary, knowing that on average, your spear skill rotation will comfortably kill 1 enemy.
Ancient Troll
Spears make him very easy, by comparison, at this level. Bring a smoke bomb and throw it 2 tiles ahead of you, so that the smoke hides you from the troll's sight. Hide in the smoke, trying to stay 2 tiles away from the troll at all times to prevent the troll from throwing a boulder at you. Afterwards, use Impaling Lunge as your main means of damaging the troll.
In addition to the usual dance, dodge the shockwaves such that you end up 1 tile away from the troll as it resolves. Then, if you know the troll is going to step forward, as opposed to roaring, activate determination. Dash is recommended as it can forgive your mistakes in positioning, allowing you to avoid damage or stabilize after taking a hit. Do not try to use the crossbow.
Entering Tier 3
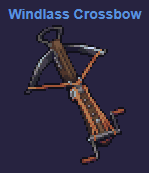
Tier 3 can be challenging as at this stage, enemies across the board start to hurt more. The most important upgrade would be finding or buying a tier 4 crossbow from Brynn, ideally one that has as long a range as possible, such as the Windlass Crossbow.
Manticore
This is an endurance fight. I strongly recommend waiting until level 18 to do this fight (which is when you should reach 30 perception). Having a tier 4 spear and crossbow will massively help as well. The main danger in this fight is running out of energy due to the pyres and being immobilized while being next to the Manticore.
The safest approach is killing skeletons in melee, and then switching to a crossbow, instantly reloading and aiming (thanks to Dexterity) to shoot the Manticore. Additionally, when the Manticore is 2 tiles away, you can impaling lunge at it.
You have to ensure the skeletons don't die from old age and heal the manticore. Allowing the skeletons to become pyres is a necessary sacrifice. Energy is a secondary concern in this fight. I recommend bringing an Azurecap mushroom to take right before the fight.
Also, make sure to receive Precision training from Leif before every major dungeon or battle.
Late Game Dungeons
Be Very, VERY careful around dungeons with trapped entrances. That is the number 1 thing most likely to kill you that is not your own blunder. Always over-prepare for such an entrance room, especially for undead, as the open floor plan of undead dungeons leads to the sound of battle attracting many, many more enemies from deep within the level. Since this is the start of the dungeon, and the exit is locked, you have nowhere to kite back the enemies, meaning you have to fight them in melee.
Here is the carnage after entering a tier 4 undead dungeon with this build:
https://youtu.be/vHhEHtJlSNY?si=37lbg_gfH80cyxi9
Typical Combat Skill Rotation
Group of 2 mace fiends, a Yagram and a sanguimage approach from 13 tiles away.
Plan 1) Retreat until they start losing interest, so you may fight them 1 at a time.
Plan 2) Scoot and shoot - slow retreat while firing.
- Begin taking aim, firing and reloading at the sanguimage.
- The moment he is dead, dash toward the exit / more kiting space so that dash is on cooldown.
- Start firing at the enemy in the middle of the congaline, to create separation.
- After the middle enemy dies, if there's time, shoot at the biggest threat - the Yagram.
- Wait for the front enemy to enter within 4 tiles before firing at them with Take Aim active (bonus stagger and immobilization chance).
- Switch to spear and try to kill them using range 2 skills.
- Use Sudden Lunge while the enemy is bleeding or immobilized to reduce cooldowns. Save kick and Leg sweep for last.
- Use regroup to gain block chance and reduce spear cooldowns.
- If Dash is still somehow on cooldown, as are all the attacking skills, use Offensive Tactic just before they enter melee, and Elusiveness as they enter melee.
- Attack with default attacks, hoping to land crits (+67%) to regain enough energy to be able to use adrenaline rush if need be.
Conclusions
This is a very powerful glass cannon battlefield artillery build that can easily dish out 80-120 damage crits every other shot, while also being capable of killing the tier 5 proselyte maggot boss in 3 turns of melee. Your main weakness is being overrun, as this build wants to keep enemies within sight but not in direct contact. It avoids the weakness of low-tier light armour by sticking to medium armour until it can skip tier 4 straight to tier 5 light armour.
This build offers an opportunity to practice fighting the troll much earlier than normal, as that can catapult you into the migame. Good luck, and may your bolts darken the skies and strike as lightning!
Like, Dislike, comment, or share!
Join the Discussion
0 commentsNo comments yet.
Be the first one to leave a comment!