
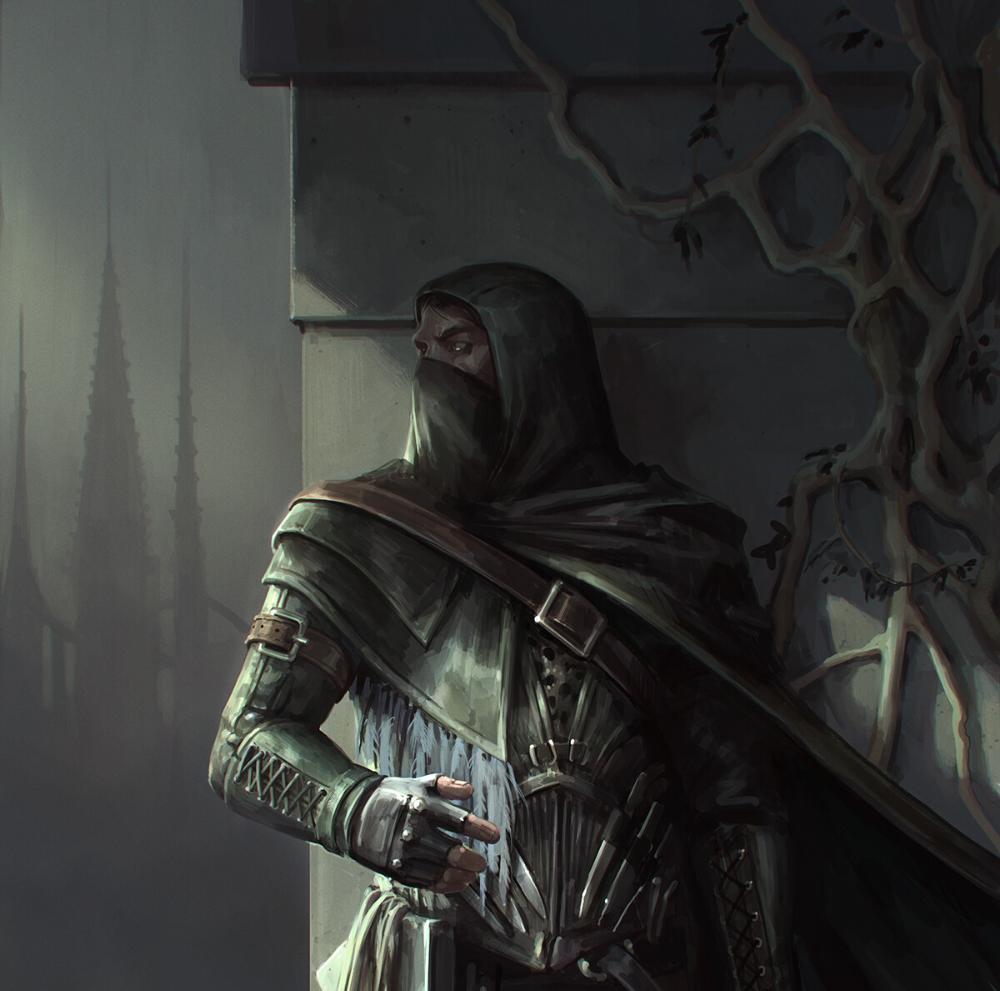
Dagger Assassin Mahir Build - The Shadestalker - Stoneshard
Introduction
A distant scream echoes through the Bastion's cobbled hallways.
Bert is still a greenhorn. After the last raid, he finally earned the right to join the others at the drinking table. He looks toward the exit from the chamber. Derin left to take a leak. He's been gone too long. The others haven't heard the scream, or if they had, they are too drunk to care.
Bert is ousted from the bench and sent to look for Derin. He grips his spear tightly, the sounds of revelry growing mute behind him. He turns the corner and gazes down the corridor. The darkness greets him. He narrows his eyes.
Deep within the inky blackness of the corridor, a shapeless shadow shifted behind the distant corner of the next room. "No," he told himself. "Me mind's playin' tricks on me. Derin, the drunk fool, must've fallen over and cracked his head on sumthin."
He keeps on walking. Annoyed, he thinks of the others getting drunk without him. He thinks of his wife and daughter waiting for him back home—the reason he set out on this briganding business to begin with. These are his last thoughts as a dagger plunges from the darkness.
A distant scream echoes through the Bastion's cobbled hallways.
Contents
Overview
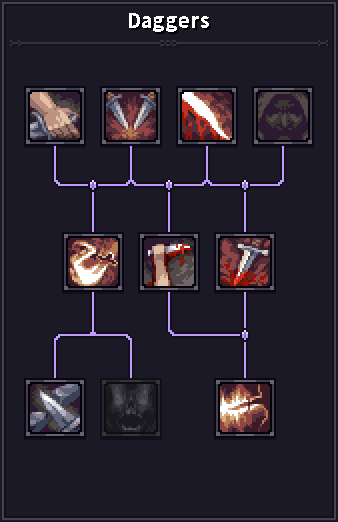
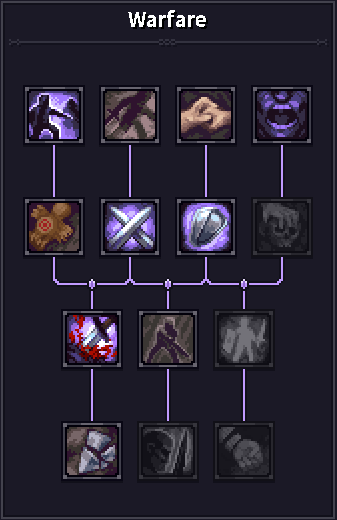
This is a single dagger build for Mahir, utilizing the ability "Right on Target" from the Warfare tree. It utilizes light armour to maximize critical and dodge chances, preferring speed, surprise, and violence of action over the strength and certainty of steel plate armour. Right on Target demands that we use a 1 handed weapon, while keeping the off-hand empty, to benefit from the bulk of its effect. This build achieves the highest DPS on any of the builds I've played.
Character Choice
Mahir is a newer character released in one of the recent updates. He starts with all but one of the necessary skill trees unlocked, and his trait is very strong for this build.
Character Trait
He has a unique trait, which awards him an additional ability point every time he acquires 6 skills in a single skill tree.
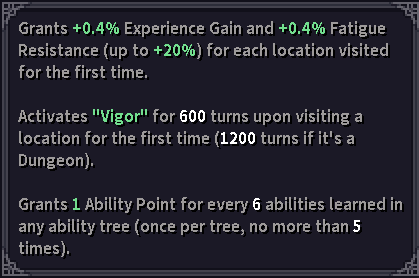
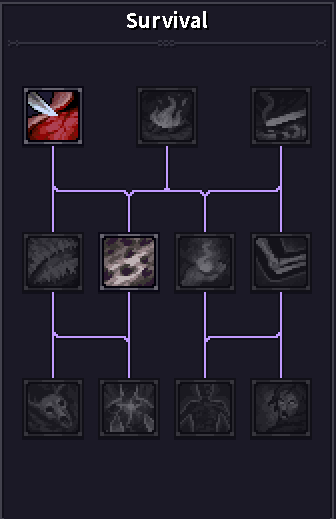
Additionally, His trait gives him Vigor whenever you visit a new location, creating natural synergy with the Survival tree. Lastly, though still important for this build, this trait gives him bonus fatigue resistance, which is helpful on a build that constantly burns through its energy.
Late-game Potential vs Mid-game Power
Mahir's trait has unique late-game potential, as ability points are a very rare commodity, with no other character offering them as readily and in as great an abundance as Mahir. It enables entirely new builds, while others are able to hit their mid-game powerspikes much sooner and in greater density.
However, achieving this requires a tremendous amount of planning and theorycrafting. Without that, Mahir can become one of the weakest characters in the game. It is therefore critically important to follow the skill order offered by this guide to the letter, or be prepared to make sweeping changes to the skill order if you wish to modify it in any way.
Early Game Hardships
Mahir is, quite certainly, the weakest character at the start of the game, offering mediocre to outright bad armour, no valuable consumables, and having access to only very weak weapons.
This means that basic combat fundamentals are doubly important when trying this build, as is the competent use of traps and nets. The early game requires playing slowly and methodically until level 7, when this build reaches its first powerspike.
For these reasons, I would not recommend this build to a new player.
Endgame Stat Spread
| Stat | Score |
| Strength | 20 |
| Agility | 11 |
| Perception | 25 |
| Vitality | 10 |
| Willpower | 17 |
Final Skills
After careful consideration, I concluded that attempting to acquire all 5 extra points from Mahir's trait to be counterproductive to the build's efficiency. Doing so would detract from the weaponry skills that we are able to take, which is the primary method for scaling the effect of RoT.
 |
 |
 |
 |
 |
Final Gear
| Item | Stats | Contribution |
|
Assassin's Dagger |
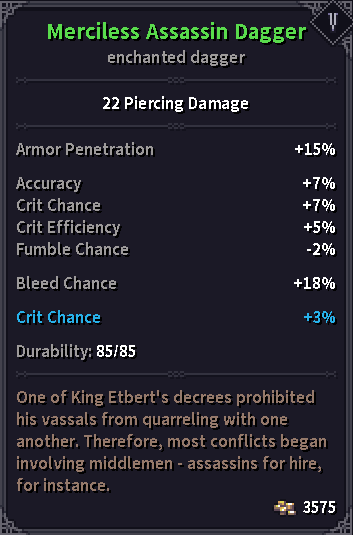 |
BIS for this build, as Unique daggers cannot be enchanted. It supplies all of the offensive stats we could possibly want from a weapon. |
|
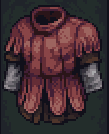
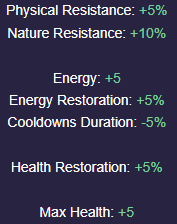
Fencer's Doublet |
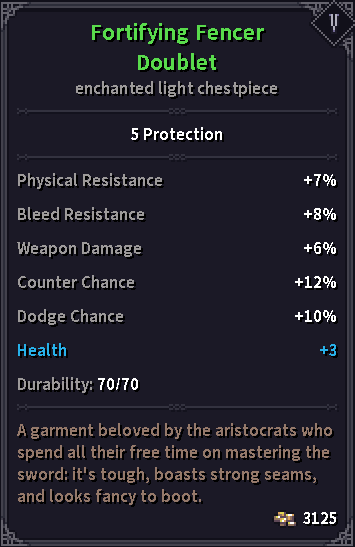 |
This armor provides the highest dodge chance of all the reasonable armor options. 12% counter chance helps make counters more common, along with Counterattack Mastery. 6% weapon damage is a cherry on top, increasing our damage output by the equivalent of 4 levels in strength. |
|
Blademaster Gloves |
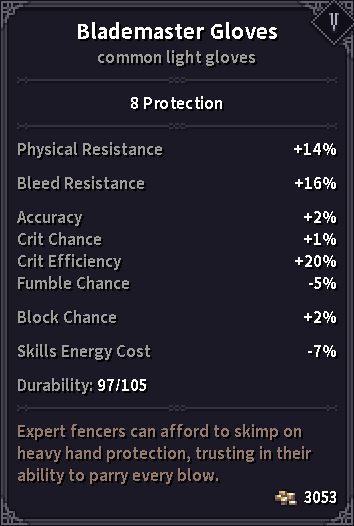 |
BIS gloves for this build. They provide Crit Chance, Crit Efficiency and fumble reduction, all of which are very valuable on this build. |
|
Magehunter Boots |
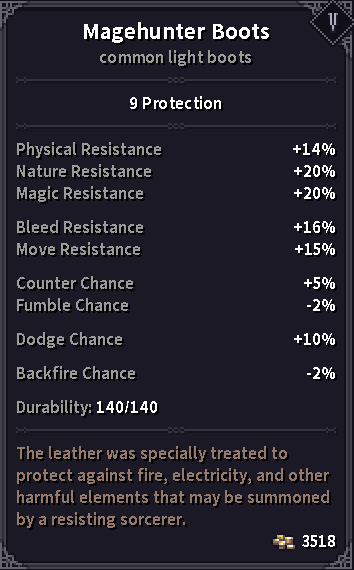 |
BIS due to a lack of options. The game suffers from a lack of non-chest armor light armor. The added dodge and reduced fumble are nice, though. |
|
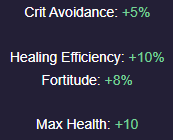
Mercenary Captain Headwear |
 |
It provides the most dodge chance of all the light armor hats, as well as offering the most crit chance and crit efficiency, making it more valuable than the berserker cowl. |
|
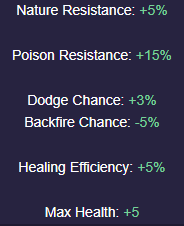
Aristocrat Belt |
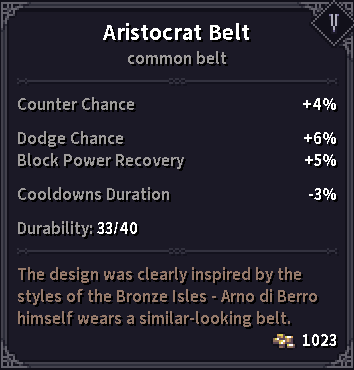 |
This belt provides the most Dodge chance of all the belts, and the added CDR is never wasted. The counter chance is a nice bonus. |
 |
 |
This is a fantastic defensive amulet. Since this build does not rely on jewelry or any of its core functions, this is a fantastic option. |
 |
 |
The ring slot is a convenient place to collect some added health and energy. The build does not rely on jewelry to fix fumble/accuracy, so this ring is superior to the ruby and emerald silver rings. |


The gear focuses on maximizing weapon damage, crit chance and crit efficiency, while providing adequate dodge and HP. This build uses emerald jewelry to supplement its HP pool. The build relies on its dazzling offence to remove the need for a defence. This informs the primary gameplay loop for this build.
Notable Alternatives
| Item | Stats | Contribution |
 |
 |
The main strength of this belt is in the +5 max health, though the dodge chance and backfire chance are not wasted either. |
 |
 |
Arguably best ring in the game. The stats it offers are never wasted on any build. |
 |
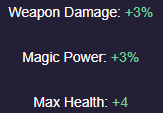 |
It offers 2 strength levels worth of weapon damage and +4 max hp. This ring is solid even lategame. |
Enchantments
The strongest enchantment options for the build include max health or energy on the jewelry and max health or dodge chance on the armour. For the weapon, the build prefers bonus elemental damage or Crit Chance.
Gameplay
This section will cover a variety of gameplay tips that range from mildly helpful to essential in achieving success with the build.
This build is not a brawler. It doesn't rush into a room and carve everyone inside into ribbons. This build is very intentional and methodical. It turns the game into a puzzle, for solving which you are rewarded with BIG RED numbers above enemy heads.
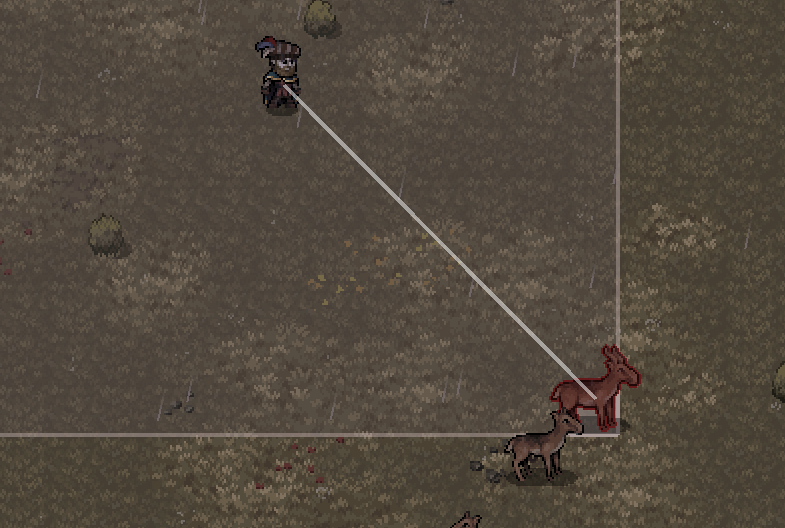
Become an Ambush Predator
A core part of the gameplay loop is ambushing alerted enemies from behind corners as they walk into your melee range. This is a fundamental part of all dagger builds, but this one leans especially hard into it.
Before RoT
I have found the heavy use of thrown weapons to be more effective early on, as they do not suffer the same accuracy penalties as ranged weapons. From the Shadows greatly boosts your thrown knives' damage, while Quick Hands gives you bonus counter chance for switching loadouts to a dagger.
For this portion of the game, I recommend keeping your best dagger and a shield in your main loadout, with 2 daggers you wish to throw in the alternate loadout.
Start the fight in the alternate loadout, and wait as the enemy approaches within 3 tiles. Throw one or both daggers, before switching to your primary loadout, thus getting bonus counter chance from Quick Hands.
After RoT
Unlocking Pathfinder greatly helps in achieving the ambushing playstyle. Once you have Warcry, ambushing becomes more valuable than relying on knife throwing, as you waste no turns on the From the Shadows damage buff.
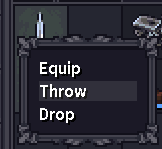
Thrown Weapons
Almost any object in your inventory can be thrown. To do so, right-click on the desired object, choose throw, then choose the target tile.
Enemy Movement Patterns
Enemies of each of the 3 enemy categories move and investigate noise in slightly different ways. These differences are important to understand when playing a build that relies on luring enemies with noise.
Bandits
Bandits are the easiest to predict, as they use the same pathfinding algorithm as the one used by your character. You can therefore hover your cursor over the tile occupied by the enemy to get a visualization of the path they will take. Any deviations must be either due to Confusion or due to the presence of unspotted traps.
Proselytes
While this is likely due to the relatively open design of catacomb dungeons, I have noticed that Proselyte enemies tend to path somewhat strangely. It seems they are reluctant to change the cardinal row or column of tiles, along which they are walking. This makes it all the more important to pick the corners from behind which you are going to ambush them.
Undead
Mindless undead, such as skeletons and restless, have a unique way of moving. Once they have turned hostile, they will always try to match the cardinal row/column occupied by your character, as well as ignoring the presence of traps, neither of which is a behaviour observed in the other 2 factions. This makes it easy to lure them into traps, using them to your advantage.
Utility Usage
Nets - should be thrown at the most deadly enemy already adjacent to you.
Claw Traps - placed in choke points, or on the tile that an alerted enemy will have to step on to enter your melee range, as you hide behind a corner.
Enemies that are alerted (??) but not hostile (!!) will not see traps you've placed, even if you place one right in front of them, while being hidden around a corner.
Caltrops - can be thrown directly at an enemy.
Smoke Bombs - in the middle of a group of hostile enemies in order to split their formation, with you standing just beyond the smoke.
Deathstingers - don't.
Ancient Troll
The troll is comparatively easy to defeat with this build. First, focus on stripping his armor using Double Lunge. Once it drops under 30% begin using Gaping Wound, with the intention to cause bleeding. Activate the stance before striking with Gaping Wound to increase the chance of Bleeding. Using War Cry is ill-advised, as confusion can make the troll move erratically, which can be very dangerous.
Breaking into Tier 3
At tier 3, with the adequate gear, this build can handle humans quite comfortably. However, the Undead are quite dangerous. The Husk boss is by far the most dangerous dungeon boss in all of tier 3, and requires traps, Abasa, and multiple nets to take down safely. At this stage, venturing into an undead dungeon with a Blasphemous Ritual, or a Trapped Entrance, is an especially dangerous affair.
Tier 4 and above - Fiends
This single enemy being worthy of an entire section of the guide should speak volumes. They are extremely dangerous. They are too durable to kill in a single turn, and will not flee after being crit, like humans would. When they are found in a group with other enemies, it is necessary to burn consumables and other resources to deal with them.
You cannot allow them to use Skullcrusher, or Hooking Chop. As such, you must fight them from around a corner, and you must use Warcry before fighting them to daze them. If they resist the daze, you must open with Sudden Lunge, followed by Double Lunge, followed by Seize the Initiative, followed by another Double Lunge / Finisher.
If any part of the above combo fails, the best course of action is to flee using Dash. Reposition, regroup, find another corner, or leave the dungeon entirely, if that is necessary. While this build can handle them reliably, they offer no room for error.
In general, Proselytes are the hardest dungeon to overcome starting tier 4 and above, due to their uncooperative layouts, and lack of sharp corners, as well as centrally-located room entrances.
Manticore
Taking down the manticore is no easy feat, but this build can do so fairly comfortably. I cleared the Manticore at level 20, after unlocking Armor Crusher and Mana Crystal, and upon reaching 15 in strength. This gave me very convincing damage numbers, which enabled me to kill the manticore in around 25 strikes. Mana Crystals provided added security due to them being qualified to be Dimensional Shift targets..
The key to this fight is the use of Finisher to land consistent damage any time Manticore's skill "Vengeance of the Dead" is off cooldown. When combined with a preemptive Elusiveness, this build can brawl with the Manticore in very short bursts, allowing you to land a double lunge and/or Gaping Wound before escaping to safety
Once the armor is gone, this build can use Gaping wound to score 1 or even multiple bleeds on the Manticore, significantly shortening the time needed to kill it.
Here is the full Manticore fight.
Endgame
This build cleared out all tier 5 dungeons by level 25.
Here is a video of me clearing out Fort Grey Falcon.
Proselytes are the most challenging, while undead are the most volatile to clear.
T5 Proselytes
Taking down Yagrams demands the use of Phantasm, and was often done in 2 bursts. Begin with a corner ambush and deal damage to trigger their Adrenaline Rush. Then, disengage with Dash to wait out the effect, before placing phantasm and dashing in with Finisher to secure the kill.
When an ambush is impossible, start with preemptive elusiveness, phantasm, finisher, sudden lunge, and double lunge. You must have either a distant mana crystal or Dash ready to disengage from combat
T5 Undead
The use of offensive dimensional shift is key here, as certain ghosts and ancient ghasts are the highest priority. It is strongly recommended to use an Azurecap, or Alqud, before entering the dungeon. Remember that throwing knives can be used to trigger Raise Shield prematurely. The entrance room is by far the most dangerous part of the dungeon.
Once the entrance room is clear, the rest of the dungeon becomes much easier to handle
Progression
Stat Allocation Order
The stat allocation is rather straightforward for this build, though still informed by the skills we want to acquire as soon as possible.
- 1. 25 Perception
- 2. 15 Strength
- 3. 15 Willpower
- 4. 20 Strength
- 5. 17 Willpower
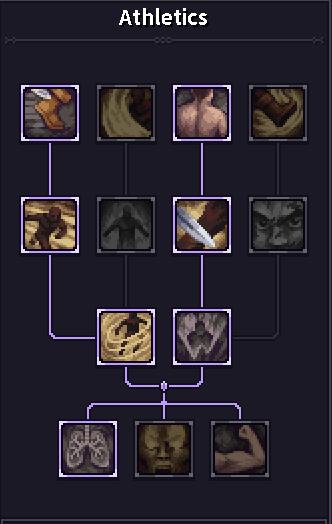
Skill Order
The order of Ability Point allocation is constrained by Mahir's trait. Optimizing its effectiveness has been by far the hardest part of constructing this build. My primary goal was to weaponize as much of the trait's effects as early as possible, without compromising any key aspect of the build.
Collective Skill Order
Unfortunately, the calculator tool does not support Mahir's passive, so the collective Skill Order View cannot be provided.
Individual Skill Order
| Level | Skill | Contribution |
| 1 |
Double Lunge |
Attack. Primary damage skill for the entire playthrough. Low base CD. Make 2 attacks with bonus weapon damage and bodypart damage. Further reduces this skill's CD if both attacks land or if the ability kills the target. |
| 1 |
From the Shadows |
Offensive passive ability. First dagger strike against the target inflicts them with +33% bonus damage taken for 3 turns. Greatly increase weapon damage and armour penetration against unaware (yellow question marks) or confused (status effect) targets. Increases thrown dagger damage by +50%. |
| 2 |
Gaping Wound |
Attack. High bleed chance and armor penetration. If the strike injures or bleeds the target, inflict them with a status giving them more damage taken, and potentially causing further bleeds. Boss-killing skill. |
| 3 |
Quick Hands |
Support Passive. Every dagger strike reduces the tree's cooldowns by 1. Switching loadouts to one containing a dagger gives bonus counter and crit chances. See Gameplay Section for tips. |
| 4 |
Pathfinder |
Core Passive. Allows you to hear enemies through walls. Enemies you hear this way take more damage and have reduced dodge. Necessary component to the core gameplay loop of the build. |
| 5 |
Seize the Initiative |
Warfare is taught by the Governor of Mannshire, found on the second floor of the castle, for 250 crowns. Attack. Massively reduces enemy block and dodge chance and delivers a strike to the target's least protected body part. If damage was dealt, apply the target with a status that grants you bonus accuracy and reduces fumble while penalizing the same stats to the target. Subsequent strikes against the target prolong the effect. |
| 6 |
Save the Ability Point |
Acquiring 6 dagger skills is a priority, and none can be taken at this level. |
| 7 |
Painful Stabs |
Stance. Gives bonus Crit Chance, Crit Efficiency, Weapon Damage, and Bleed chance, every time you use a dagger skill. CDR synergy. |
| 7 |
Deadly Trick |
Attack / Maneuver. Core offensive skill. Delivers a strike with bonus damage and bleed chance, and swaps positions with the target. The attack has 100% energy drain. Primary use to restore Energy. |
| Mahir Trait 1 |
Right on Target |
Core Passive. Provides a great array of offensive stats when using a 1 handed weapon and an empty offhand. Weaponry skills grant Main Hand Efficiency. Main Hand Efficiency multiplicatively increases all other stats, including crit chance, accuracy, fumble chance, and weapon damage. |
| 8 |
War Cry |
Maneuver. Core Buff / Debuff. Does not turn Alert enemies Hostile. Gives bonus weapon damage, crit chance and crit efficiency, while confusing and dazing enemies. |
| 9 |
Disengage |
Defensive Passive. Stepping stone toward Dash and Elusiveness. |
| 10 |
Dash |
Core defensive skill. Helps in the Troll fight. Primary line of defence for the majority of the game. Must be used preemptively. |
| 11 |
Opportune Moment |
Powerful support passive. Recovers energy with every critical strike. % energy recovered scales with Willpower. |
| 12 |
Offensive Tactic |
Maneuver. Powerful Offensive buff to be used whenever necessary. |
| 13 |
Finisher |
Attack / Charge. Core skill. Delivers a powerful attack that will instantly kill the target if it has left them under a certain HP threshold. If that happens, recovers a portion of max energy and resets the cooldown of ALL attacking skills Sprint Training Synergy. |
| Mahir Trait 2 |
Elusiveness |
Maneuver. Grants 5 stacks of an effect. each stack offers a high dodge chance and minor reduction to damage taken. dashing through tiles recovers stacks. |
| 14 |
Not This Time |
Defensive Passive. additional protection against CC. |
| 15 |
Sudden Lunge |
Attack. Very strong source of CDR, and antivenom to enemies with dangerous skills such as casters. Ideal counter to enemies with Raise Shield. |
| 16 |
No Time to Linger |
Offensive Passive. Offensive stat buff against weakened enemies. Strong damage buff to Sudden Lunge. |
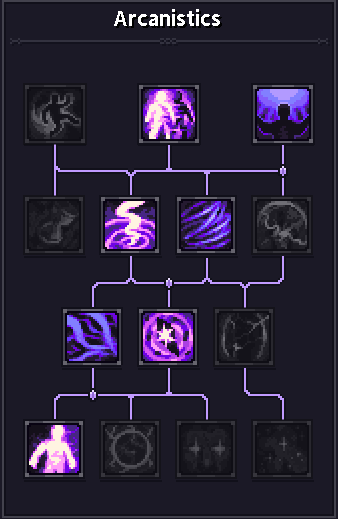
| Mahir Trait 3 |
Dimensional Shift |
Spell. Core Skill. Swapping the positions of 2 entities within range has huge tactical utility, as well as potentially an escape tool. |
| 17 |
Schism |
AoE Spell. Offers situational utility through forced movement, as well as being able to stun and daze enemies. Stepping stone towards Phantasm' |
| 18 |
Transcendental Anchoring |
Utility Passive. Reduces Cooldown on Dimensional Shift when teleporting yourself or your phantasm. Also burns the energy of enemy targets, and replenishes energy by the same amount. |
| 19 |
Armor Crusher |
Powerful Offensive Passive. Grants a lot of armor pen and armor damage against armored targets, and Damage taken against unarmored ones. Gives bonus crit chance against blocking opponents. |
| 20 |
Mana Crystal |
Spell. Creates a turret that fires arcane projectiles at the weakest enemy within 4 tiles. It can be used as a target for dimensional shift. Setting this turret behind you before combat allows you to use Dimensional Shift to escape. |
| 21 |
Astral Tides |
Offensive Passive. Stepping stone toward Phantasm. |
| 22 |
Phantasm |
Spell. Last core skill of the build. Create an arcane projection of the player character that is able to attack enemies. The projection scales with Willpower. It can be targeted with Dimensional Shift. Enemies will target and attack the phantasm, forgetting about the player character. |
| Mahir Trait 4 |
Sprint Training |
Utility Passive. Increases the range of Dash and Finisher by 1, as well as greatly reducing their cooldowns and energy costs. |
| 23 |
Weakening Jabs |
Defensive Passive. Dagger attacks reduce the damage output of the target. Stepping Stone toward Coup de Grace. |
| 24 |
Coup de Grace |
Attack. The weaker the target, the stronger the attack. If the attack kills the target, it grants the player another turn and a massive increase to crit chance. |
| 25 |
Counterattack Mastery |
Offensive Passive. Dagger strikes grant a bonus counter chance. Increases the damage of counter strikes by 33%. |
| 26 |
Arcane Might |
Offensive Passive. Dealing arcane damage grants bonus crit chance. |
| 27 |
Dance Macabre |
Defensive Passive. Critical strikes reduce the target's damage dealt. Improves RoT scaling. |
| 28 |
Setup |
Utility Passive. Using stances and maneuvers grants reduced energy costs and damage taken. A stepping stone towards Defensive Tactic. |
| 29 |
Defensive Tactic |
Maneuver. Powerful defensive buff. Does not cost a turn while under the effects of an offensive tactic. gives bonus dodge and counter chance. |
| 30 |
|
Powerful Passive. Enhances Defensive and Offensive Tactics. Reduces energy cost and cooldowns of all stances and maneuvers by 33%. |


 Tactical Advantage
Midgame Gear
This section covers some of the items you should look out for in the midgame.
| Item | Stats | Contribution |
 |
3 Protection
|
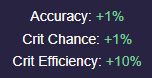
Fantastic +3% crit helps raise our crit chance as we enter midgame. |
 |
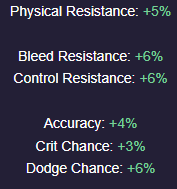
 |
Acquired from the dwarven Merchant in Brynn docks. Provides all of our most desired offensive stats for the midgame. |
 |
 |
Helps force our fumble chance to 0 until we can get enough via perception scaling on RoT, and gear bonuses. |
 |
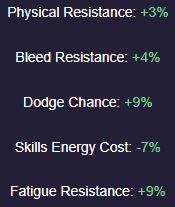 |
While it offers little protection, and the durability is very poor, the reduction in skill energy costs and fatigue resistance is very valuable IF you are prepared to play passively and very carefully. Otherwise, use the Padded Doublet instead. |
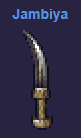 |
 |
Very powerful Tier 4 dagger, which can be purchased from the Elven merchant in the Brynn port starting 3000 reputation. |
Good luck, and may your enemies never know you're coming!
Like, Dislike, comment, or share!
Join the Discussion
0 commentsNo comments yet.
Be the first one to leave a comment!