
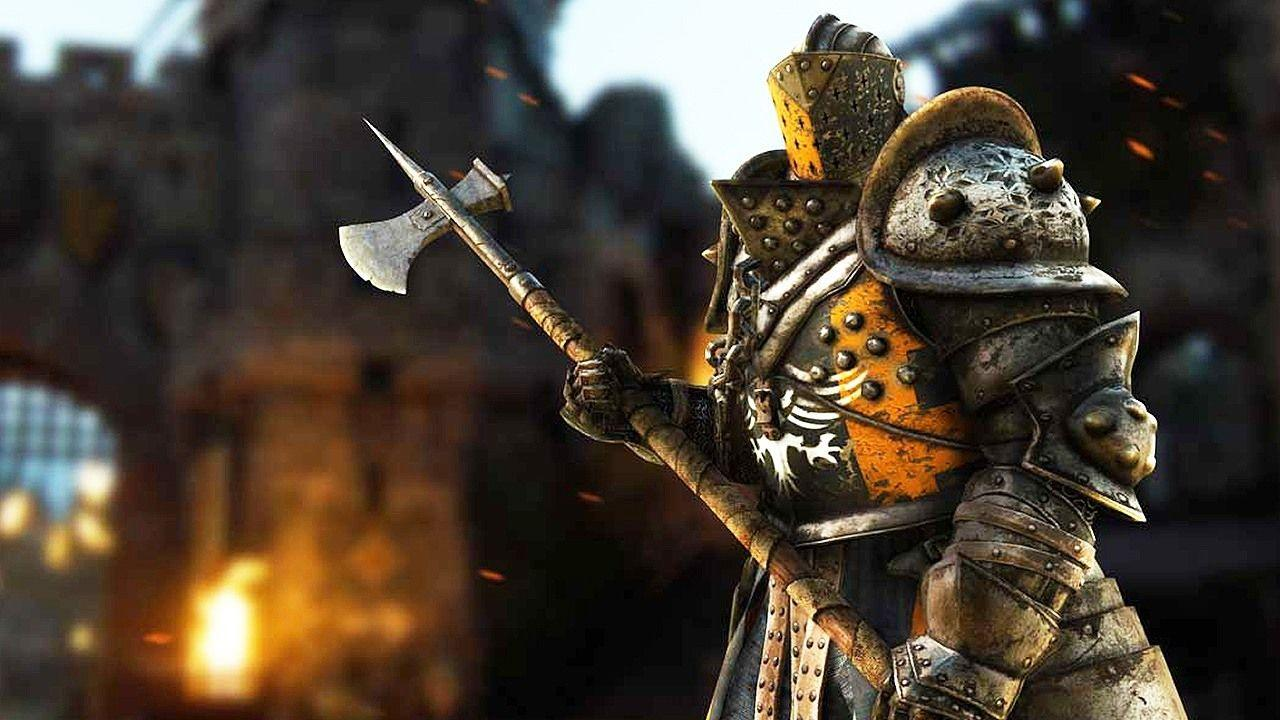
The Lawbringer - Heavy Armor 2H Axe Build - Stoneshard
Introduction
The thief shall lose the hand that held the knife
He who in guiltless blood has wet the sword
Was marked to end his Path of Life
I am Law
A verdict made - a sentence given
To those whose ears are deaf to reason.
Those who to the noble task have risen
Shall see the fine be paid in crimson.
I am Wrath
My axe shall bite, and it shall drink,
'till it can drink no more.
My wrath will offer no respite
To those who break the word of law.
The steel shall sing, and when it's done
There will, alive, remain but one.
Judge. Jury. Executioner.
Oath of the Lawbringers of the Triune Hand
Contents
Overview
This is a heavy armor 2H Axe build which leverages the defensive properties of heavy armor to fight with unrestrained violence and unmatched ferocity. 2H axe is one of the strongest weapon classes in Stoneshard, and are distinguished by their huge raw damage output. To the untrained eye, 2h axes may seem one-dimensional - all gas no breaks, perfect for glass cannon builds. But that could not be further from the truth.
In the hands of a skilled player, 2h axe builds become a unique exercise in pacing. By conciously holding back on the immense damage output of 2h axes a skilled player can distribute it efficiently, using skills when and where theyre needed to clear entire hordes of enemies, instead of burning through their resources and being overwhelmed.
At the same time, by combining 2H axes with heavy armor, this build obtains an enormous amount of resiliency. This makes the build very forgiving to play, and overall less reliant on having polished gameplay fundamentals. This is my most beginner-friendly build so far.
Character Selection
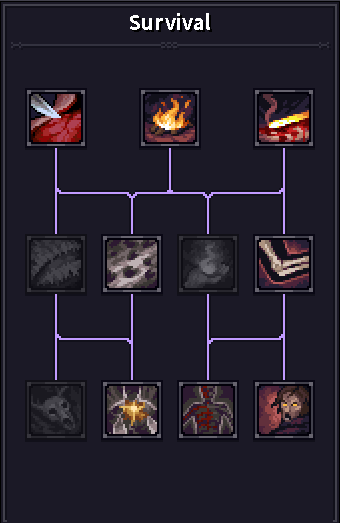
This build does not depend on any one character's passive, but several of them prove to be very useful.
|
Character |
Strength |
|---|---|
|
|
Jorgrim's trait is |
|
|
Dirwin's trait is I recommend Dirwin for a new player. |
|
|
Leo's Trait is |
|
|
Arna's Trait is |
 Jorgrim
 Dirwin
 Leosthenes
 Arna
Arna
On Jorgrim, remember to always butcher dungeon bosses for trophies!
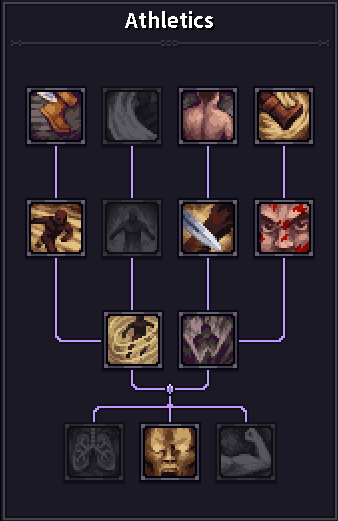
When playing Arna or Leosthenes, you will need to learn the 2h axe and Athletics Skill trees.
Athletics can be learned by buying a book from the clerk at Mannshire Castle.
2H Axes can be learned from the Mannshire Carpenter.
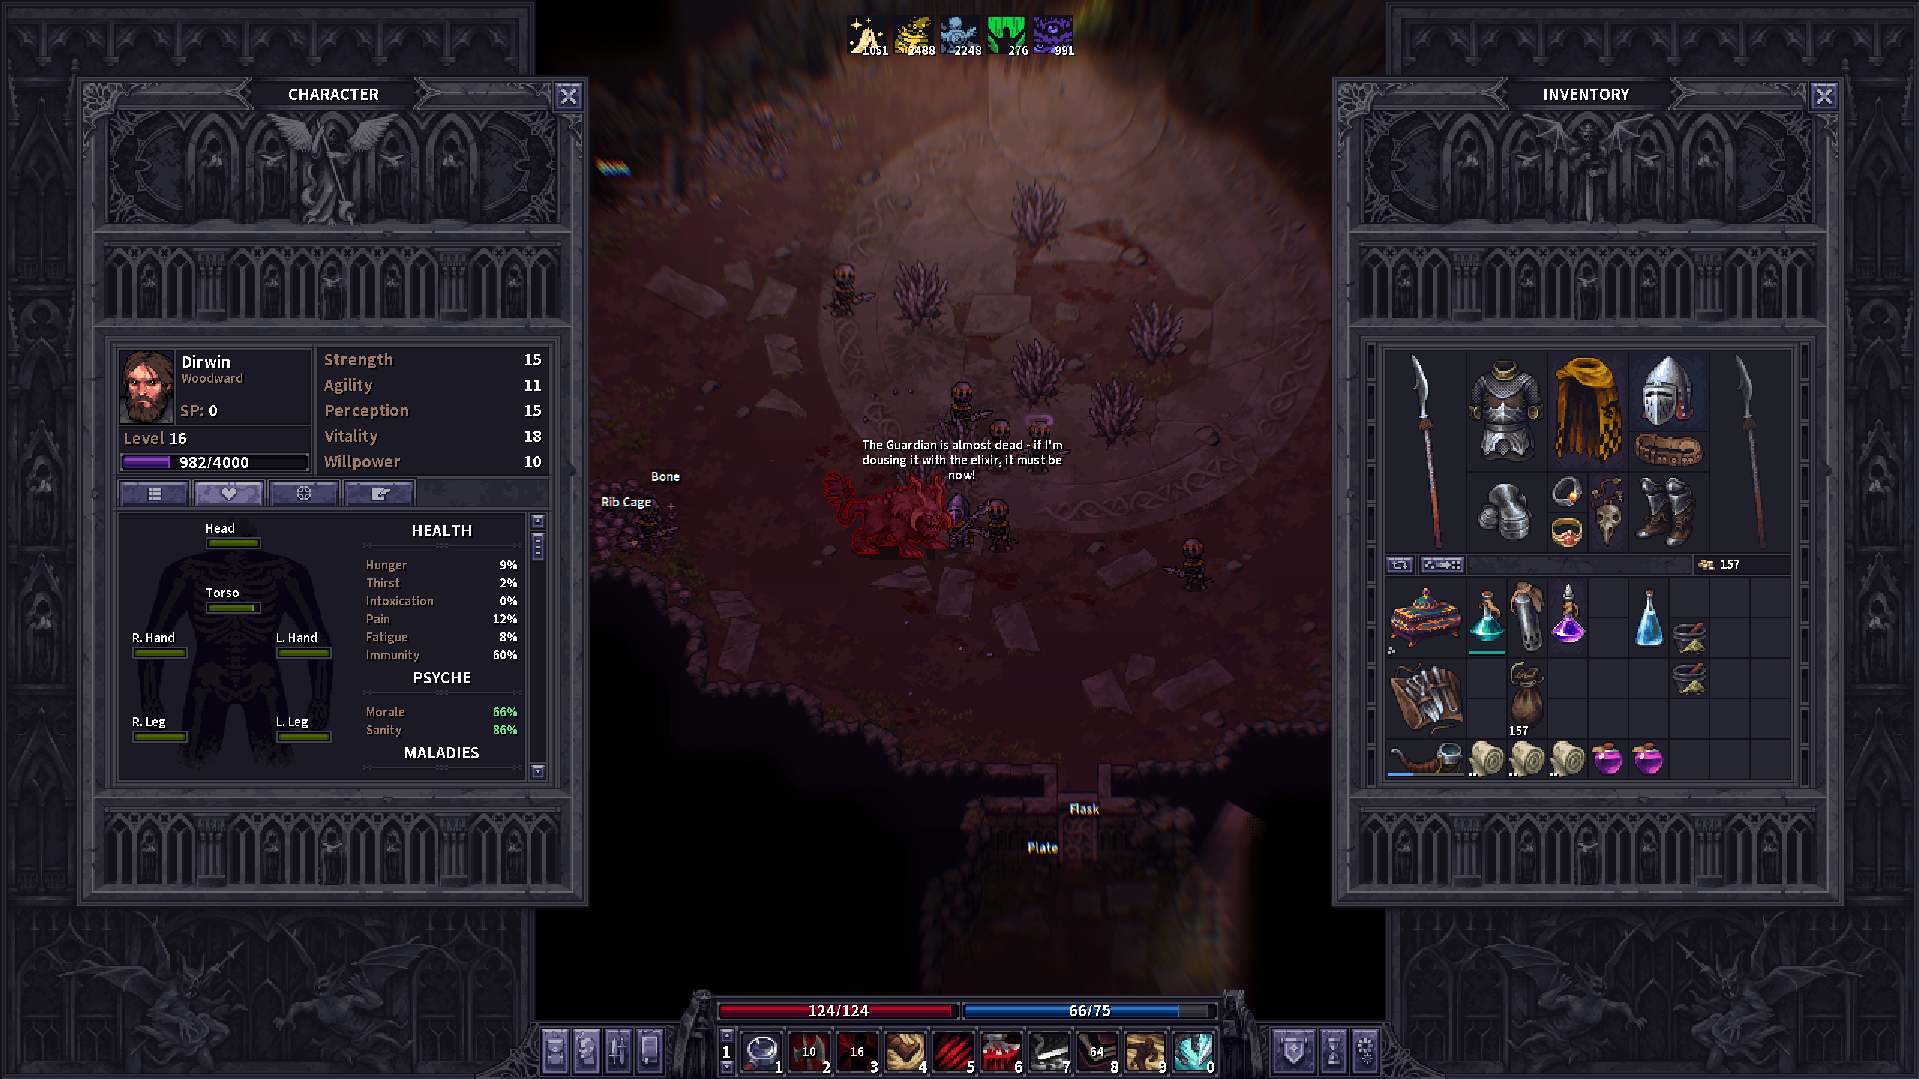
Final Stats
| Stat | Value |
|---|---|
| Strength | 25 |
| Agility | 10 |
| Perception | 15 |
| Vitality | 25 |
| Willpower | 10 |
Final Skills
 |
 |
|
|
 |
|
Dirwin |
Everyone Else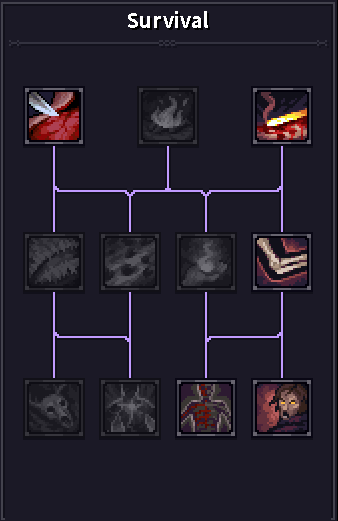 |
Final Gear
|
Item |
Contribution |
|---|---|
|
Forholt Staff |
This is our non-unique BiS. It offers accuracy to reach 96% without relying on jewelry too much, and bleed chance to supplement the weapon's low base damage.
Best enchantment is fire damage, or crit chance. |
|
Noble Armor |
BiS non-unique chest armor. It offers all the most important stats without costing excess energy.
Max HP, or Healing efficiency, are the optimal enchantments |
|
Knight Gauntlets |
Non-unique BiS. These are the only heavy tier 5 gloves that money can buy.
Max hp or healing efficiency are the optimal enchantment |
 Noble Sabatons Noble Sabatons |
BiS. These boots offer more bleed and move res as well as better energy at the cost of less raw damage mitigation.
Move res, HP or healing efficiency are optimal enchantments. |
|
Pig-Faced Bascinet |
BiS. Provides just enough protection to prevent your head from being targeted by seize the initiative, while being more economical than the Grand Bascinet.
Max HP, and healing efficiency are the optimal enchantments. |
|
Captain Waistband |
non-unique BiS. This belt reduces fumble chance and offers crit efficiency. The added 1% of accuracy makes it an easy sell.
HP, Bleed, move or control resare the optimal enchantments. |
|
Pagan Pendant |
This Unique amulet is obtained from the new quest a Matter of Faith. Make sure to folllow the instructions listed further below to complete the quest correctly and obtain this item. |
|
Silver Emerald Ring |
Only 1 such ring is needed. This build needs a bit of extra fumble reduction from jewelry
Bleed resist, Healing efficiency, Control and Move Resists are all good. |
|
|
Only 1 such ring is needed. This Build needs a little bit extra accuracy from jewelry.
Bleed resist, Healing efficiency, Control and Move Resists are all good enchantments. |
|
Jousting Cloak
|
BiS. This cloak offsets the -6% damage taken penalty from the Pagan Amulet. It offers many fantastic bonuses which stack with those of heavy armor. |


 Silver Ruby Ring
Progression
Stat Allocation Order
This build has 2 main priorities, which inform our stat allocation.
- Unlocking the
 Rampage Stance and
  Reign In Blood at level 7
 - Having enough energy to wear heavy armor in tier 3
With these 2 things in mind, we know that our first 2 break points must be taken in STR/PER to unlock the stance prematurely, but we cannot afford to delay our vitality investment any further, as we would be unable to fight in heavy armor without raising our max energy.
| Stat | Investment |
|---|---|
| Perception | 15 |
| Strength | 15 |
| Vitality | 20 |
| Strength | 20 |
| Vitality | 25 (Leosthenes can skip this) |
| Strength | 25 |
Skill Order
Since this build can be replicated on multiple characters, ive included multiple versions of the skill order to accomodate for each possible character choice.
| Order | Skill | Contribution |
|---|---|---|
| 1 |
Attack. Range 2. Good opening move, as it can set up a stun combo |
|
| 1 | Attack. Big pay-off move. Best used as a follow-up to Seize the Initiative or timed to be the third strike of Rampage. | |
| 2 | Attack. Ideal opening move. If the opponent also has |
|
| 3 | Active Ability. Cures all instances of bleeding. | |
| 4 |
|
Active Ability. Best used with vigor, ideally to prevent an injury rather than to stabilize one. Be careful of using it too often, as it has a long cooldown. |
| 5 | Passive. Helps reduce fumble to 0 and disables blocks on shielded or late game 2h enemies | |
| 6 | Save Skill Point | |
| 7 | Stance. Must be used before every single fight. Thanks to this stance and |
|
| 7 | Attack. Has Knockback, and inflicts more bodypart damage the weaker the target is. This is a finishing move. Combos with |
|
| 8 | Maneuver. It helps you start stacking |
|
| 9 | Passive. Minor defensive buff. Reduces the risk of walking while in enemy zone of control, enabling tactical repositioning. | |
| 10 | Charge. Primarily an escape tool. can buy you enough turns to pop first aid, and reapply buffs before enemies reengage. | |
| 11 | Passive. The main purpose is to reduce the impact of Bodypart health on our max health. This makes lifedrain more effective. | |
| 12 | Maneuver. Powerful Defensive buff. Best used in anticipation of a powerful enemy skill or a charge attack, like |
|
| 13 | Passive. Strikes against bleeding enemies restore energy. | |
| 14 | Passive. Strong defensive buff. Reduces the armor penetration for all incoming attacks. | |
| 15 | Maneuver. Repositions to an adjacent tile. Greatly increases protection while offering some block chance. This is the main defensive buff on this build - used every dangerous fight. | |
| 16 |
|
Passive. Refunds a sizeable amount of energy while wearing heavy armor. Lowers the durability loss rate. |
| 17 | Passive. Powerful Offensive Buff. This helps the build ramp up its crit chance and damage and makes us much scarier in large fights. | |
| 18 | Passive. Also makes us a lot stronger in large fights. If your stance runs out mid combat, its fine to reactivate it even when surrounded by enemies. | |
| 19 | Passive. Powerful offensive buff. Enables injuring enemies a turn earlier and finishing them faster. | |
| 20 |
|
Passive. Critting an enemy causes them to take more damage. stepping stone toward Make Space. |
| 21 | Attack. Massive 3x2 AoE. Excellent payoff for racking up |
|
| 22 | Maneuver. Big pre-combat buff. Confusion can split a tight pack of enemies. Best used when fighting an entire in the open. | |
| 23 | Active Ability. Grants vigor if you had none, and enables you to temporarily ignore injuries. This is your panic button. | |
| 24 | Passive. Major Defensive Passive. Recall that |
|
| 25 | Passive. Greatly reduces armour durability loss rate. Helps you reach 100% crit avoidance, which can make you immune to being crit. Enemies drop repair components. Make sure to bring a repair kit to late game dungeons. | |
| 26 | Maneuver. Defensive Buff. Greatly reduces damage taken. Stacks decay as you take hits. | |
| 27 | Passive. Offensive buff. Bonus accuracy, fumble and crit chances against bleeding, injured or disoriented enemies. | |
| 28 | Maneuver. Powerful Buff. Refunds some energy, reduces pain, and gives a wide array of combat buffs. Best used to the peak of your fighting power after |
|
| 29 | Passive. Makes you almost entirely immune to being stunned or staggered. | |
| 30 | Attak. Helpful utility skill, which can make certain endgame fights easier. |
| Order | Skill | Contribution |
|---|---|---|
| 1 |
Attack. Range 2. Good opening move, as it can set up a stun combo |
|
| 1 | Attack. Big pay-off move. Best used as a followup to Seize the Initiative or timed to be the third strike of Rampage. | |
| 2 | Maneuver. It helps you start stacking |
|
| 3 | Active Ability. Cures all instances of bleeding. | |
| 4 |
|
Active Ability. Best used with vigor, ideally to prevent an injury rather than to stabilize one. Be careful of using it too often, as it has a long cooldown. |
| 4 | Passive. Reduces Fumble Chance while under the effect of Vigor, and allows you to hear nearby enemies with Inspect Surroundings. | |
| 5 | Passive. Helps reduce fumble to 0 and disables blocks on shielded or late-game 2h enemies | |
| 6 | Save Skill Point | |
| 7 | Stance. Must be used before every single fight. Thanks to this stance and |
|
| 7 | Attack. Has Knockback, and inflicts more bodypart damage the weaker the target is. This is a finishing move. Combos with |
|
| 8 | Passive. Powerful defensive and support buff. Reduces enemy accuracy and crit chance. Killing enemies extends the duration of Vigor, which helps maintain Pathfinder and Make a Halt's effects. | |
| 9 | Passive. The main purpose is to reduce the impact of Bodypart health on our max health. This makes lifedrain more effective. | |
| 9 | Passive. Minor defensive buff. Reduces the risk of walking while in enemy zone of control, enabling tactical repositioning. | |
| 10 | Charge. Primarily an escape tool. can buy you enough turns to pop first aid, and reapply buffs before enemies reengage. | |
| 11 | Attack. Ideal opening move. If the opponent also has |
|
| 12 | Maneuver. Powerful Defensive buff. Best used in anticipation of a powerful enemy skill or a charge attack, like |
|
| 13 | Passive. Strikes against bleeding enemies restore energy. | |
| 14 | Passive. Strong defensive buff. Reduces the armor penetration for all incoming attacks. | |
| 15 | Maneuver. Repositions to an adjacent tile. Greatly increases protection while offering some block chance. This is the main defensive buff on this build - used every dangerous fight. | |
| 16 |
|
Passive. Refunds a sizeable amount of energy while wearing heavy armor. Lowers the durability loss rate. |
| 17 | Passive. Powerful Offensive Buff. This helps the build ramp up its crit chance and damage and makes us much scarier in large fights. | |
| 18 | Passive. Also makes us a lot stronger in large fights. If your stance runs out mid-combat, it's fine to reactivate it even when surrounded by enemies. | |
| 19 | Passive. Powerful offensive buff. Enables injuring enemies a turn earlier and finishing them faster. | |
| 20 |
|
Passive. Critting an enemy causes them to take more damage. stepping stone toward Make Space. |
| 21 | Attack. Massive 3x2 AoE. Excellent payoff for racking up |
|
| 22 | Maneuver. Big pre-combat buff. Confusion can split a tight pack of enemies. Best used when fighting an entire in the open. | |
| 23 | Active Ability. Grants vigor if you had none, and enables you to temporarily ignore injuries. This is your panic button. | |
| 24 | Passive. Major Defensive Passive. Recall that |
|
| 25 | Passive. Greatly reduces armour durability loss rate. Helps you reach 100% crit avoidance, which can make you immune to being crit. Enemies drop repair components. Make sure to bring a repair kit to late-game dungeons. | |
| 26 | Maneuver. Defensive Buff. Greatly reduces damage taken. Stacks decay as you take hits. | |
| 27 | Passive. Offensive buff. Bonus accuracy, fumble and crit chances against bleeding, injured or disoriented enemies. | |
| 28 | Maneuver. Powerful Buff. Refunds some energy, reduces pain, and gives a wide array of combat buffs. Best used to the peak of your fighting power after |
|
| 29 | Passive. Makes you almost entirely immune to being stunned or staggered. | |
| 30 | Attak. A helpful utility skill, which can make certain endgame fights easier. |
| Order | Skill | Contribution |
|---|---|---|
| 1 | Attack. Ideal opening move. If the opponent also has |
|
| 1 | Maneuver. Big pre-combat buff. Confusion can split a tight pack of enemies. Best used when fighting an entire in the open. | |
| 2 | Active Ability. Cures all instances of bleeding. | |
| 3 |
|
Active Ability. Best used with vigor, ideally to prevent an injury rather than to stabilize one. Be careful of using it too often, as it has a long cooldown. |
| 4 |
Save Skill Point |
|
| 5 | Save Skill Point | |
| 6 | Save Skill Point | |
| 7 |
Attack. Range 2. Good opening move, as it can set up a stun combo |
|
| 7 | Attack. Big pay-off move. Best used as a follow-up to Seize the Initiative or timed to be the third strike of Rampage. | |
| 7 | Passive. Helps reduce fumble to 0 and disables blocks on shielded or late-game 2h enemies | |
| 7 | Stance. Must be used before every single fight. Thanks to this stance and |
|
| 8 | Attack. Has Knockback, and inflicts more bodypart damage the weaker the target is. This is a finishing move. Combos with |
|
| 9 | Passive. Minor defensive buff. Reduces the risk of walking while in enemy zone of control, enabling tactical repositioning. | |
| 10 | Charge. Primarily an escape tool. can buy you enough turns to pop first aid, and reapply buffs before enemies reengage. | |
| 11 | Maneuver. It helps you start stacking |
|
| 12 | Passive. The main purpose is to reduce the impact of Bodypart health on our max health. This makes lifedrain more effective. | |
| 13 | Maneuver. Powerful Defensive buff. Best used in anticipation of a powerful enemy skill or a charge attack, like |
|
| 14 | Passive. Strong defensive buff. Reduces the armor penetration for all incoming attacks. | |
| 15 | Maneuver. Repositions to an adjacent tile. Greatly increases protection while offering some block chance. This is the main defensive buff on this build - used every dangerous fight. | |
| 16 |
|
Passive. Refunds a sizeable amount of energy while wearing heavy armor. Lowers the durability loss rate. |
| 17 | Passive. Strikes against bleeding enemies restore energy. | |
| 18 | Passive. Powerful Offensive Buff. Helps this build ramp up its crit chance and damage and makes us much scarier in large fights. | |
| 19 | Passive. Also makes us a lot stronger in large fights. If your stance runs out mid-combat, its fine to reactivate it even when surrounded by enemies. | |
| 20 | Passive. Powerful offensive buff. Enables injuring enemies a turn earlier and finishing them faster. | |
| 21 |
|
Passive. Critting an enemy causes them to take more damage. stepping stone toward Make Space. |
| 22 | Attack. Massive 3x2 AoE. Excellent payoff for racking up |
|
| 23 | Active Ability. Grants vigor if you had none, and enables you to temporarily ignore injuries. This is your panic button. | |
| 24 | Passive. Major Defensive Passive. Recall that |
|
| 25 | Passive. Greatly reduces armour durability loss rate. Helps you reach 100% crit avoidance, which can make you immune to being crit. Enemies drop repair components. Make sure to bring a repair kit to late-game dungeons. | |
| 26 | Maneuver. Defensive Buff. Greatly reduces damage taken. Stacks decay as you take hits. | |
| 27 | Passive. Offensive buff. Bonus accuracy, fumble and crit chances against bleeding, injured or disoriented enemies. | |
| 28 | Maneuver. Powerful Buff. Refunds some energy, reduces pain, and gives a wide array of combat buffs. Best used to the peak of your fighting power after |
|
| 29 | Passive. Makes you almost entirely immune to being stunned or staggered. | |
| 30 | Attak. A helpful utility skill, which can make certain endgame fights easier. |
When playing Leo, you might have to delay ![]() Rampage and
Rampage and ![]() Reign In Blood until level 8. In such case, take Disengage at level 7, or simply withold an extra skill point and take 3 skills at level 8.
Reign In Blood until level 8. In such case, take Disengage at level 7, or simply withold an extra skill point and take 3 skills at level 8.
Make sure to pick up the Athletics or Armored Combat Book while you are in mannshire, depending on which tree your character is missing.
IMPORTANT - A Matter of Faith
A Matter of Faith is the new Tier 3 story quest that was added to the game by the Blood Omens update, and it is very important for this build. This quest is unlocked at the Rotten Willow Tavern when you reach 3000 reputation, and is given by L'Owcrey the Occultist.
This is a very complicated quest, with multiple different endings and multiple different rewards. It can be harder or easier to complete depending on the path you choose, and based on your choice, you will receive different rewards.
This build relies on the unique item you receive from L'Owcrey by siding with him and completing this quest according to L'Owcrey's instructions. There is no other way to get it, so the quest must be completed correctly.
A Matter of Faith - Instructions
I will list the instructions in a manner that minimizes story spoilers while including all the critical information.
After receiving the quest:
- Travel to the Roadside Chapel and prepare for a short but tough fight.
- Go inside, and learn more about the object that L'Owcrey sent you to retrieve.
- Receive the keystone, and return to camp. Prepare to clear a tier 3 dungeon.
- Head to the Theosopher's Refuge, and clear the dungeon. Find the quest item.
- Return directly to your caravan. Do not visit the Roadside Chapel.
- Return to L'Owcrey and hand over the quest item. Claim your Reward.
There is no timer associated with the quest when completed in this way. You do not need to head to the Roadside Chapel immediately upon receiving the quest, nor do you need to return to the Tavern immediately upon acquiring the quest item
The only mission-critical step is step 5.
Early & Midgame Gearing
This section will discuss notable pieces of gear that can be found throughout the early / mid-game
Weapon Progression
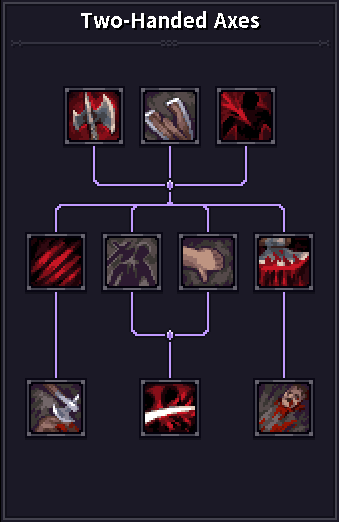
This build uses the Sword-staff branch of 2H axes, which gives accuracy and bleed chance to compensate for their relatively low base damage.
| Item | Source |
|---|---|
|
Doloire |
Can be bought from the Osbrook Smith at the start of the game. Prime contender for the strongest weapon in tier 1. |
 Voulge Voulge |
Can be bought from the Osbrook Smith upon reaching 3000 rep |
 Skadian Sovnya Skadian Sovnya |
Can be bought in Brynn Docks starting 3000 Brynn rep, either at the dock general merchant, or Zdenebrad the Skadian merchant. Can also be found at the pawnshop before then. Slight upgrade over the jagged voulge due to the 2% crit chance. |
 Glaive Glaive |
Can be bought in the Rotten Willow tavern, or pretty much anywhere in Brynn, starting 4000 rep. Alternatively can be bought from the Brynn Fence, or the pawn shop, starting with 3000 rep. |

Breaking into Tier 3
The entrance to tier 3 is a very pivotal moment for this build, as it is here where it faces its greatest challenge - which is a good thing. It's only up from here.
At this time, we are beginning to switch into heavy armour. Since Dirwin starts with Make a Halt and takes Pathfinder, when playing this build with him i also recommend that you pick up some Plate Mittens.
| Item | Source |
|---|---|
 Old-Fashioned Armor Old-Fashioned Armor |
The Mannshire smith can sell it starting 4000 reputation. After killing the Ancient Troll, this is the cheapest place to buy it. |
|
|
The Mannshire smith can sell it starting 4000 reputation. After killing the Ancient Troll, this is the cheapest place to buy it. |
|
|
The Mannshire smith can sell it starting 4000 reputation. After killing the Ancient Troll, this is the cheapest place to buy it. |
|
|
The Mannshire smith can sell it starting 4000 reputation. After killing the Ancient Troll, this is the cheapest place to buy it. |
|
|
No consistent source, but many vendors can roll it. Check Ol' Tott, and the pawn shop any chance you get. Can also be dropped as loot from necromancer dungeon bosses. I typicallly always find at least 1 before i start clearing tier 3. |
|
|
Sold by the Dwarven Merchant in Brynn Port, or the Portside General merchant. |
|
Sold by the Dwarven Merchant in Brynn Port, or the Portside General merchant. |
 Klappvisor Bascinet
 Soldier Gloves
 Mail Boots
 Brass Agate Ring
 Trophy Necklace
Notable Mentions
| Item | Source |
|---|---|
 Flagbearer Armor Flagbearer Armor |
Brynn Pawnshop starting 3000 rep, or general merchant, or the smithing bailiff starting 4000 rep. It can also spawn as random loot in graves covered by loose dirt. |
|
|
Rotten Willow Tavern starting 4000 RWT rep. In Brynn, it is sold by general merchants and leatherworking bailiff, starting 4000 rep. |
Gameplay
This section is dedicated to specific Gameplay tips, such as skill combos,
Understanding High Vitality Builds
The most important thing that you need to understand about High Vitality Builds is that you don't need to understand anything. You hit enemies, and if their health reaches 0 before yours does, they will die.
Jokes aside, High Vitality builds don't die easily, and by combining our large health pool with Lifedrain supported by high, reliable damage, makes us very hard to kill. Heavy raises that bar to the next level. It provides an enormous amount of Protection, which is further increased by ![]() Unyielding Defence, allowing us to become an immovable juggernaut for up to 8 turns.
Unyielding Defence, allowing us to become an immovable juggernaut for up to 8 turns.
The build uses ![]() Adaptability to delay the moment when body part damage begins to impede its performance. Meanwhile,
Adaptability to delay the moment when body part damage begins to impede its performance. Meanwhile, ![]() First Aid allows it to prevent itself from taking injuries even as you are in the middle of a fight, or mend them after the fight without expending a splint.
First Aid allows it to prevent itself from taking injuries even as you are in the middle of a fight, or mend them after the fight without expending a splint.
In the case of 2h axes, our heavy armor and immense survivability play a key role in the tactical performance of the build. This build is comparatively less reliant on ambushing enemies, often preferring to fight entire rooms together to get maximum value out of the stance, cleaving axe crits, and ![]() Make Space.
Make Space.
Basic Skill Combos
This section discusses common combat skill combos this build likes to use.
Rampage Third-Strike Timing
With ![]() Rampage your every 3rd strike will deal bonus damage, if it connects. Timing your third strike to be an axe attack skill is a great way to increase your damage and grease the wheels of your build.
Rampage your every 3rd strike will deal bonus damage, if it connects. Timing your third strike to be an axe attack skill is a great way to increase your damage and grease the wheels of your build.
| Turn 0 | Turn 1 | Turn 2 | Turn 3 | Turn 4 | Turn 5 | Turn 6 | Turn 7+ |
|---|---|---|---|---|---|---|---|
| Normal / Skill Attack | Normal / Skill Attack |
Stance Empowered Skill Attack |
Normal / Skill Attack | Normal / Skill Attack |
Stance Empowered Skill Attack |
... |
This is most important for Axe skills like ![]() Dismember,
Dismember, ![]() Reign In Blood and
Reign In Blood and ![]() Make Space, but it works with any attack skill. If this third strike happens to be
Make Space, but it works with any attack skill. If this third strike happens to be ![]() Seize the Initiative, it will deal bonus damage as well.
Seize the Initiative, it will deal bonus damage as well.
![]() Mighty Kick, however, does not trigger, nor help you make progress toward that third strike, as this skill is not an attack, but instead a maneuver that deals damage.
Mighty Kick, however, does not trigger, nor help you make progress toward that third strike, as this skill is not an attack, but instead a maneuver that deals damage.
Counterattacks count toward this third-strike system. This build does not level agility, but the weapon we use has an innate counter chance. Make sure to factor in any counters you make into your calculations when fighting.
Rapid Dismemberment
This combo is good at dealing a lot of upfront damage, potentially disabling an enemy before the fight began. This is a staple way to start the fight as soon as you unlock all the skills. Do not use this if the enemy has ![]() Seize the Initiative.
Seize the Initiative.
| Turn 0 | Turn 1 | Turn 2 | Turn 3 |
|---|---|---|---|
| Normal Attack | Stance Empowered |
![]() Seize the Initiative targets the most vulnerable body part, which might be enough to injure on its own. By making it the most injured bodypart with the strike from
Seize the Initiative targets the most vulnerable body part, which might be enough to injure on its own. By making it the most injured bodypart with the strike from ![]() Seize the Initiative we guarantee that it will also be targeted by
Seize the Initiative we guarantee that it will also be targeted by ![]() Dismember.
Dismember.
For most enemies, the least protected bodypart is the head. A Moderate to Severe head injury prevents them from casting spells.
Delaying ![]() Dismember by one turn allows us to time it to benefit from
Dismember by one turn allows us to time it to benefit from ![]() Rampage 's third strike effect.
Rampage 's third strike effect.
Subdue the Suspect
Speed. Surprise. Violence of Action. Don't give the enemy the time to gather their wits when beginning a fight.
This combo allows you to set up a stun on a single enemy by pulling them with ![]() Hooking Chop such that their back is to a solid object, and knocking them back into it with
Hooking Chop such that their back is to a solid object, and knocking them back into it with ![]() Mighty Kick, and then a second time with
Mighty Kick, and then a second time with ![]() Reign In Blood to secure a stun.
Reign In Blood to secure a stun.
![]() Hooking Chop will always pull the enemy to a cardinally-adjacent tile, meaning North, South, East or West, depending on the direction from which they are approaching. It will never pull them toward your corner tile.
Hooking Chop will always pull the enemy to a cardinally-adjacent tile, meaning North, South, East or West, depending on the direction from which they are approaching. It will never pull them toward your corner tile.
| Turn 0 | Turn 1 | Turn 2 | Turn 3 |
|---|---|---|---|
|
|
This combo will break if ![]() Hooking Chop fails to pull the target, but that is not the end of the world, as it effectively means that we get a free strike and a bleed against them.
Hooking Chop fails to pull the target, but that is not the end of the world, as it effectively means that we get a free strike and a bleed against them.
Do not use this combo if the enemy has a charge attack.
This combo cannot be used while ambushing around corners.
The Can-Opener Special
Used against shielded or otherwise block-reliant enemies to disable their shields and start stacking ![]() Shieldbreaker as soon as possible.
Shieldbreaker as soon as possible.
| Turn -1 | Turn 0 | Turn 1 | Turn 2 | Turn 3 |
|---|---|---|---|---|
|
(If they can charge) |
Normal Attack |
This combo will shred enemy Block Chance and Power. After this combo, your next attack will be empowered by the stance, as ![]() Mighty Kick does not count as a strike.
Mighty Kick does not count as a strike.
The Ancient Troll
2h Axes have a very easy time against the ancient troll. Hooking Chop can be used to interrupt the troll's regeneration, while the repeated use of dismember can quickly rack up injuries. Make sure to conserve energy for Hooking Chop as the fight progresses, and you will have no problems.
The Manticore
This build can tackle the Manticore at any level, as the core skills necessary for the fight are obtained early on in the build. That being said, I recommend waiting until level 16, as that is when you unlock Custom Adjustments, which greatly helps the build maintain its energy.
The biggest factor in how easy the fight will feel is the tier of your weapon. Having a tier 4 Glaive means that you will consistently kill Risen Axonians in 3 hits, or 2 if the second attack is Dismember timed to be the third strike under Rampage.
With a tier 3 weapon, it is impossible to consistently kill the skeletons in 2 hits, and killing them in 3 would require having the stance active. This, at first glance, minor difference drastically reduces the margin of error that you have during the fight.
The best way to deal damage to the Manticore is to stack up Rampage while fighting skeletons, and then use Hooking Chop against the Manticore while at 2 or more Rampage stacks.
I do not advise being overly aggressive in this fight, as you do not need to remain in melee for long in order to make progress. Playing slow and patiently waiting for Hooking Chop cooldowns is a safer approach.
Do not neglect fighting skeletons in melee when it is safe to do so. Inflicting injuries and attacking injured targets is your main source of energy replenishment. This does not override the importance of triggering Bone Pyres as often as possible.
Managing Repair Costs
When playing this build, armor repair costs are something you will have to deal with, more so than on a block and / or dodge build. You need to be mindful of the repair costs of your gear when you plan your budget while shopping.
Up to and including tier 3, when we first buy heavy armor, it is best to pay the repair costs out of pocket. Bring any metal repair items back to your caravan, only using them on tier 3 armor if you need the inventory space for something else in the short-term.
From the moment that you unlock Darrel, be sure to check him regularly and purchase any bits of iron that can be used in repairs. This extends to all general merchants as well.
This is a form of investment, as we will use these metal pieces to save on repair costs on tier 4 and 5 armor, which would have otherwise cost a lot more. Buying Cloth and Leather is also a good idea, as it can be used to repair broken endgame armor that you find, so we can sell it as loot.
Additionally, make sure to collect Wire, Spools of Thread, and Blacksmith Tongs while you are out adventuring. You will need them in tier 4+ to craft Repair Kits.
Lastly, while in Denbrie, you must find the Desolate Quarry, as inside you will find a crafting recipe for Repair Kits.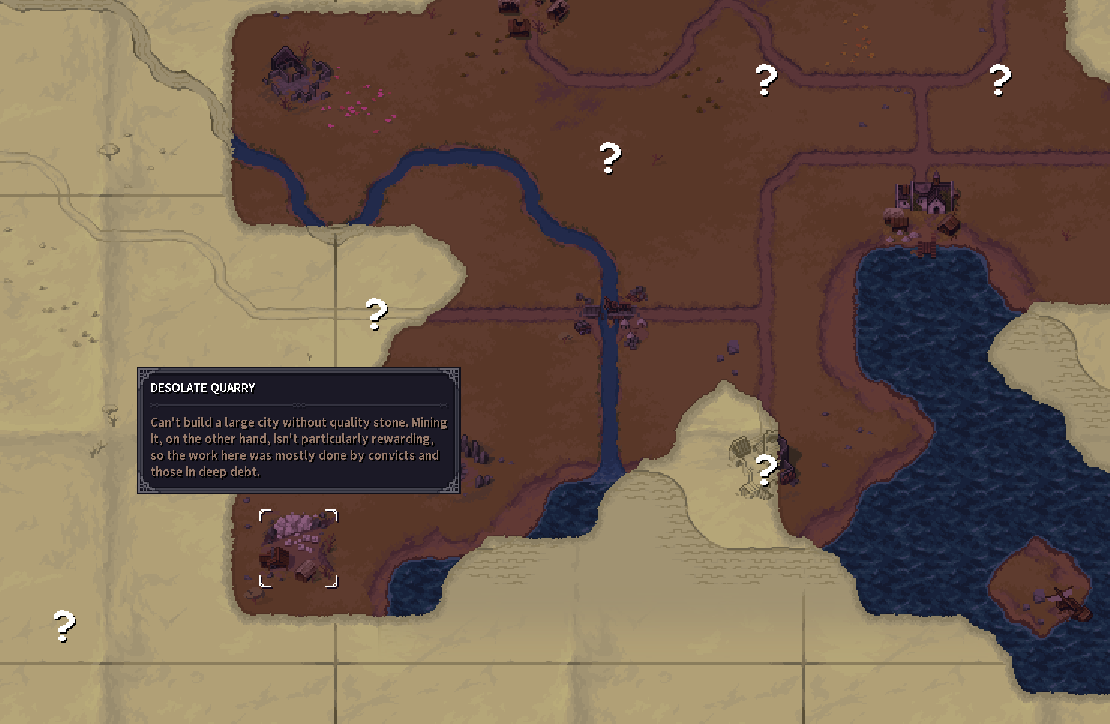 It can spawn anywhere around Denbrie, including North East of it, but it will always be on the steppe, and it will show up on the map you can buy in Denbrie, if it spawns in that area.
Repair Kits are very cost-efficient at repairing scratches, but are almost entirely useless at repairing heavy damage. That is why we needed to collect the iron bits. Consumable repair materials always repair a fixed amount of durability. Make sure to repair damage in excess of 25 durability points with consumables, only using repair kits to polish the armor.
Once you have ![]() Self-Repair, you must maintain your armor at above 80% durability at all times.
Self-Repair, you must maintain your armor at above 80% durability at all times.
Jorgrim Trophy Checklist
Jorgrim's trait ![]() Gore and Glory allows him to use the skill "Butchering" on the corpses of dead dungeon bosses to produce a trophy. As of the latest update, Jorgrim will say something in text floating above his head whenever an unbutchered boss corpse is nearby.
Gore and Glory allows him to use the skill "Butchering" on the corpses of dead dungeon bosses to produce a trophy. As of the latest update, Jorgrim will say something in text floating above his head whenever an unbutchered boss corpse is nearby.
Whenever you hand in the contract while a related trophy is in your inventory, there will be additional dialogue after which the contract giver will award you extra gold and reputation.
For Endgame trophies, taken from dungeons without a contract, you can hand them in to any contract giver to gain gold and local reputation.
There are 19 Unique trophies in the game, meaning you do not need to collect every single one to fulfill Jorgrim's Trait. With perfect RNG, and some farming, it is barely possible to gain 3 extra stat points before you leave tier 3, but even with the worst RNG, you will still see at least 2.
Here is the full table, as it appears on the Wiki:
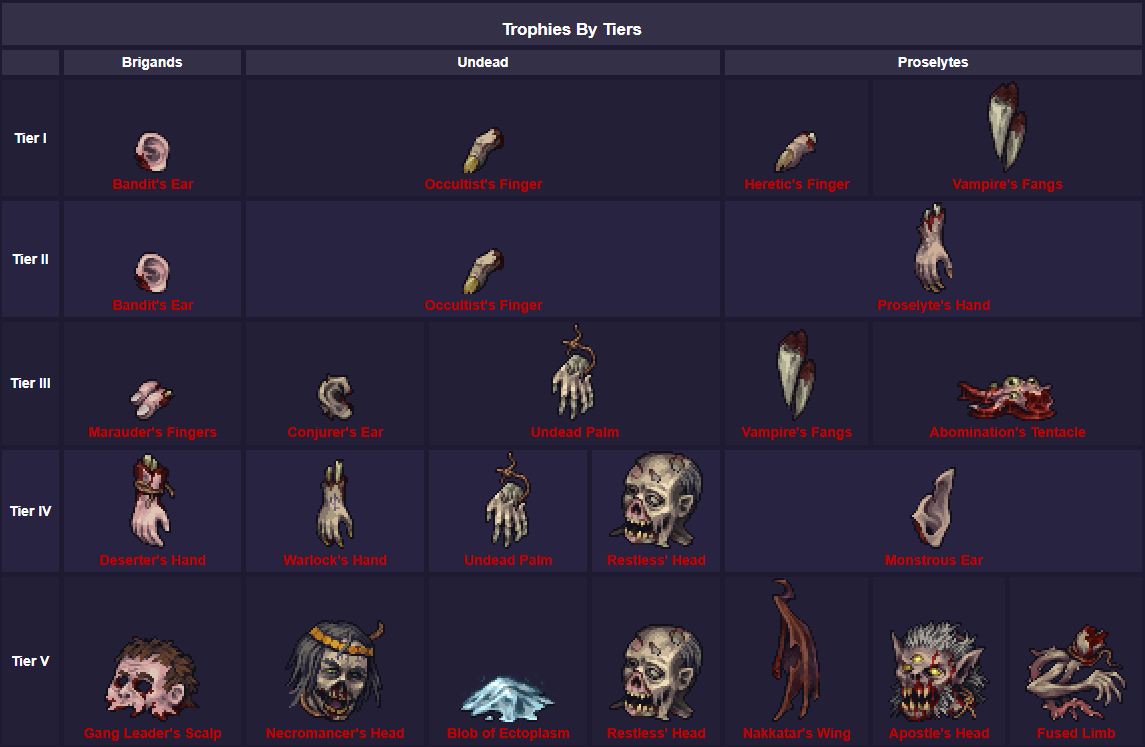
I recommend writing a note to help yourself remember which trophies you've already collected, as it can be hard to keep track of, with some of them duplicating between tiers.
Dirwin Exploration Checklist
Dirwin's passive ![]() Ranger's Grit rewards exploring overworld PoI's with extra attribute / stat points. This ability only counts the types of locations you discover, not the total number of locations you visited.
Ranger's Grit rewards exploring overworld PoI's with extra attribute / stat points. This ability only counts the types of locations you discover, not the total number of locations you visited.
Here is the full checklist of the different types of locations that you need to discover
The Hunting Grounds and Dens are sorted into tiers based on when this build can comfortably tackle them.
Caves
- Abandoned Mineshaft - Plenty of evidence of past exploitation. Usually inhabited by Bandits, or Rockeaters. Often houses valuable ore nodes. Sometimes, a pickaxe can spawn at the entrance.
- Beast Lair - The tunnels are littered with corpses and gnawed bones. Typically inhabited by Wolves, Crawlers, or Bears. Often houses valuable herbs and mushrooms, but also ore nodes.
- Overgrown Cave - Prominently features moss and emerging pieces of Axonian Ruins. Usually inhabited by Rockeaters, Crawlers or Wolves. Often houses valuable herbs and mushrooms, but also ore nodes.
Dens
| Tier | Den Type |
|---|---|
| 1-2 | - |
| 3 | Ghouls, Crawlers |
| 4 | Harpies, Deathstinger Hive |
| 5 | Gulons, Young Trolls |
To "clear" a Den, you must kill all inhabitants and destroy the source, if there is one.
Hunting Grounds
| Tier | Den Type |
|---|---|
| 0 | Deer, Saiga |
| 3 | Wolves, Boars |
| 4 | Moose |
| 5 | Bears, Bison |
Bears are afraid of deathstingers. If you throw a deathstinger jar at them, they will immediately flee, allowing you to kill them with opportunity attacks. This can enable you to kill them as early as Tier 2.
Dirwin Trait - Optimal Stat Gain
When planning my playthrough, I found this to be the easiest way to fulfill the scaling on Dirwin's trait, ![]() Ranger's Grit, as early as possible.
Ranger's Grit, as early as possible.
Stat Point 1
| Location | Advice |
|---|---|
|
Deer Trail |
Use Dash early to chase after them, catch up with the second cooldown. Score a kill with opportunity attacks. |
| Saiga Trail | Use Dash early to chase after them, catch up with the second cooldown. Score a kill with opportunity attacks. |
| Beast Lair | The easiest one is a wolf lair, in Tier 2. These wolves can be lured by shouting. Bring Traps and a Net. Dont fight more than 1 at a time if you do not have heavy armor. |
| Abandoned Mineshaft | Can spawn as early as Tier 1, and usually populated by bandits. |
Stat Point 2
| Location | Advice |
|---|---|
|
Ghoul Den |
Ghouls can be lured into 1v1s by shouting. Never fight in the same place twice, as they will eat the corpses. Use nets and Claw Traps on the big Ghouls. Don't let any escape. |
| Wolf Den | Bring a Net and a claw trap. Build and light a campfire where you plan to fight, as they fear fire. Kill as many as you can as soon as possible. Drink a Vivifying Essence if needed. |
| Crawler Burrow | Crawlers can be lured into 1v1s by shouting. Make sure to ambush them from behind cover, leading them into a claw trap. If you're spotted - leave the map and reset. |
| Overgrown Cave | Tier 2 rockeaters can't do much against heavy armor. Lure and ambush rockeater hunters from around a corner. Use your dash only after they use theirs. |
Stat Point 3
| Location | Advice |
|---|---|
|
Boar Trail |
Boars are dangerous and can chain stun with their charges. Light a campfire. |
| Harpy Nest | Harpies are easily lured into 1 on 1 fights, and are entirely countered with a net. |
| Moose Trail | Moose are dangerous. You can fight a deathstinger Hive instead, but make sure to kill all the bees and wait 100~ after winning, in case lost bees return. Against Moose, Campfire. For Bees, Antidote syringe. |
| Bear Territory | Bears can be cheesed earlier in the game with a jar of Deathstingers, as bears will flee at the sight of bees. Use Dash to escape, if necessary. |
Endgame Dungeon Preparation
This build can start tackling tier 5 content as soon as it unlocks ![]() Make Space and
Make Space and ![]() Warcry. Having a tier 5 weapon - specifically the Forholt Staff - is extremely important, as more damage means shorter fights, less damage taken by us, and more damage healed through Lifedrain from the Pagan Necklace.
Warcry. Having a tier 5 weapon - specifically the Forholt Staff - is extremely important, as more damage means shorter fights, less damage taken by us, and more damage healed through Lifedrain from the Pagan Necklace.
Having ![]() Will to Survive is a powerful assurance that will help you survive very tough situations. As such, I recommend waiting until at least level 23, when playing permadeath.
Will to Survive is a powerful assurance that will help you survive very tough situations. As such, I recommend waiting until at least level 23, when playing permadeath.
Having Tier 5 armor, specifically head and chest, will make a significant difference, especially against Brigands. You could try to subsist off of tier 4 armor, but in that case, make sure your boots are the least protected bodypart. You do not want to funnel your enemy's ![]() Seize the Initiative into any other bodypart.
Seize the Initiative into any other bodypart.
Useful Consumables
This build makes a very good use of medicinal herbs, as it takes damage gradually, rather than in one big, unlucky hit:
- Silverleaf
- Honey Hyssop
- Crimson Spleenwort
Bringing a Crimson Spleenwort can sometimes be more efficient than bringing multiple healing salves. You should still bring both, of course. I still recommend you carry at least 2 splints, even though you have ![]() First Aid, as it has a long cooldown, and it is best to save it for when you need to use it mid-combat.
First Aid, as it has a long cooldown, and it is best to save it for when you need to use it mid-combat.
When playing anyone other than Dirwin, it is very important to keep a stock of Elven Mud to give yourself vigor before dangerous fights, where you may need to use ![]() First Aid
First Aid
Caravan Camp Buffs
It is important to stay ahead of your fatigue. Dirwin has a huge advantage in this regard, as ![]() Make a Halt covers most of his fatigue needs.
Make a Halt covers most of his fatigue needs.
For Dirwin
- Banner - Owl, or Stallion
- Leif Training - Strength
- Ideal Food Buff - Honey Glazed Ham
The added energy and fatigue replenishment from Make a Halt and Vigor make the stallion banner and Alda's Brew more of a convenience rather than a must-have item. It is wise to carry a Nikkaf Drug as it fixes most of your fumble and fatigue gaps.
For Other Characters
- Banner - Stallion
- Leif Training - Endurance
- Ideal Food Buff - Honey Glazed Ham + Daytayler Stew
The lack of ![]() Make a Halt becomes noticeable in the lategame as fatigue begins to catch up to this build. Either Nikkaf or Alda's brew is more or less mandatory if you want to clear a dungeon in a single day.
Make a Halt becomes noticeable in the lategame as fatigue begins to catch up to this build. Either Nikkaf or Alda's brew is more or less mandatory if you want to clear a dungeon in a single day.
Dangers in the Dungeons
This section is dedicated to threats that you need to keep in mind while playing. Many of these apply at all stages of the game, but become all the more important in Tier 5.
Traps
Your vision radius is severely reduced when using a heavy helmet. Even with 15 Perception, it is easy to miss traps when scouting rooms. Take extra care to find them, as with ![]() Unyielding Defence and
Unyielding Defence and ![]() Mighty Kick or
Mighty Kick or ![]() Hooking Chop there are many ways in which you could use them to your advantage.
Hooking Chop there are many ways in which you could use them to your advantage.
Immobilization
Becoming immobilized prevents you from moving to other tiles. This means you cannot use ![]() Unyielding Defence, which is your main defensive buff. Be careful around enemies with spears, and avoid engaging in prolonged fights with them, as they will gain a lot of value from Spear Passives like No Retreat and One at a Time, and in the case of Immobilization, Precise Hits.
Unyielding Defence, which is your main defensive buff. Be careful around enemies with spears, and avoid engaging in prolonged fights with them, as they will gain a lot of value from Spear Passives like No Retreat and One at a Time, and in the case of Immobilization, Precise Hits.
2H Mace Enemies
This build does not take Not This Time until much later, and so Skull Crusher becomes a very dangerous skill for it to face. A specific example is the 2h Mace Renegade - a Tier 5 Bandit enemy. They have Mighty Swing, Skull Crusher, and Forceful Slam.
The Nightmare Scenario is them using Mighty Swing to charge at us with Skull Crusher from 3 tiles away, landing a stun, and then following that up with Forceful Slam, which crits due to its extra crit chance, annihilating our skull.
In my run, this happened once, except that Forceful Slam did not crit, and it still scored an injury. I was left below half health, but I doubt it would have killed me even if it did crit.
The lesson is that 2h Mace enemies must be handled carefully and with respect - either ambushed from around the corner to deny them the charge, or by absorbing the Skull Crusher blow through ![]() Unyielding Defence +
Unyielding Defence + ![]() Brace for Impact.
Brace for Impact.
The other 2h mace enemies, specifically Fiends and the Tier 3 Bandit boss are also dangerous, though not nearly to the same extent.
Conclusion
The Lawbringer is a supremely powerful build at all stages of the game and possesses the rare quality of having both a low skill floor and a high skill ceiling. This build leverages the strengths of heavy armor to cover the weaknesses of 2H Axes, which historically have given this weapon class a hit-or-miss reputation.
I think this build has an immense amount of RP potential because of how uniquely visceral 2H Axe gameplay feels when things work as they should. There is no other build in my recent memory that sent me lurching away from the screen, reeling with disgust from the mess that was left of an enemy. Heads will roll, and limbs will fly, when the strong arm of the law directs the Lawbringer to his next victim.
Like, Dislike, comment, or share!
Join the Discussion
0 commentsNo comments yet.
Be the first one to leave a comment!