
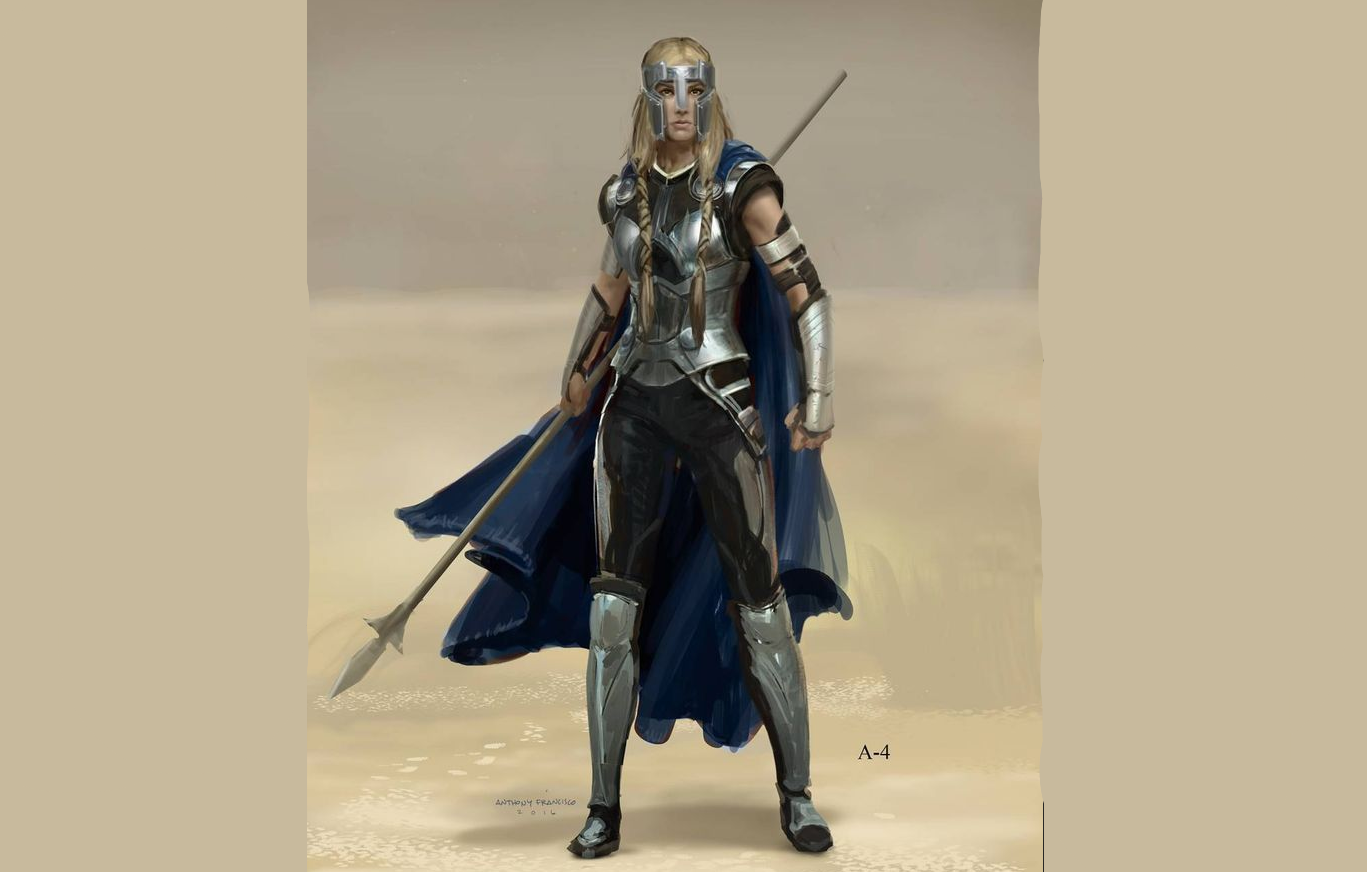
The Valkyrie - Electro Spear Battlemage - Stoneshard
Introduction
"...Then gleamed a ray from Logafioll, and from that ray lightnings issued; then appeared, in the field of air, a helmed band of Valkyriur: their corslets were with blood besprinkled, and from their spears shone beams of light..."
~ an excerpt from Snorri Sturleson's Poetic Edda - a dwarven Saga
Overview
This is a high cooldown duration reduction battlefield control Spear build, which uses Seal of Power and Residual Charge in Electromancy to stack large amounts of shock damage on every attack. The build relies on immobilizing and knocking back enemies to deny them the ability to fight effectively. It uses medium armor to mitigate ranged attacks, as well as the few melee attacks that do land against you.
Character Selection
This build is designed for Hilda. Thanks to her Bonecharm, Hilda has the unique ability to get a free 10% cooldown duration reduction, further reduce her skill energy costs, and replenish energy through Energy Drain. This build will not work on other characters.
| Character |
Trait |
|---|---|
 |
Hilda's Trait - What makes her truly unique is her Bonecharm. It allows you to consume hunting trophies to give yourself up to 3 permanent buffs, which can transform or even define the build. |
Final Stat Spread
| Stat | Amount |
|---|---|
| Strength | 11 |
| Agility | 20 |
| Perception | 10 |
| Vitality | 15 |
| Willpower | 25 |
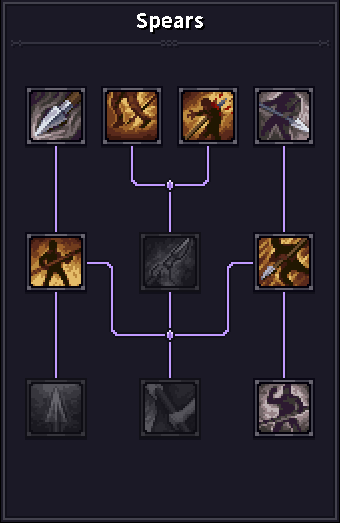
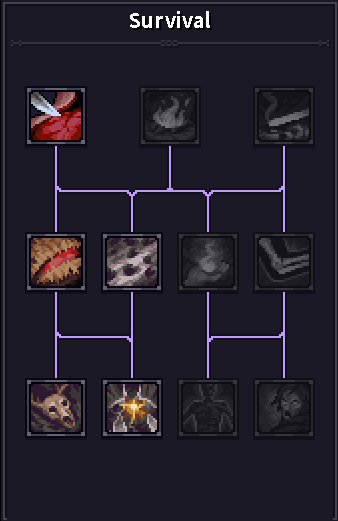
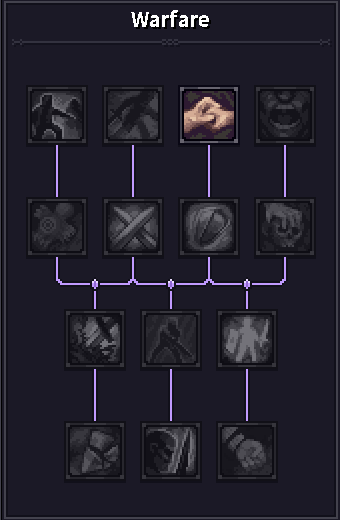
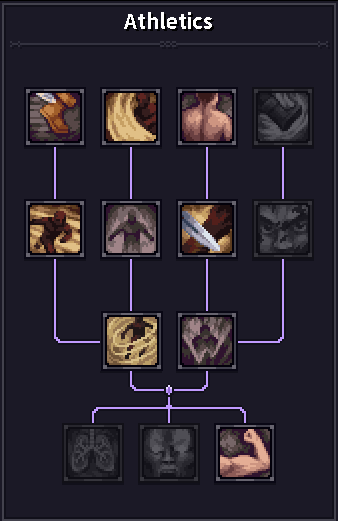
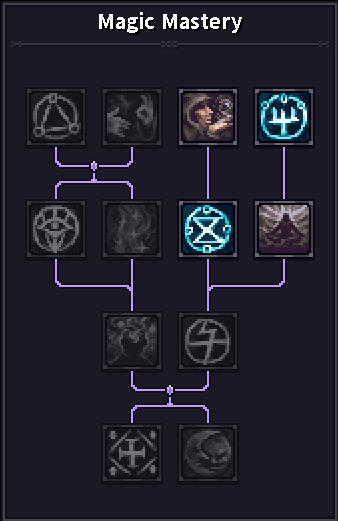
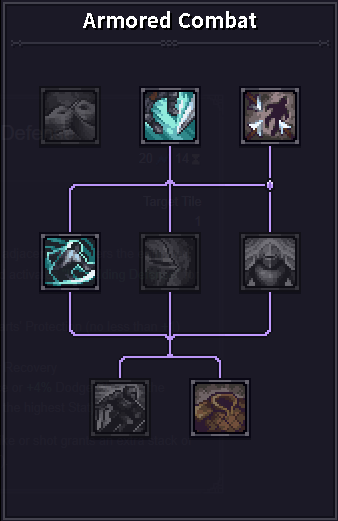
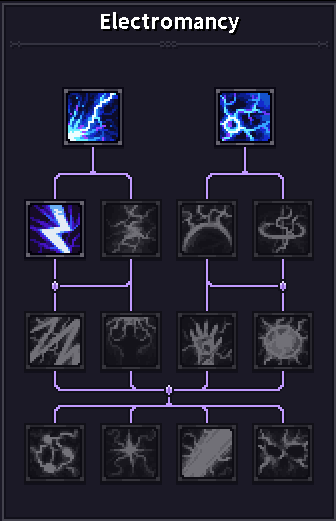
Final Skills
 |
 |
 |
 |
 |
 |
 |
Final Gear
| Icon | Contribution |
|---|---|
|
Spontoon |
The Spontoon offers a valuable innate immobilization chance, as well as a strong innate bleed chance. It also offers innate accuracy and fumble chance fixing, both of which are very valuable. Optimal enchantment is Shock Damage or Cooldown Duration Reduction |
|
Border Guard Brigandine |
The Border Guard Brigandine offers solid protection, as well as an innate -3% cooldown duration, which is very important for this build. Optimal Enchantment is Max Energy or Fortitude |
|
|
On this build, it is very important to protect the head. It's worth using a heavy helmet to do so. Optimal Enchantment is Max Energy or Fortitude |
|
Captain Gloves |
The Captain Gloves offer all-around solid defensive stats. Optimal Enchantment is Max Energy or Fortitude |
|
Captain Boots |
The Captain Boots offer all around solid defensive stats. Optimal Enchantment is Max Energy or Fortitude |
|
Wanderer Cloak |
The Wanderer Cloak offers a tremendous 12% fatigue resist, as well as some skill energy cost reduction and dodge chance. Optimal Enchantment is Max Energy or Fortitude |
|
Spellweaver Girdle |
Spellweaver Girdle offers -5% cooldown Duration, as well as reducing spell energy costs and backfire chance. Optimal Enchantment is Max Energy or Fortitude |
|
Ruby Pendant |
Ruby Pendant offers extra accuracy, -5% cooldown duration reduction, as well as reduced skill energy costs, in addition to other helpful stats. Optimal Enchantment is Max Energy or Fortitude |
|
Exquisite Ruby Ring |
The Exquisite Ruby Rings provide +5 max energy, as well as -4% cooldown duration Reduction. By the late game, accuracy is largely solved thanks to Setup, Pikeman Stance, the Ruby Pendant, and the Spontoon. This makes the Exquisite Ruby Rings a preferable option over the Silver Ruby Rings. |


 Gryphon Sallet


General Breakpoints
This build is fundamentally a cooldown-based build, and its strength may not be immediately apparent. The utility of having all of your best skills available to you almost all the time is hard to quantify in a single screenshot. Still, there are some very important breakpoints.
Stat Breakpoints
The Valkyrie gains a significant damage boost every time it reaches a new Willpower threshold. This is because Seal of Electromancy ( ![]() Seal of Power ) and
Seal of Power ) and ![]() Residual Charge both scale their damage riders according to (Willpower * 0.2), with
Residual Charge both scale their damage riders according to (Willpower * 0.2), with ![]() Residual Charge also scaling with your Electromantic Power.
Residual Charge also scaling with your Electromantic Power.
This means that your damage will jump when you reach 15/20/25 Willpower.
Cooldown Duration Breakpoint
With this build, the magic number is 42.9% Skill Cooldown Duration.
This may seem oddly specific, but as long as your cooldown duration is below this value, ![]() Determination will consistently have a 6-turn cooldown. Coincidentally, it is also the breakpoint when
Determination will consistently have a 6-turn cooldown. Coincidentally, it is also the breakpoint when ![]() Sudden Lunge has a 6-turn cooldown, without needing to rely on
Sudden Lunge has a 6-turn cooldown, without needing to rely on ![]() No Time to Linger.
No Time to Linger.
This is very important because so long as both of those skills are on a 6-turn cooldown, you can cycle ![]() Determination indefinitely, as it lasts for 2 turns,
Determination indefinitely, as it lasts for 2 turns, ![]() Nail Down can knock back an enemy for 1 more turn,
Nail Down can knock back an enemy for 1 more turn, ![]() Leg Sweep lets you retreat for 1 more turn, and
Leg Sweep lets you retreat for 1 more turn, and ![]() Sudden Lunge reduces all cooldowns by 2 more turns
Sudden Lunge reduces all cooldowns by 2 more turns
To be clear, the Valkyrie can clear the midgame without this. But this threshold is what allows the build to function against a functionally endless flow of melee enemies.
It is important to remember that ![]() No Retreat provides an innate -9% cooldown duration so long as you do not move to other tiles by any means besides
No Retreat provides an innate -9% cooldown duration so long as you do not move to other tiles by any means besides ![]() Leg Sweep.
Leg Sweep.
This means that in practice, you only need to reach 52% Cooldown Duration, with every subtracted 3% CD making you less reliant on ![]() No Retreat for the build to function seamlessly.
No Retreat for the build to function seamlessly.
It's important to understand how rounding works in Stoneshard. If you test this yourself, you will see that ![]() Determination displays a 6-turn cooldown as soon as you dip below 46.4%, but the game is lying to you. Do not fall for its tricks.
Determination displays a 6-turn cooldown as soon as you dip below 46.4%, but the game is lying to you. Do not fall for its tricks.
Cooldowns are displayed as integers but are actually floating-point numbers below the hood. Anytime that the game rounds the cooldown duration to the nearest integer, it saves the rounded value and adds it to the skill's next cooldown.
This was, if your Cooldown Duration is between 42.9% and 46.4%, your first use of ![]() Determination might be 6 turns, but the next will likely be 7 turns. Below 42.9%
Determination might be 6 turns, but the next will likely be 7 turns. Below 42.9% ![]() Determination and
Determination and ![]() Sudden Lunge will return at most after 6 turns every single time.
Sudden Lunge will return at most after 6 turns every single time.
This rounding behaviour is most obvious with ![]() Jolt at high amounts of CDR. Sometimes the skill has a 1-turn cooldown, and others its availible immediately.
Jolt at high amounts of CDR. Sometimes the skill has a 1-turn cooldown, and others its availible immediately.
This guide is meant to overprepare you for playing this build. I've included just about every source of CDR that I can think of. With that being said, it is important to understand that you will not need all of them to make the build work. Reaching 52% Cooldown duration is surprisingly easy with the right gear and a moderate investment into Willpower.
You do not need to stack every CDR buff in this guide for the build to work.
Progression
Stat Allocation Order
The highest priority is to unlock ![]() Determination and begin scaling our flat lightning damage from
Determination and begin scaling our flat lightning damage from ![]() Residual Charge and
Residual Charge and ![]() Seal of Power (Seal of Electromancy) as soon as possible. Each source of shock damage increases by +1 for each 5 stat points invested into Willpower.
Seal of Power (Seal of Electromancy) as soon as possible. Each source of shock damage increases by +1 for each 5 stat points invested into Willpower.
Furthermore, we need to fix fumble chance as soon as possible.
With this in mind, we know that our first 2 breakpoints must be in Agility and Willpower
| Stat | Amount |
|---|---|
| Agility | 15 |
| Willpower | 15 |
| Vitality | 15 |
| Willpower | 25 |
| Agility | 20 |
| Perception | 12 |
Skill Order
| Order | Skill | Contribution |
|---|---|---|
| 1 | Starts unlocked due to |
|
| 1 | Attack. 2 tile range. Has different effects depending on whether the target is adjacent. Can be used at a 2 tile range to kite early game enemies to death. | |
| 1 | Attack. 2 tile long AoE. Can hit 2 enemies. Can hit through closed doors. Best used after |
|
| 2 | Maneuver. Another source of immobilization, which allows you to reposition out of melee reach. best used as a backup to |
|
| 3 | Passive. Very strong passive, rewarding you for standing still in combat. Repositioning with |
|
| 4 | Passive. Minor defensive buff, reducing the chance of being crit. | |
| 5 | Skip | |
| 6 | Allows you to hear enemy positions through walls and closed doors. Also reduces fumble chance while under vigour. Can be skipped, and replaced with |
|
| 7 | Spell. This build uses only the Seal of Electromancy effect. Allows you to stack lightning damage to every attack. Not worth casting until level 8. | |
| 8 | Maneuver. Powerful Skill, giving you free attacks, and rewarding knocking enemies back. Can carry in tier 3 when equipped with the footman spear, as it has an innate knockback chance. | |
| 8 | Spell. Your first Electromancy Spell. Able to apply resonance, reducing the enemy's control and move resist. Transforms |
|
| 9 | Passive. Powerful damage buff, and the core source of offence in the build. It is imperative that you cast |
|
| 10 | Charge. Excellent source of mobility, allowing you to disengage from a bad fight or reposition to better terrain. Can be used to chase down mages and archers. | |
| 11 | Passive. Helpful passive, making nets more useful. Carry at least 1 net in your inventory at all times when playing this build. | |
| 12 | Stance. Core part of the build, rewarding you for standing still while in combat. In our high-cooldown playstyle, it is trivial to maintain full stacks of its effect. | |
| 13 | Passive. The main source of energy recovery in this build. | |
| 14 | Passive. Helpful passive, which prevents lethal stun combos from 2h mace enemies. | |
| 15 | Attack. Core part of the build. places all enemy skills on cooldown, while reducing our own cooldowns by 2 turns. This lets us cycle our core spear skills indefinitely, when fighting 1 on 1, making us nearly untouchable. Can be used to shut down mages or other dangerous enemies, like Fiends. | |
| 16 | Passive. Important utility tool. Shreds enemy phys resist, but also grants 30% knockback chance against all adjacent enemies. This, combined with the stance, allows us to deny the enemy from being able to attack us turn after turn. | |
| 17 | Passive. Greatly improves |
|
| 18 | Maneuver. Excellent defensive buff. Best used in anticipation of an enemy charge attack. Can be layered with |
|
| 19 | Spell. Your last electromancy spell. Much safer, backup way of activating |
|
| 20 | Maneuver. Helpful Defensive Buff, mostly used against archers. Stepping stone toward |
|
| 21 | Passive. This passive makes it significantly harder for enemy archers to hit you. Best stacked with Elusiveness to mitigate enemy archers. | |
| 22 | Passive. very versatile passive, helping us overcap our accuracy, as well as reduce our energy costs, and reduce damage taken. Can be maintained indefinitely, as long as you use a maneuver every third turn in combat. | |
| 23 | Passive. Provides extra energy replenishment from backfiring, or from enemy magic. Stepping stone toward |
|
| 24 | Spell. Minor midcombat heal, and essential tech piece against late-game proselytes and undead. Can be used to eliminate Boiling Blood, sigils placed on the ground by enemies, curse of agony, and much, much more. | |
| 25 | Passive. A well-rounded effect that acts as a capstone to the build. | |
| 26 | Passive. Allows Vigor to last an entire dungeon. Reduces enemy offensive stats, especially crit chance, against you. | |
| 27 | Maneuver. Backup way to apply stagger on up to 3 enemies. Stepping stone toward |
|
| 28 | Passive. Decent utility and defensive passive, providing some extra dodge chance and refunding some energy. | |
| 29 | Passive. Minor offensive buff, granting some extra weapon damage and crit chance. | |
| 30 | Passive. If you haven't taken this instead of Pathfinder, you can take it now. The build really doesn't need this to hunt any of the animals whose trophies it relies on. This is here in case you decide to hunt some trolls or gulons for sport. |
Early & Midgame Gearing
Here are some notable midgame gear choices.
| Icon | Contribution |
|---|---|
|
Hunting Spear |
It is worth replacing Hilda's starting weapon with the Hunting Spear, as Hilda's Spear deals comparatively little damage. |
|
Footman Spear |
The Footman Spear can be obtained for free by completing the Troll Hunt Quest in Mannshire. It does not provide fumble chance reduction, but it does provide accuracy, which makes it worth using to save money in tier 3. |
|
Cervelliere with Ear Guards |
Obtained for free by completing the Troll Hunt Quest. It offers 10% fortitude and good control resist, which is very helpful at mitigating Proselyte banshee screeams as well as stuns and dazes from mace-wielding bandits. |
|
Bow Pendant |
Improves your accuracy and fumble chance, which is very valuable in the early game. |
|
Brass Agate Rings |
The brass agate rings help fix fumble chance in tier 3, during the stretch of time when you are using the Footman Spear. They can be sold by general merchants, the Brynn pawnshop and Ol' Tott. |
|
Footman / Magistrate Mail |
The Footman & Magistrate mail have identical stats, but they look slightly different. This armor offers reasonable defensive stats with little energy penalty. |
|
Norse Belt |
The Norse Belt can be acquired during your first trip to Brynn from the customs house or Okri, the dwarf merchant. It offers -2% fumble chance and +1% crit chance. |
|
Steel Bracers |
The steel bracers offer solid defensive stats while also providing +1% accuracy and -2% fumble chance, which is important for this build, so long as you use the footman spear. |
|
Recruit Boots |
The recruit boots have no energy penalties, which makes them ideal in tier 2. They also offer very solid defensive stats and are enough for tier 3 as well. You can safely wear these until you are ready to upgrade to tier 4. |


Gameplay
Skill Use and Fatigue
Due to the very high amount of cooldown duration reduction, this build does not rely on skill combos and sequences in a traditional sense, the way that the Lawbringer or the Blademaiden might have. Instead, the use of skills is much more freeform, flowing seamlessly from one to another.
This means that the build very rarely, if ever, uses default attacks. You should never withhold the use of a skill "in case you need it later" as your cooldowns are almost non-existent. When piloting this build, you should aim to win without fighting by denying the enemy the opportunity to enter a position where they could hurt you.
This approach does make fatigue a point of concern, especially late-game. I've found it more reasonable to split the process of clearing late-game dungeons over 2 days, or use Nikkaf to reset my fatigue just in time for the boss fight. Still, if you take all the appropriate measures against fatigue accumulation, such as collecting the Stallion Banner, taking Leif's endurance training, imbibing Alda's brew and preparing a good meal, it is possible to clear dungeons in one go.
Pre-combat Buffs
You want to ensure that as many of your passive and active buffs as possible are active and spinning at full speed in time for melee combat to begin. Here is a short checklist:
 Pikeman Stance is Active
- Seal of Electromancy is active
 No Retreat is at full swing
 Setup is active
 Residual Charge timer is fresh
- The closest enemy has Resonance
You want to do everything possible to avoid the nightmare scenario - turning a corner and being faced with an enemy while your pants are down and no buffs are active. That is the situation where you would typically need to use a net prematurely, ![]() Dash, or Smokebomb.
Dash, or Smokebomb.
Dungeon Preparation
Before every dungeon, this build wants to stack as many nonuses which reduce fatigue and cooldown duration as possible.
Leif's Endurance Training
Leif's Endurance training provides 10% fatigue resistance and a whopping -10% cooldown duration. This is insanely strong and is always our choice of training.
Jibean Roast with Figs
This is the first time that a specific dish is highlighted as an important part of a build. This is because the Jibean Roast with Figs offers -5% to cooldown duration for almost half a day, which is an incredibly strong buff on this build.
The recipe can be bought from the Golden Grain Inn in the northwestern quarter of Brynn. The ingredients to make this dish can be bought from the House of Azure thread - the elven shop just north from the Golden Grain Inn.
Stallion Banner
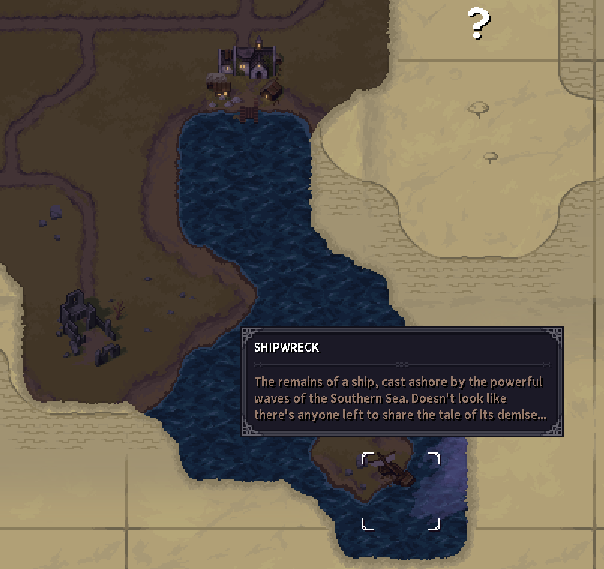
This banner can be consistently obtained by swimming to the lonely island off the coast of Denbrie and searching the Shipwreck that is found there. It is safe to leave all your gear ashore before beginning to swim, as there are no hostile enemies on the island as of 0.9.24
Drug Usage
This build does not rely on any drug to function, but it can struggle with fatigue. This makes Nikkaf a useful tool to bring with you into lategame dungeons, even if you will not need to use it every time.
Alternatively, Al'qud can help you maintain your energy in intense fights, such as during your fight with the Manticore,
Ancient Troll
Ancient Troll is made completely trivial when using this build, as you have 2 two-tile range attacks in addition to magic and can use ![]() Dash to reposition from under the boulder. You can also use
Dash to reposition from under the boulder. You can also use ![]() Determination to inflict free hits on him every time you step away from him, which makes this fight very quick.
Determination to inflict free hits on him every time you step away from him, which makes this fight very quick.
The Manticore
The Valkyrie has an easy time fighting the Manticore, as you can use ![]() Impaling Lunge and
Impaling Lunge and ![]() Nail Down to damage the beast, while
Nail Down to damage the beast, while ![]() Determination can be used to deal with the skeletons. As always, this fight is a marathon, not a sprint. pace yourself and your energy, and be mindful of allowing the manticore to use Bone Pyres as often as possible, and you will have no issue.
Determination can be used to deal with the skeletons. As always, this fight is a marathon, not a sprint. pace yourself and your energy, and be mindful of allowing the manticore to use Bone Pyres as often as possible, and you will have no issue.
It is very helpful to have a tier 4 spear during this fight, as that can reduce the number of hits needed to kill a skeleton, but overall, this build can tackle the manticore as soon as it is unlocked.
Important Gameplay Patterns
This section is dedicated to documenting interesting play patterns and skill interactions that I've noticed when piloting the build. This section may be expanded in the future, if I recall or if someone else identifies a new piece of technology.
Ambushing with Residual Charge
![]() Residual Charge does not require that you hit an enemy with a spell. It only requires that you cast it. This means that you can ambush enemies effectively, while also activating
Residual Charge does not require that you hit an enemy with a spell. It only requires that you cast it. This means that you can ambush enemies effectively, while also activating ![]() Residual Charge.
Residual Charge.
To do so, you must cast ![]() Jolt targeting a tile that the enemy cannot see. That way, they will not become hostile as they do not witness a spell being cast.
Jolt targeting a tile that the enemy cannot see. That way, they will not become hostile as they do not witness a spell being cast.
Casting any spell causes some amount of noise, and casting ![]() Seal of Power or
Seal of Power or ![]() Jolt while within a certain distance of an enemy will draw them to your location, just like shouting would.
Jolt while within a certain distance of an enemy will draw them to your location, just like shouting would.
Perpetuating Setup Value
![]() Setup is a very strong passive, which is very important against T5 bandits, who often have at least 10-20% dodge chance even while in heavy armour. Its primary purpose is to maintain your accuracy high until you can accumulate enough stacks with your
Setup is a very strong passive, which is very important against T5 bandits, who often have at least 10-20% dodge chance even while in heavy armour. Its primary purpose is to maintain your accuracy high until you can accumulate enough stacks with your ![]() Pikeman Stance.
Pikeman Stance.
The best way to do that is to use ![]() Determination and
Determination and ![]() Leg Sweep early, before you burn
Leg Sweep early, before you burn ![]() Nail Down or
Nail Down or ![]() Impaling Lunge.
Impaling Lunge.
Both ![]() Determination and
Determination and ![]() Leg Sweep prolong the effects of
Leg Sweep prolong the effects of ![]() Setup. The former has a long cooldown, which incentivizes using it early so that it can be used against the next enemy.
Setup. The former has a long cooldown, which incentivizes using it early so that it can be used against the next enemy. ![]() Leg Sweep has next to no cooldown, so there's little shame in using it regardless.
Leg Sweep has next to no cooldown, so there's little shame in using it regardless.
Once you reach 3-4 stacks on your ![]() Pikeman Stance, or if the enemy you are fighting is netted, it becomes comparatively less important to maintain setup, and it's fine to let it expire.
Pikeman Stance, or if the enemy you are fighting is netted, it becomes comparatively less important to maintain setup, and it's fine to let it expire.
Stand Your Ground
This build makes very good use of the ![]() No Retreat passive, as it can immobilize enemies while they are a tile away, and then damage them repeatedly with
No Retreat passive, as it can immobilize enemies while they are a tile away, and then damage them repeatedly with ![]() Impaling Lunge while standing firm. This is normally achieved with
Impaling Lunge while standing firm. This is normally achieved with ![]() Nail Down , but you should always keep at least 1 net, ideally 2, in your actual inventory as an on-demand source of immobilization.
Nail Down , but you should always keep at least 1 net, ideally 2, in your actual inventory as an on-demand source of immobilization.
In this context, I do not recommend trying to kite enemies with ![]() Jolt. The damage does not justify losing the stats from
Jolt. The damage does not justify losing the stats from ![]() No Retreat and
No Retreat and ![]() Setup.
Setup.
Keep in mind that you can reposition with ![]() Leg Sweep without breaking
Leg Sweep without breaking ![]() No Retreat.
No Retreat.
Anti-Charge Setup
This build generally prefers having a clear line of sight to the approaching enemy, so that you can sling spells at them. This, unfortunately, leaves you vulnerable to charge attacks. The best countermeasure is to use ![]() Brace for Impact on the turn BEFORE the enemy charges, and then use
Brace for Impact on the turn BEFORE the enemy charges, and then use ![]() Determination as the enemy is about to charge.
Determination as the enemy is about to charge.
Timing this correctly is imperative, as some enemies have ranged attacks or other skills they could use before charging.
Keep in mind that most T4 and T5 bandits have precombat buffs, such as Stance + Offensive Tactic that they like to activate just before charging.
Sudden Lunge Usage
![]() Sudden Lunge 's utility is not restricted to reducing the duration of cooldowns. It is one of the most flexible skills in the game and has many uses.
Sudden Lunge 's utility is not restricted to reducing the duration of cooldowns. It is one of the most flexible skills in the game and has many uses.
In certain situations where the enemy has dangerous skills that they can use against you, you may want to use ![]() Sudden Lunge to put those skills on cooldown. This effect works on dungeon bosses, but not on true bosses like the Ancient Troll or the Manticore.
Sudden Lunge to put those skills on cooldown. This effect works on dungeon bosses, but not on true bosses like the Ancient Troll or the Manticore.
Otherwise, ![]() Sudden Lunge can be used to finish off one enemy to replenish your toolkit in time to fight the second. In this context, it's a really good idea to wait until the enemy is immobilized, staggered, or bleeding, before you use
Sudden Lunge can be used to finish off one enemy to replenish your toolkit in time to fight the second. In this context, it's a really good idea to wait until the enemy is immobilized, staggered, or bleeding, before you use ![]() Sudden Lunge on them. That way, it will deal a lot more damage, and automatically have its cooldown halved.
Sudden Lunge on them. That way, it will deal a lot more damage, and automatically have its cooldown halved.
Impaling Lunge Discipline
Try to use ![]() Impaling Lunge only on netted or immobilized targets. It's your primary way of dealing damage from 2 tiles away, so it is best to delay putting it on cooldown until you are sure you won't get a chance to immobilize the enemy in this particular engagement.
Impaling Lunge only on netted or immobilized targets. It's your primary way of dealing damage from 2 tiles away, so it is best to delay putting it on cooldown until you are sure you won't get a chance to immobilize the enemy in this particular engagement.
Also related - always decide whether you are going to use a net before you put ![]() Impaling Lunge on cooldown.
Impaling Lunge on cooldown. ![]() Impaling Lunge is the main payoff for using a net, as you can completely murder an enemy with just that skill and nothing else, thanks to
Impaling Lunge is the main payoff for using a net, as you can completely murder an enemy with just that skill and nothing else, thanks to ![]() No Retreat and
No Retreat and ![]() Precise Hits.
Precise Hits.
Refreshing Residual Charge
its important to find moments to refresh your ![]() Residual Charge while in mid-combat. Maintaining the buff requires you to cast
Residual Charge while in mid-combat. Maintaining the buff requires you to cast ![]() Jolt or
Jolt or ![]() Impulse every 5th turn.
Impulse every 5th turn.
Maintaining ![]() Residual Charge is the primary purpose for which this build takes Impulse, as it can be very safe to cast even when in melee, as
Residual Charge is the primary purpose for which this build takes Impulse, as it can be very safe to cast even when in melee, as ![]() Impulse can knock back or stagger the enemy.
Impulse can knock back or stagger the enemy.
But until you unlock ![]() Impulse at level 19, it is very important to find the safest moments to cast
Impulse at level 19, it is very important to find the safest moments to cast ![]() Jolt to maintain your shock damage.
Jolt to maintain your shock damage.
The best time to cast ![]() Jolt in such situations is when the enemy is immobilized and cannot reach you, or when he is staggered, and his next attack is unlikely to seriously hurt you.
Jolt in such situations is when the enemy is immobilized and cannot reach you, or when he is staggered, and his next attack is unlikely to seriously hurt you.
When piloted correctly, it is very rare for this build to cast ![]() Jolt in the enemy face with no safety measures or debuffs active, but there are times when that is the optimal course of action. These situations are the few times when the build might take meaningful amounts of damage.
Jolt in the enemy face with no safety measures or debuffs active, but there are times when that is the optimal course of action. These situations are the few times when the build might take meaningful amounts of damage.
When do I use Elusiveness?
Surprisingly, not often. This build doesn't have a good dodge chance until very late in its career. It's generally not worth using ![]() Elusiveness before every combat, as immobilizing and knocking back enemies should never be brawling with the enemy.
Elusiveness before every combat, as immobilizing and knocking back enemies should never be brawling with the enemy.
This build wants to stand still due to ![]() No Retreat, which makes it very hard to recover
No Retreat, which makes it very hard to recover ![]() Elusiveness stacks. Its main benefit is imposing fumble chance on adjacent enemies and reducing your damage taken.
Elusiveness stacks. Its main benefit is imposing fumble chance on adjacent enemies and reducing your damage taken.
As such, its main use case is to protect yourself from archer fire, which you cannot interrupt by breaking line of sight, or as a last-ditch defensive layer against an already-adjacent enemy.
Even then, you generally want to avoid putting yourself in a position where spending a turn to apply ![]() Elusiveness seems like a good idea.
Elusiveness seems like a good idea.
Hilda's Bonecharm
Hilda's Bonecharm is the last integral part of the build that was not yet covered. Hilda's unique quirk is that she can butcher exotic animals and use their trophies to grant herself unique buffs. Different animals provide different bonuses, and those bonuses grow stronger for every animal of that type that you've slain during your adventures.
The exact value of each bonus does not update automatically with each kill. You need to manually update the bonuses by sacrificing another trophy of that animal type.
Here is the complete list of all Bonecharm effects:

On this build, 4 effects stand out from the rest.
- Boar Tusks - 10% cooldown duration reduction is absurdly strong. That doesn't even do it justice - it's THE reason this build works as well as it does. It's so good that it's worth it to buy boar tusks from a general merchant, should you find them being sold before you can reasonably fight a boar.
- Crawler Eye - Energy drain scales with your damage dealt, and this build deals a lot of damage. It's arguably the most consistent way to replenish energy, and it feels very useful on this build.
- Wolf Tongue - This build can fight wolves safely relatively early into the campaign. -10% skill energy cost doesn't seem like a lot, but in practice it makes a noticeable difference, especially in the context of expensive skills like Dash, or Flexible defence.
- Harpy Stomach - This is no doubt the best bonus that the Bonecharm can provide. However, it doesn't feel that useful on this build, given how consistently this build can deny the enemy the opportunity to attack. It might be worth it in the very late game.
Harpies were changed in 0.9.24. Now, harpies are no longer flying by default, and they will assume a territorial stance before becoming hostile. This makes them easier to evade in the early game.
The build was played, designed and tested before this change, so as of the time of publishing, it remains unclear just how dangerous they may now be.
Others have said that this change made fighting them easier, as they can be lured into an ambush even after the changes. Still, I would advise against fighting them until after level 15.
All in all, this build definitely wants to hunt Wolves, Boars, and Crawlers, so make note of any hunting grounds or burrows that you discover from rumours. This build can fight them by the time it reaches level 10. Even more so by level 12, when you unlock ![]() Pikeman Stance.
Pikeman Stance.
As for Harpies, you can consistently find 7 of them whenever you decide to find and clear the Order Prison to complete the Boulder Circle secret quest for the free extra stat point.
If you want to max out your Bonecharm's dodge chance bonus, do not destroy the harpy nests at the Order's Prison. That way, after some time, the harpies will respawn, making it a lot easier to farm this bonus.
Endgame Content
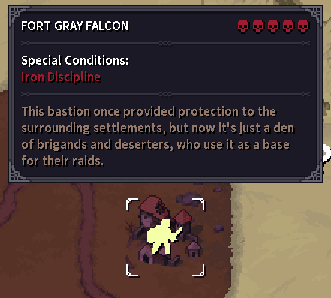
This build was able to clear T5 Bandits - Fort Grey Falcon at level 18 over the course of 2 in-game days. The hardest part was clearing the fort entrance, which was done during the day, which forced me to fight most of the camp all at once. Fighting multiple t5 enemies at once at level 18 is very challenging, even with this build. This part took me a couple of deaths.
This build excels at fighting in doorways and tight corridors. It works best whenever you can predict how many turns it will take the enemy to reach you in melee. Lategame archers, Proselyte, and Undead mages are among the greatest threats.
Even though the core of the build is complete at level 15, it is not advisable to tackle tier 5 Bandits until you unlock ![]() Setup and
Setup and ![]() Hard Target. Similarly, it is not advised to attempt T5 undead or Proselytes until you have unlocked
Hard Target. Similarly, it is not advised to attempt T5 undead or Proselytes until you have unlocked ![]() Seal of Cleansing
Seal of Cleansing
Notable Enemies
Bandits
- Axe and Shield Ringleader
- 2-Handed Sword Renegade
- Halberd (Spear) Renegade
Both 1 and 2 have a dangerous charge attack, which can injure and stagger you in a single turn. This can make it very hard to recover, as you are unlikely to be able to knock back the enemy with ![]() Nail Down, or immobilize them with
Nail Down, or immobilize them with ![]() Leg Sweep while staggered. It is best to net them to kill them safely.
Leg Sweep while staggered. It is best to net them to kill them safely.
3 can damage you even from 2 tiles away, due to having a spear. It's important to soften 3 with magic, and kill him as quickly as possible. It is likewise important to net him to prevent him from using Regroup.
At night, 1 will put away his shield to carry a torch. This makes him significantly less tanky and easier to kill quickly. For that reason, it is strongly recommended to only approach T4 and T5 bandit forts at night.
Undead
- Ancient Ghast
- Risen Guardsman (spear)
- Risen Guardsman (mace and shield)
1 can make other undead much more resilient, absorbing some of their damage, and granting them life leech. Additionally, they can resurrect other undead. They are not themselves dangerous, but with them on the field, we will eventually lose the war of attrition.
2, like the Halberd Renegade, can damage us from 2 tiles away. They are a lot less accurate, but they are also more durable. Once again, net them to prevent the use of Regroup, and try to kill them quickly.
3 is not dangerous on its own, but it is one of the most durable undead due to the very high block chance. This can buy other undead enough time to close the gap and overwhelm you. He also has a relatively high move resist, which can make it hard to keep away from you. It is safest to net him and try to kill him quickly
It is strongly advised not to attempt T5 undead unless you have ![]() Seal of Cleansing.
Seal of Cleansing.
![]() Seal of Cleansing can remove Pain-inducing curses, malevolent sigils, as well as magical effects from enemy undead. Undead located within the affected area will gain +33% damage taken.
Seal of Cleansing can remove Pain-inducing curses, malevolent sigils, as well as magical effects from enemy undead. Undead located within the affected area will gain +33% damage taken.
Proselytes
The Proselytes are comparatively less threatening, with the exception of the bosses.
- Templar (sword)
- Cherub (spear)
1 has very high move resist, which makes it very hard to immobilize or knock them back consistently. Furthermore, he has 2 charge attacks, which can make it very hard to keep him off of you. As always, it is safest to net this enemy.
I hope you are seeing the pattern here. 2 is very dangerous because he can get to us very quickly while also being able to deal damage from 2 tiles away. This is the only enemy I thought necessary to fight exclusively from an ambush.
As for bosses, each one is dangerous in their own right. I fought against the Apostle, but I was able to clear the room before and still chose to use 2 smoke bombs to close the distance without being spotted. The Leechlord is likely the hardest of the 3, as he can both damage you from range and threaten you very quickly. The Nakkatar is also dangerous, but can be dealt with consistently by bringing an abundance (3+) of nets.
It is strongly advised not to attempt T5 proselytes unless you have ![]() Seal of Cleansing.
Seal of Cleansing.
![]() Seal of Cleansing can remove Pain-inducing curses, as well as Boiling Blood, and even the Cherub's status "Judgement Day".
Seal of Cleansing can remove Pain-inducing curses, as well as Boiling Blood, and even the Cherub's status "Judgement Day".
Conclusion
The Valkyrie is a very powerful hybrid build, capable of pushing late-game content very early. Its gameplay feels very dynamic, almost acrobatic, where every combat is a puzzle to be solved. Playing this build is like driving a sports car down a serpentine mountain road. The process is very stimulating, but success ultimately depends on the driver's skill.
It definitely takes getting used to, and you need to develop good risk-assessment skills to push this build to its limit. At the same time, this build is a toolbox, and I've often been impressed by its ability to come out victorious from seemingly impossible circumstances.
Playing this build is also a fantastic way to learn how to use consumables and polish your fundamental skills. While not as beginner-friendly, I found this build to be just as, if not more fun than the Blademaiden, which so far was my favourite build that I've ever played.
Like, Dislike, comment, or share!
Join the Discussion
0 commentsNo comments yet.
Be the first one to leave a comment!