
Living Boulder Leo - Mace and Geomancy Battlemage - Stoneshard
Introduction
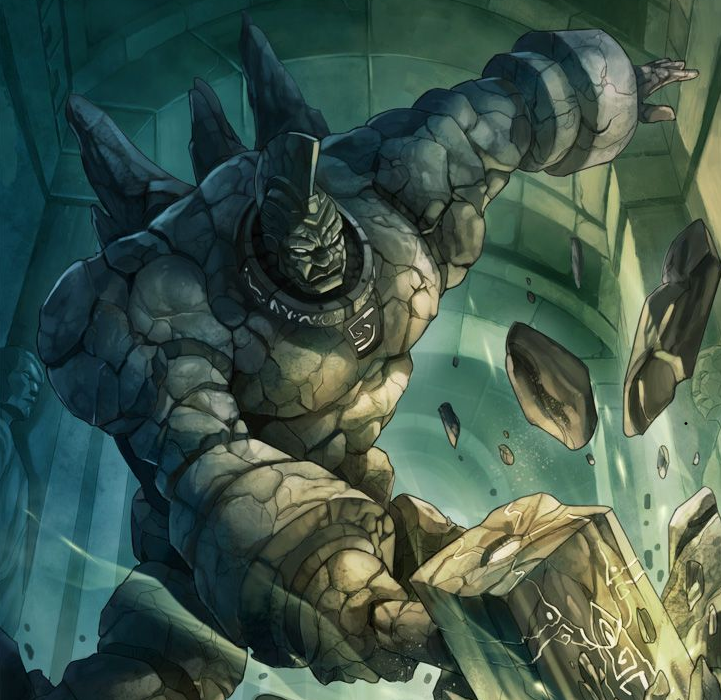
He mistook the grinding and crashing of stone for yet another cave-in of the musty crypt. Now, seeing the shattered bodies of his restless guards, Herfius understood the gravity of his mistake.
An ispolene mound of rock, in shape resembling a man, stood at the far end of the damp corridor, looming over the broken and disanimated body of an armorclad undead.
Then it came closer.
The last undead knight raised it's greathammer to strike and- the ground erupted as a glowing runecarved menhir shot upward from below, throwing the knight against the earthen walls. The stone goliath stepped forward and, with a mighty kick, sundered the rusted armor, crushing the skeletal remains within.
Then it came closer.
But wait! From the shadows, a monstrous ghoul lept out and- a single swing of an iron flail dashed it's brains across the floor.
Then it came closer.
"The Host have mercy! IT'S COMING FOR ME!-"
Overview
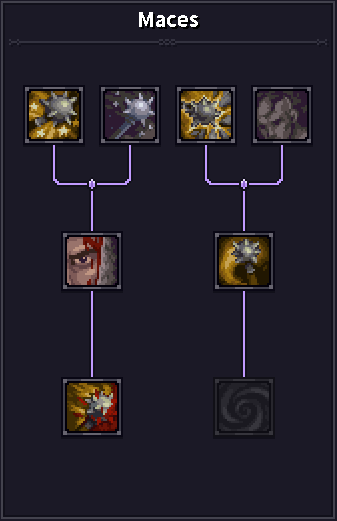
This is a one-handed mace & Geomancy hybrid build for Leosthenes, one of the characers added in 0.9.2. It utilizes the Warfare skill "Right on Target" to maximize the already monstrous power of the Knight Flail by efficiently covering it's weak accuracy and fumble, while maximizing it's crits and raw damage output. Clad in medium armor, and supported with the Geomantic spell Stone Armor, the build boasts high on-demand durability, while the mace skills supported by the spell Raise Boulder offer a staggering amount of close-quarter battlefield control.
Character Choice
This build is specifically designed for Leosthenes as it maximizes the utility of his unique trait, which is the most potent one in the game right now.
Character Trait - Might and Magic
Leosthenes has a versatile trait that rewards investing in a variety of skill trees, especially when mixing weapon skills with magical abilities.
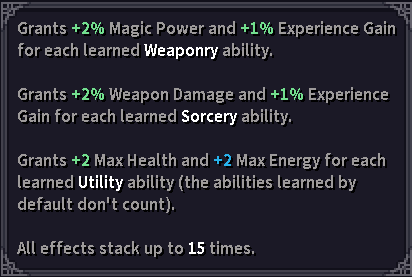
The most valuable part of this trait is the bonus max health and energy from taking utility skills, as most builds will naturally want to take 15 or more utility skills. This makes Leo the only character that can comfortably wear Medium armor without any investments into Vitality.
Furthermore, the bonus weapon damage from Sorcery skills greatly incentivises a Melee Mage hybrid playstyle, as it is much easier to supplement a melee character with rudimentary magic, than to force a pure mage to wield a weapon.
Early Game Powerhouse
This build has the strongest level 1-5 out of any build I've ever tried. The skills that you take at the start of your journey will be your bread and butter for its entire duration, giving you plenty of time to become familiar with the basic combos, and maybe even inventing some of your own.
Challenged by Bosses
Due to this build's reliance on stuns and other CC as a primary form of defense, it naturally struggles when fighting the 2 big story bosses currently present in the game. Specifically Manticore. Since both of them are highly resistant to all forms of crowd control, it can be difficult to reliably output damage against them while remaining safe. I do not recommend fighting the manticore until you unlock dimensional shift and Seal of Cleansing, which should happen at level 22.
No Dash?
This build does not use the Dash skill. While it is certainly a very powerful skill with a variety of uses, it did not fit the build concept of a Living Boulder mercenary wading into battle, and more importantly, I don't think that this build needs it.
However, it can save you in certain situations, especially when running into hostile wildlife early on. This can make it very valuable on a hardcore playthrough. If you are determined to have it, feel free to slot it in at any point so long as Right on Target is taken at the earliest possible level, and you have all the necessary skills by the time you go to fight the manticore..
Endgame Stat Spread
| Stat | Score |
| Strength | 21 |
| Agility | 10 |
| Perception | 30 |
| Vitality | 11 |
| Willpower | 11 |
Final Skills
 |
 |
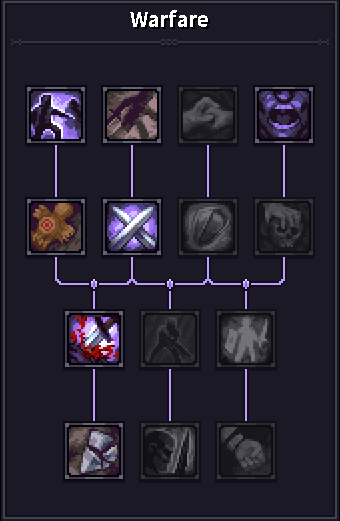 |
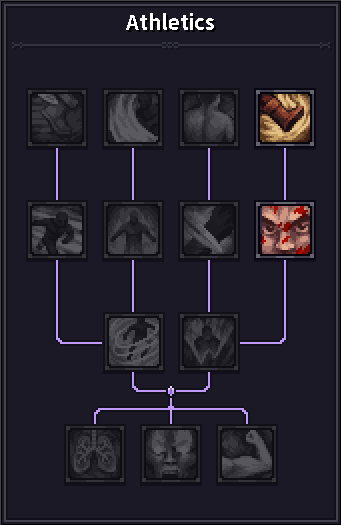 |
 |
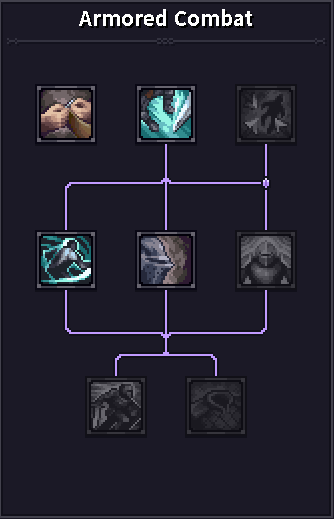 |
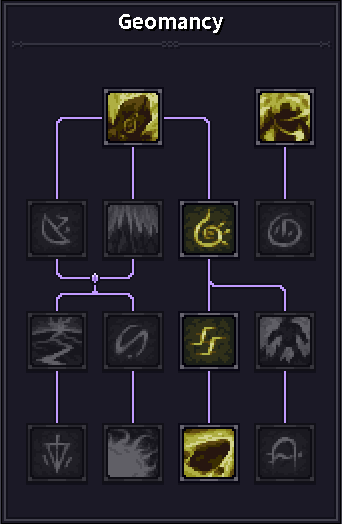 |
 |
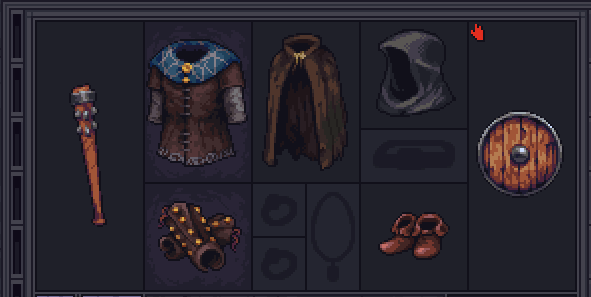
Final Gear
|
Item |
Stats |
Contribution |
|---|---|---|
|
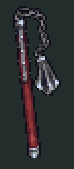
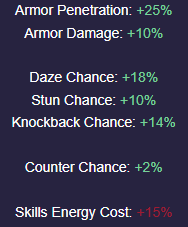
Knight Flail |
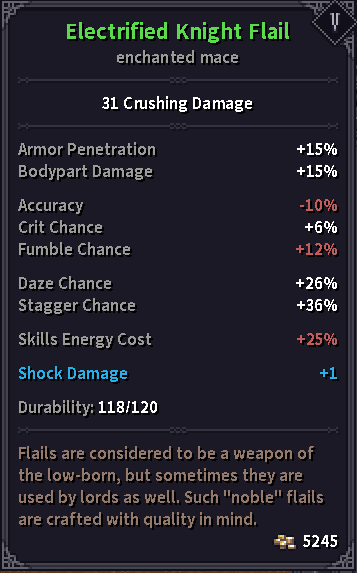 |
BIS weapon, and the core of the build. Great synergy with RoT, which amplifies all the strengths and diminishes the weaknesses of the weapon. |
|
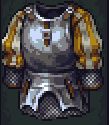
Captain's Cuirass |
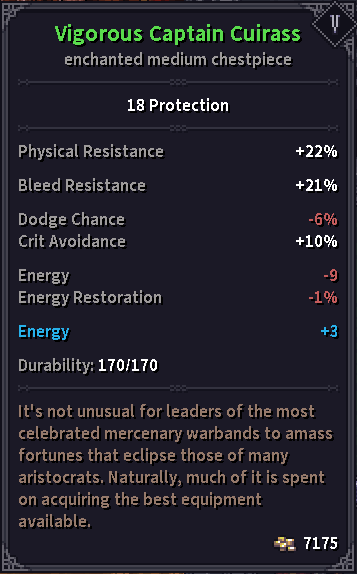 |
BIS Chestpiece. This build requires a medium chest, and this is the best one for this build. Max Health and Energy is a preferred enchantment. |
|
Captain Gloves |
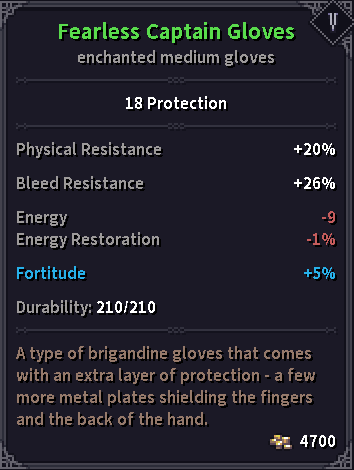 |
BIS Gauntlets. Good balance between protection and energy cost. Max Energy or Health is a preferred enchantment. |
 Captain Boots Captain Boots |
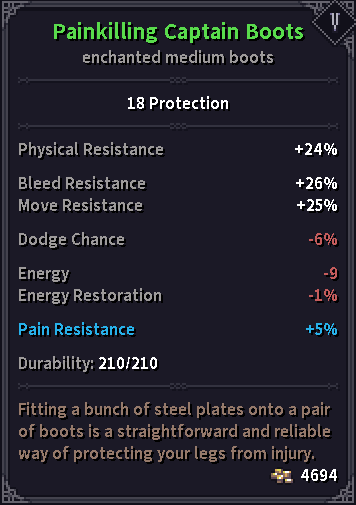 |
Best non-unique boots. Good balance between protection and energy cost. Max Energy or Health is a preferred enchantment. |
|
Captain Barbute |
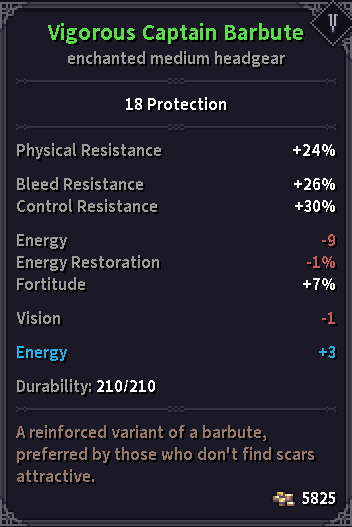 |
Best non-unique headpiece. Good balance between protection and energy cost. Max Energy or Health is a preferred enchantment. |
|
Captain Waistband |
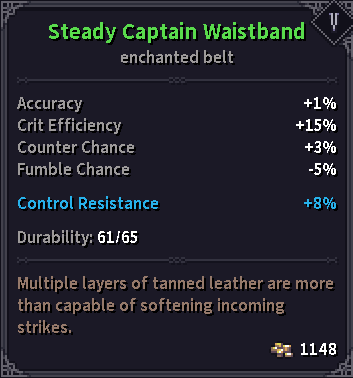 |
Best non-unique belt. -5% fumble is necessary to achieve 0% fumble late game.
Bleed, control or move resist is a preferred enchantment. |
|
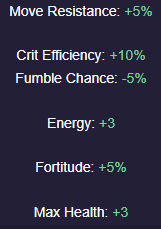
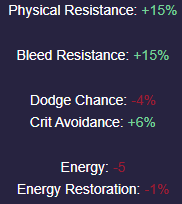
Silver Emerald Necklace |
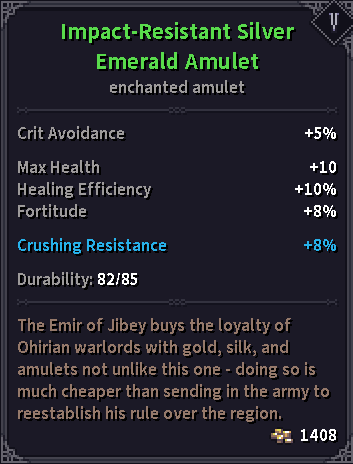 |
BIS Necklace. Max health, fortitude and crit avoidance are valuable defensive resources
Bleed, control or move resist is a preferred enchantment. |
|
Silver Emerald Rings |
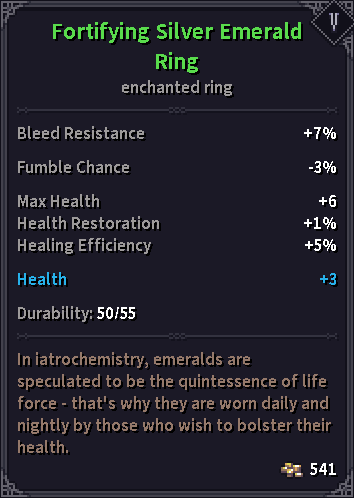 |
BIS Rings. 2 rings with -3% fumble are necessary to reach 0% fumble chance late game.
Bleed, control or move resist is a preferred enchantment. |
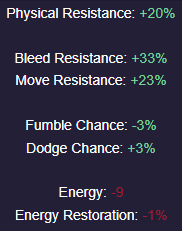
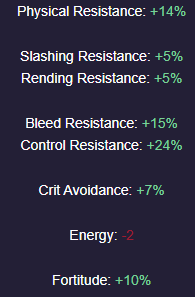
|
Jousting Cloak |
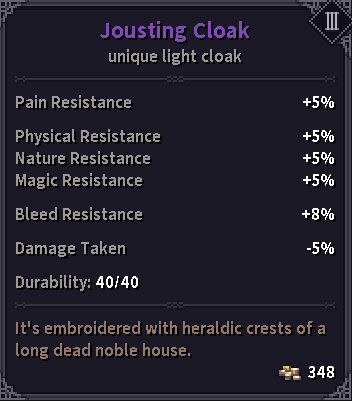 |
BIS defensive cloak. -5% damage taken makes it more valuable than the Nistrian cloak for this build. |


Notable Alternatives
| Item | Stats | Contribution |
|---|---|---|
 |
 |
BIS Belt. Superior to Captain Waistband thanks to +3 health and energy. |
 |
 |
BIS Boots. +9% dodge over non-unique alternative. -3% fumble opens a Ring slot for more offensive alternatives. |
 |
 |
BIS Helmet. Strict upgrade to the Captain's Barbute. |
 |
 |
Best ring in the game. Can Only be worn with Sardar Boots, or Battlemage Cloak |
Progression
Stat Allocation Order
This build has a very straightforward stat allocation order. Right on Target offers fumble chance reduction, which scales with our investment into perception, while crits offer bonus damage, with mace crits offering added daze chance.
- 30 Perception
- 21 Strength
Skill Order
| Level | Skill | Contribution |
|---|---|---|
| 1 |  Raise Boulder Raise Boulder |
Spell. Excellent control and debuff tool. Knocks enemies back and gives you reduced ability energy cost. Knocking enemies back into Solid objects will daze them. Does not harm you. |
| 1 |  Seize the Initiative Seize the Initiative |
Attack. Excellent Offensive skill, and a 1v1 machine. Starting with Tier 3, wait for the opponent to use their Seize the Initiative first, so that yours may override theirs. |
| 2 |  Onslaught Onslaught |
Attack. If the enemy is successfully knocked back, also considered a maneuver. Fantastic offensive skill. Reduces enemy control and move resist. Good combo starter. |
| 3 |  Armor Break Armor Break |
Attack. Staggers enemies and helps reduce their Armor protection sooner. Excellent against Bosses, and armored enemies. Best used after Mighty Kick / Onslaught. |
| 4 |  Moment of Weakness Moment of Weakness |
Passive. Increases the chance to daze and stagger injured enemies, and increases damage against them. |
| 5 |  Pathfinder Pathfinder |
Passive. Allows you to hear enemies through walls and while behind cover. Grants -5% fumble chance while under Vigor. bet used to ambush enemies from around corners and from behind trees. |
| 6 |  Mighty Kick Mighty Kick |
Mighty Kick. Shreds an enormous amount of control and move resistance, which scales with your perception. Kicking enemies into solid objects, such as your Runic Boulder, will daze them. |
| 7 |  Dazing Strikes Dazing Strikes |
Passive. Attacks against dazed, stunned or staggered enemies reduce their combat effectiveness. Best used by securing a stun early into the fight. |
| 8 |  Hammer and Anvil Hammer and Anvil |
Stance. Increases Armor damage, as well as daze and stagger chances on all attacks, while reducing fumble chance. Fumbled strikes cannot daze or stagger. |
| 9 |  Right on Target Right on Target |
Passive. Huge offensive buff, and a core of this build. Requires an empty offhand, disallowing the use of shields. Gameplay shifts towards bursting enemies down and avoiding prolonged fights. |
| 10 |  Rune of Enfeeblement Rune of Enfeeblement |
Runic Boulders reduce the move and control resist as well as physical resist of nearby enemies. |
| 11 |  War Cry War Cry |
Maneuver. Confuses or Dazes enemies, making them more susceptible to CC, and gives Battle Rage to you. Battle Rage gives bonus weapon damage and crit chance. |
| 12 |  Respite Respite |
Passive. Attacks against dazed, staggered or stunned enemies replenish a huge amount of energy. |
| 13 |  Stone Armor Stone Armor |
Spell. Powerful defensive buff with a short duration, which can be extended with the presence of Runic Boulders. Received damage instances charge the armor, causing it to explode on expiration. |
| 14 |  Knock Out Knock Out |
Attack. Very powerful, flexible control / offensive skill. Can be used early in the fight to set all enemy abilities on cooldown. It can be used as a finishing move for huge damage against stunned targets. |
| 15 |  Opportune Moment Opportune Moment |
Passive. Crits grant energy replenishment. Stepping stone towards Finisher and Armor Crusher. |
| 16 |  Rune of Unity Rune of Unity |
Passive. Enemies destroying your runic boulders that were within 2 tiles of you no longer cause you confusion. This enables you to fight in narrow chokepoints, such as 2-tile doorways, in 1 on 1s. |
| 17 |  Offensive Tactic Offensive Tactic |
Tactic. Powerful offensive buff, greatly reducing fumble chance and increasing crit chance. Best used as a final push to tip the scales of a drawn-out battle. |
| 18 |  Finisher Finisher |
Attack/Charge. The only useful charge move we can access on this build. 1) Requirement for Manticore. Best used to tackle dangerous 1v2 fights, quickly bursting one enemy down to turn it into 2 1v1s. |
| 19 |  Dimensional Shift Dimensional Shift |
Spell. Swap the positions of 2 non-boss entities, including yourself. 2) requirement for Manticore. Affected enemies can be confused or dazed. Can be used on yourself while immobilized. |
| 20 |  Armor Crusher Armor Crusher |
Passive. Extremely powerful offensive passive, giving you armor damage while your opponent still has armor, and crit chance once their armor is broken. |
| 21 |  Dissipation Dissipation |
Passive. Gives you magic and nature resist as well as energy recovery from received damage of that type. Stepping Stone toward Seal of Cleansing. |
| 22 |  Seal of Cleansing Seal of Cleansing |
Spell. Able to terminate magical effects imposed on you, and surrounding tiles, such as flames, boiling blood, or proselyte sigils, and Manticore's Spikes. 3) Requirement for Manticore. |
| 23 |  Seal of Power Seal of Power |
Spell. Useful defensive buff, once transformed into Seal of Geomancy by casting a Geomantic Spell. Stepping stone for Body and Spirit. Best used while preparing for a dangerous fight. |
| 24 |  Body and Spirit Body and Spirit |
Passive. Powerful offensive passive which naturally synergizes with the build's desired playstyle, shining brightest in the most dangerous battles. |
| 25 |  Push the Falling Push the Falling |
Passive. Another energy replenishment passive, which restores energy by attacking CCed enemies. Using Mighty Kick on a stunned enemy can prolong the stun duration. |
| 26 |  Self Repair Self Repair |
Passive. Helps abate the durability deficit of medium armor, grants bonus bleed resistance and notably lowers the repair bill. |
| 27 |  Brace for Impact Brace for Impact |
Maneuver. Powerful short-term defensive buff. stepping stone toward Battle forged. |
| 28 |  Battle-Forged Battle-Forged |
Passive. Minor defensive passive. Using maneuvers grants -10% damage taken until next turn. Recall that both Mighty Kick and Onslaught's second strike is a maneuver. |
| 29 |  Flexible Defense Flexible Defense |
Maneuver. Staggers up to 3 adjacent enemies. When wearing medium armor, it offers additional moe and control resist shred. |
| 30 |  Boulder Toss Boulder Toss |
Spell. Very fun and thematically appropriate skill for the build's concept. Can be monstrously effective with the correct setup, but ultimately is chosen for flavour. Substitute for Concussion for higher build efficiency. |
Early & Mid Game Gearing
This section is devoted to noteworthy early-game items that can greatly help you master the build.
Osbrook & Starting Equipment
You can easily complete the first contract and finish some of the NPC missions in Osbrook just with Leo's starting gear, until you can find a Reinforced Club. It is possible to even delay allocating skill points until you do so. You can also steal a shield from the Roadside tower to help you complete Osbrook. Take a Training Crossbow from the Guardhouse for some free ranged damage.
If you want to learn more about theft in this game, check out my Early Game Guide
Overall, you are looking for something like this:
Recommended Midgame Gear
Listed here are some of the gear you should look out for to help you transition into the Midgame.
| Item | Image | Contribution |
|---|---|---|
|
Shishpar |
21 crushing damage
|
Can be acquired on your first trip to Brynn, from the elven vendor found in the Brynn port. It is strongly recommended to save 1600 gold for this purchase before visiting Brynn for the first time.
|
|
Soldier's Cuirass |
12 protection
|
This Chespiece offers very solid defensive stats, at a negligible Dodge chance and energy penalty |
|
Cervelliere with Ear Guards |
9 protection
|
Acquired by defeating the Ancient Troll. Offers a wide range of beneficial stats, and can be used until throughout tier 3, until you are ready to upgrade to tier 4. |
|
|
|
These are our BIS rings until we can upgrade to teh silver emerald rings in the lategame. The sooner you can find them, the better. |
|
|
|
Very solid necklace, which offers minor but helpful bonuses until the lategame. |
 |
|
This belt can be easily acquired from the dwarven merchant in teh Brynn Port, as early as your first visit to the City of Gold. |


Transitioning to Flails
Flails have enormous penalties to fumble chance, which remains the build's biggest limitation. This build largely relies on RoT perception scaling to fix its fumble chance. It is a dangerous risk fumbling strikes on this build, as fumbled strikes cannot daze or stagger, meaning that we cannot rely on our primary defensive strategy - stuns.
As such, I do not recommend switching to flails until you have 30 perception.
Gameplay
This section will cover a variety of gameplay tips that range from mildly helpful to essential in achieving success with the build.
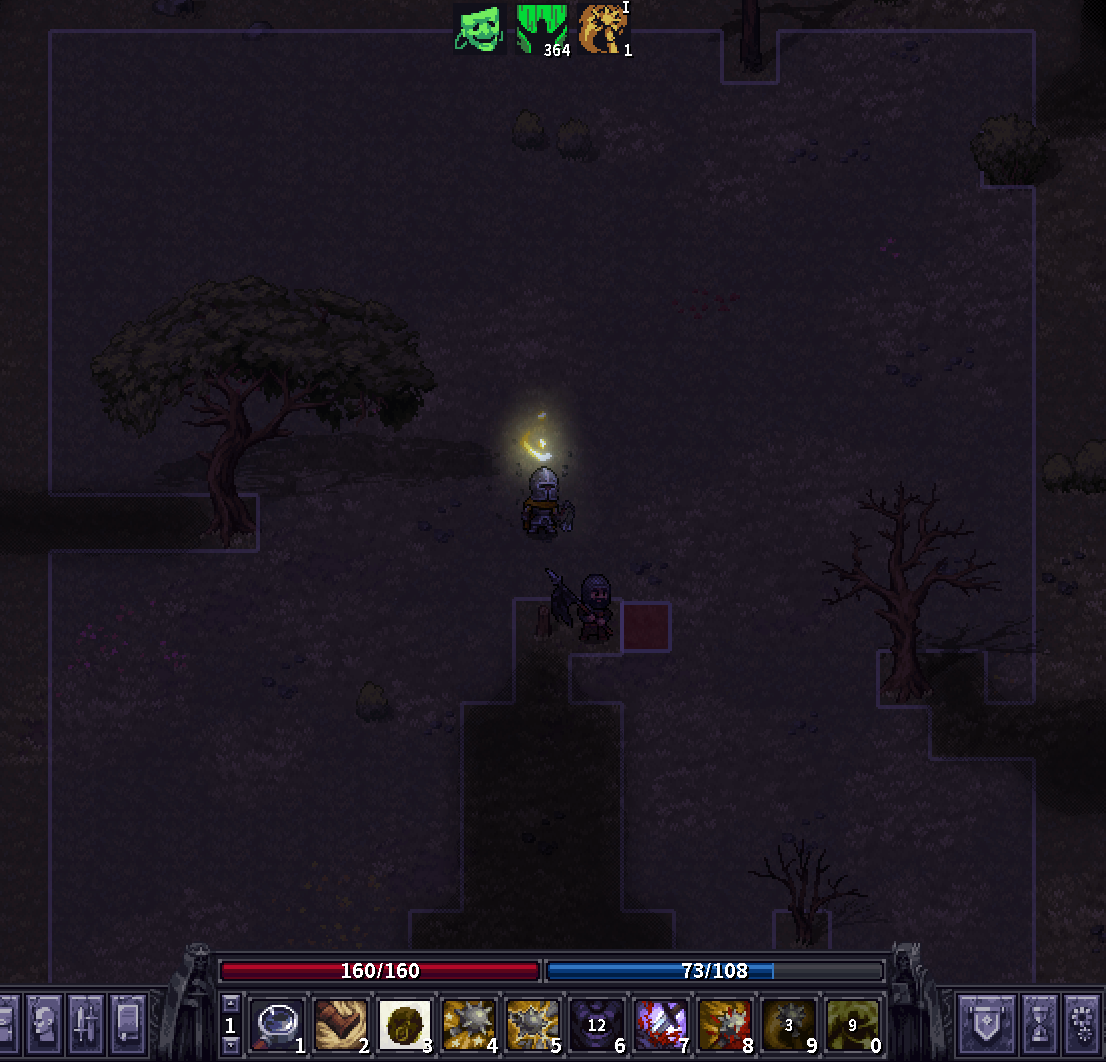
The environment is your playhouse
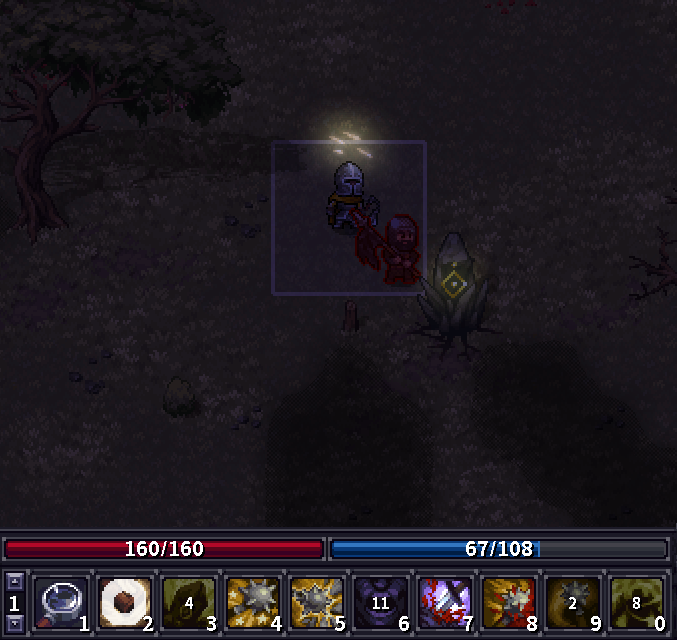
This build is all about using the environment to your advantage, setting up stuns with Runic Boulder, Mighty Kick and Onslaught.
Tree Tech
This tech is best used in relatively safe 1 on 1 fights, with the goal of using the minimum energy required to conserve fatigue
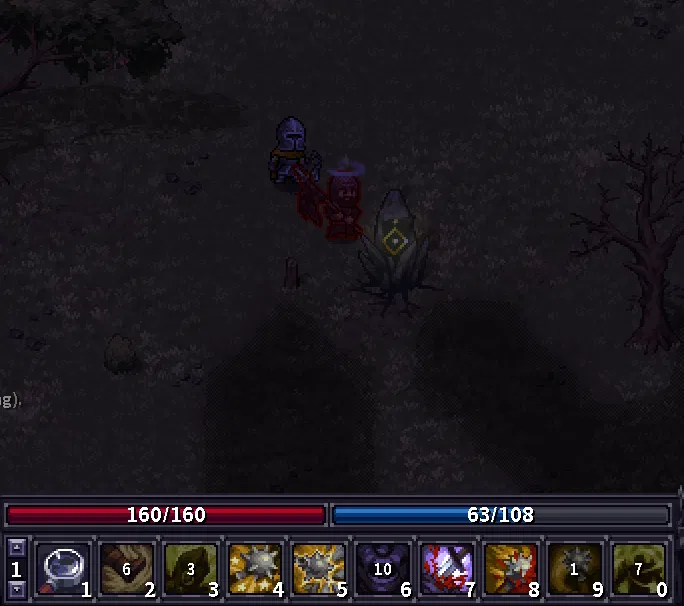
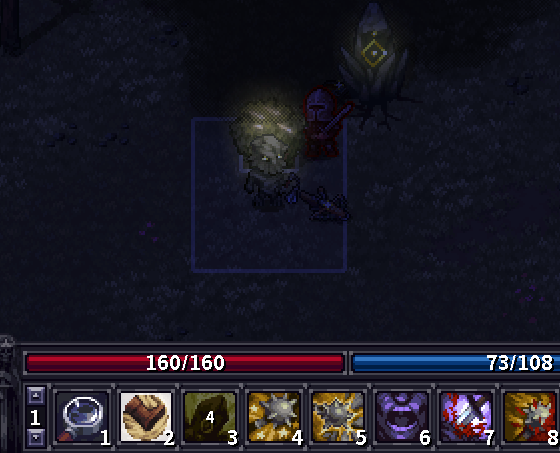
We position 1 tile behind the tree, such that a pursuing enemy would have to go adjacently around it to reach us. When they enter sight, use Runic Boulder to knock them into the Tree.
Figure 1:
Then, once they enter melee, use Mighty Kick on them. If step 1 was done correctly, the Boulder should be directly behid them, causing the knockback to be turned into a daze / stun.
Figure 2:
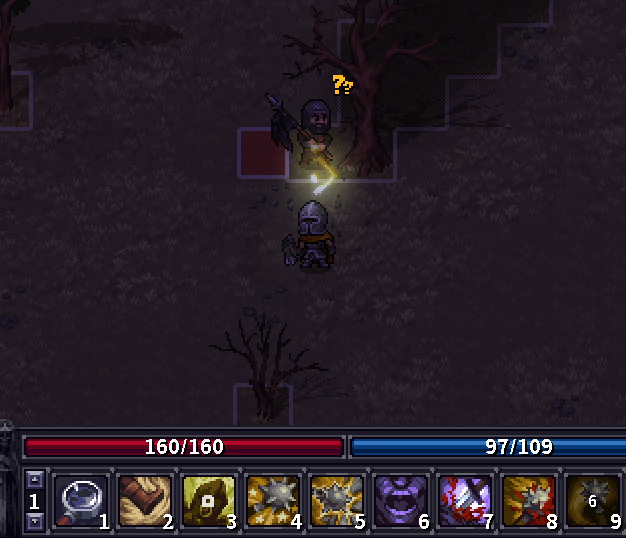
Once you secure the stun, you can finish the fight in any number of ways.
Figure 3:
Onslaught Tech
This tech is best used against a spread-out group of enemies, especially archers, where it would be useful to create a chokepoint and score an early kill.
Initiate the same as with the Tree tech. This is done to deny the enemy a charge attack. However, on the turn that the enemy would have become visible, step out in front of them. This way, when you Raise your Boulder, it would not be directly behind the enemy, relative to you.
By keeping the space behind the enemy open, you allow Onslaught to knock them back and land the second strike, which will likely secure the stun. 2 of your adjacent tiles will be blocked, while the enemy you stunned blocks the one remaining tile in front of you. The other enemies will either navigate around the tree, only to double back as the first enemy is killed, or will instead attack your boulder, giving you a turn to breathe and buff.
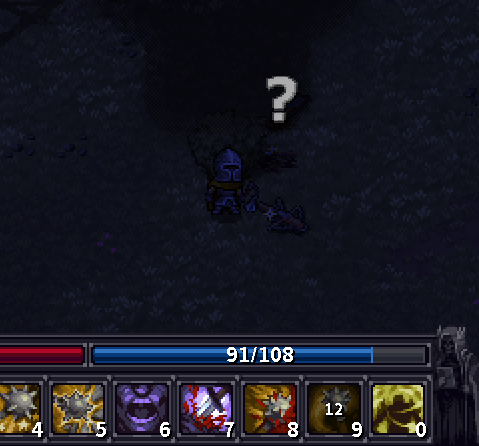
Stone Armor Tech
This one is essential for the late game, giving you better odds against enemies with high Move and Control resists.
Position directly behind an obstacle, such that the enemy cannot see you until they walk into melee. On the turn just before they do, activate stone armor.
Figure 1:
Once they are in melee, raise a boulder behind them. If they are knocked back, they will hit you, dealing minor damage, and become dazed. The damage you took serves to charge your Stone armor, increasing the explosion damage, while the boulder extends its duration.
Figure 2:

Finally, use mighty kick to shred their move and control resist, as well as block power.
Figure 3:
Most of your skills become ineffective if they are fully blocked by the enemy. It's important to be aware of the late game, where the enemies start using bigger shields and can access skills like Hold the Line.
This limitation is especially important for Knock Out, as it needs to deal damage to put enemy skills on cooldown. Mighty Kick does not have the same problem, which is why it often must be used first, even though it deals little damage.
There are many other cool combos you can achieve with this build, but these are the most fundamental or essential ones, upon which you can design your own variations.
Conclusion
Living Boulder Leo is a powerful, high-octane, offensive build that turns the environment and dungeon corridors alike into your own personal playhouse. It offers a unique playstyle that makes you experience the game from a new angle and solve battles like a game of chess. At times, the build can seem formulaic, but the real joy lies in learning which combo or tactic to apply in a given situation.
Like, Dislike, comment, or share!
Join the Discussion
0 commentsNo comments yet.
Be the first one to leave a comment!