
2h Sword Arna Build - the Blademaiden - Stoneshard
Introduction
The demanding voice of her father, Johannes der Vyrne, echoed in her ears.
The air shrieked as her sword snapped toward the cultist's neck. One more dead, but many more remained.
"...You must be flexible in your defence. If you are strong within the bind, displace the opponent's blade from the center line to create an opening..."
Her father's instruction was unforgiving. But as time went on, and her noble responsibilities became ever more daunting, the training courtyard became the only part of the der Vyrne castle where Arna felt at home.
Arna parried the Executioner's cleaver and, in one fluid motion, delivered a lethal counter-thrust to the proselyte's chest. As the scent of blood filled the air, a bloodcurdling roar shook the walls of the catacombs.
"... Stand up! Stand and fight, damn it! No der Vyrne dies with their face in the mud!"
Collapsed with physical and mental exhaustion, a young Arna gazed up toward the clouded sky. With tears in her eyes, she rose to shoulder the burden of nobility and the legacy of the der Vyrne.
Arna stopped to catch her breath. Suddenly, the twisting catacombs shook with another bellowing roar as a humongous beast came charging from the darkness. With a surge of adrenaline and a battle cry tearing from her lips, Arna dashed toward the beast in a daring, heroic charge.
Contents
Overview
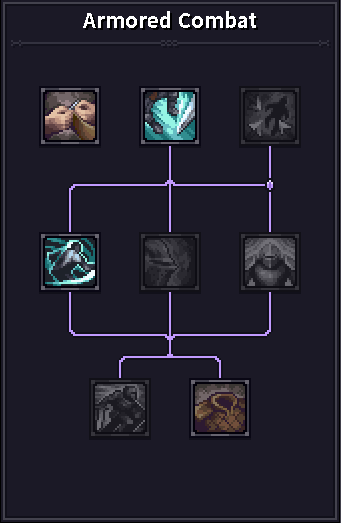
This is a dodge-focused medium armour 2h sword counter build. This is an archetype that was noticeably buffed in the Blood Omens update, through the changes made to the Armored Combat skill Custom Adjustments, and the introduction of new gear that greatly favours this build. These changes empower the existing synergies of this archetype with 2h swords, giving the build nearly indestructible layered defences, without sacrificing offensive power.
Character Selection
Arna is the prime choice for this build. The late-game setup can be replicated with Hilda, and her passive offers a couple of advantages in that late game. However, with Arna, you can clear the game long before Hilda's strengths come online.
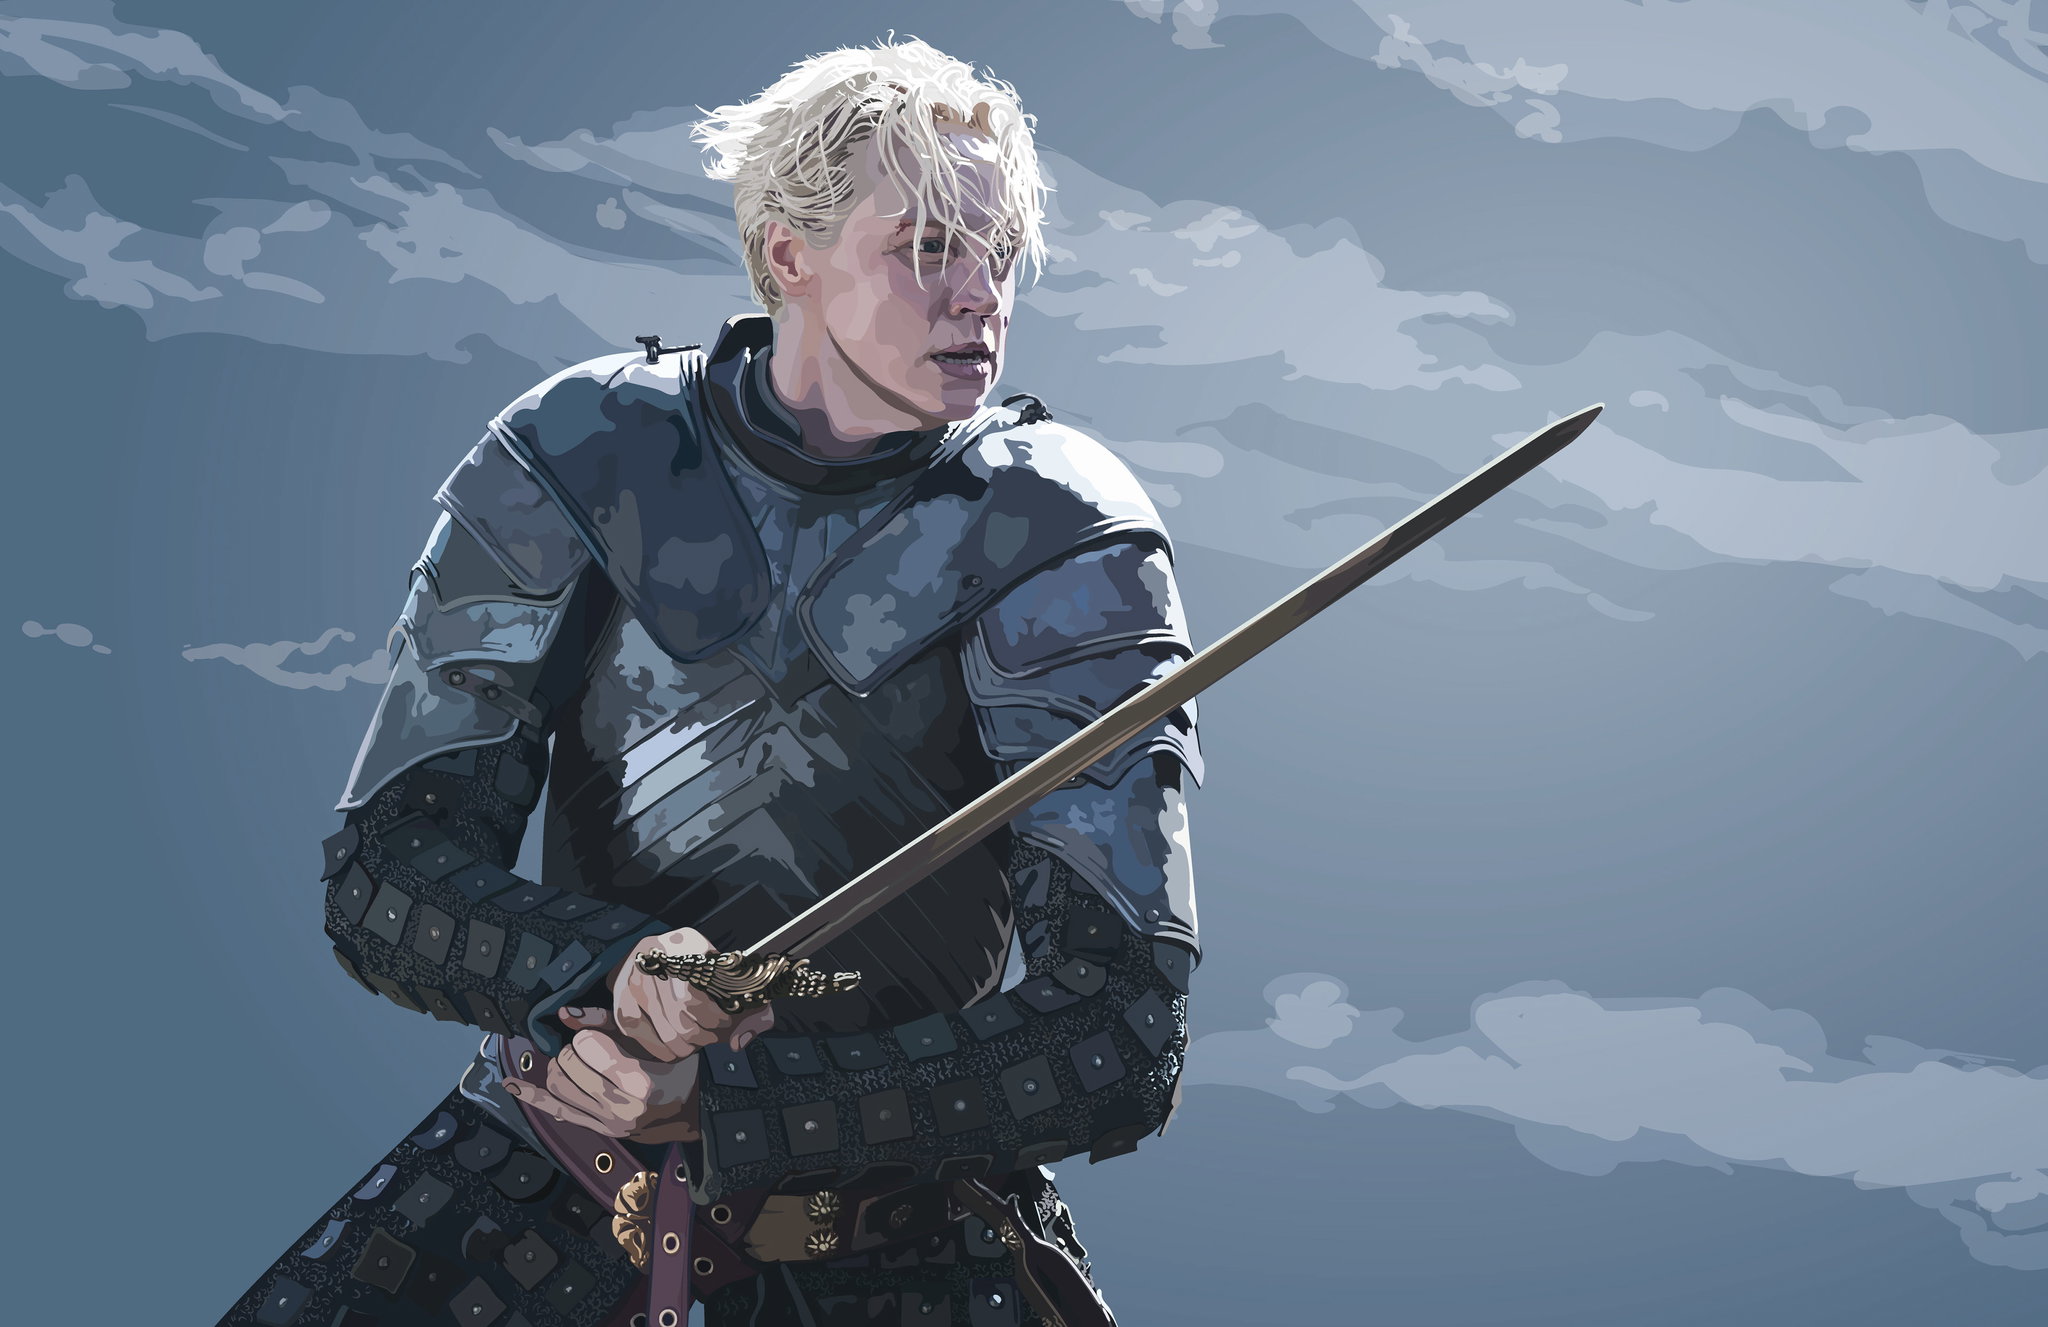
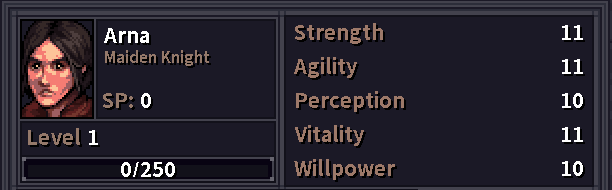
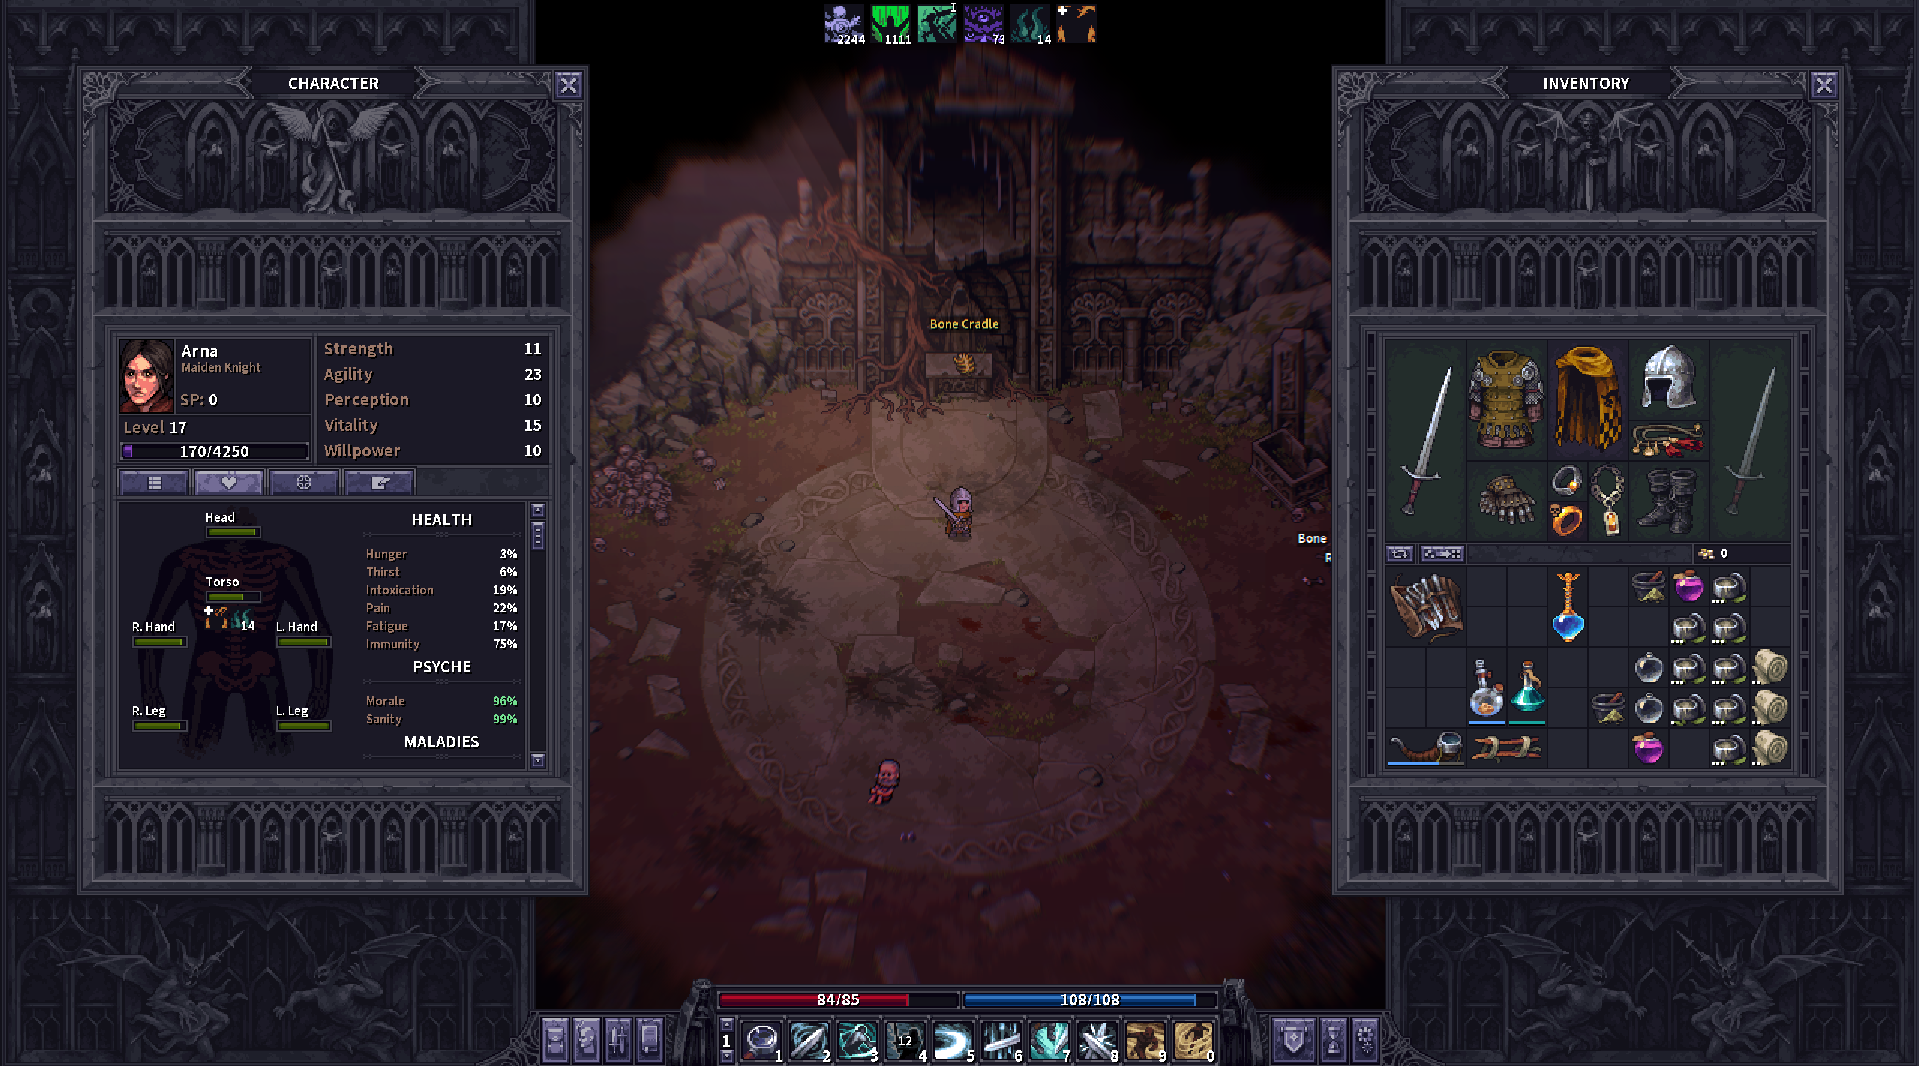
Arna - the Maiden Knight
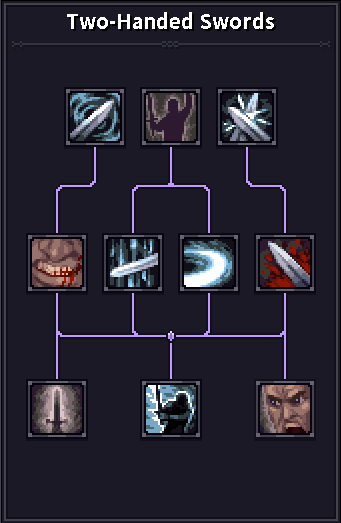
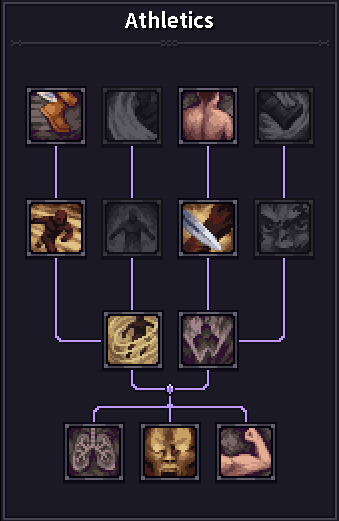
Arna starts with most of the necessary skill trees unlocked, most importantly, Two-Handed Swords. This allows you to get used to the build's playstyle from the very beginning. Furthermore, she starts with 11s in strength, agility, and vitality. All are stats that this build wants.
Her trait, "Vow of the Feat" also offers outstanding bonuses:
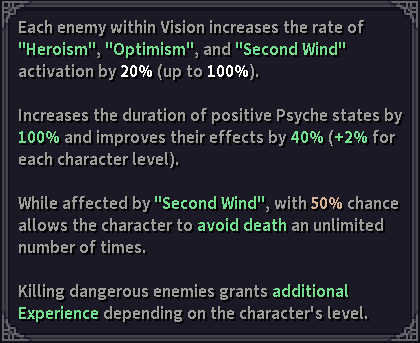
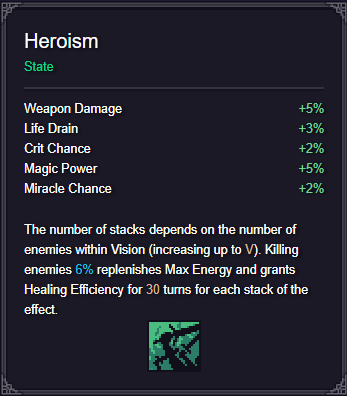
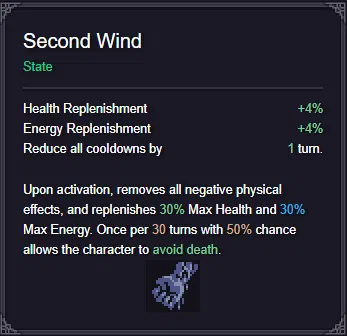
By increasing the rate of activation of positive psyche states, it enables them to activate more often, with shorter periods of cooldown, ultimately activating whenever there are 5 or more enemies within vision, and your Sanity and morale are both in the green.
Furthermore, these effects gradually become more powerful as you level, capping out at level 20 with a 40% increase in all of the numbers provided by these psyche states. The cherry on top is the Second Wind's ability to allow the character to avoid death, losing its cooldown, meaning that you could survive on 1 hp even when surrounded by multiple enemies.
Both of these effects are very noticeable when comparing her to other characters in gameplay.
Final Stats
| Stat | Score |
|---|---|
| Strength | 15 |
| Agility | 30 |
| Perception | 10 |
| Vitality | 15 |
| Willpower | 13 |
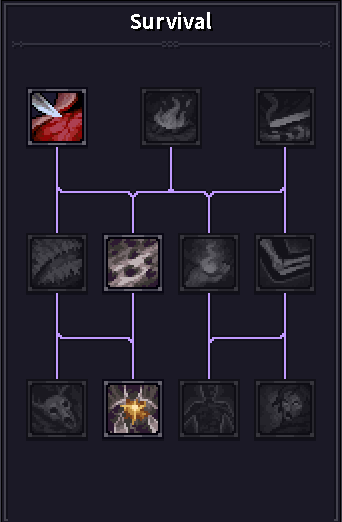
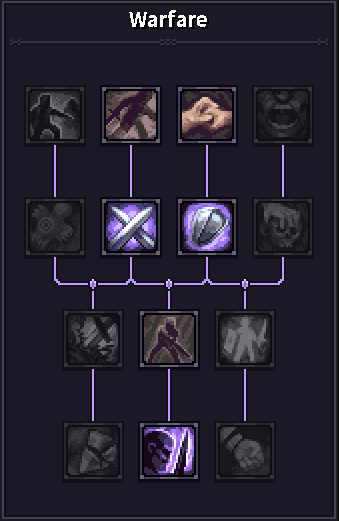
Final Skills
 |
 |
 |
 |
 |
Final Gear
|
Item |
Stats |
Contribution |
|---|---|---|
|
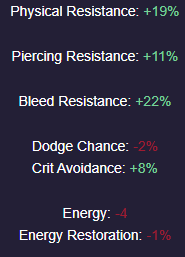
Knight Two-Hander |
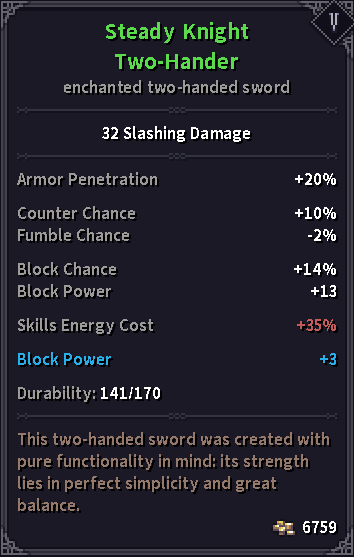 |
Late-game BIS. Further enhances defence by improving block power, and supports our offence and sustain with -10% fumble chance. |
|
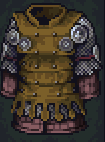
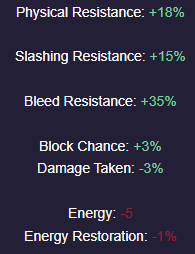
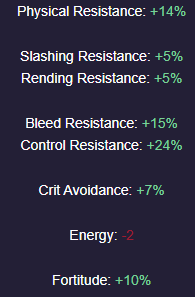
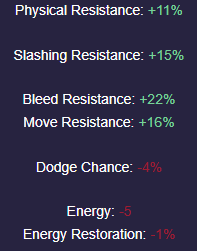
Border Guard Brigandine |
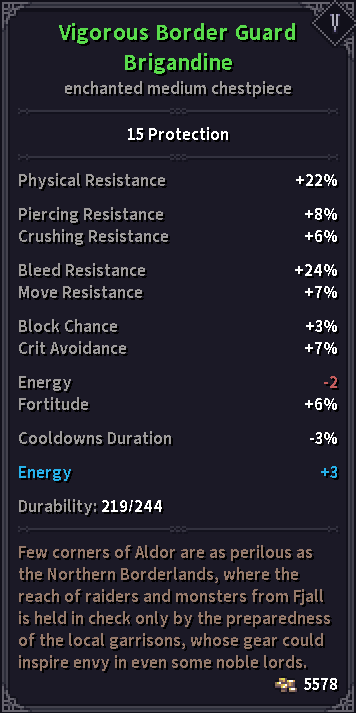 |
This armor was introduced in Blood Omens, and it is the only medium armor in tier 5 that does not penalize dodge chance. It has negligible energy cost and offers solid defensive bonuses in the form of good bleed resist, Block chance, and fortitude. Energy or Dodge chance is the optimal enchantment |
|
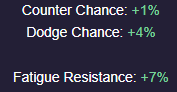
Veteran Gloves |
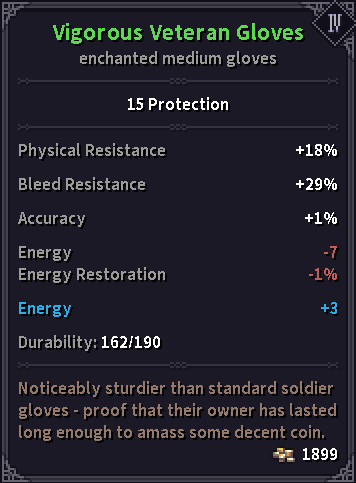 |
It is strange to be wearing tier 4 gear in the endgame, but Captain Gloves do not offer a meaningful improvement, as they cost more energy while losing the 1% of accuracy. The added protection seldom matters either, as 15 is more than enough to tank the occasional fumbled hit. I would not replace them unless you find the unique Guardsman Gloves. Energy or Dodge chance is the optimal enchantment. |
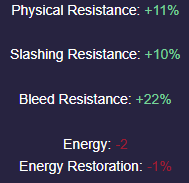
 Blademaster Boots Blademaster Boots |
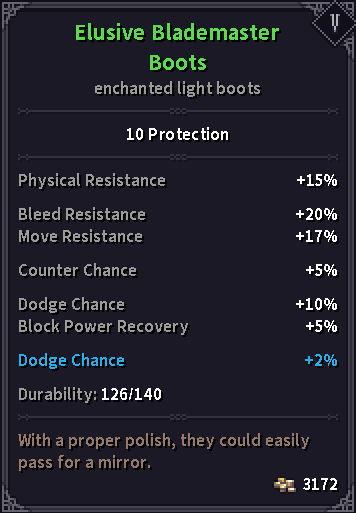 |
New boots, introduced by the Blood Omens update. The changes to Custom adjustments mean that we are no longer required to wear medium armor in every slot, to get the full effect, meaning we can wear light boots for these juicy stats. Custom adjustment also bumps the protection value to 12.
Energy or Dodge chance is the optimal enchantment. |
|
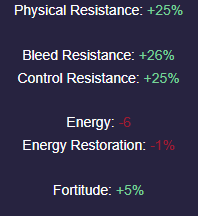
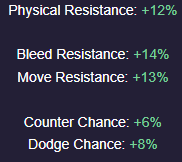
Barbute |
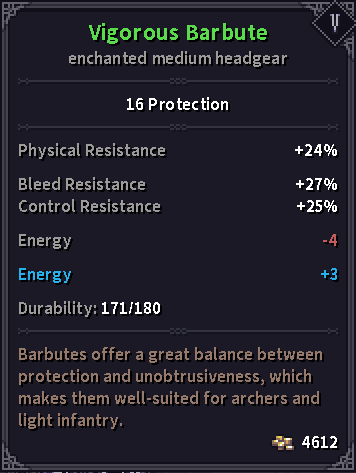 |
This helmet costs a lot less energy than the Captain's Barbute, and has no vision penalty, for marginally worse protection values. Can be upgraded to the unique Ornate Barbute if found.
Energy or Dodge chance is the optimal enchantment. |
|
Aristocrat Belt |
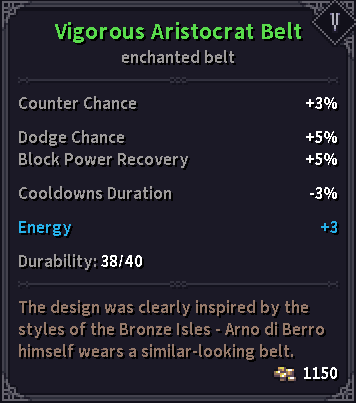 |
This belt pulls ahead of the Knight belt because dodge is a more reliable defence for this build than block. The other stats are also very valuable.
Bleed and Move resist are preferred enchantments. Energy is good too. |
|
Ruby Pendant |
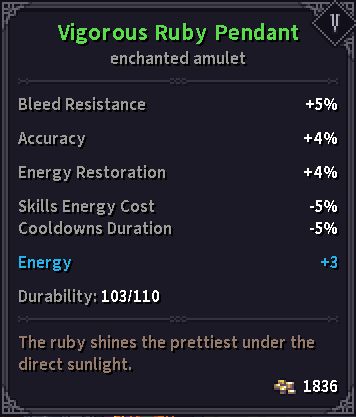 |
This build relies on Jewellery to fix its accuracy. Furthermore, Bleed resist, Skill energy cost, and CDR are all very valuable stats for this build. Bleed and Move resist are preferred enchantments. Energy is good too. |
|
Silver Ruby Rings |
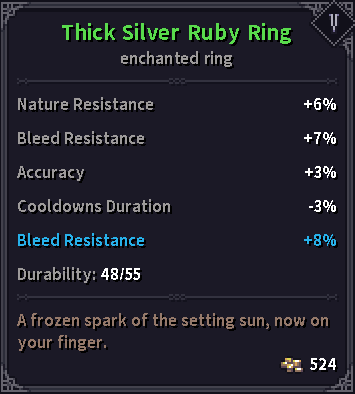 |
This build relies on the accuracy bonus, but the CDR and Bleed res are also fantastic.
Bleed and Move resist are preferred enchantments. Energy is good too. |
|
|
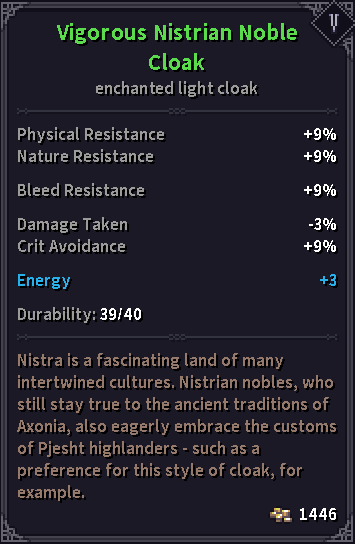 |
This cloak is a minor upgrade to the Jousting cloak because it can be enchanted. Physical Resist, reduced damage taken, and Bleed resist are also welcome stats. Bleed and Move resist are preferred enchantments. Energy is good too. |


 Nistrian Noble Cloak
When it comes to enchanting the cloak, belt, rings and necklace, make sure that at least 2, ideally 3 of them, are enchanted with Bleed Resist. Additionally, you want at least 1, ideally 2 items enchanted with move resist to protect yourself from being staggered.
Notable Alternatives
| Item | Stats | Contribution |
|---|---|---|
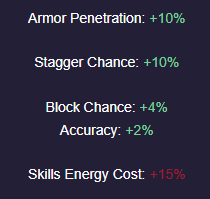
 |
 |
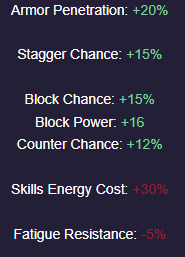
Third-best weapon for this build. Increased innate stagger chance enables the build to be much safer in a 1 v Many scenario.
Using this weapon requires replacing the rings with Steel Signet Rings, and enchanting them with Bleed resist. |
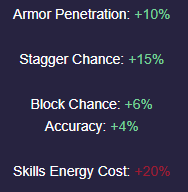
 |
 |
Second-best weapon for this build, strictly better than the Knight Two-Hander. |
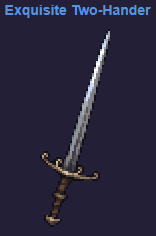 |
34 Slashing Damage
|
BIS weapon and possibly the strongest unique weapon in the game. It also has 2 more raw damage than the Knight Two-Hander. This thing is crazy. |
 |
 |
BIS Gloves. Slightly superior to the Veteran gloves in every way except for accuracy. |
 |
 |
BIS Helmet. Costs more energy than the Barbute, but the 4% accuracy is invaluable, allowing you to run an enchantment other than accuracy on your sword, or replace a ring. |
 |
 |
Best ring in the game. |
Progression
Stat Allocation Order
This build needs an abundance of energy and energy recovery in order to leverage the enormous buffs to Peak Performance. As all counter builds do, it suffers from significant fatigue drain. As such, it is important to balance our agility with Vitality, while Willpower is necessary to scale the energy recovery from opportune moments and revanche.
| Stat | Investment |
|---|---|
| Agility | 20 |
| Vitality | 15 |
| Agility | 25 |
| Willpower (Boulder Circle) | 11 |
| Willpower | 12 (Same level as Peak Performance) |
| Strength | 15 |
| Willpower | 13 |
| Agility | 30 |
Skill Order
| Order | Skill | Contribution |
|---|---|---|
| 1 |  Hewing Strike Hewing Strike |
Attack. Strikes the arms, with a high likelihood of causing an injury and bleed. Arm injuries reduce accuracy. Twice as effective if the enemy is staggered.
In the early game, best used as an opener to disable the enemy. Starting level 8, be sure to stagger the enemy before using Hewing Strike. |
| 1 |  Parry Parry |
Maneuver. Powerful buff which scales with the number of enemies in combat. Can be used both before and during a fight. Increases counter and block chance as well as Block Power recovery from hits taken. |
| 2 |  Brace for impact Brace for impact |
Maneuver. Powerful Defensive buff. Best used in anticipation of a powerful enemy skill, like Hooking Chop, Impaling Lunge, or Cut Through. |
| 3 |  Revanche Revanche |
Passive. Your counterattacks replenish energy and give you reduced skill energy cost. |
| 4 |  Opportune Moment Opportune Moment |
Passive. Your counterattacks replenish energy. |
| 5 | Save Skill Point | |
| 6 |  Pathfinder * Pathfinder * |
Passive. Reduces Fumble Chance while under the effect of Vigor, and allows you to hear nearby enemies with Inspect Surroundings. Stepping stone toward Ever Vigilant. |
| 7 |  Feast of Steel Feast of Steel |
Stance. Very Powerful buff, and the core of this build. Must be used before every single fight. Greatly buffs accuracy, fumble and counter chance. In addition, every third strike gains +100% stagger chance. Your counterattacks count as strikes. |
| 7 |  Arc Cleave Arc Cleave |
Attack. Powerful AoE. Cleaves through 5 adjacent tiles with added damage, bleed chance, and stagger chance. Reduces 2h sword skill cooldowns for every enemy hit by the strike. Best used after Hewing Strike. |
| 8 |  Flexible Defence Flexible Defence |
Maneuver. Reduces Move resist, and staggers up to 3 adjacent targets. Best used as an opener right before the enemy's first attack, and followed by Hewing Strike to injure them. |
| 9 |  Disengage Disengage |
Passive. Minor defensive buff. Reduces the risk of walking while in enemy zone of control, enabling tactical repositioning. |
| 10 |  Fight to the Death Fight to the Death |
Passive. Arguably one of the strongest passive effects in the game. Attacking the same target gives stacking stagger chance, counter chance, block chance, and block power recovery. This skill + the stance will carry you through the entire midgame. |
| 11 |  Dash Dash |
Charge. Allows you to cross up to 4 tiles in one turn. If this leaves in melee with an enemy, gain 15% dodge and 15% counter chance for 2 turns. |
| 12 |  Not This Time Not This Time |
Passive. Powerful defensive buff. Offers up to 10% stacking control and move resist. Once per 90 turns allows you to ignore 1 instance of stagger, immobilization, daze or stun. |
| 13 |
|
Attack. Powerful Offensive Debuff. High chance to stagger the enemy. If it deals damage, it puts all of their skills on a 2-turn cooldown. Shuts down Mages. Can be used as an opener against a shielded enemy to prevent them from using Raise Shield. |
| 14 |  Elusiveness Elusiveness |
Maneuver. Very Powerful Defensive Buff. Gives you a stacking buff that increases dodge chance and reduces damage taken. Enemy attacks prolong the duration, while moving to other tiles generates stacks. Best used while in melee with a dangerous enemy. |
| 15 |
|
Passive. Powerful defensive buff. Gives you 3% dodge chance and 8% bleed resist to every piece of medium armor, and 2 protection to every piece of light armor. You need to start wearing Duelist Boots and dodge focused tier 4+ medium armor. |
| 16 |  Recklessness Recklessness |
Passive. Situational offensive buff. Reduces damage taken and grants crit, and counter chance if there's more than 1 enemy adjacent. Makes you very good at 2v1s. |
| 17 |  Heroic Charge Heroic Charge |
Attack/Charge. Extremely powerful gap closer + disabler. Deals more damage for every tile travelled. Also has a high chance to stagger. Can be used to replenish Elusiveness stacks. |
| 18 |  No Time To Linger No Time To Linger |
Passive. Powerful offensive buff. Grants buffs accuracy against bleeding and staggered enemies, greatly buffs the damage of Sudden Lunge, and allows it to be used multiple times per fight. |
| 19 |  Ever Vigilant * Ever Vigilant * |
Passive. Powerful defensive buff. Reduces enemy accuracy and crit chance, and grants you dodge chance while under the effects of Vigor. Killing enemies extends the duration of Vigor. |
| 20 |  Peak Performance Peak Performance |
Passive. Very Powerful Buff. So long as you remain above 50% energy, you gain 10% Dodge and Weapon Damage. You need to get at least 12, ideally 13 willpower to help you maintain your energy.
Parry now gains a higher priority as increasing counter chance increases your energy recovery. |
| 21 |  Sprint Training Sprint Training |
Passive. Reduces the energy cost and cooldown of Dash and Heroic Charge. Grants both +1 range. Extra range means more damage on Heroic charge. |
| 22 |
Taste of Victory |
Passive. Strong ramping offensive synergy. Killing enemies while under the effect of Parry extends Parry by an extra turn. |
| 23 |  Setup Setup |
Passive. Using maneuvers reduces skill energy cost and damage taken, and also grants accuracy. |
| 24 |  Adrenaline Rush Adrenaline Rush |
Maneuver. Powerful Buff. Refunds some energy, reduces pain, and gives a wide array of combat buffs. Best used as a pick-me-up. This is the last skill that the build "needs" to clear the game. |
| 25 |  Courage Courage |
Passive. Killing an enemy with a 2h sword attack skill instantly refreshes its cooldown. If the enemy survives a 2h sword attack skill, it grants stacking weapon damage. |
| 26 |  Hard Target Hard Target |
Passive. Strong defensive buff. Reduces enemy ranged accuracy and taking ranged hits boosts your dodge chance. Reduces the armor penetration for all incoming attacks. |
| 27 |  Offensive Tactic Offensive Tactic |
Tactic. Powerful offensive buff. Grants decaying crit chance, energy cost, and cdr bonuses. Kills recover stacks of the effect. |
| 28 |  Defensive Tactic Defensive Tactic |
Tactic. Powerful Defensive Buff. Grants dodge, Block and Counter Chance. Switching from one Tactic to another does not take a turn. |
| 29 |  Tactical Advantage Tactical Advantage |
Passive. Huge Sustain Buff. Greatly reduces the energy cost and cooldown duration of all stances and maneuvers, and greatly enhances both tactics. |
| 30 |  Thirst for Battle Thirst for Battle |
Maneuver. Huge Buff. Excellent Capstone to the build. Best used as a pick-me-up. |
 Sudden Lunge
 Custom Adjustments
I recommend skipping Pathfinder and inserting Setup from first row Warfare at level 3 (delaying Revanche and Opportune Moment by 1 level) and skipping Ever Vigilant entirely
Early Game - Osbrook
This build takes a greedy approach to the early game. There are relatively few first row skills that this build wants to take early on, with only Hewing Strike being an attack skill. Ive considered Seize the Initiative, Setup, and even First Aid, but in the end rejected all of them because they all either become obsolete, or end up delaying us from taking other, more powerful skills later on.
With the right early game strategy, it is possible to reach 3000 Osbrook reputation after doing only 1 contract, which would allow you to then immediately purchase a tier 2 weapon as early as Level 3. This gear-induced powerspike trivializes all of tier 1 content, as it allows you to, generally, just click your enemies to death.
The exact steps are explained in my Early Game Strategy Guide. The Blood Omens update did not introduce any significant changes that would affect its content. So if you feel like you are struggling, I suggest you read that too.
Midgame Gearing - Weapons
To function properly, this build needs late-game accuracy-improving jewelry. This means that until you reach the endgame, you need to find other ways to improve your accuracy. On my Gladiator build, this was solved using Setup, but 2h swords offer a better solution.
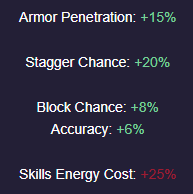
Throughout tier 1-4, you want to be using the Noble Longsword chain of 2h swords:
| Tier | Sword | Stats |
|---|---|---|
| 1 | 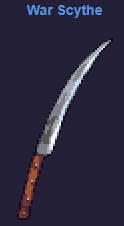 |
 |
| 2 | 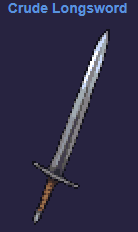 |
 |
| 3 | 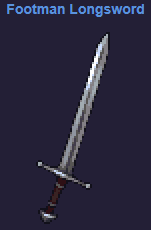 |
 |
| 4 | 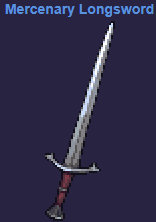 |
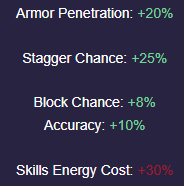 |
They offer innate Accuracy, which, when combined with the stance, helps us minimize the odds of our counters missing the enemy. Additionally, their innate stagger chance stacks with the Fight to the Death passive, allowing us to often stagger enemies with regular attacks while the Stance is active. The block chance is not wasted either, as it will catch the occasional hit while parry is active.
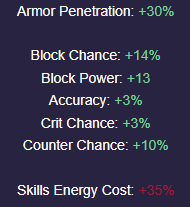
Later on, once you unlock Ruby Jewelry, you can safely transition to the Knight 2 hander, which trades the accuracy and innate stagger for block power and a whopping 10% innate counter chance.
Midgame Gearing - Armor
|
Item |
Stats |
Contribution |
|---|---|---|
|
|
12 protection
|
This Chespiece offers very solid defensive stats, at a negligible Dodge chance and energy penalty. It can serve you all the way through tier 4, but if you find a cheap Mercenary Cuirass, it might be worth upgrading. |
|
|
9 protection
|
Acquired by defeating the Ancient Troll. Offers a wide range of beneficial stats, and can be used throughout tier 3 until you are ready to upgrade to tier 4. |
|
|
12 Protection
|
At tier 3, we begin seeing the first truly dangerous 2h sword enemies, so it is important to keep our hands safe. These gloves are the most economical in terms of energy, and they offer 3 more protection than the Steel Bracers, at the cost of their 1 accuracy. |
|
|
15 Protection |
At tier 4, you begin seeing increasing amounts of dangerous 2h mace enemies with skull crusher, and the Troll Helmet becomes an obvious point of weakness. |
|
|
12 Protection |
In tier 3, the build is not yet ready to fully rely on its dodge for safety, and so we will continue to use Medium Boots until we can upgrade to the Duelist Boots in tier 4. |
|
|
8 Protection |
The changes to Custom Adjustments brought by the Blood Omens Update allow us to mix medium and light armor to maximize dodge and counter chance. These boots are fantastic, and we ideally want to upgrade into them as soon as we reach level 14 and unlock Custom Adjustments. |
|
|
|
This belt can be purchased on your first trip to Brynn, and it will serve you well until you're ready to upgrade it to tier 5. It lost 1% dodge chance in the Blood Omens Update, but it remains an excellent choice. |
|
|
|
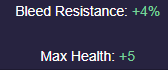
Very solid necklace, which offers minor but helpful bonuses until the late game. |
|
|
|
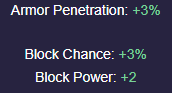
This ring offers some much-needed block power, which is hard to come by. Meanwhile Armor penetration is a very welcome offensive stat that 2h swords don't get enough of. |
|
|
|
Solid Defensive ring choice. Will serve you well until you are ready to upgrade to silver topaz rings. |


Gameplay
Understanding Dodge Builds
This is a medium armor dodge build, and to pilot it effectively, you need to understand how Dodge chance works.
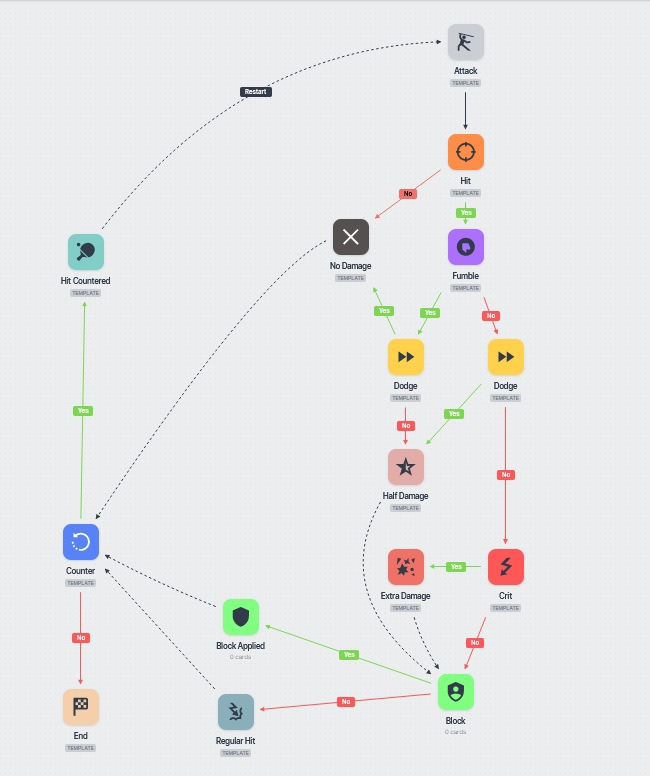
As shown by the above diagram, Dodge offers a chance to turn regular hits into fumbles, and fumbles into complete misses. Dodge alone is not enough to remain safe, as unless you can reach 100% you are still vulnerable to getting demolished in a single strike. You need more layers.
The easiest method is to combine dodge with block, such as in my Gladiator build. However, another approach is to increase the enemy fumble chance. The most effective method of doing this is through applying the stagger debuff to enemies, which just so happens to be the specialty of Two-Handed Swords.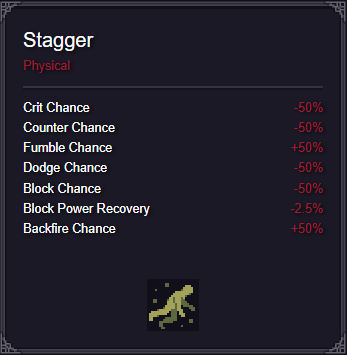
Stagger is the best debuff in the game, because it severely nerfs the opponent while still allowing them to attack. This means that they will continue to trigger your counter chance, which creates a lot of synergy with Agility builds. This creates a vicious loop with 2h swords, as your counterattacks can help reapply the stagger debuff.
Furthermore, this is a medium armor dodge build, which is an archetype that was buffed by the Blood Omens update. This means that we sport considerable protection values on our gear, which allows us to tank the few fumbled strikes that sneak through our defence.
Combat Tactics - Embracing the Control Playstyle
A defining feature of this build is its ability to counter the opponent's every move, both mechanically and strategically. You have a comparatively small array of situational skills accompanied by a whole host of very powerful passives, which allow you to shut down the enemy at every twist and turn.
Pre-Combat Buffs
Once you are in the midgame, activating the Stance is usually enough to win 1v1s where you are ambushing the enemy. You can save on energy by not using any skills and allowing Fight to the Death and the other passives to do the work for you. Feast of Steel must be active every fight.
When fighting more dangerous enemies, such as Fiends, the preemptive use of Elusiveness is often encouraged. Beyond the Early game, preemptive use of Parry becomes increasingly unnecessary. Parry is best used reactively when surrounded by enemies.
1v1 Tactics
This build accumulates a lot of fatigue, so it is important to be energy-efficient in 1v1 fights. You need to quickly stack up Fight to the Death in the first couple of turns, while disabling your opponent, as Stance + Fight to the Death can usually end the fight on its own. While affected by Feast of Steel, it pays to count your strikes against the enemy, as every third strike will stagger the enemy. Missed, fumbled or blocked attacks still count as strikes, and so do counterattacks. If you know your next attack will be empowered by the stance, it's often better to use a regular attack instead of an attack skill.
Starting level 8, your 1v1 sequence looks like this:
| Turn 0 | Turn 1 | Turn 2 | Turn 3 | Turn 4+ |
|---|---|---|---|---|
| Feast of Steel | Flexible Defense | Hewing Strike | Empowered attack | Default attacks / Sudden Lunge |
Once you have No Time To Linger, it is safer and stronger to open with Sudden Lunge instead, saving flexible defence for a later turn. If the enemy is shielded or is a mage, starting with Sudden Lunge is preferable even before No Time To Linger.
If you are ambushing an enemy, such that they are unaware when they enter your melee range, you should start the fight with a default attack, delaying the rest of the sequence by 1 turn. This is because unaware enemies will spend the first turn becoming hostile, meaning that any stagger applied on the first turn is wasted.
1 v Many Tactics
When faced with many enemies or a few dangerous ones, it's best to play defensively and rely on counters. Ideally, you want to engage exactly 2 enemies at once to activate Recklessness. Use the environment and position smartly to limit the amount of liberties around your character.
Parry is your best friend, and you want to use your sword skills so that you maintain 2 or more Stance stacks at all times. If the fight is particularly dangerous, preemptive use of Elusiveness is encouraged. Parry, on the other hand, is best used once already in melee, as it has a short duration.
Due to the higher rate of counters, it may be hard to keep track of your Stance-empowered attack. If you do manage to track them, using it to empower Arc Cleave is a very good idea. Sudden Lunge is best delayed, so you can capitalise on the cooldown reduction to Parry that it provides.
Brace for Impact is a very important situational defensive skill that should be used when you anticipate the enemy using a powerful attacking skill. It applies the enemy with a high amount of fumble chance. Its main purpose is to protect you from enemy charge attacks, such as Mutilating Lunge, Onrush, Skull Crusher, and Heroic Charge. In this role, it is better than Parry and should be used instead.
When piloting this build, it is important to be conservative in your decision-making. Do not underestimate the power of counters - your defence fuels your offence. Do not get greedy.
A typical 1 v Many fight will look something like this:
| Turn -1 | Turn 0 | Turn 1 | Turn 2 | Turn 3 | Turn 4 | Turn 5 |
|---|---|---|---|---|---|---|
| Stance | Elusiveness | Flexible Defence | Parry | Arc Cleave | Sudden Lunge | Parry |
There are many exceptions to this sequence, but I've noticed it crops up in different permutations again and again. Note that both Arc Cleave and Sudden Lunge reduce the cooldown on Parry, not to mention Parry itself. This can allow you to maintain Parry for up to 6 consecutive turns.
Furthermore, you can replenish Elusiveness stacks by using Heroic Charge on a third nearby enemy, or simply by dashing 2 tiles within the same engagement, ending the Dash in melee with an enemy.
Drugs and Potions
This build benefits from Hornet Honey more than any other build in the entire game. The things that this build can pull off while tripping balls on some spicy honey deserve a place among war crimes listed by the Geneva Convention. It is, frankly, absurd. I strongly recommend you complete the Hornet quest in the Mannshire Orchard before fighting Manticore and beginning tier 4. Always keep 1 Hornet Honey in your inventory in case of emergencies, whenever you are heading into danger.
Hornet Honey's aftermath only lasts 60 turns and does not drain situational morale too much. So long as you can safely wait out the aftermath, Hornet Honey is safe to use.
As for potions, besides the classic Restoration and Life Drain potions, you should keep an eye out for Energy Drain and Accuracy potions as well. Energy Drain becomes a very useful tool in the lategame, once you access Peak Performance.
Ancient Troll
This build has no problem with the Ancient Troll, as you have access to Dash, and Hewing Strike has a high chance to cause a bleed. It is still not advisable to try to brawl with the troll in melee.
Manticore
This build dunks on the Manticore to a comical degree. Though the manticore cannot be staggered, you can still leverage Heroic Charge to deal enormous damage.
With the changes to this fight brought by the Blood Omens update, the Manticore is more forgiving in a prolonged melee. This makes it possible to brawl with the manticore in short bursts, while under elusiveness and parry, especially while under the effects of Hornet Honey. During my playthrough, I was able to mince the manticore with Heroic Charge while playing very aggressively.
You need to have Heroic Charge to take this fight comfortably, as it allows you to consistently deal damage to the manticore without immediately receiving any damage in return, any time it has Vengeance of the Dead or Raise Dead off cooldown.
Dungeon Preparation Guidelines
By popular request, I am updating the guide to include information about how to prepare for difficult endgame dungeons with this build.
I have made a video explaining how to prepare for lategame dungeons with this build:
Tier 5 Dungeons
This build cleared all 3 tier 5 dungeons in a single day / delve, before level 24 live on my stream.
Undead
I cleared Tier 5 undead with poisonous miasma at level 22, which was by far the hardest of the 3. Toxicity build up is a very serious concern as fighting Rotting Restless Soldiers adds another source of toxicity buildup in addition to the dungeon modifier. I had to sprint through the dungeon, not even attempting to ambush enemies.
The main thing that was learned from that experience is that 2h axe enemies are deceptively dangerous. Since the build does not reach 100% dodge chance, it is possible for the enemy to sneak a clean hit through even while staggered. This risk is heightened by the Rampage 2h Axe stance, which enables every third strike to deal extra damage proportional to your max health. If this third hit is Reign in Blood, which happens to crit, you can find yourself in very serious danger. Once again, play safe, and do not be greedy.
Brigands
This dungeon was largely unremarkable as it did not have a special situation. The lack of time pressure and the layout of the dungeon made it easy to clear safely. The only remarkable encounter was the final boss, which was the 2h sword Raubritter.
Previously, around level 17, we fought a Brigand Paymaster. That fight alone was responsible for 2 of the 3 deaths ive had throughout the entire campaign. Granted, I was tired, and rusty when it came to fighting a Paymaster, but that does change the fact that 2h swords is the most dangerous weapon type to fight against, for this build.
Killing the Raubritter at level 23 was even harder than that, and required Hornet Honey, and every bit of focus I could muster. It was an extremely long fight, lasting around 30 turns. It was also the most cinematic fight of the entire playthrough.
The main danger is the stagger. It takes away everything - your dodge chance, block chance, counter chance, wallet, car keys... You name it. Winning this fight required patiently stacking our defences and waiting for an opening - a gap in the armor.
A single turn where the Raubritter was staggered was enough to sneak in a Hewing Strike to cause a bleed. The problem was his Parry. Attacking into Parry meant likely causing a counter attack, which could stagger us. It was too risky to attack or use attack skills while Parry is active, so there were many turns, more than half a dozen, where the best option was to wait by skipping turn.
Proselytes
The new Proselyte tier 5 largely reinforced everything we already knew. It had the Blood Curse effect, which occasionally causes random bleeds. I did it at level 23, reaching level 24 within the dungeon.
The main challenge came in the form of the new enemy - the Cherub. They are highly evasive while flying, which is bad for our relatively low base accuracy, and otherwise act as a Spear-weilding fiend. This means that they can target our feet with Nail Down, which, against light boots, can often cause an injury.
The main takeaway - just net the Cherub. There's no need to risk missing your core skills by trying to control them through Sudden Lunge / Flexible Defence. The risk is just not worth it. Just net them.
Gameplay Demonstration
After many requests, I have filmed an overexplained gameplay guide of this build clearing out T5 Proselytes at level 24.
Conclusion
The Blademaiden was the strongest build I've tried to date. It has a somewhat slow start, but by using the right weapons, and good fundamentals, you can reach level 7 without much trouble. After that, the build just spirals out of control. The raw power of Feast of Steel is on full display here, and it definitely cemented itself as the strongest stance in the game.
In addition to being strong, the build is also beginner-friendly. While there is a lot of depth to the stagger timings and reactive skills that this build provides, it's also possible to get into a comfortable groove and play off instinct. Playing this build has raised the bar for power so much that I am a little worried about having unreasonable expectations for my future characters.
Like, Dislike, comment, or share!
Join the Discussion
0 commentsNo comments yet.
Be the first one to leave a comment!