Archfey Warlock Build

Archfey Warlock Build - Baldur's Gate 3 (BG3)

ByJohnDavid

Last updated:
0
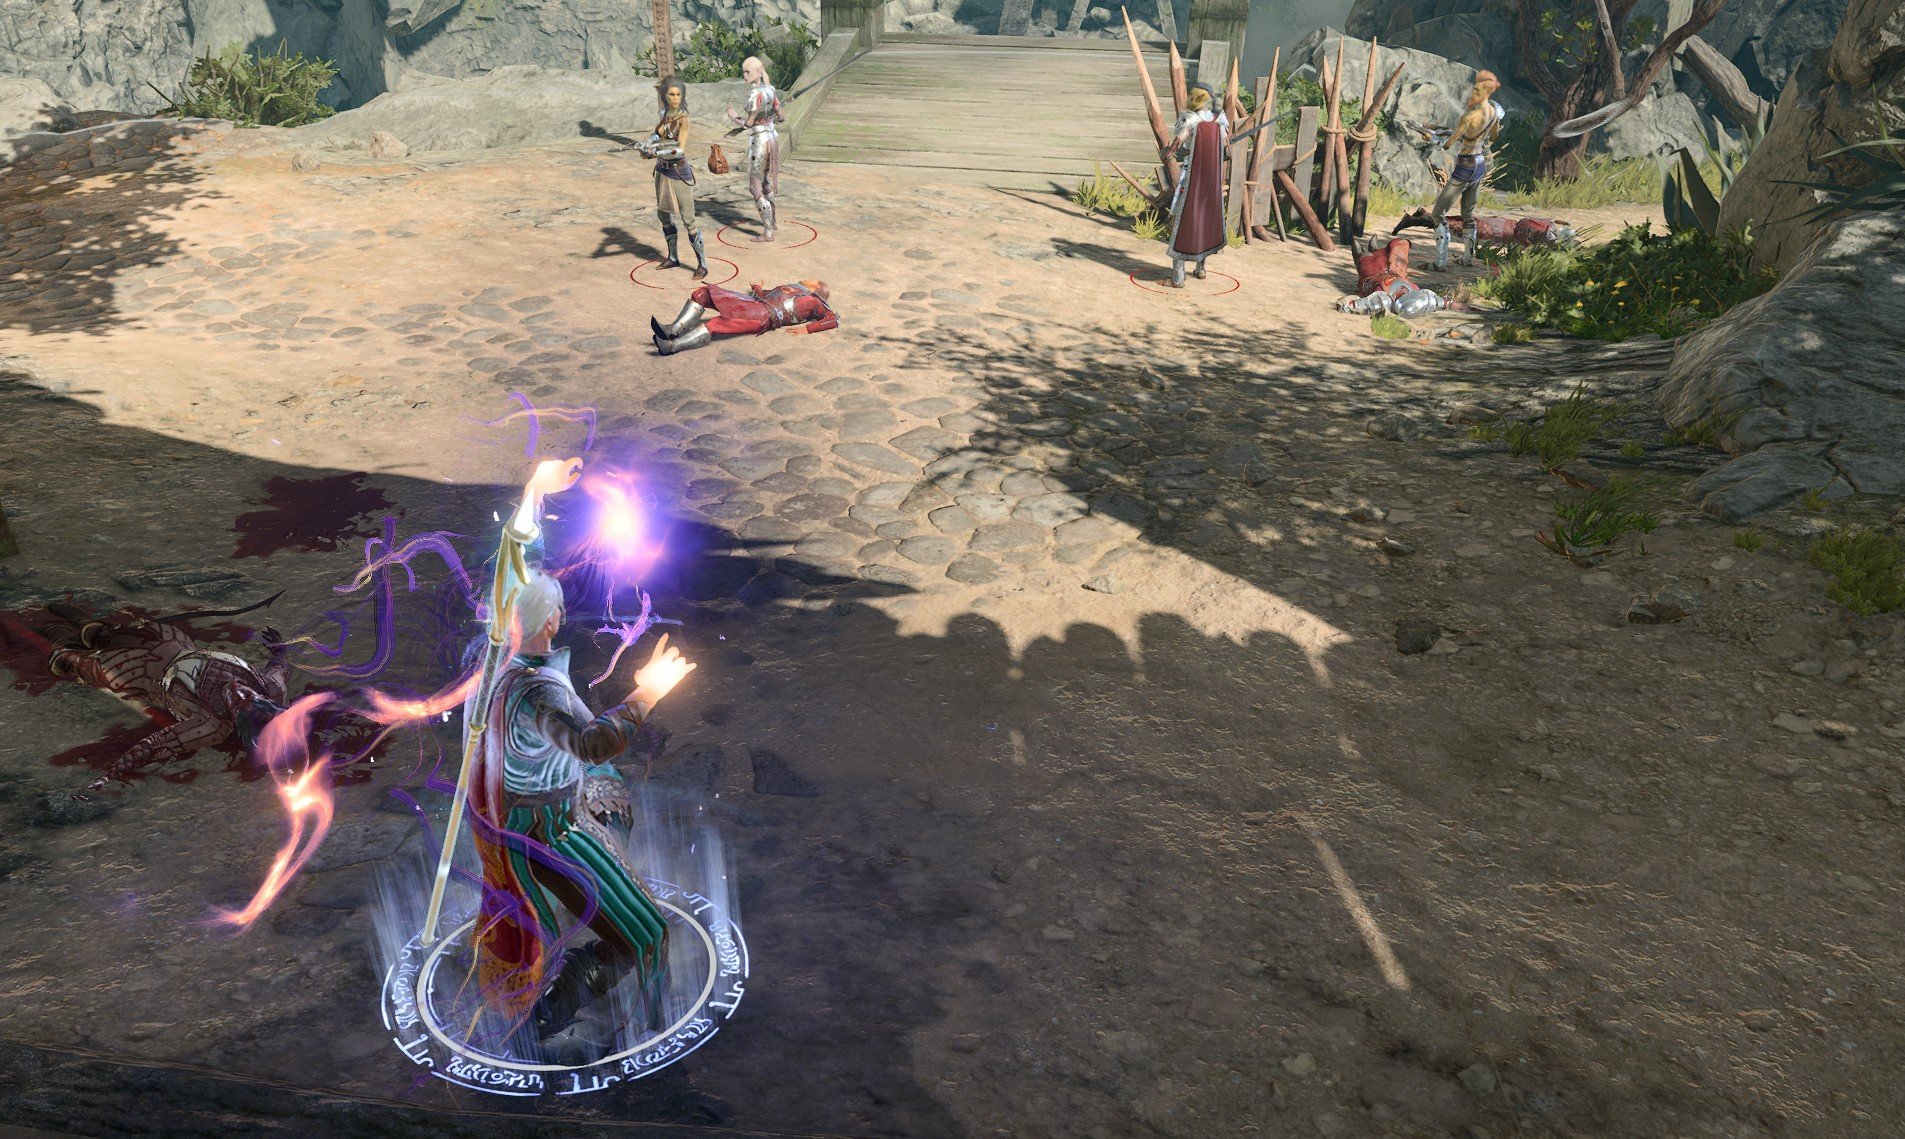
The Archfey Warlock - Feylock Melee Assasin build for Baldur's Gate 3. Use the powerful Shadow Blade icon bg3Shadow Blade and your elusive skillset to eliminate your foes with guaranteed crits due to multiclassed Assassin Rogue. With the setup you'll be able to kill many enemies before the fights even starts.

The Archfey - sneaky Feylock Assassin

The idea of this build is to utilize the Rogue + Assassin's subclass features like Expertise icon passive feature bg3Expertise​, Assassinate: Ambush icon bg3Assassinate: Ambush and Assassinate: Initiative icon bg3Assassinate: Initiative with 7 Warlock Archfey's Misty Escape icon bg3Misty Escape with spells like Greater Invisibility icon bg3Greater Invisibility and previously mentioned Shadow Blade icon bg3Shadow Blade to absolutely melt your enemies. 

Thanks to guaranteed crits on Surprised icon bg3Surprised targets you can combine equipment/items like Bhaalist Armour icon bg3Bhaalist Armour, Resonance Stone icon bg3Resonance Stone, Craterflesh Gloves icon bg3Craterflesh Gloves and Vicious Shortbow icon bg3Vicious Shortbow for some absolutely devastating melee swings. 

If you want to fully use Archfey Warlock's features we'll have to lean into an approach of Arcane Acuity icon bg3Arcane Acuity as some of the features require high spell save DC to use them to a full extent. 

Hope you like the idea of the build, and will enjoy reading it!

How to effectively use and read the build? Here are a few tips:

  1. Build Overview gives a high-level overview of each level
  2. Go into the leveling progression to understand why these picks were made, which also offers variations and mechanics explanations
  3. The equipment section offers gear progression and gives an in-depth explanation of what each piece offers to the build
  4. Check the Mechanics section to fully understand how the build falls into place

Class Contribution

So this is the core of the build that you will use the most:

9 Archfey Warlock

  • Warlock Spellslots that reset on short rest.
  • ​Ability to make your enemies Charmed icon condition bg3Charmed​​ or Frightened icon condition bg3Frightened​ due to Fey Presence icon bg3Fey Presence
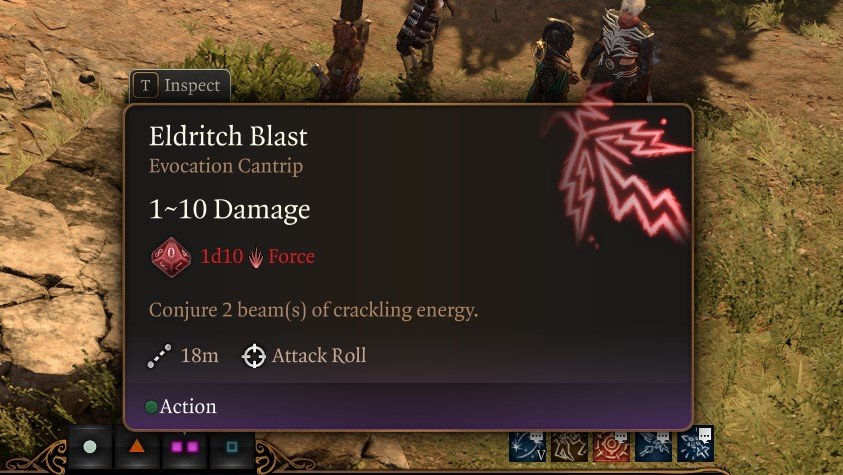
  • Access to a useful cantrip - Eldritch Blast icon action bg3Eldritch Blast,​ which scales with level and gains damage bonuses throughout the game .
  • Warlock Spellslots that reset on short rest which allows you for usage of a vast array of control spells - Darkness icon action bg3DarknessHunger of Hadar icon action bg3Hunger of Hadar, Hold Monster icon action bg3Hold Monster​, etc.
  • Special invocations which give unique features like Devil's Sight icon passive feature bg3Devil's Sight, Repelling Blast icon passive feature bg3Repelling Blast​, Agonising Blast icon passive feature bg3Agonising Blast​, etc.
  • Gain an extra attack via the Pact of the Blade icon action bg3Pact of the Blade​ pact.
  • Have an easy way to escape after taking damage thanks to Misty Escape icon bg3Misty Escape.
  • Unique spell list like Plant Growth icon bg3Plant Growth, Greater Invisibility icon bg3Greater Invisibility, Dominate Person icon bg3Dominate Person and many more

3 Rogue Assassin

  • Expertise icon passive feature bg3Expertise​ which can furthermore boost our skill proficiencies; in this build's case - Stealth.
  • Sneak Attack icon action bg3Sneak Attack​ which will boost our damage when we have an Advantage icon bg3Advantage.
  • Bonus action Cunning Action: Dash icon bg3Cunning Action: Dash, Cunning Action: Disengage icon bg3Cunning Action: Disengage, Cunning Action: Hide icon bg3Cunning Action: Hide which can help a lot in and outside combat.
  • Assassin's Alacrity icon bg3Assassin's Alacrity thanks to this, we can freely attack before combat starts and regain our used action economy points, allowing us to easily to surprise our enemies.
  • Assassinate: Ambush icon bg3Assassinate: Ambush which will make every successful attack on Surprised icon bg3Surprised targets critical, easily doubling our damage dice. 
  • Assassinate: Initiative icon bg3Assassinate: Initiative which will give us Advantage icon bg3Advantage on attack rolls against creatures which haven't taken a turn yet; That works perfectly with Sneak Attack icon bg3Sneak Attack,Surprised icon condition bg3Surprised​ enemies and targets that act after you in combat.

There are more choices, but I will leave those in the build variation section below.

Build Variations

For this build, there are a lot of options, both from a progression perspective and the level splits

Setup Description
  • 12 Fey Warlock
Mono Warlock still offers a good build. You gain 3 feats, more Warlock spells, spell slots, invocations and mystic arcanum.

Build Overview

Here is a concise table with all the main picks during your leveling progression. For more detailed reasoning, I go further in the article. Also, do not forget to check the recommended gear as it is crucial.

You can start with this setup from the early levels thanks to Shadow Blade icon bg3Shadow Blade available at level 3. There are very good 2 handed weapons like Svartlebee's Woundseeker icon bg3Svartlebee's Woundseeker, Jorgoral's Greatsword icon bg3Jorgoral's Greatsword, Unseen Menace icon bg3Unseen Menace and many more but in this build I will focus on the Shadow Blade icon bg3Shadow Blade as it is finesse weapon and those are a must for Sneak Attack icon bg3Sneak Attack to work.

Level Class Selection
1 Warlock 1 Cantrips: Eldritch Blast icon action bg3Eldritch BlastBooming Blade icon action bg3Booming Blade​
Subclass: The Archfey​
Spells: Hex icon action bg3Hex​​, Hellish Rebuke icon action bg3Hellish Rebuke​
STR - 8, DEX - 16, CON - 14, INT - 8, WIS - 10, CHA - 17
Skills: Stealth (Background dependant),Deception, Intimidation
2 Warlock 2 Spells: Armour of Agathys icon action bg3Armour of Agathys​
Eldritch Invocations: Agonising Blast icon passive feature bg3Agonising Blast, Repelling Blast icon passive feature bg3Repelling Blast
3 Warlock 3 Spells:  Shadow Blade icon action bg3Shadow Blade​
Pact Boon:  Pact of the Blade icon passive feature bg3Pact of the Blade​​
4 Warlock 4 Cantrips: Minor Illusion icon action bg3Minor Illusion​
Spells: Darkness icon action bg3Darkness 
Feat:  Savage Attacker icon passive feature bg3Savage Attacker​ ​​
5 Warlock 5
Spells: Hunger of Hadar icon action bg3Hunger of Hadar​
Eldritch Invocations: Devil's Sight icon passive feature bg3Devil's Sight​
Replace Spell: Hellish Rebuke icon action bg3Hellish Rebuke​ -> Plant Growth icon action bg3Plant Growth​
6 Rogue 1 Skills: Stealth, Persuasion/Deception, Sleight of hand
7 Rogue 2 Cunning Actions
8 Rogue 3 Subclass: Assassin
9 Warlock 6 Spells: Counterspell icon action bg3Counterspell​
10 Warlock 7 Spells: Greater Invisibility icon bg3Greater Invisibility
Eldritch Invocations: One with Shadows icon action bg3One with Shadows​
11 Warlock 8 Spells: ​Hold Person icon action bg3Hold Person​
Feat:  β€‹Ability Score Improvement +2 Charisma 
12 Warlock 9 Spells: Hold Monster icon action bg3Hold Monster​ or Dominate Person icon action bg3Dominate Person​
Eldritch Invocations: Any, my personal choice: Beguiling Influence icon passive feature bg3Beguiling Influence​

Synergy with other builds

This section will give a few ideas on how to utilize other builds to maximize the combat potential of the group. There are usually various synergies that make the group play more enjoyable. However, this should not be the main factor. With full game knowledge, any party composition will work freely.

Darkness Setup

Thanks to Devil's Sight icon passive feature bg3Devil's Sight​ you have a natural way to see and attack through magical darkness. Here's some builds that can help in your party:

Synergetic Builds Enabler Description
Beast Master Ranger (level 11) Dire Raven Companion icon bg3Dire Raven Companion From level 11, when using Fly icon bg3Fly, the raven will create Darkness icon bg3Darkness fields for free.
Shadow Magic Sorcerer Eyes of the Dark: Darkness icon bg3Eyes of the Dark: Darkness The Sorcerer has an easy way of creating Darkness icon bg3Darkness fields, and see inside of it thanks to Eyes of the Dark icon bg3Eyes of the Dark
Sorlock
  • Devil's Sight icon bg3Devil's Sight
  • Darkness icon bg3Darkness
Sorlock can create and also see inside the Darkness icon bg3Darkness thanks to the Devil's Sight icon bg3Devil's Sight

Playing with Darkness

So Darkness icon bg3Darkness is one of those very powerful spells that can break the enemy AI, and make many encounters a breeze. There are a few sources that you can get it from:

  • Darkness icon bg3Darkness or Eyes of the Dark: Darkness icon bg3Eyes of the Dark: Darkness spells
  • Arrow of Darkness icon bg3Arrow of Darkness
  • Shar's Spear of Evening icon bg3Shar's Spear of Evening with it's special Shar's Darkness icon bg3Shar's Darkness and Edge of Darkness icon bg3Edge of Darkness actions.
  • Dire Raven Companion icon bg3Dire Raven Companion at level 11 from Beast Master Ranger, with its flying mechanic.

The created field is special because it will cancel out most of the arrow projectiles, protecting anyone inside it. Of course, it can be buggy, and enemies can still throw stuff, or used ranged attack if they are elevated. There are a few sources of being able to see in the "Magical" Darkness:

With all of the requirements and conditions in mind, you can now use Darkness to your advantage. My recommendation is to position the Darkness field in two ways:

Cover enemies with the field - this is an excellent strategy when enemies are clumped together, and you are the one starting the combat. Cast Darkness icon bg3Darkness on them, so that they would get Blinded icon bg3Blinded and use the character that can see in it, move together with them. Now you have an easy way on avoiding enemies, they also cannot freely move, or you will hit them with Opportunity Attack icon bg3Opportunity Attack.

The second option is to use it as a cover field. This is perfect for those situations where you want to take it slowly, there are no enemies that can see in the dark, and you might be overwhelmed by them otherwise. You can then stay in the Darkness icon bg3Darkness field and once your turn starts, move out, hit enemies with spells or weapons, and go back. The NPCs will have to make a choice - should they go inside and gain disadvatnage or stay outside and skip their turn

Darkness icon bg3Darkness comes with a plethora of caveats, so have this in mind when using:

  • Some enemies can see in Magical Darkness, so check their features in the explanation window
  • Other enemies can throw projectiles like Javelin icon bg3Javelin and hit you inside the field
  • Sometimes it can be buggy as hell and doesn't work at all.

Another cool thing is that you can use Darkness icon bg3Darkness strategically, with characters that cannot see inside of it. For example, enemies that are inside the field have Blinded icon bg3Blinded condition. Position your melee characters outside, so that enemies would have to attack with Disadvantage icon bg3Disadvantage. They might also try to run away, which would allow you to use Opportunity Attack icon bg3Opportunity Attack for an additional hit against them.

Piercing Damage

Synergetic Builds Enabler Description
Bhaalist Armour icon bg3Bhaalist Armour for the Aura Of Murder icon bg3Aura Of Murder For the late game, you can use Bhaalist Armour icon bg3Bhaalist Armour to apply easy piercing vulnerability - Aura Of Murder icon bg3Aura Of Murder. This is a very powerful buff that makes it easy to deal very high damage in Act 3. Use weapons like Shar's Spear of Evening icon bg3Shar's Spear of Evening, Nyrulna icon bg3Nyrulna, Vicious Shortbow icon bg3Vicious Shortbow etc. to get a huge damage boost.

Psychic Damage

Synergetic Builds Enabler Description
All of these builds have access to Shadow Blade icon bg3Shadow Blade spell, making this an extremely good synergy with our build.
Open Hand Monk Manifestation of Mind icon bg3Manifestation of Mind Open Hand Monk also can deal psychic damage, it's not as big as having full Shadow Blade icon bg3Shadow Blade, but still works well for a slight damage boost.

Starting the Game - Level 1

This section covers the creation screen and what would go into the best Races, Abilities, and Skills for the Feylock build. Some of these choices are impactful as you cannot respec them.

Origins and Characters

Origin Features Description
astarion icon bg3Astarion On top of already being a Rogue, in Act 3, Astarion can obtain the Vampire Ascendant icon passive feature bg3Vampire Ascendant​ buff, which gives a 1d10 necrotic damage boost on top of other useful features. Early game feature Bite icon action bg3Bite​ granting the Happy icon condition bg3Happy​ gives you a minor yet good boost to your gameplay.

Races

Picking a race provides various benefits - abilities, dialogue options, looks, etc. Specifically for the Feylock build, they will give important armor proficiencies or advantages on the melee damage dealer archetype.

If you are having difficulties making a choice, pick whatever you prefer in terms of looks or roleplay. "The perfect race pick" is important if you are into extreme min-maxing.
Race Features Description
drow bg3Drow
  • Drow Weapon Training icon passive feature bg3Drow Weapon Training​
  • Superior Darkvision icon passive feature bg3Superior Darkvision​
  • Fey Ancestry icon passive feature bg3Fey Ancestry
  • Dancing Lights icon action bg3Dancing Lights
All three choices offer you access to a free Darkness icon bg3Darkness spell. This is a really nice bonus that you can utilize to save your resources, especially if the party is leaning on this mechanic.
tiefling bg3Asmodeus Tiefling
  • Darkvision icon passive feature bg3Darkvision​
  • Hellish Resistance icon passive feature bg3Hellish Resistance​
half elf bg3Drow Half-Elf
  • Fey Ancestry icon passive feature bg3Fey Ancestry​
  • Darkvision icon passive feature bg3Darkvision​
  • Civil Militia icon passive feature bg3Civil Militia​
gnome bg3Deep Gnome
  • Gnome Cunning icon passive feature bg3Gnome Cunning​
  • Superior Darkvision icon passive feature bg3Superior Darkvision​
  • Stone Camouflage icon passive feature bg3Stone Camouflage​
The main attractiveness of Gnomes is that they have Gnome Cunning icon passive feature bg3Gnome Cunning, which will allow you to negate some of the Resonance Stone icon bg3Resonance Stone effects, thus improving your survivability.
dwarf bg3Dwarf Duergar
  • Dwarven Combat Training icon passive feature bg3Dwarven Combat Training​
  • Superior Darkvision icon passive feature bg3Superior Darkvision​
  • Dwarven Resilience icon passive feature bg3Dwarven Resilience​
  • Duergar Resilience icon passive feature bg3Duergar Resilience​
One of the best race picks overall. The Invisibility icon action bg3Invisibility​ action allows you to enter combat with the best possible position and always activate the Surprised icon bg3Surprised round extremely easy. 
Half-Elf Baldur's Gate 3Wood Half-Elf Comes with a solid movement speed boost that any melee build can utilize well in combat to reach enemies on the initial turn.
elf bg3Wood Elf
  • Elven Weapon Training icon passive feature bg3Elven Weapon Training​
  • Darkvision icon passive feature bg3Darkvision​
  • Fey AncestryFey Ancestry
  • Fleet of Foot - your movement speed is increased by 1.5m.

half orc bg3

Half Orc

  • Darkvision icon passive feature bg3Darkvision​
  • Relentless Endurance icon passive feature bg3Relentless Endurance​
  • Savage Attacks icon passive feature bg3Savage Attacks​
A perfect fighter race - can stand up instead of being Downed icon condition bg3Downed but most importantly gains additional rolls for critical hits from Savage Attacks icon passive feature bg3Savage Attacks​.
Githyanki Baldur's Gate 3Githyanki
  • Martial Prodigy icon passive feature bg3Martial Prodigy​
The race comes with all weapon proficiencies and early medium armor proficiency. Moreover, it gets some good actions like Misty Step icon action bg3Misty Step​ and Astral Knowledge icon action bg3Astral Knowledge.

Class

Overview
warlock Baldur's Gate 3Warlock
Features
ico_mini_spellSlot_warlock Baldur's Gate 3Warlock Spell Slots These spell slots can be used to cast spells and refill each Short Rest.

Cantrips

You can only take two, so here are my recommendations:

Cantrip Description
Booming Blade icon action bg3Booming Blade​ The new cantrip can be used with a normal attack without any cost. When enemies move while under its effect, they receive thunder damage. In later levels, it gives a direct damage boost. So no reason not to use it every turn.
Eldritch Blast icon action bg3Eldritch Blast​ The iconic warlock cantrip, which has good scaling with levels, gains unique invocations for further improvements. This is the go-to option for ranged warlock attacks.
Friends icon action bg3Friends​ This is a somewhat optional cantrip. It can be extremely useful in dialogue checks. However, be careful not to cancel it near the affected NPC, as they can start attacking you.

Subclass

Overview

warlock_archfey Baldur's Gate 3

The Archfey

Features
Fey Presence icon action bg3Fey Presence​​ Allows us to make enemies Charmed icon condition bg3Charmed​ or Frightened icon condition bg3Frightened​ giving us slight control over the battlefield.

Spells

There are multiple good spell picks, but for now, you can only take 2:

Spell Description
Hex icon action bg3Hex​ Good damage boosting option especially with your ranged Eldritch Blast icon action bg3Eldritch Blast. Adds a respectable amount of damage + it's a good surprise starting round tool.​
Hellish Rebuke icon action bg3Hellish Rebuke​ It allows you to indirectly attack during the enemy's turn, while you have a limited number of attacks. Sadly, it is useful for the first few levels.

Background

Backgrounds are mostly for role-playing, and you can pick whatever you prefer. 

Background Skills Description
Urchin Sleight of Hand
Stealth
Excellent pick for being effective in stealth and also disarming traps or pickpocketing.
Criminal Stealth
Deception
This is especially useful for the main character, as you will get proficiency in deception that helps with some dialogue options.
Charlatan Deception
Sleight of Hand
Makes pickpocketing, lockpicking, and trap disarmament easier. Moreover, comes with dialogue-based skill proficiency.

Abilities

BG3 Build Ability Points
Build ID: 20869

Skill proficiencies

Overall, the skills should be impacted by your roleplaying and background decisions. However, you would still want those that will give you the best benefits. My recommendations are to pick those at which you have a high ability modifier, and these are Charisma-related.

  • Deception
  • Intimidation
  • any other

Leveling Progression 2-12

Here is the detailed progression for the Feylock to get you started. You can use it as a guideline because early games can be daunting and overwhelming. Later on, once you get a feel for the class you can start picking your options

Levels 2-6

By this time, you should have landed on the Map icon bg3Ravaged beach already and started exploring the initial area. You might need 1 additional encounter if you did not obtain enough XP in the Nautiloid.

Recommended Exploration (Spoilers)

This part of the progression covers 3 main areas. They are important both from an exploration and experience perspective. This is a huge swath of content, so missing any of the regions can negatively impact the game experience if you especially enjoy finding all the places

Again, exploring them will give both awesome gear and a lot of experience, and of course, content with interesting quests.

For most of the builds, early levels are pretty simple, as there are minimal spell options and features that you can use. However, there are notable spikes at levels 5-6:

  • Extra Attack icon bg3Extra Attack
  • Level 3 spells
  • Major class and subclass features

With these, you will feel how the game combat opens up, and with correct preparations, you can start eliminating foes with minimal preparations.

Level 2 - 2 Warlock

Spells

Spells Description
Armour of Agathys icon action bg3Armour of Agathys​ It can be used before short rest if you have a free spell slot. It improves survivability and can inflict decent cold damage.

Eldritch Invocations

Invocation Description
Agonising Blast icon passive feature bg3Agonising Blast​ One of the most important invocations to make Eldritch Blast icon action bg3Eldritch Blast​ more powerful.
Repelling Blast icon passive feature bg3Repelling Blast​ If you are interested in improving the Eldritch Blast icon action bg3Eldritch Blast​ cantrip further, here is my pick. This can be used to push back enemies into chasms or into the Hunger of Hadar icon action bg3Hunger of Hadar.

Preparing Armour of Agathys and other Long Rest spells

So you can do some next-level precasting with Warlock, especially if you are getting ready for a big fight. For example, you can cast Armour of Agathys icon action bg3Armour of AgathysExpeditious Retreat icon action bg3Expeditious Retreat then use Short Rest to restore spell slots, and go into a fight with maximum preparation.

You can also take Minions of Chaos icon passive feature bg3Minions of Chaos​ at later levels and cast Conjure Elemental icon action bg3Conjure Elemental​. This minion stays until Long Rest, so it will also help with this setup. Your options depend on what you choose.

Level 3 - 3 Warlock

The first level 2 spells are unlocked. You also gain some nice features that will be useful later on.

Spells

Spell Description
Shadow Blade icon action bg3Shadow Blade​ Main weapon in the build that deals a lot of damage for level 3. It also scales with the spellslot upcast and psychic damage is rarely resistant, making it a very dangerous weapon.
Cloud of Daggers icon action bg3Cloud of Daggers​​ This spell can hit multiple targets, and it activates 2 times - on initial cast and the enemy's turn. It can destroy some early game fights when placed correctly.

Pact Boon

Boon Description
Pact of the Blade icon passive feature bg3Pact of the Blade​ Will allow us to make our Shadow Blade icon bg3Shadow Blade scale with charisma and we'll gain Deepened Pact icon passive feature bg3Deepened Pact,​ which gives an additional attack at level 5.

Using any melee Weapon - Bind Pact Weapon

What does the Bind Pact Weapon icon action bg3Bind Pact Weapon​ from Pact of the Blade icon passive feature bg3Pact of the Blade​ do? Well, its purpose is revealed at level 5 when you gain Deepened Pact icon passive feature bg3Deepened Pact​ for a Deepened Pact: Extra Attack icon condition bg3Deepened Pact: Extra Attack. It also allows your weapon to use fully charisma modifier to attacks instead of strength/dexterity at level 3.

Switching between melee and ranged

So Warlock is especially versatile in mid-game, and it's thanks to a few options that you have. First, you get access to Eldritch Blast icon action bg3Eldritch Blast,​ which is your go-to option for ranged attacks. This cantrip gets significant boosts with eldritch invocations:

  • Agonising Blast icon passive feature bg3Agonising Blast​
  • Repelling Blast icon passive feature bg3Repelling Blast​

Level 4 - 4 Warlock

Level 4 brings the first feat, it will be a huge improvement. Here you can select from a few choices, based on your playstyle and what kind of playthrough you are doing.

Feat Description
Savage Attacker icon passive feature bg3Savage Attacker​​ Allows to re-roll damage dice for melee weapons for a higher result. Very good with Shadow Blade icon bg3Shadow Blade.
Ability Improvement - +2 Charisma

Another option is improving your Charisma, which is beneficial for your attacks, Eldritch Blast icon action bg3Eldritch Blast​ and some gear properties.

Cantrips

You can pick only one

Cantrip Description
Minor Illusion icon action bg3Minor Illusion​ A pretty good cantrip that you can use to lure enemies to NPCs. Even before combat, you can perfectly align foes into one spot and land Cloud of Daggers icon action bg3Cloud of Daggers.

Using Minor Illusion

On the other hand, you can also use something like Minor Illusion icon action bg3Minor Illusion​ to pull enemies together, changing their vision cones, and attacking with the same spell but hitting all of them. This is a very powerful cantrip that can be overlooked.

First, it does not break Invisibility or stealth (unless you get seen). Second, enemies, when not in combat, will chase it, meaning they will change their vision direction. Third, on most occasions, they will come closer to investigate the illusion.

This creates various opportunities like landing a powerful Area of Effect spell from a caster or scrolls, or hitting with wide attacks.

Spells

Spell Description
Darkness icon action bg3Darkness​ This would be a perfect time to pick this spell, at least to try it out. You can now set up dark areas and gain an Advantage icon bg3Advantage in combat

Level 5 - 5 Warlock

Level 5 plays a pivotal role in most of the builds. You will get access to level 3 spells, which are very powerful and start unlocking the class's potential.

Feature Description
Deepened Pact icon passive feature bg3Deepened Pact​ This is the improved Pact of the Blade icon passive feature bg3Pact of the Blade​ version, which gives extra attack, highly improving your damage potential.

Spells

Spell Description
Hunger of Hadar icon action bg3Hunger of Hadar​ This is one of the strongest control spells in the game. It covers a large area and makes enemies blind. Moreover, it inflicts damage per turn and slows them down. This is an extremely strong setup that makes multiple encounters a cakewalk.

Eldritch Invocations

Invocation Description
Devil's Sight icon passive feature bg3Devil's Sight​ This is one of the most useful passives in the game. It helps with general dark areas. However, it also plays well with dark environment like from: Darkness icon action bg3Darkness​,  Arrow of Darkness icon bg3Arrow of Darkness etc.

Replace Spell

Remove Spell Add Spell Description
Hellish Rebuke icon action bg3Hellish Rebuke​ Plant Growth icon action bg3Plant Growth​​ This is an extremely powerful spell as its a NON-concentration big AoE slowing zone that will work perfectly with your Hunger of Hadar icon bg3Hunger of Hadar or other ally spells. It being non-concentration is a huge deal.

Darkness with Devil's Sight

Using Darkness icon action bg3Darkness​ spells with a Warlock is one of the ways to guarantee success. You will, of course, need Devil's Sight icon passive feature bg3Devil's Sight​ Eldritch Invocation. Once you have it, you can stay inside and either attack with Eldritch Blast icon action bg3Eldritch Blast, cast spells, or wait for enemies to come and bash them with Advantage icon bg3Advantage, while they are blind.

Sadly, this doesn't work perfectly. Some enemies can throw weapons outside of the fog without penalties, easily breaking your concentration. So be mindful of that, and try to force enemies into the Darkness icon action bg3Darkness​ so that they would be at a Disadvantage icon bg3Disadvantage and Blinded icon condition bg3Blinded.

Level 6 - 5 Warlock 1 Rogue Multiclass

You can keep playing Archfey Warlock until level 7; That way you'll keep level 4 spell slots and spells, then at level 8 respec into 5 Warlock -> 3 Assassin then keep leveling Warlock. 

So, now in the level-up screen, you can start multiclassing. We're dipping into Rogue for:

  • Sneak Attack icon bg3Sneak Attack
  • Expertise icon bg3Expertise
  • Cunning actions
  • Assassin subclass features

Here's a guide how to multiclass:

Class

Overview
rogue Baldur's Gate 3Rogue
Features
​Sneak Attack (Melee) icon action bg3Sneak Attack (Melee) This can be exploited with weapon attacks for an additional 1d6 damage once per turn. Be sure to have an Advantage icon bg3Advantage or attack using Hide icon action bg3Hide. Later, more damage rolls are added.
Sneak Attack (Ranged) icon action bg3Sneak Attack (Ranged)​ This can be exploited with weapon attacks for an additional 1d6 damage once per turn. Be sure to have an Advantage icon bg3Advantage or attack from hiding. Later, more damage rolls are added.

Skill proficiencies

Any pick is okay although I recommend:

  • Stealth - perfect pick for this build.
  • Any Charisma related skill 
  • Sleight of Hand - if you need a dedicated lockpicker or trap disarmer.

Correctly using Sneak Attack

So the main feature of Rogue is Sneak Attack icon action bg3Sneak Attack​​ which is enabled from the first level. In the early game, this is an excellent source of additional damage, especially if you land a critical hit. However, it does get phased out in the latter part of the game.

The main thing to know is that you can use the Reaction window to enable it on hit. This means that you can use your offhand bonus action attack to activate it, instead of using the action itself on the main hand.

Enlarged view

So with this, you will be asked if you want the additional Sneak Attack damage when using normal attacks. However, this can lead to easily miss the activation and it is an important damage source on each turn. So here are the ways that enable the sneak attack:

  • You have to use a Finesse weapon - dagger, shortsword, or ranged weapons like bows.
  • Have an Advantage icon bg3Advantage like Prone icon condition bg3Prone​, being invisible, being hidden, etc.
  • Having an ally close to the enemy circumvents the Advantage icon bg3Advantage requirement.

Levels 7-10

Generally, this covers the Act 2 part of the game. This unlocks items that give a slight boost to a few builds, and you uncover a really interesting part of the story.

Level 7 - 5 Warlock 2 Rogue

This level does not give any flashy moves, however, it unlocks cunning actions. These are similar to normal actions but instead of using Action Points, use Bonus actions. So in the same turn, you can attack and use them:

Action Description
Cunning Action: Hide icon action bg3Cunning Action: Hide​ Hide from enemies by succeeding Stealth checks. Stick to the dark and avoid enemy sightlines. Attacking or casting a spell will reveal your location. Probably the most important. Now you can start sneaking using Bonus action and then use Sneak Attack at the same turn
Cunning Action: Dash icon action bg3Cunning Action: Dash​ Cover more distance this turn: double your movement speed.
Cunning Action: Disengage icon action bg3Cunning Action: Disengage​ Retreat safely: moving won't provoke Opportunity Attacks.

Level 8 - 5 Warlock 3 Rogue

Overview
rogue_assassin Baldur's Gate 3Assassin
Features
Assassinate: InitiativeAssassinate: Initiative You are deadliest against unprepared enemies. In combat, you have an Advantage icon bg3Advantage on Attack Rolls against creatures that havenβ€˜t taken a turn yet.
Assassinate: AmbushAssassinate: Ambush Any successful Attack Roll against a Surprised creature is a Critical Hit.
Assassin's AlacrityAssassin's Alacrity Quick as an alley cat in a rain-dark city, you immediately restore your action and bonus action at the start of combat.

From this point we keep leveling Warlock until level 12. 

Stealth Basics

Stealth is used to remain undetected while using Hide icon action bg3Hide​/Cunning Action: Hide icon action bg3Cunning Action: Hide​ within the line of sight of non-allied creatures. If a hiding character enters a non-allied creature's line of sight and is:

  • In a Clear Area icon bg3Clear Area or within melee range, they are spotted immediately, without a Stealth check.
  • InLightly Obscured icon bg3Lightly Obscured, a Stealth check is made every turn, or every 6 seconds outside turn-based mode. The DC is the other creature's passive Perception
  • Heavily Obscured icon bg3Heavily Obscured a Stealth check is not made.

Many creatures have a hidden Darkvision icon bg3Darkvision passive, and in this range it will be treated as below:

  • Lightly Obscured icon bg3Lightly Obscured creatures count as being in a Clear Area icon bg3Clear Area instead.
  • Heavily Obscured icon bg3Heavily Obscured creatures count as being Lightly Obscured icon bg3Lightly Obscured instead.

For more information you can check the stealth guide and INSPECT YOUR ENEMIES !

Level 9 - Warlock 6

The level unlocks some nice features:

Feature Description
Misty Escape icon action bg3Misty Escape​ Upon taking damage you can teleport to a safe spot and gain Invisible icon condition bg3Invisible​ condition. Be careful as it may break the spell you're using your Concentration icon bg3Concentration on AND it recharges on short rest so use it smart.

Spells

Spells Description
Counterspell icon action bg3Counterspell​​ This is an extremely powerful spell that can be used if you see that the enemy is casting a deadly spell. It can outright save your runs if you mess something up or rolls are against you.

Level 10 - 7 Warlock

Spells

Spells Description
Greater Invisibility icon action bg3Greater Invisibility​ Great spell that will work perfectly with our Assassin features and overall boost our combat flow due to how we can attack as long as we pass a Stealth check.

Eldritch Invocations

Invocations Description
One with Shadows icon action bg3One with Shadows​​ Good spell that will work very well with your Darkness icon action bg3Darkness​, Arrow of Darkness icon bg3Arrow of Darkness, Shar's Spear of Evening icon bg3Shar's Spear of Evening and many other effects. The invisibility also doesn't break if you use Half-Illithid fly ability.

How does Greater Invisibility work ?

The Stealth check difficulty for this spell starts at 15 and increases with the number of successes, with the exact scaling determined by difficulty. What does it mean ?

Below Honour (Tactician - Balanced - Explorer) it's calculated as : DC=15+(number of previous successful Stealth checks)

On Honour mode difficulty it's calculated as : DC=15+(number of previous successful Stealth checks)^2

This means that this strategy on Honour mode will be nerfed but still able to work. To our assisstance comes the Darkness icon action bg3Darkness​ strategy as it works the same both in Honour and below it. Thanks to Rogue's Cunning Action: Hide icon bg3Cunning Action: Hide we can utilize it easily.

Levels 11-12

This is where you will spend most of the time in Act 3. There will be an immense amount of content, and you can finish your builds and unlock extremely powerful gear.

Level 11 - 8 Warlock

The main highlight of this level is the additional feat.

Spells

Here are some relevant spell recommendations:

Spells Description
Hold Person icon action bg3Hold Person​ It can be extremely useful if you plan on using Band of the Mystic Scoundrel icon bg3Band of the Mystic Scoundrel and/or Arcane Acuity icon condition bg3Arcane Acuity​ gear. This is an easy way to guarantee critical hits.

Feat

Feat Description
Ability Improvement - +2 Charisma Another option is improving your Charisma, which is beneficial for your attacks, Eldritch Blast icon action bg3Eldritch Blast​ and some gear properties.
Savage Attacker icon passive feature bg3Savage Attacker​​ Allows to re-roll damage dice for melee weapons for a higher result.

Level 12 - 9 Warlock

Level 5 spell slots are unlocked with some additional invocations:

Spells

Spells Description
Hold Monster icon action bg3Hold Monster​ Hold Monster​ is  a counterpart to Hold Person icon action bg3Hold Person​ but as the name suggests - it works on monsters.

Eldritch Invocations

For now, I think the build has everything covered. So feel free to pick anything of interest:

Invocations Description
Beguiling Influence icon passive feature bg3Beguiling Influence​

Additional proficiencies for charisma dialogue checks, my personal choice.

Equipment Recommendations

Here are some recommendations on how to follow the gear picks:

  1. I recommend checking the Item Checklists or Interactive Map, depending on which is easier to use for you. This will help you track which items and when you should pick them.
  2. I mention Stat Sticks in caster and ranged builds. These are items that you do not use directly (like Club of Hill Giant Strength icon bg3Club of Hill Giant Strength, Knife of the Undermountain King icon bg3Knife of the Undermountain King, The Dead Shot icon bg3The Dead Shot, etc.), but their bonuses still apply to other weapon attacks or actions.
  3. If an item is taken by another character, use the one with lower priority or even those from previous acts. If you want to have the best items for all builds, this will require planning, which is not for everyone.

Act 1

This covers the earliest part of the game, which generally spans Map icon bg3Nautiloid, Map icon bg3Wilderness, Map icon bg3Underdark and the semi Act 1, or to be precise Act 1.5 - Map icon bg3Rosymorn Monastery Trial.

BG3 Build Equipment Embed
Build ID: 20869
Mode: Full Equipment
Sets: Act 1, Act 1.5

Act 2

The main goal for this act is to obtain the Resonance Stone icon bg3Resonance Stone, which is available pretty late. So don't be in a hurry and enjoy all the stuff that you can encounter here.

BG3 Build Equipment Embed
Build ID: 20869
Mode: Full Equipment
Sets: Act 2

Act 3 - Final Build setup

This is where you will unlock the strongest weapons and armors for most of the builds. It is split into two major parts, starting with Map icon bg3Rivington and later reaching the huge area - Map icon bg3Lower City itself.

BG3 Build Equipment Embed
Build ID: 20869
Mode: Full Equipment
Sets: Act 3

Build Mechanics

In this section, I would like to dive deep into how to play the Feylock. This will help you utilize it to the fullest and correctly use various actions and spells throughout the game.

Important Mechanics and Combos

Let's go through key mechanics and tips on how to effectively use the build.

How do crits, vulnerability and resistances work

Since we're dipping into Assassin Rogue who guarantees our crits on Surprised icon condition bg3Surprised​ and we get our 2d6 Sneak Attack icon bg3Sneak Attack we might expand how those work. Throughout the game you can see a lot of items that can enhance your damage by d4, d6, d8 etc. and items that increase it by flat amount like Caustic Band icon bg3Caustic Band. Critical strikes make it so grand majority of your damage from items that increase it by some kind of dice (like d6) gets doubled, while flat numbers stay the same (1d6 turns into 2d6 while 2 stays as 2).

This means that thanks to guaranteed Assassin crits a lot of our damage enhancing actions, effects and items will have a great power up. You are able to check the math chart in the Maximizing section down below.

Vulnerability is also another mechanic that enhances our damage AND stacks with crits; it makes it so a target takes twice the amount of damage from a certain damage type. Let's theorize our enemy has a Vulnerability to fire and acid and we crit them while using Helldusk Gloves icon bg3Helldusk Gloves and Caustic Band icon bg3Caustic Band.

The Helldusk Gloves icon bg3Helldusk Gloves deal an initial damage of 1d6 which turns into -> 2d6 on crit which also turns into -> 4d6 Vulnerability

The Caustic Band icon bg3Caustic Band deals an initial damage of 2 acid -> which turns into 2 on crit which turns into -> 4 damage from Vulnerability

You can check if a target is Vulnerable (red arrow), Resistant (white/blue arrow) or Immune (yellow outline) by inspecting an enemy.

vuln

VulnerabilityMeans that the target takes 100% more damage from a given damage type. Making an already resistant target vulnerable to a certain damage type will make them take normal damage instead.

Resistance: White arrow means that the target takes reduced Non-Magical damage by 50%. Blue arrow indicates that the target takes reduced Magical damage by 50%.

Immunity: Means that the target is completely immune to the given damage type.

Elemental infusion ring

As mentioned in the Act 1.5 Equipment section, Ring of Elemental Infusion icon bg3Ring of Elemental Infusion works wonky with Booming Blade icon action bg3Booming Blade (BB)​. To properly activate the ring with BB you need the Drakethroat Glaive icon bg3Drakethroat Glaive from Act 2 (map below) or the Elemental Weapon icon action bg3Elemental Weapon spell. BB isn't properly coded as a Thunder spell so you need to imbue your weapon with any element to activate it without using a dedicated cantrip or a spell. This ring's damage can also apply multiple times as it is a Damage Rider.​ Map icon bg3Drakethroat Glaive

How to surprise easily

Rules of how to make a target Surprised icon condition bg3Surprised​ in most instances is:

  1. Use Cunning Action: Hide icon action bg3Cunning Action: Hide​ or Hide icon action bg3Hide​ to put the entire party into stealth, including pets.
  2. The ambusher must initiate combat from within line of sight of the enemy.
  3. You mustn't kill an enemy if you want to surprise everyone, because it wont surprise other foes unless it's from Greater Invisibility icon bg3Greater Invisibility or Darkness icon action bg3Darkness​ and similar sources.
  4. The most reliable way to surprise an enemy is to become Invisible icon condition bg3Invisible​ and attack them, this invisibility can come from any source. The easiest one is the Duergar's level 5 Invisibility icon action bg3Invisibility​ or Invisibility icon action bg3Invisibility​ from Shovel Scroll of Summon Quasit icon bg3Scroll of Summon Quasit
  5. If the attack type (melee, ranged, spell) works, it does not matter whether it hits or misses.

Shovel can be found here in Act 1.

Invisibility options

So this build does shine when using Invisibility. First, it allows starting with a Surprise round, giving you 1 turn Advantage icon bg3Advantage which you can use to either kill or weaken enemies. Second, there are multiple ways of getting it:

  • Potion of Invisibility icon bg3Potion of Invisibility - I think the most obvious one. If you can pickpocket or have plenty of gold, this option can be cheesy but effective.
  • Invisibility icon action bg3Invisibility​ - can be cast by various casters or activated via items.
  • The Deathstalker Mantle icon bg3The Deathstalker Mantle - one of the key items that you obtain during the Dark Origin playthrough. You enter invisibility after each kill.
  • Greater Invisibility icon action bg3Greater Invisibility​ - this is the most lucrative option. However, to use it you will want both proficiency and expertise in stealth, high dexterity, and stealth Advantage icon bg3Advantage. With this effect, you can outright clean enemies without them even understanding what is happening. 

Arcane acuity

So the core aspect is being able to build your Arcane Acuity icon condition bg3Arcane Acuity​ both during your turn and outside of it to use control spells or Fey features. It will greatly increase your spell potency. Quickly stacking Arcane Acuity icon bg3Arcane Acuity will make your control spells like Hold Monster icon bg3Hold Monster or Hold Person icon action bg3Hold Person​ almost guaranteed to hit. Having Cunning Action: Hide icon action bg3Cunning Action: Hide​ with Devil's Sight icon passive feature bg3Devil's Sight​ and Darkness icon action bg3Darkness​ or Greater Invisibility icon action bg3Greater Invisibility​ will allow us to stack acuity as long as we succeed the stealth checks; This can even lead up to stacking the maximum amount of 10 stacks of Arcane Acuity icon bg3Arcane Acuity.

Act 2 - Githzerai Mind Barrier

To have good resistances for some time against Intelligence checks, you can do a special mechanic late in Act 2 (illithid colony). This requires you to finish a puzzle and find a specific mind. First, go and complete the puzzle:

illithid colony puzzle map bg3Once the doors are unlocked, go inside and pick up the Waking Mind:

waking mind bg3

Now, go back to the interface and place the mind. After that, you will be able to get the Githzerai Mind Barrier effect.

mind inerface insert panel bg3

This is a great buff that will improve your saving throws, giving an Advantage icon bg3Advantage on Intelligence. This will be extremely valuable in the upcoming fight. Sadly, it will disappear if you die, so try to avoid that.

Combat Tactics and Rotation

Γ—
β€ΉLv 1-4β€ΊΓ—
β€ΉLv 5-10β€ΊΓ—
β€ΉLv 11-12β€ΊΓ—
+ Add tab
  • lways Bind Hexed Weapon icon action bg3Bind Hexed Weapon​ after a long rest.
  • Your early DC spells will have low hit chance, always use them around 65% and above.
  • Use your Fey Presence icon bg3Fey Presence in groups as it has a pretty respectable range.
  • When melee attacking, always first hit with Booming Blade icon action bg3Booming Blade. This can be a source of extra damage and activate items like the Diadem of Arcane Synergy icon bg3Diadem of Arcane Synergy.
  • Use Eldritch Blast icon action bg3Eldritch Blast​ when you cannot reach your foe.
  • Cloud of Daggers icon action bg3Cloud of Daggers​ is excellent early game, multi-target foe. There are encounters like Gnolls, Goblins, where enemies are stuck together or need to pass through a passway and get damaged.
  • Shadow Blade icon action bg3Shadow Blade has a lot of early damage and an easy way to get Advantage icon bg3Advantage. Don't forget to use Bind Hexed Weapon icon action bg3Bind Hexed Weapon​ for extra bonuses and Charisma scaling
  • Use Darkness icon action bg3Darkness​ + Devil's Sight icon passive feature bg3Devil's Sight​ if you have it for some difficult combat encounters like Githyanki's or Goblin Camp.
  • If you pick Friends icon action bg3Friends,​ avoid cancelling it close to the target NPC, as they may attack you.
  • Hunger of Hadar icon action bg3Hunger of Hadar​ is perfect for breaking large groups of enemies. While in the fog, use Eldritch Blast icon action bg3Eldritch Blast​ to push enemies back in with Repelling Blast icon passive feature bg3Repelling Blast. It's also exceptional with Plant Growth icon bg3Plant Growth
  • Plant Growth icon bg3Plant Growth isn't a Concentration icon bg3Concentration spell so remember you can use it even with Greater Invisibility icon bg3Greater Invisibility
  • Your Misty Escape icon bg3Misty Escape is once per short rest and it may break your spell Concentration icon bg3Concentration so use it very smart.
  • If it's possible and you see an encounter incoming, Minor Illusion icon bg3Minor Illusion is a very powerful option to lure enemies into one place.
  • Remember about using Booming Blade icon bg3Booming Blade and Sneak Attack icon bg3Sneak Attack as you can use both. Just remember to check Sneak Attack icon bg3Sneak Attack in the reaction tab in-game.
  • Your out of combat potency can quickly stack Arcane Acuity icon bg3Arcane Acuity 
  • Approach the combat area alone in stealth or much better invisible. attack the first enemy, and initiate the combat then you can then let your allies join in combat as all of you get a free round to attack.
  • Use your cunning actions so your advantage as they allow a lot of various plays like chasing an enemy, running away from archers or melees, hiding and breaking enemy AI and many more.
  • Assassinate: Initiative icon passive feature bg3Assassinate: Initiative gives easy Advantage icon bg3Advantage versus creatures that haven't had their turn yet and given how high your initiative can be or using Assassin's Alacrity icon passive feature bg3Assassin's Alacrity​ well gives you easy hit chance and opportunity to use Sneak Attack icon action bg3Sneak Attack​ with our Shadow Blade icon bg3Shadow Blade
  • Use your Greater Invisibility icon bg3Greater Invisibility with your high potential Stealth score to eliminate enemies before the combat even starts, this combined with Shadow Blade icon bg3Shadow Blade and Resonance Stone icon bg3Resonance Stone will be able to even oneshot some foes.
  • If using Strange Conduit Ring icon bg3Strange Conduit Ring apply Concentration spells like Expeditious Retreat icon action bg3Expeditious Retreat​, Hex icon action bg3Hex​ or Magic Weapon icon bg3Magic Weapon
  • Try to enter combat with Invisibility, to activate Surprise Round. If you can, use Greater Invisibility icon action bg3Greater Invisibility, to inflict more than one hit it will also quickly stack Arcane Acuity icon bg3Arcane Acuity
  • Use guaranteed crit effects to your advantage, Craterflesh Gloves icon bg3Craterflesh Gloves, Vicious Shortbow icon bg3Vicious Shortbow, Shadow Blade icon bg3Shadow Blade will absolutely tear through enemy hp bars
  • Always use Minor Illusion icon bg3Minor Illusion or if you go illithid, Black Hole icon bg3Black Hole to eliminate foes then be able to follow it up with your hard CC spells like Hunger of Hadar icon bg3Hunger of Hadar, Plant Growth icon bg3Plant Growth and so on.
  • Remember about using Booming Blade icon bg3Booming Blade and Sneak Attack icon bg3Sneak Attack as you can use both. Just remember to check Sneak Attack icon bg3Sneak Attack in the reaction tab in-game. This with guaranteed crits and Resonance Stone icon bg3Resonance Stone/Bhaalist Armour icon bg3Bhaalist Armour gives us a free 4d8 + 4d6 damage.
  • Be careful of Resonance Stone icon bg3Resonance Stone effects. If you fight Illithid enemies, 90% of them will use psychic damage and could be lethal to you and your party.
  • Try to maintain the initiative, Resonance Stone icon bg3Resonance Stone will apply a Disadvantage icon bg3Disadvantage on mental rolls, so either have someone Counterspell icon action bg3Counterspell​ or kill them before they can cast a spell.

Maximizing the Build 

This section I would like to dedicate to various optimizations that you can do to further empower your build. Various things like Illithid Powers, consumables can make the build from powerful to totally overpowered, trivializing the hardest game encounters

Assassin features and damage effects

I will be using the equipment from Act 3 section. and best possible optimization of the build we can achieve (like 22 Charisma);

All of these effects combined you'll be able to deal over 199 damage with just 1 swing. Excluding effects that need refreshing like Sneak Attack icon bg3Sneak Attack or Broodmother's Revenge icon bg3Broodmother's Revenge or that require you to consume Mind Flayer Parasite Specimen icon bg3Mind Flayer Parasite Specimen you'll still be able to deal hundreds of damage.

Maximizing Ability Scores

Ability Scores play an important role both in terms of how your attacks and spells land. Moreover, these can help to also reach extremely high skill rolls needed for a few checks.

  1. Act 1 - Auntie Ethel's Hair icon bg3Auntie Ethel's Hair - you can get +1 Charisma if you pick this choice.
  2. Feat - Ability Improvement - +2 Charisma.
  3. Act 3 - Mirror of Loss - pick +2 Charisma.
  4. Act 3 - Mirror of Loss - Patriar's Memory, additional +1 Charisma, to counteract Auntie Ethel's Hair icon bg3Auntie Ethel's Hair if it was skipped in Act 1

Illithid Powers

This special mechanic in Baldur's Gate 3 allows you to consume tadpoles and unlock special Illithid Powers.

At first, you can only use the base powers. As you move to Act 3, you will be able to unlock the outer ring powers.

Illithid Power Type Description
Favourable Beginnings icon passive feature bg3Favourable Beginnings Base Beneficial power to take as it does not have any costs and provides only benefits on the first hits.
Luck of the Far Realms icon passive feature bg3Luck of the Far Realms​ Base Guarantees a critical hit, use it on important targets that you want to make sure are killed.
Psionic Overload icon action bg3Psionic Overload​ Base As this is Psychic damage, you will double it to 2d4 thanks to Resonance Stone.
Psionic Backlash icon action bg3Psionic Backlash​ Base A decent use for reaction to deal some bonus psychic damage.
Cull the Weak icon passive feature bg3Cull the Weak​ Base Can help to kill an enemy faster if it is left with a few HP.
Illithid Expertise icon passive feature bg3Illithid Expertise​ Elite Especially helpful since you're a Charisma class, boosting your proficiencies even more.
Freecast icon passive feature bg3Freecast​ Elite Remove the cost of spell slots or charges.
Black Hole icon action bg3Black Hole​ Elite Very powerful spell that can be used to pull enemies together. You can then follow up with area-of-effect spells or attacks. In general, it is a very effective action in the hands of any character.
Psionic Dominance icon passive feature bg3Psionic Dominance​ Elite Can be used to save yourself from a deadly spell. This is especially relevant as you will have a Disadvantage icon bg3Disadvantage on mental saving throws.

Potions, Elixirs and Consumables

Let's take a look at what consumables you can use to further empower the build.

Potions

These are general consumables, and most of them are activated for a few turns. Potions are separate from Elixirs and can be active together.

Consumable Description
Potion of Speed icon bg3Potion of Speed You can chug this potion before combat, or during combat using a bonus action. It gives another action point that gives an additional attack or one more spell cast. Sadly, its duration is only 3 turns.
Oil of Accuracy icon bg3Oil of Accuracy Can be used to enhance your hit chance on a weapon. The +2 bonus is pretty significant,
Diluted Oil of Sharpness icon bg3Diluted Oil of Sharpness Gives a bonus attack roll and damage. It is a good coating if you can apply it before combat to improve hit chances and get a slight damage boost.
Potion of Animal Speaking icon bg3Potion of Animal Speaking Although not something powerful, it is worth stocking up and saving a spell slot.
Potion of Invisibility icon bg3Potion of Invisibility Can be used to get a perfect position before the encounter starts. It can also help trigger Surprise rounds.
Terazul icon bg3Terazul Another buff granting Hastened icon bg3Hastened that also stacks with Potion of Speed icon bg3Potion of Speed although be careful as this one lasts 2 turns BUT it doesn't cost anything to consume.
Potion of Angelic Reprieve icon bg3Potion of Angelic Reprieve Due to this potion granting the effect of Short Rest it will also reset your used spell slots, very big value.

Elixirs

Unfortunately, only one Elixir can be active at a time. However, the good thing is that they last until a long rest, making them very useful and economical.

Be sure to activate them before combat, as otherwise, you will need to use a Bonus Action.

Remember to activate one elixir after each Long Rest. These are found plentifully throughout the game, so don't save them too much.
Consumable Description
Elixir of Bloodlust icon bg3Elixir of Bloodlust As you will be able to easily kill at least the weakest foe, this ensures additional attacks per turn. This is one of the most powerful options that you can use for the Feylock build.
Elixir of Vigilance icon bg3Elixir of Vigilance For some encounters, you will want to go first. This elixir will ensure that it overcomes even surprise mechanics.
Elixir of Hill Giant Strength icon bg3Elixir of Hill Giant Strength Sets strength value to 21 until the Long Rest. I recommend this elixir in the early game if you want to throw enemies off to chasms easier.

Useful Buffs

  • Auntie Ethel's Hair icon bg3Auntie Ethel's Hair - Grants you permanent +1 to a stat of your choice. Granted by haggling with Map icon bg3Auntie Ethel.
  • Volo's Ersatz Eye icon passive feature bg3Volo's Ersatz Eye​ grants you permanent See Invisibility icon condition bg3See Invisibility​ effect in exchange for one of your eyes. It's a permanent cosmetic change and it's mutually exclusive with Paid the Price icon condition bg3Paid the Price​. It's obtained from Map icon bg3Volo.
  • Awakened icon passive feature bg3Awakened​ - let's you use your Illithid powers as a bonus action. You can obtain it from the Map icon bg3Zaith'isk machine.
  • Resonance Stone icon bg3Resonance Stone can be found in Map icon bg3The Mindflayer Colony effectively boosting your Psychic damage for the prize of debuff on mental Saving Throws but also your vulnerability to Psychic damage.
  • Sweet Stone Features icon condition bg3Sweet Stone Features - Grants you the Bless icon action bg3Bless​ effect. Pay 5000 gold to Map icon bg3Boney in the Map icon bg3Circus of The Last Days for Stoney to construct a statue of the player character or another party member​.
  • Anointed in Splendour  icon condition bg3Anointed in Splendour β€‹ - Grants +2 to all Saving Throws, offer enough gold to one of the deities in Map icon bg3Stormshore Tabernacle. Gold needed scales with the difficulty level of the game and your character level.
  • Partial Ceremorphosis icon passive feature bg3Partial Ceremorphosis​ - Allows you to become Half Illithid granting you stronger Tadpole powers in exchange for your looks.
  • Map icon bg3Mirror of Loss can grant you and your companions +2 to any stat permanently. Can also grant additional +1 to Charisma offering it +3 instead of regular +2. I recommend looking into Mirror of Loss guide.

Conclusion and Credits

This Archfey warlock build heavily focuses on easy stealth and big damage damage. Your various invisibility and forms of control through fear and charm will leave enemies vulnerable. Thanks to Shadow Blade icon action bg3Shadow Blade​ and maximizes Charisma as a single stat, both for weapon attacks and spellcasting you'll have a good party face and damage dealer. For any questions I heavily urge to ask. I hope you enjoyed reading it.

Your turn:
Like, Dislike, comment, or share!
0
Enjoy what you read? We are passionate about creating exceptional and high-quality gaming builds and guides. If you find value in the work that we do here and want to see more, I would appreciate a contribution on Patreon.

- Site Owner: Zanuffas
Buy Me a Coffee at ko-fi.com

Join the Discussion

0 comments

No comments yet.

Be the first one to leave a comment!

gamestegy-discord-invite-link