
Healer Build - Spirit Guardian - Dragon Age: Origins (DAO)
Contents
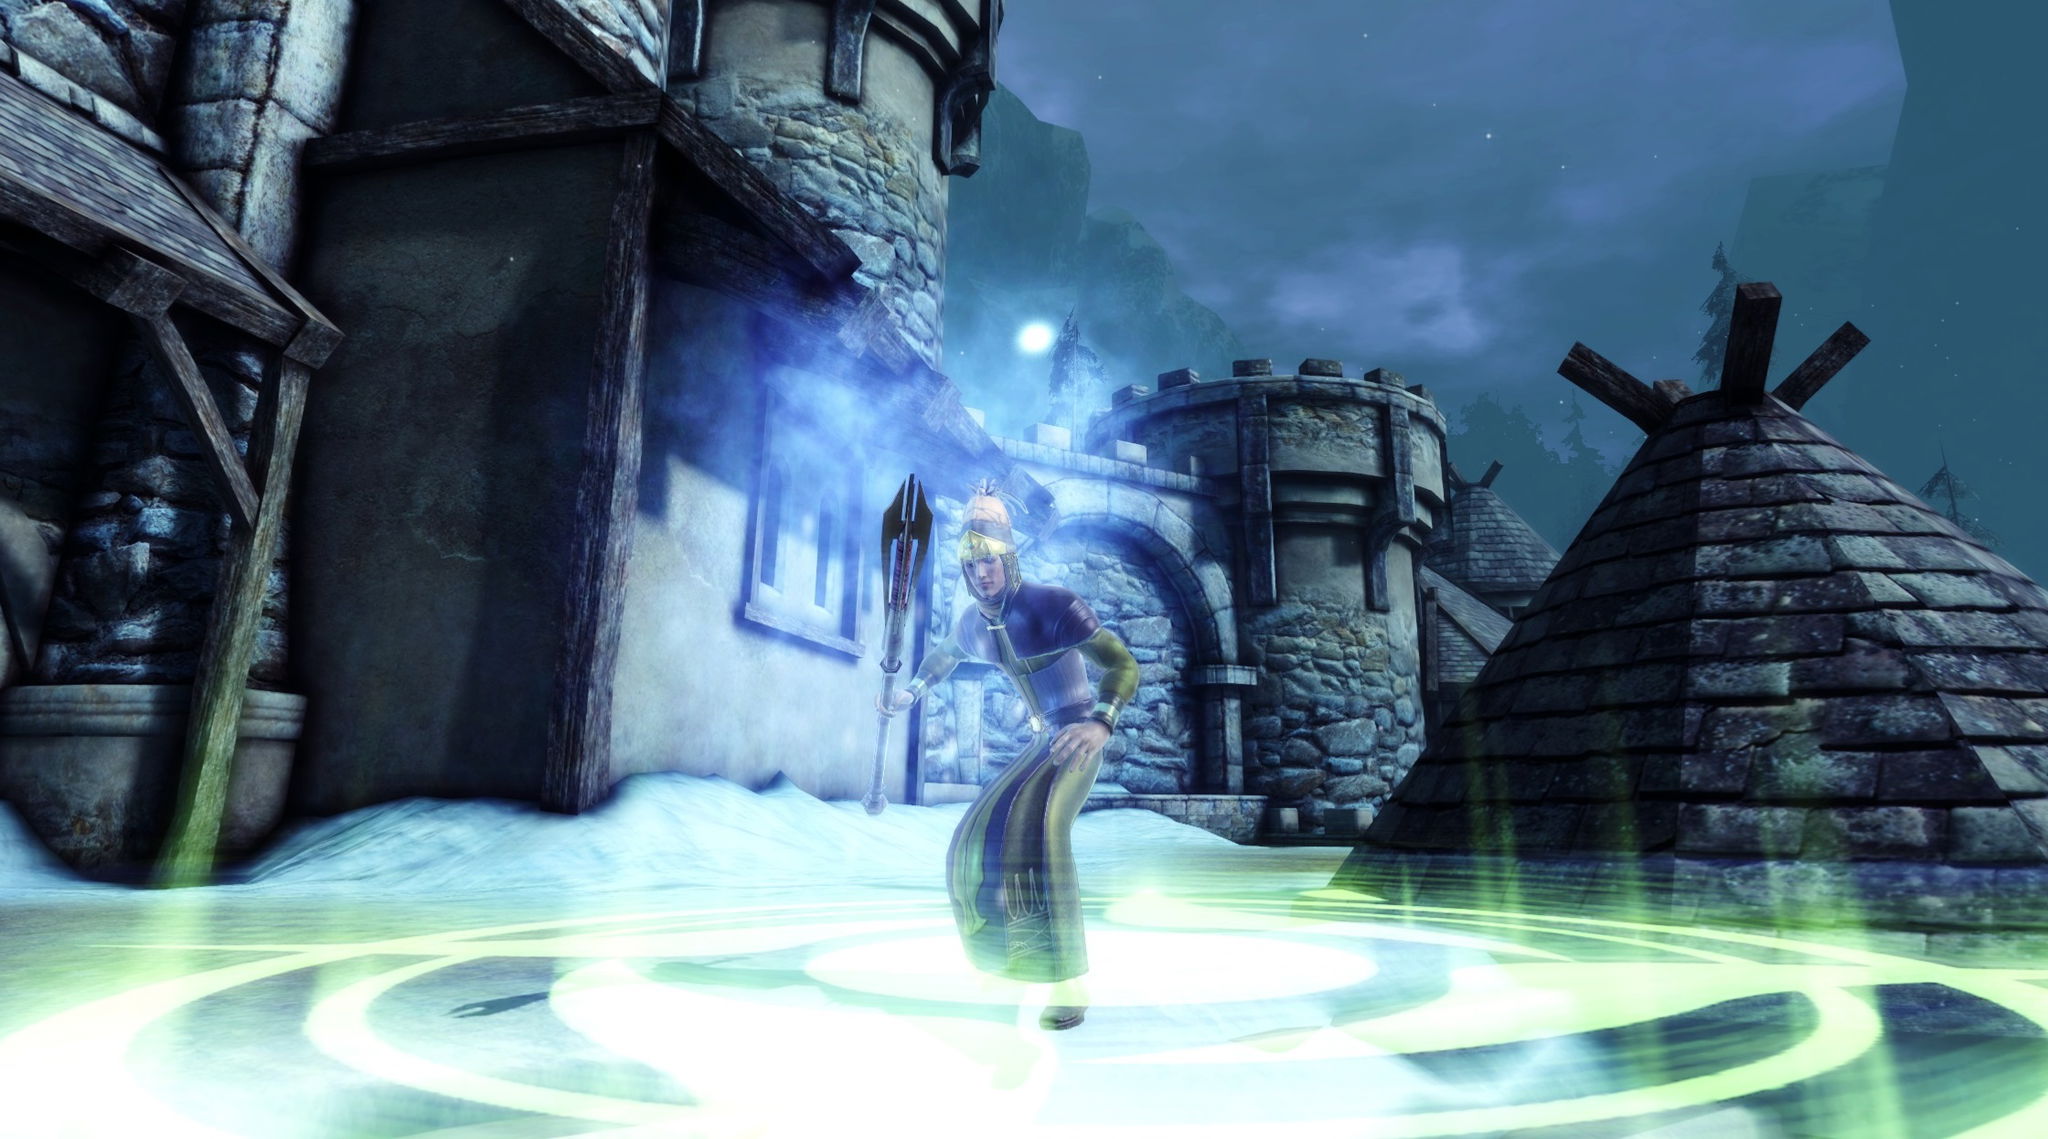
Healer Build - Spirit Guardian
So the build idea is to allow the main character to play more of a support role, that mainly concentrates on ensuring that your AI companions are ready for combat and are protected against dying.
This does not mean that you will just heal. There will be plenty of spells to buff allies - Heroic Offense, Haste, etc. This will improve their combat stats and give you more control if they have difficulties. Moreover, you will have some control spells to ensure that enemies get paralyzed or weakened if the need arises.
This, of course, will require that your companions would do the majority of heavy lifting in terms of damage. So be sure to check the companion builds on the website to optimize them.
This build can become a bit bland. I did not enjoy using it as I prefer doing some damage or being more in control of combat output. Still, some people like this, and if you are one of those continue reading!
Character Creation
If you are into optimizing there are a few things that you can do to optimize your build a bit.
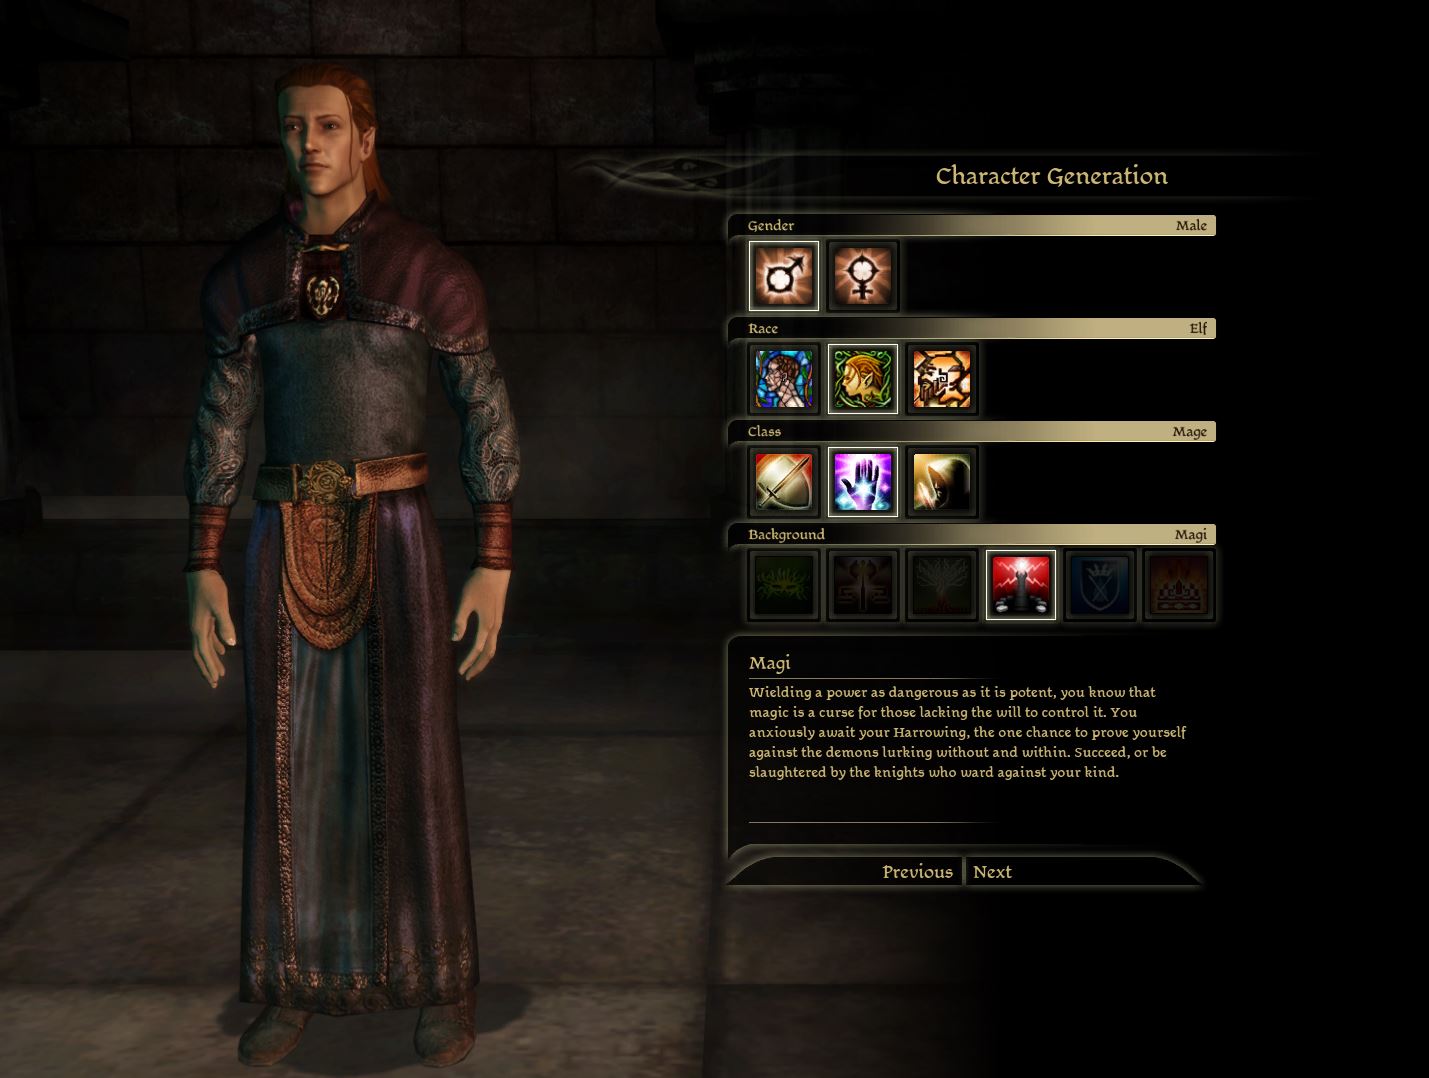
Race
There are 2 race options in my opinion:
| Attribute | Description |
|---|---|
| Human | A little less optimized but can also be a choice for a caster build like this. |
| Elf | The go-to choice for this build as it gets the biggest bonus to Magic. |
Class
The choice here is obvious:
| Class | Description |
|---|---|
| Mage | The main class will give you access to all the spells mentioned in the build and recommended specializations. |
Background
Sadly only one choice is possible here:
| Background | Description |
|---|---|
| Magi | All mages have to start in Circle Tower, no matter the race choice. |
Attributes
For the start of the game, all points should be invested - +5 Magic. This will make all of the spells much more effective. By all I mean - healing, control, and damage. You may think about investing in Willpower, but I would not worry too much about it, as your MP will increase naturally and from gear bonuses.
Skills
I would recommend getting Coercion, this will help with some early-game dialogues and quest options.
| Skill | Description |
|---|---|
| Coercion | 1 level will help in the early game to unlock some additional dialogue options. |
Spells
The build will want to use both Healing and Control spells. Just going for one, will greatly reduce your usefulness in the early game. Shutting down a foe can make encounters easy vs. difficult.
| Spells | Description |
|---|---|
| Glyph of Paralysis | This will be the first step towards reaching the next two abilities in the tree. Moreover, paralyzing a deadly foe or a ranged one, can save you or a party member from being killed. |
| Heal | The first support spell you should get. It is not much but it will ensure you can heal allies at a moment's notice. |
Quest Priority and Locations
Once you have finished Ostagar and Lothering, the world will open up and you can visit multiple areas. Below I will cover some progression recommendations, to obtain a few core items needed.
If you do not have Specializations unlocked:
- Soldier's Peak - you can purchase the cheaper tome of Spirit Healer specialization after the DLC is finished. Moreover, it gives some useful gear.
- Other DLCs - Stoner Prisoner, and Return to Ostagar have a few useful items, but they are not crucial and could be delayed for later. Still, this is a great source of XP.
- Circle Tower - additional attributes for progression. Mana Clash can be useful for this quest but is not mandatory.
- Your preferred quests
Full Build Setup
In this section, I will go with in-depth explanations of each important selection for attributes, talents, and skills. This will give you a better understanding of what role each decision will have on your overall build. The explanations can also be used to better decide your picks for optimizations
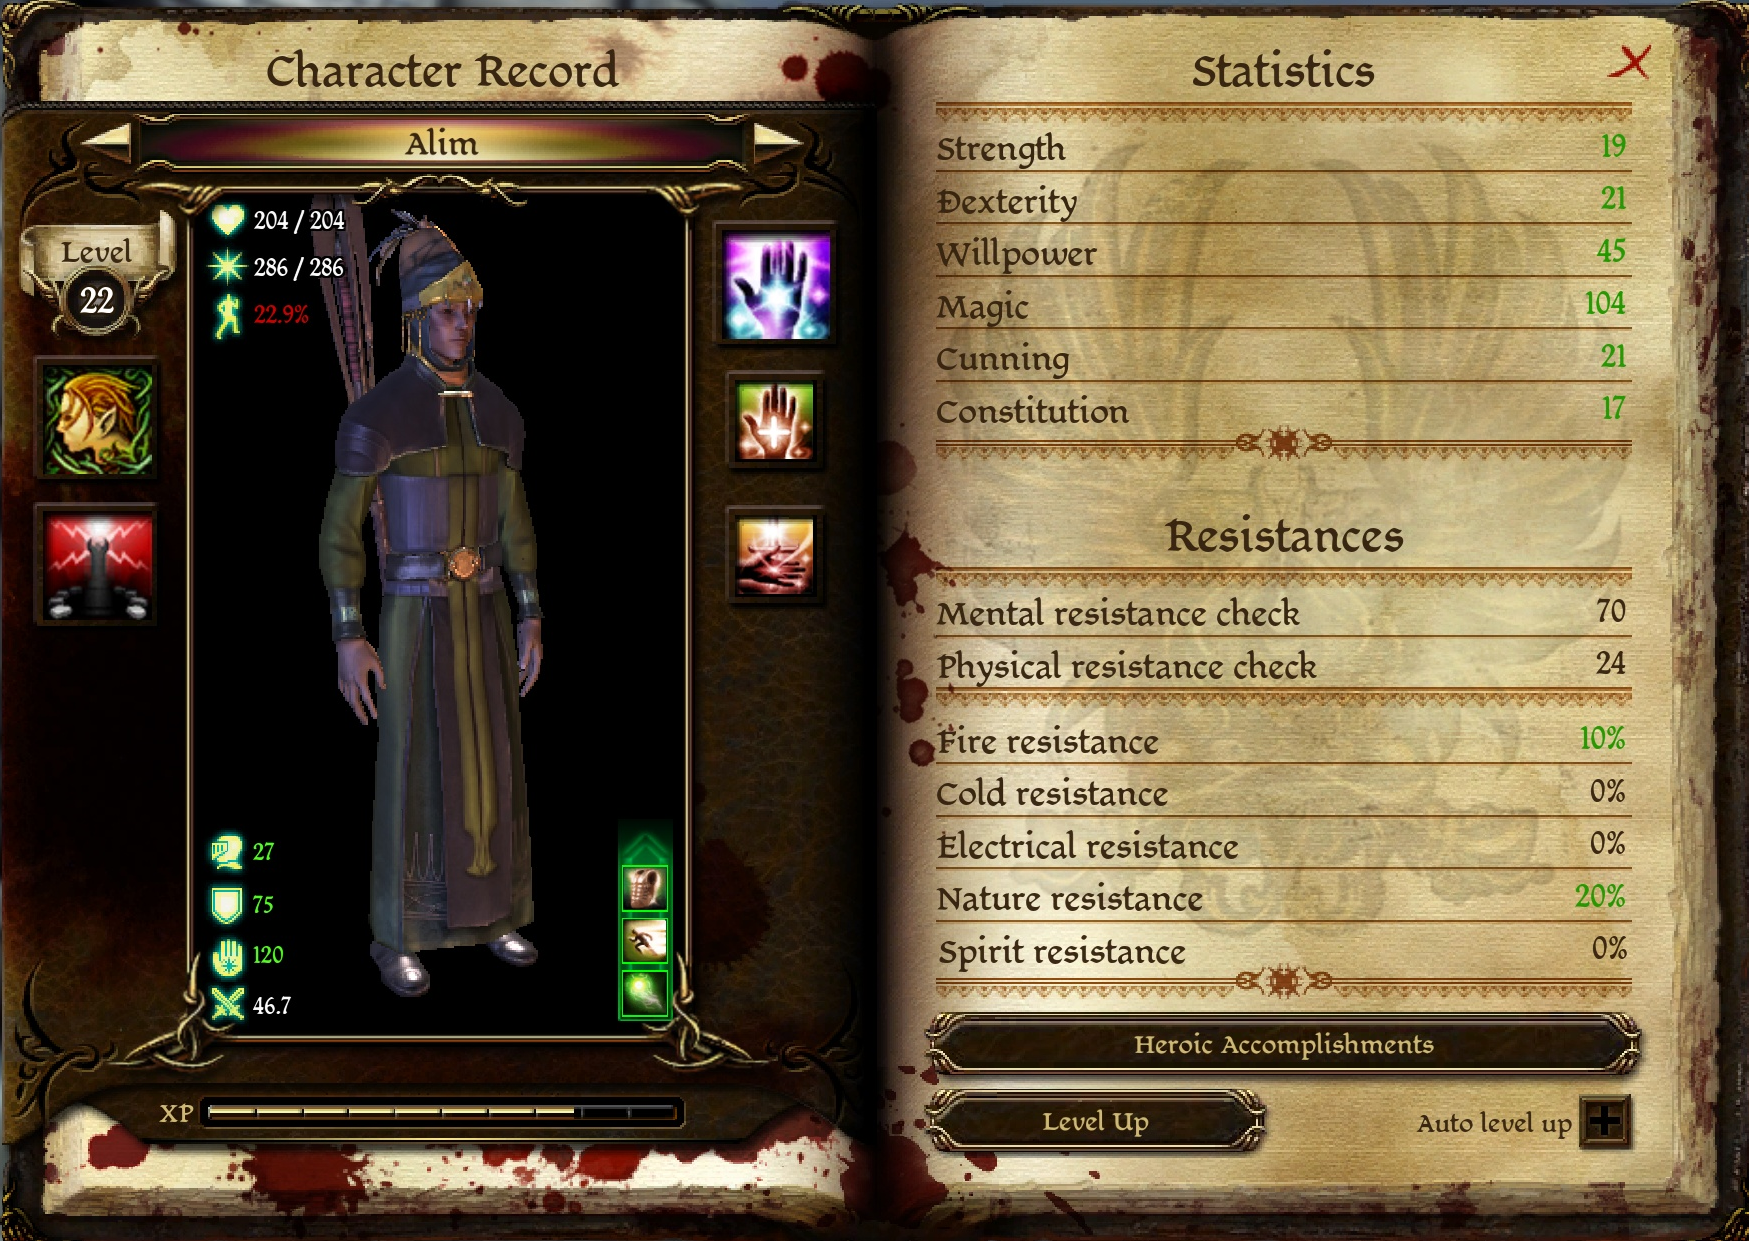
Attributes
In this section, I would like to review the recommended attributes for Healer Build. You will be required to pick them every level up, so optimizing and not wasting any of them will prove vital for the build.
| Attribute | Description |
|---|---|
| Magic - everything | This is the main attribute that the build needs. This will improve the healing power of your spells. Moreover, it will make almost all aspects of the mage better like Lyrium potion effectiveness and control spell success. |
Regarding other attributes like Constitution or Willpower. The former would be relevant if you were a Blood Mage and even in that case, I would be skeptical. Willpower can be taken with a few points every few level-ups. However, in reality, greater mana will increase your total pool, but your heals will be weaker.
Skills
The goal in my opinion is to get Combat Training and Coercion to a maximum. This will cover all the aspects that the main character would need in my opinion.
| Skill | Level | Description |
|---|---|---|
| Coercion | 4 | Allows to overcome various dialogues, finish quests earlier, or avoid unnecessary combat. |
| Pickpocket | 1 | Access to one of the most lucrative quests in the game in terms of gold rewards. |
| Combat Training | 2 | Improves mana regeneration, and casting while under attack, mainly we want that +2 regeneration from level 2. |
| Tactics | 4 | Unlocks more slots, for the situations when you are controlling another character. I think this build benefits a lot from these as you will want to also take control of some companions when you need higher damage output. |
Specializations
The build core is 1 specialization. Another one is free and generally depends on your preferences. Here is what and why I recommend.
| Specialization | Description |
|---|---|
| Spirit Healer | This specialization is the core of the build and ensures that you get some very powerful healing options. |
| Arcane Warrior | Although you might be interested in Blood Mage, I think this pick fits the build theme much better. You will be able to wear Helm of Honnleath which is the best option for almost any build for headwear. Moreover, if you want to have a more Cleric-like setup with sturdier armor you can pick Wade's Superior Dragonskin armor set for a negative fatigue bonus! |
Talents and Spells
The build will concentrate on support spells as the highest priority, followed by control ones. Both of these will play a crucial role in covering your ally's asses when things go wrong.
Spirit Healer
The core tree of this build will give the super healing powers.
| Spell | Description |
|---|---|
| Group Heal | A strong healing spell that will heal everyone in the group. The main downside is that this spell has a very long cooldown so you will still have to use Heal and Regeneration. |
| Revival | This is kind of obvious, you revive dead allies if something goes wrong. |
| Lifeward | This spell is kind of bugged so it will heal two times. Otherwise, it is a pricey spell, so I skipped it most of the time. |
| Cleansing Aura | Late in the game when you are stocked on lyrium potions, I would also start using this spell. The constant healing pulses will greatly improve survivability. However, if your party is already clearing enemies easily, I would deactivate it and save mana. |
Arcane Warrior Tree
Only one talent will be relevant here.
| Spell | Description |
|---|---|
| Combat Magic | Just by taking this talent, you will be able to wear items with strength requirements using Magic. You do not need to activate it. |
Mage
This tree is a very low priority, I would delay it for the late game, once you have covered all the stuff. Talents here are mainly for optimizations.
| Spell | Description |
|---|---|
| Arcane Bolt | Can be used to inflict fast damage when you need to finish off an enemy. Moreover, this is the first spell you obtain, so not many choices to avoid it. Excellent use for the early game. |
| Arcane Shield | Sustained spell, giving access to higher Defense values. I would not use this with the build as it does not aim for that. |
| Staff Focus | Improves auto attack damage. |
| Arcane Mastery | A slight boost to spellpower improving healing efficiency and spell success. |
Primal Tree
Only a handful of spells are relevant here, especially as the build will not engage in offensive magic much.
Path of Stone Tree
| Spell | Description |
|---|---|
| Rock Armor | A decent defensive sustained spell that will improve the survivability of the mage. |
Creation Spells
Healing Tree
| Spell | Description |
|---|---|
| Heal | One of the core spells to heal allies. |
| Rejuvenation | Mainly progression spell. |
| Regeneration | A very powerful spell that heals over time with health ticks every few seconds. It is very cost-efficient, so use it often. |
| Mass Rejuvenation | This spell can be useful based on party composition. If you have another mage and a fighter or warrior that uses activate abilities - then I would use this. Otherwise, it will not be cost-effective and I would just not take it. |
Heroism Tree
| Spell | Description |
|---|---|
| Heroic Offense | The spell can be used to buff allies and greatly improve their hit chance. |
| Heroic Aura | Only for progression. |
| Heroic Defense | Improves defensive values, and can be used on oneself. |
| Haste | The goal of this tree, that boost attack speed by 25%. This does stack with other Haste sources - other mages, allowing to reach a 50% attack speed increase. |
Glyphs Tree
| Spell | Description |
|---|---|
| Glyph of Paralysis | A simple yet effective paralysis spell to apply control on enemies like lieutenants or bosses. |
| Glyph of Warding | Progression spell. |
| Glyph of Repulsion | By itself, it can be used to push back enemies like corridors or specific persons. Otherwise, together with the Glyph of Paralysis, it will create an explosion. |
Nature Tree
| Spell | Description |
|---|---|
| Spell Wisp | A very important spell that will improve spellpower for higher damage. |
Spirit Spells
Mana Drain Tree
If you have read my previous build you know I like Mana Clash. The same is true here, it may not fit perfectly the playstyle, but instant kill on mages is just too good to pass up. However, if you have another caster with Mana Clash, then I would disregard this, and put points elsewhere.
With the magic attribute investment that the build has it is just too good to pass up.
| Spell | Description |
|---|---|
| Mana Drain | Progression spell |
| Mana Cleanse | Progression spell |
| Spell Might | Very valuable spell, if you have mana capacity as it will improve weapon damage and spell success chance. |
| Mana Clash | One of my favorite spells, that can instantly destroy enemy mages and inflict heavy damage to monsters from the Fade. |
Telekinesis
| Spell | Description |
|---|---|
| Mind Blast | In case enemies are close to you, popping this spell will stun them and also reset your threat levels. This means that they are more likely to choose another target like the main tank. |
| Force Field | A very potent spell, that can make an ally or an enemy invincible. For example, if your Rogue is grabbed by an Ogre just pop this shield and protect them. Or disable an enemy, while you take care of other foes. |
Equipment
The gear you use with Healer Build will play a crucial role in combat. There are various combos that you can go with.
Below, you will find the gear that should be used with the build. Generally, the lower the item is in the table the lower its priority and the earlier you can get it. So the top ones are the best picks.
Weapons
| Item | Description |
|---|---|
| Trades blows with Staff of the Magister Lord. This one is much cheaper and can be accessed earlier for this reason. | |
| The best staff in terms of overall stat boosts, however, it is quite pricey. | |
| I would say these staves are the same. So get the ones that are easier to obtain. Sadly, the spirit damage bonus is not as important and you will not use these spells as much. | |
| The staff comes with +3 spellpower which is a significant boost. | |
| Early game staff that comes with +2 spellpower boost for improved healing and spell success. |
Helm
| Item | Description |
|---|---|
| If you picked Arcane Warrior Specialization then, this Helmet becomes mandatory, as it is the most powerful option. | |
 First Enchanter's Cowl First Enchanter's Cowl |
Significantly increases the chance to dodge attacks. This effect stat with other items, can enable you to easily avoid enemy attacks. Still, this is only available very late in the game. |
| Improves mana regeneration and gives a decent boost to defense. |
Armor
| Item | Description |
|---|---|
| Gives significant bonuses to willpower and magic, greatly improving the healing capacity of the build. However, might not be accessible if you are playing for the first time, so look at the options below. | |
 Wade's Superior Dragonskin armor Wade's Superior Dragonskin armor |
Part of Wade's Superior Dragonskin armor set. If you are looking more for a cleric-like playstyle, being able to sustain some enemy damage, this option is perfect. The whole set will make your fatigue value negative, meaning spells will cost even less than what is written in the tooltip. |
| Gives mana regeneration and a direct increase in spellpower improving your damage. | |
| Improves core stats of caster - willpower, and magic. | |
| Improves core stats of caster - willpower, and magic, albeit with a lower bonus than First Enchanter Robes. | |
| Decent robes that you can get early in the game if you do the Circle Tower quest. |
Gloves
To be fair, any kind of gloves will work. Generally, I would recommend elemental gloves. However, as the build doesn't deal that kind of damage, they are irrelevant. There is one option if you plan on going with the armor set:
| Item | Description |
|---|---|
 Wade's Superior Dragonskin Gloves Wade's Superior Dragonskin Gloves |
Part of Wade's Superior Dragonskin armor set. |
Boots
| Item | Description |
|---|---|
| The only boots giving direct magic attribute improvement for mages. | |
 Wade's Superior Dragonskin Boots Wade's Superior Dragonskin Boots |
Part of Wade's Superior Dragonskin armor set. Although the boots can be used without a set, it is unlikely as you would be wasting one of the best sets. |
 Imperial Weavers Imperial Weavers |
Improves the chance to dodge attacks. |
| Improves defensive values leading to more chances of avoiding attacks. | |
| Improves defense and also reduces hostility, attracting fewer enemies. |
Accessories
| Item | Description |
|---|---|
| The best belt available all around. The bonuses to stamina regeneration are great to counteract the sustained abilities. | |
| Gives a significant boost to the core stats of the build. This is a truly powerful option but requires to finish The Golems of Amgarrak DLC | |
| You will need to finish Witch Hunt DLC to unlock this accessory. The chance to dodge is excellent for survivability improvement. | |
| A decent belt that boosts spellpower and damage. |
Amulets
There are plenty of choices for Blood Mage in terms of amulets.
| Item | Description |
|---|---|
| It is one of the best amulets as it increases the mana pool adds a chance to dodge and a significant boost to spell resistance. | |
| This is more of a rogue or amulet. However, it can still be worn by mages due to a significant boost to mana (stamina can also mean mana). | |
| The +1 to all attributes is a significant boost, especially at the start of the game. | |
| Provides +1 to magic. | |
 Par Vollen Willstone Par Vollen Willstone |
+2 Willpower, which is a decent boost early in the game. Otherwise, it is a low priority. |
Rings
| Item | Description |
|---|---|
| One of the best rings in the game. It gives +2 to all attributes. It can be obtained in Orzammar | |
| Gives +1 to all attributes, which in turn will improve the constitution, magic, willpower - everything that the build uses. | |
| A great ring at the beginning of the game that you can obtain if you choose Magi origin. | |
| Provides a decent stamina regeneration. However, I would prioritize this ring on Rogue. | |
 Morrigan's Ring Morrigan's Ring |
+2 Willpower. It's a decent bonus, especially if you have other casters and gear needs to be shared. |
How to use the Build
In this section, I would like to go through some general tips on how to correctly utilize the build.
Main mechanics
In this part, I would like to go through the core mechanics of the build. Using them you can construct your preferred playstyle and utilize everything that the various talent and equipment picks have to offer.
Sustained Spells
As with all caster Builds, this one will utilize them to some degree. Three of them I would say are mandatory, the others depending on the situation and how late in the game you are:
- Spell Wisp - a simple and cheap spell that will improve everything for the Blood Mage Build.
- Rock Armor - Improves armor, this will improve survivability, but I would leave it only if you have mana to spare.
- Haste - the spell improves the attack and movement speed of party members. It also stacks with other Haste casts from other mages. This can easily improve the attack speed by 50%.
And here are some optional ones, that I might use depending on the situation:
- Cleansing Aura - I do recommend using this on more difficult battles, or in the late game. The spell drains a significant amount of mana, but it offers an unparalleled amount of healing.
- Spell Might - the lowest priority spell. It is a sustained ability that will improve spellpower resulting in more chance of spell success and better healing.
Arsenal of Control Spells
So as a mage, you do have plenty of spells that apply some kind of control. Let's go through a few of them:
- Glyph of Paralysis - a solid spell that will paralyze enemies. Use it to apply control, particularly on stronger enemies - lieutenants or bosses.
- Glyph of Repulsion - this spell can ensure that enemies get knocked down or pushed back on an entrance or other place. You can also cast it on yourself or other caster, to push enemies back that try to reach you.
- Glyph of Paralysis + Glyph of Repulsion - This combo is extremely deadly. It can paralyze multiple enemies and make encounters easier. Cast one of two spells, and at a similar position cast the second one to create an explosion. Still, it does have friendly fire, so I would only use this at the start of the combat, while your group members have not reached enemies.
- Mind Blast - excellent spell to stun most targets in close range. This will also improve your survivability In case you get overwhelmed.
- Force Field - this spell can be used both in a supportive and offensive manner. You could disable a specific enemy while you take care of other minions. Or save your party member from close death.
Enemy Mages
One of the main and most destructive enemies in the game (besides Templars) is Mages. They can cast Fireball, apply Hexes, or freeze you or your allies. For this reason, I recommend taking Mana Clash.
In most cases, it will instantly destroy enemy casters if they have full mana. So use it the moment you see a caster enemy. It also works on enemies that might have mana, like Fade creatures, even though many of them don't use spells.
Healing allies
The last core part of the build is utilizing the wide array of heals available. This is what makes this a true Paladin build. Let's go through how and when you should use them:
- Heal - I would recommend using this in the early game or when Group Heal is on cooldown. Otherwise, you have more cost-efficient choices.
- Group Heal - the main healing option, especially in harder fights. The only downside is its long cooldown.
- Regeneration - this is an extremely cost-efficient healing option. Use it more or less always, especially on characters that are being targeted by enemies - like tanks or mages.
- Cleansing Aura - the ultimate sustained healing spell, that will release waves of healing. It does become weaker the further your allies are, so be aware of that.
Early Game Combat
The start of the game might be a bit difficult as you will be limited by your spell arsenal. However, with each level, it will be easier and easier. Here are some recommendations for the early game:
- If enemies come close, you should be using Mind Blast to stun them and reset your threat level.
- Glyph of Paralysis and Glyph of Repulsion are your go-to spells for control in the early game. If you use them together one onto another this will create a paralysis explosion. So be careful not to activate it on allies.
- Heal and Group Heal will be your early healing spells. The former should be used when an ally is getting low on HP like 30%. For Group Heal, I would use it whenever two or more allies have less HP than 80%. The long cooldown makes this a bad use case in emergencies.
Late Game Combat
You will have a huge arsenal of spells, for different situations, I will try to cover some of them, but I will leave it to you to find the perfect combos for your playstyle.
- Cleansing Aura should be ready for more difficult encounters if you can predict them. I would also make sure that Haste is active as it will give a significant boost to attack speed.
- Use Mana Clash to instantly destroy enemy mages or creatures from the Fade. This will make encounters easier.
- Regeneration should be used early. If you see an ally having 90% HP and it continues dropping, pop the spell, so that their health would start regenerating.
- Group Heal - should be mainly used when the group is in the middle of combat and you have sustained some damage.
- Heal - is more like an "oh shit!" option to instantly restore health. In addition, Force Field can play a similar role, to save the ally. It can also be used offensively to remove an enemy temporarily from the battle.
Tactics
For this build, I do recommend setting up some tactics as I think you will be spending some time controlling other characters to optimize the damage output.
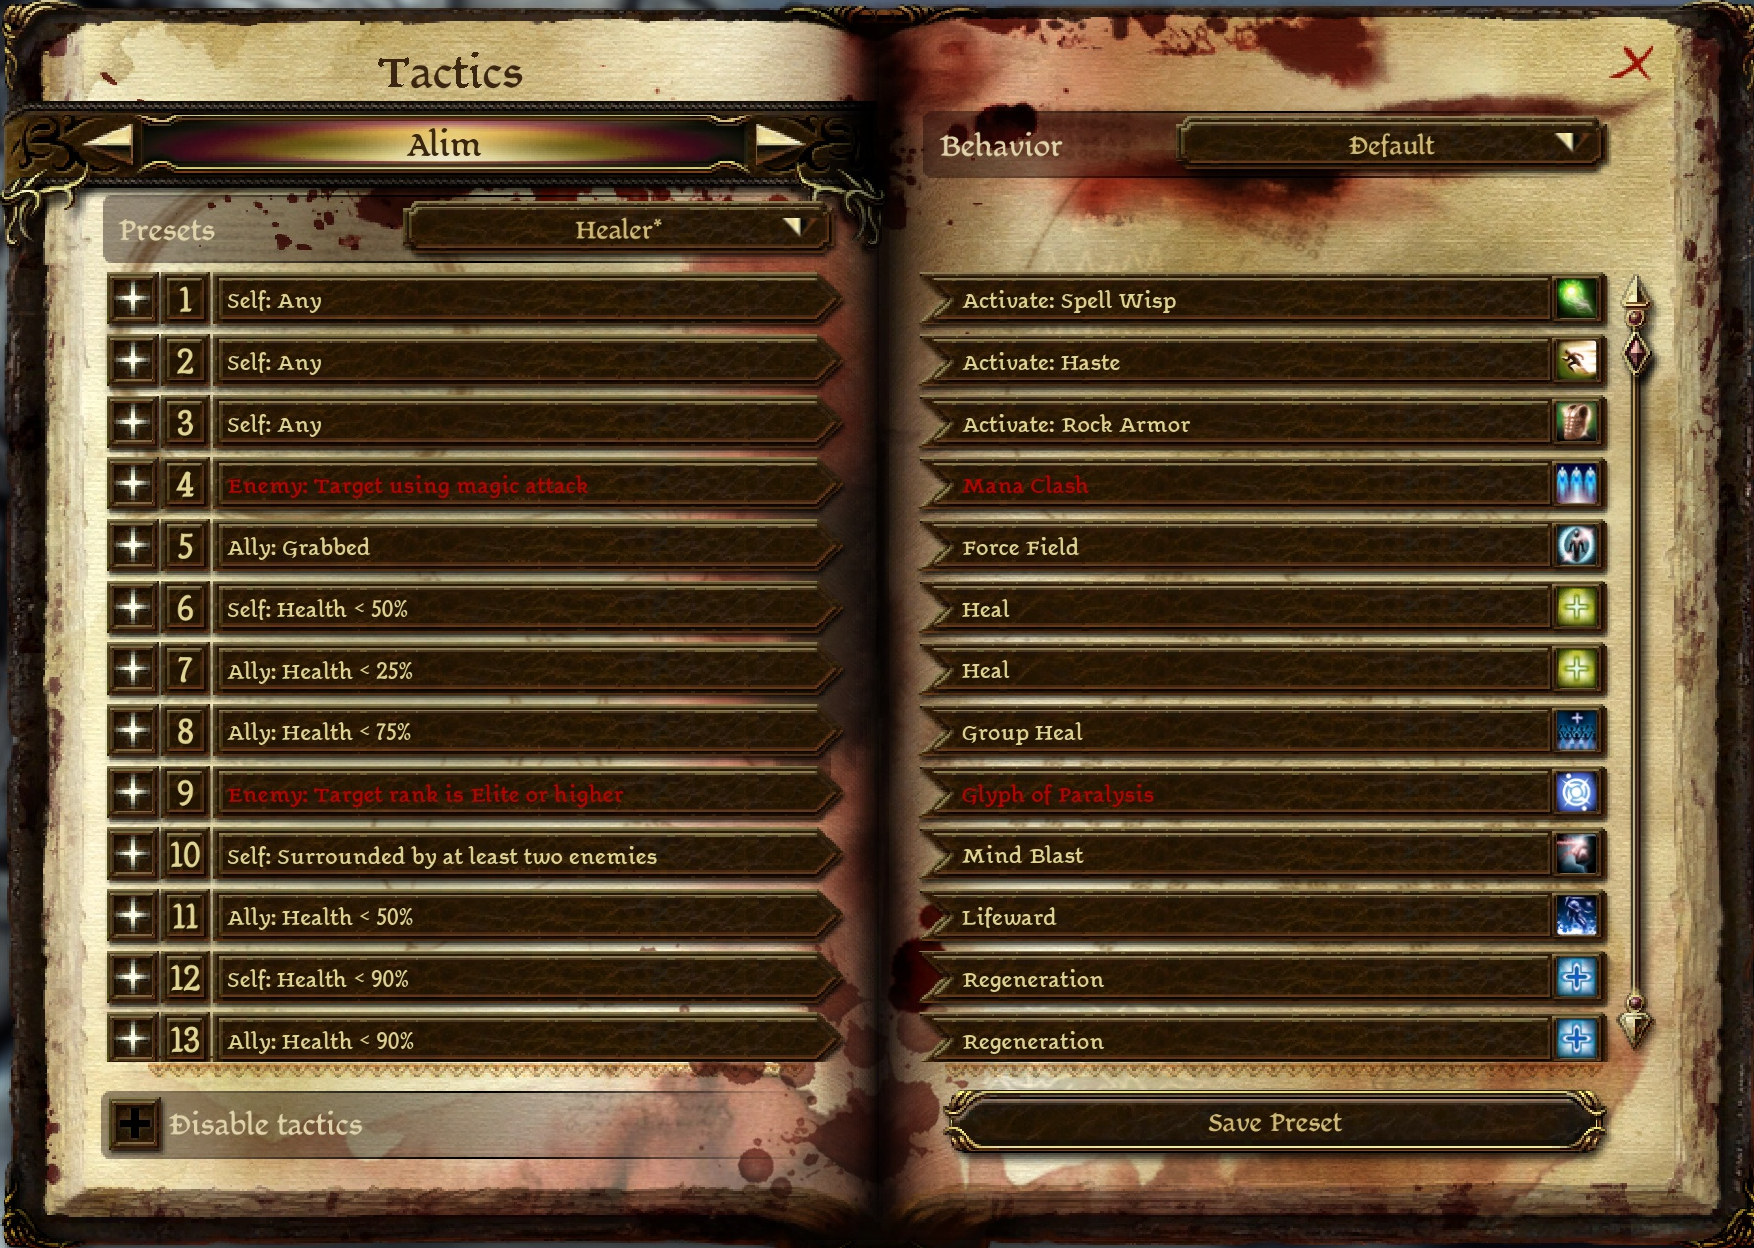
So the general idea is to have sustained abilities active, otherwise have ample healing and control spells like Mind Blast, and Force Field ready to be cast at moments' notice.
Conclusion
Thank you for reading the Healer Build - Spirit Guardian, post for Dragon Age: Origins. The build offers the experience of true support character that ensures your party's survivability in the harshest battles. You will concentrate on two aspects - healing and control. Both of these give ways to shut down deadly enemies and save allies from death.
Feel free to leave feedback below
Like, Dislike, comment, or share!
Join the Discussion
0 commentsNo comments yet.
Be the first one to leave a comment!