
Best Sera Build - Complete guide - Dragon Age: Inquisition (DAI)
In this post, I will go through the complete Sera build in Dragon Age: Inquisition. It will cover all you need to know about the best skills, tactics, and equipment.
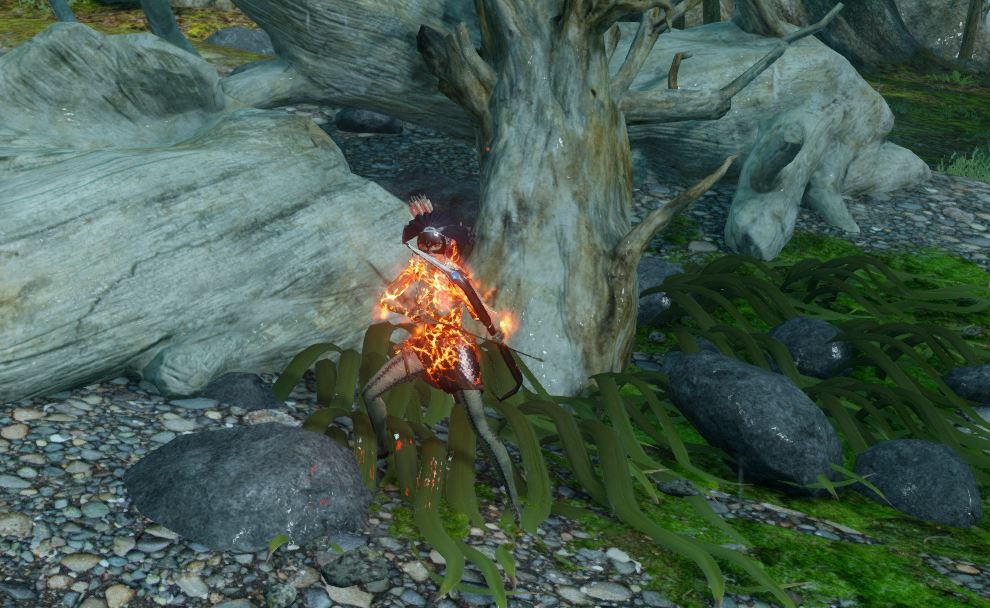
Sera is an elven archer. She has an interesting personality that makes some players confused. The reason is her "Friends of the Red Jenny". She is exceptionally skilled in combat and provides great support to Inquisitor
Important! The companion build is compatible with Nightmare difficulty, however, to pull it off correctly, be sure to have a good Inquisitor build
Contents
Sera level 1-10
Early in the game, our main priority is to have Sera act as an effective archer. This is fairly difficult to achieve due to the limited number of skills points you have. However, here is what I would prioritize:
| Order | Skill | Description |
|---|---|---|
| 1 | Allows Sera to escape from enemies easily | |
| 2 | Early ability to increase overall damage you do with skills and auto-attack | |
| 3 | Does 600% weapon damage if shot from more than 15 meters | |
| 4 | Passive skill that will increase damage if enemy health is full | |
| 5 | We take it mainly for progression | |
| 6 | Fire spell is cheap and deals decent damage | |
| 7 | Effective knockback skill to take out a specific target. |
Unfortunately, there are not many skills that will support AI. Due to this, the build may feel lackluster, but we will greatly improve in the mid-game
Sera Archer Build
With this build, we will concentrate on making Sera as effective as she can be. She will shoot as fast as a machine gun, tearing through enemies. Not only this but due to constant critical hits she will be able to spam skills to her heart's content:
Remember that you will need to respecialize skills before making this build
Abilities - detailed progression
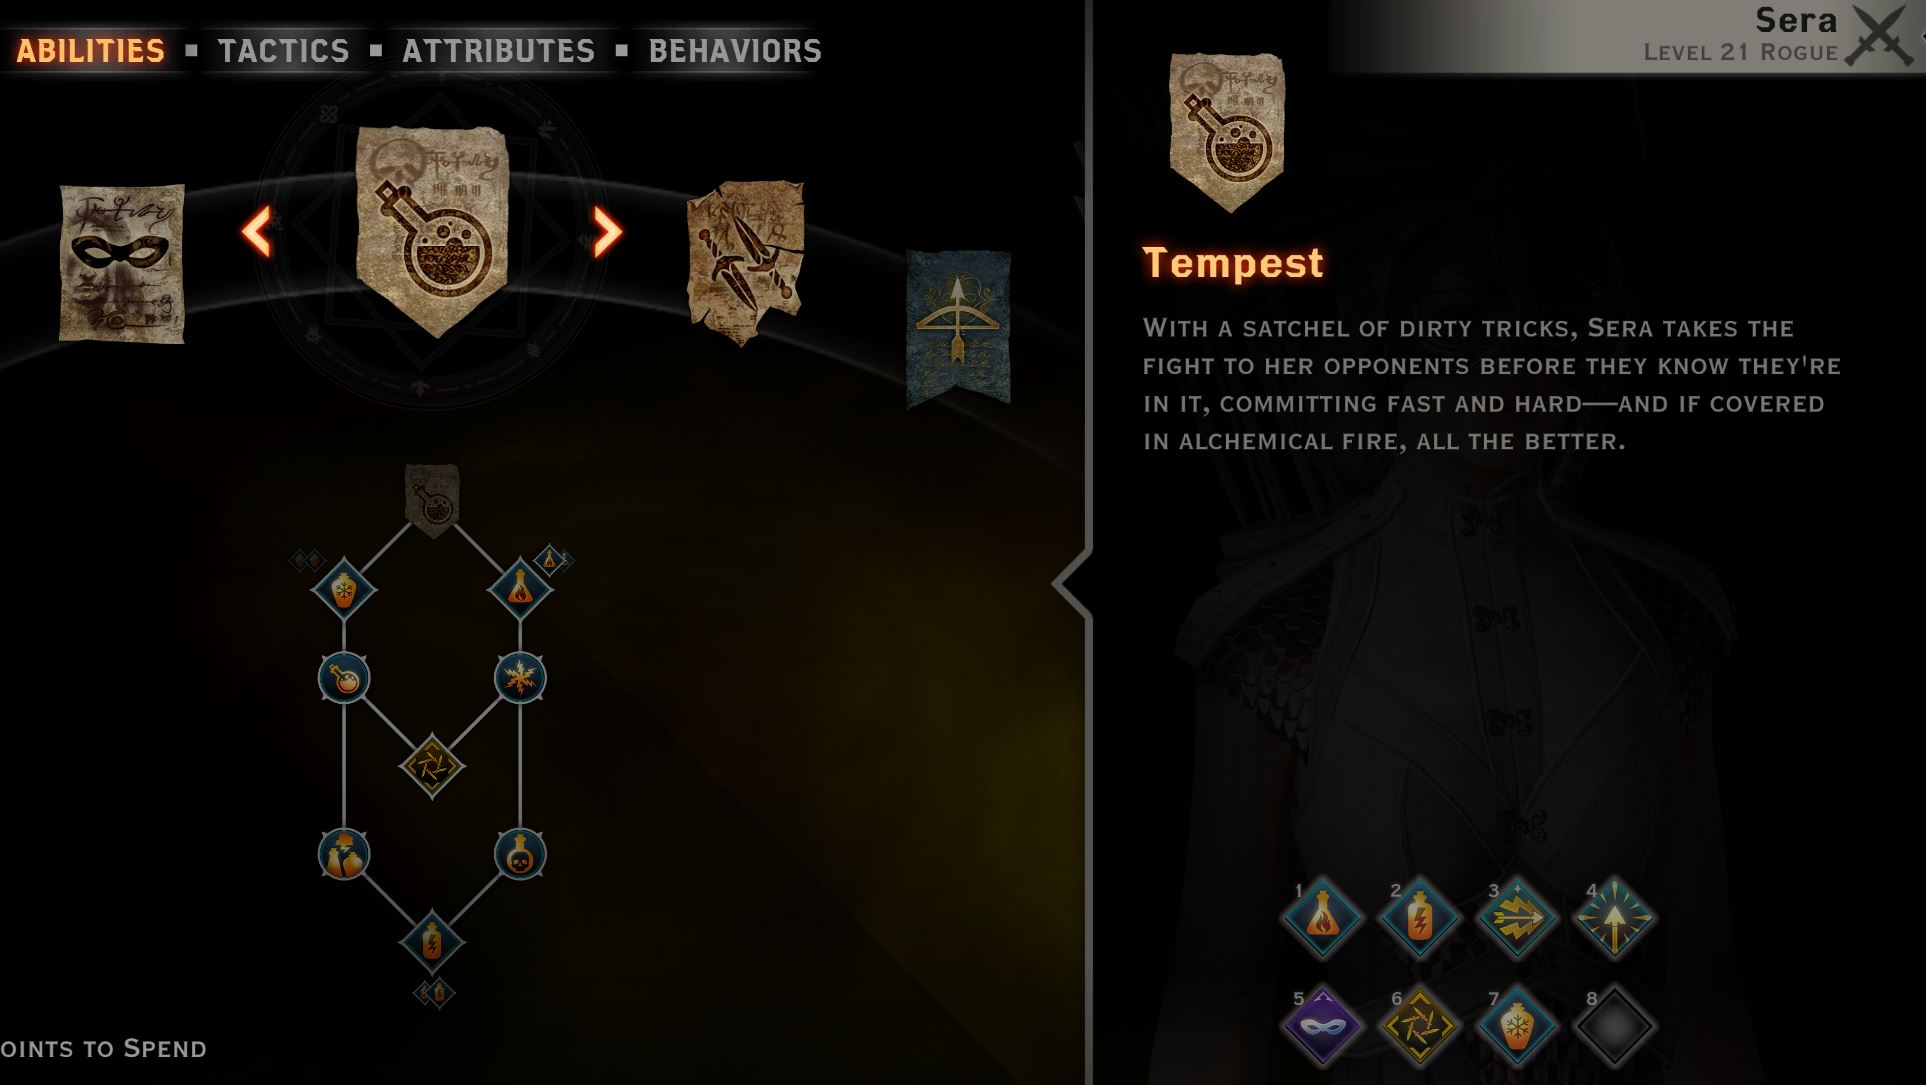
With the Tempest specialization, we unlock great possibilities. Here is how you should start:
IMPORTANT: Get relevant Amulet of Power for Sera to maximize the number of ability points
| Order | Skill | Description |
|---|---|---|
| 1 | Will allow Sera to use Long Shot and Explosive Shot without cooldowns | |
| 2 | Gives a boost to damage when stamina is below 50% | |
| 3 | Gain bonus damage after using a Flask or potions | |
| 4 | Slows time allowing to shoot Sera as fast as a machine gun. The upgrade gives a bonus duration allowing to deal more damage. | |
| 5 | It will be good to have bonus survival skills so that Sera could escape any difficult encounter | |
| 6 | Main active ability that AI Sera will use to deal damage. Will work great with Flask of Fire. | |
| 7 | Increases damage that Sera deals to enemies when they have 80% or more HP. | |
| 8 | An additional active skill that can deal AOE damage. I prefer Shockwave upgrade for better Crowd control capabilities on higher difficulties and if you have friendly fire on. | |
| 9 | Each hit from your bow to the same target will give an additional boost to damage | |
| 10 | We take this ability only for progression | |
| 11 | Each critical hit will restore 10 stamina. Mandatory skill to have. | |
| 12 | As you will do many critical hits use this passive ability to lower enemy armors | |
| 13 | This Focus ability will allow you to take dragons with a single-use. So save it for difficult encounters | |
| 14 | We mainly take this skill to unlock other abilities | |
| 15 | We mainly take this skill to unlock other abilities | |
| 16 | It will make Sera elixirs last longer by 3 seconds. However, this activates only if they are used one after another, for this reason, we set them to preferred | |
| 17 | With this passive ability, Sera's threat generation will be greatly reduced. |
Abilities overview
This section shows a high-level overview of what skills to pick
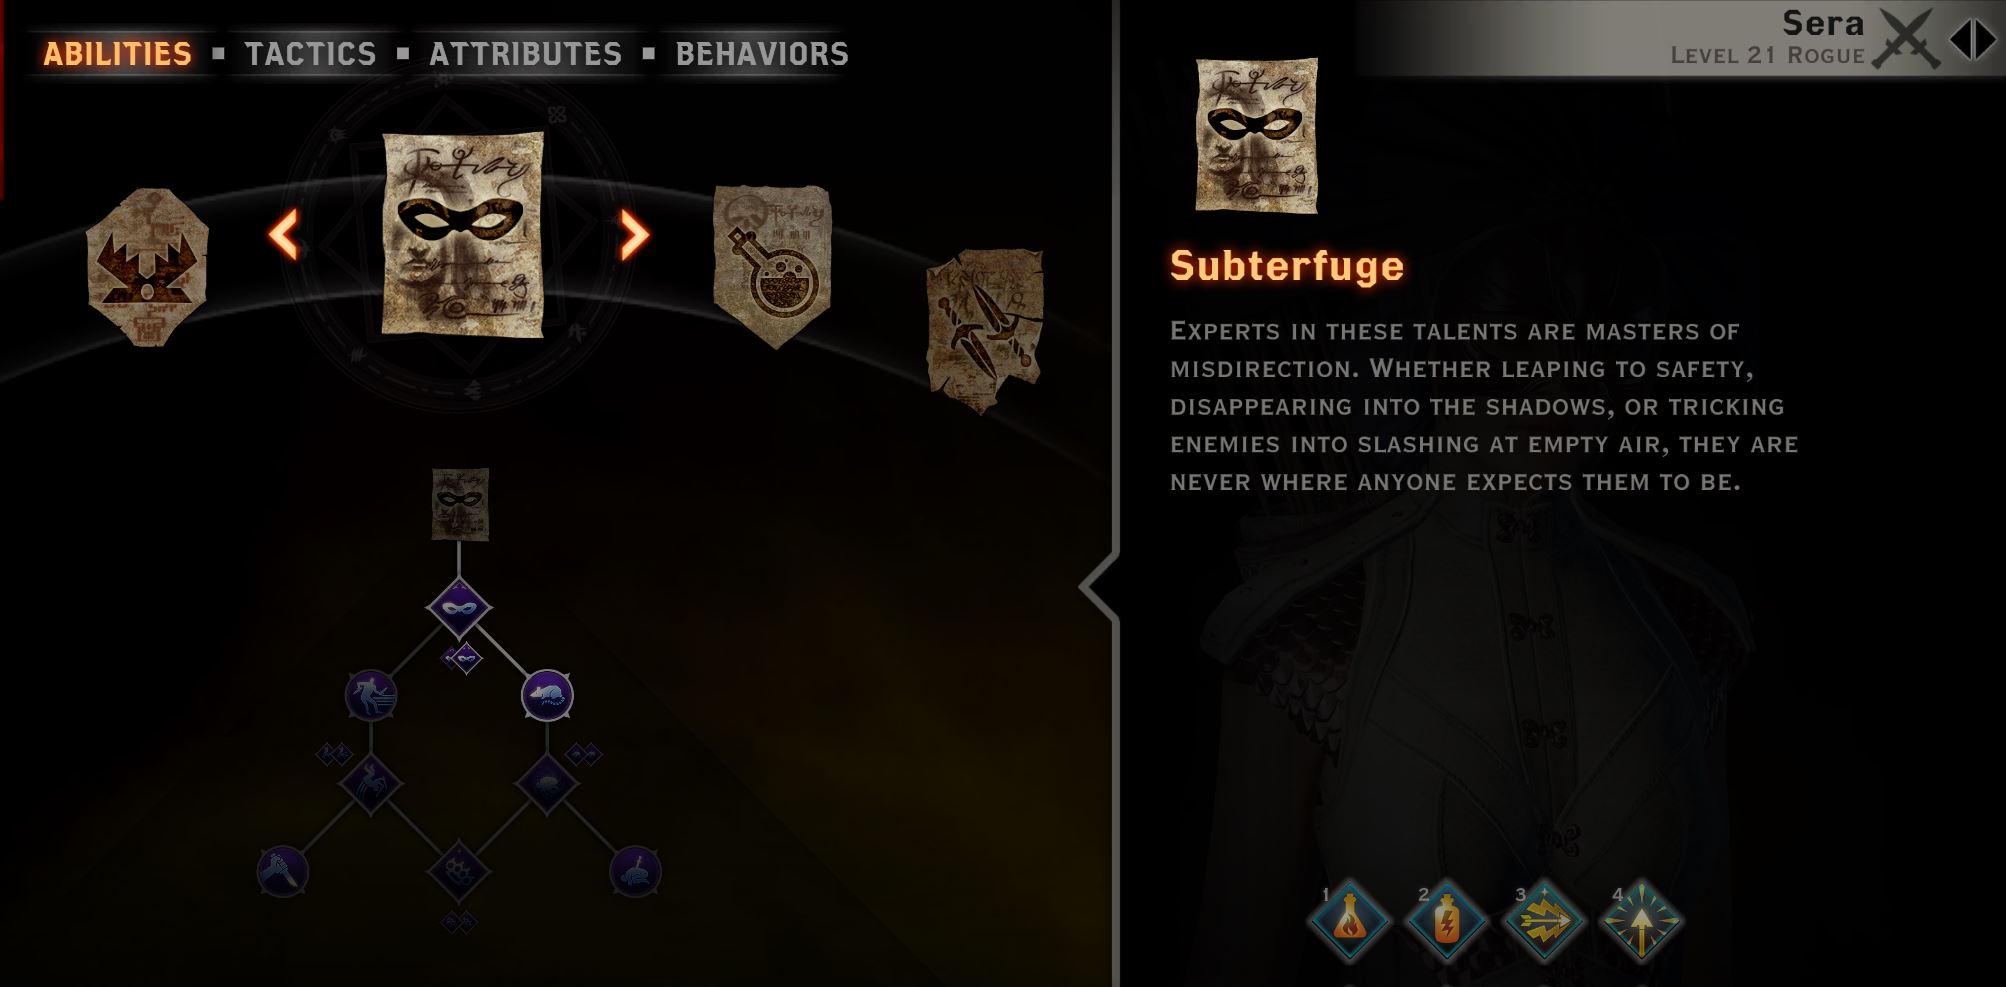
Subterfuge Tree
Tempest Tree
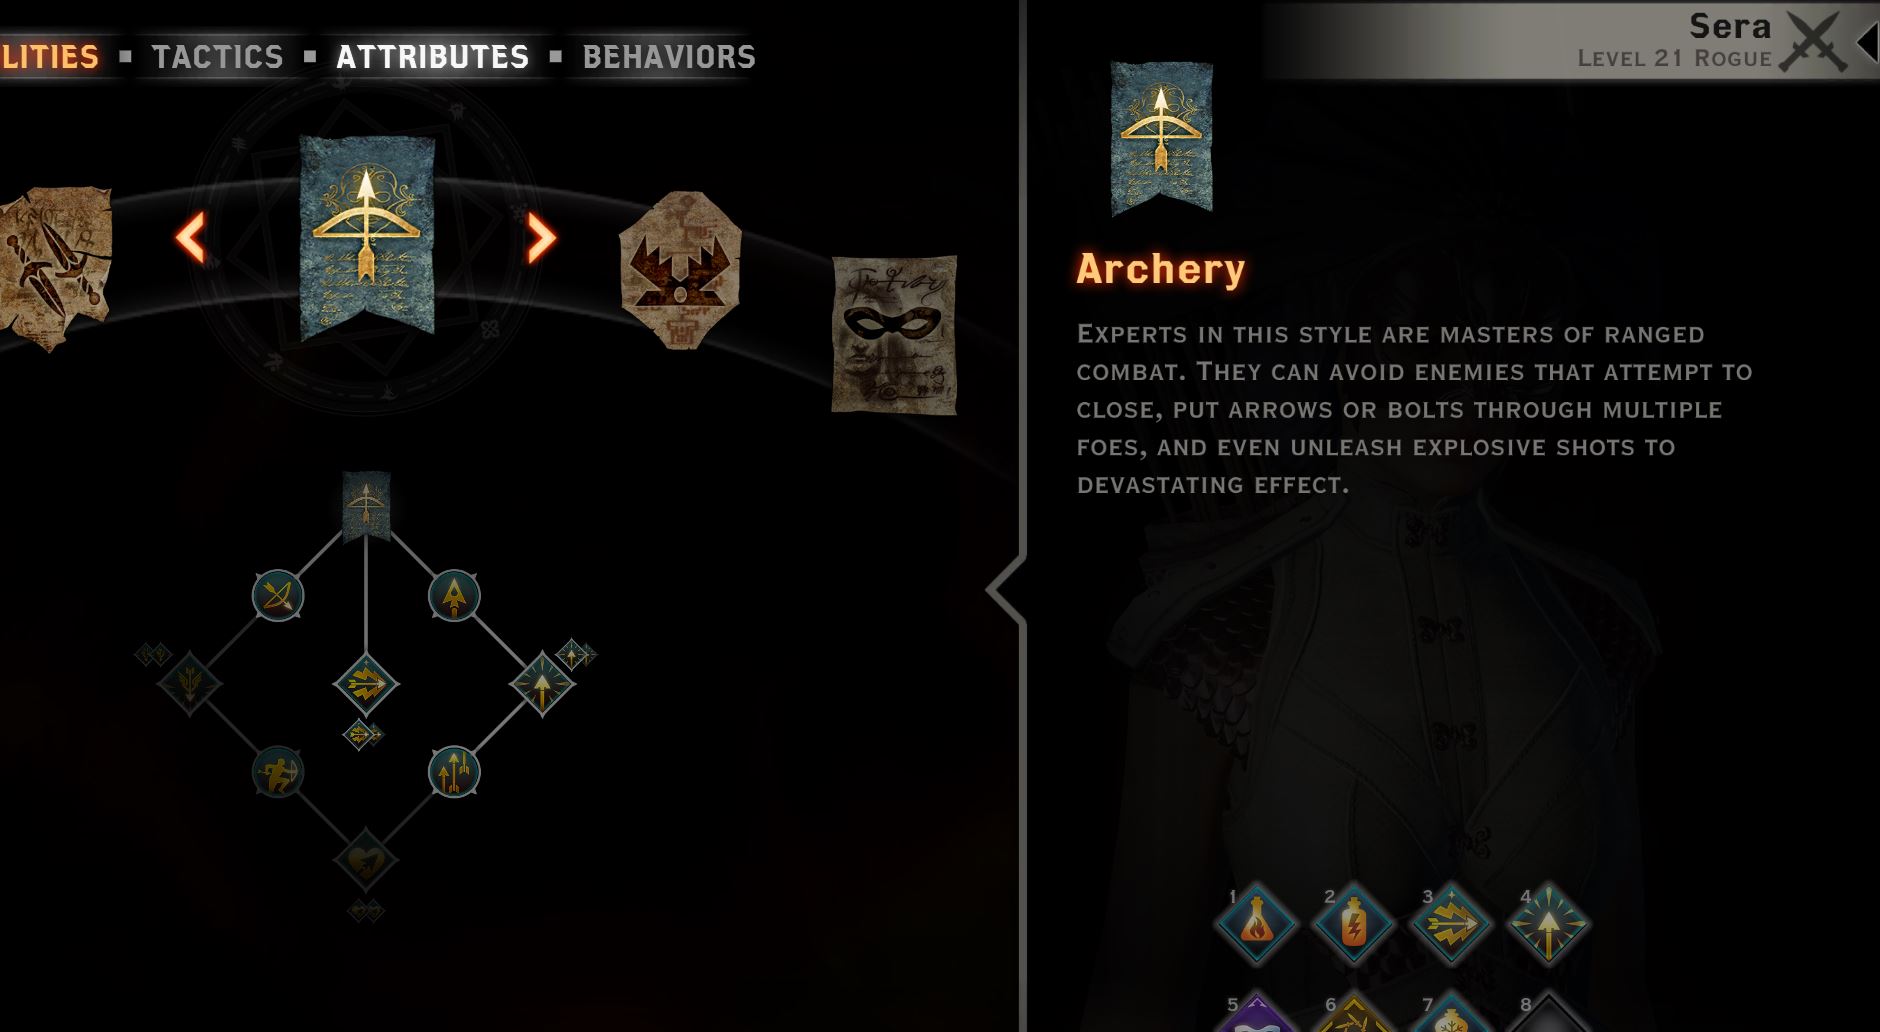
Archery Tree
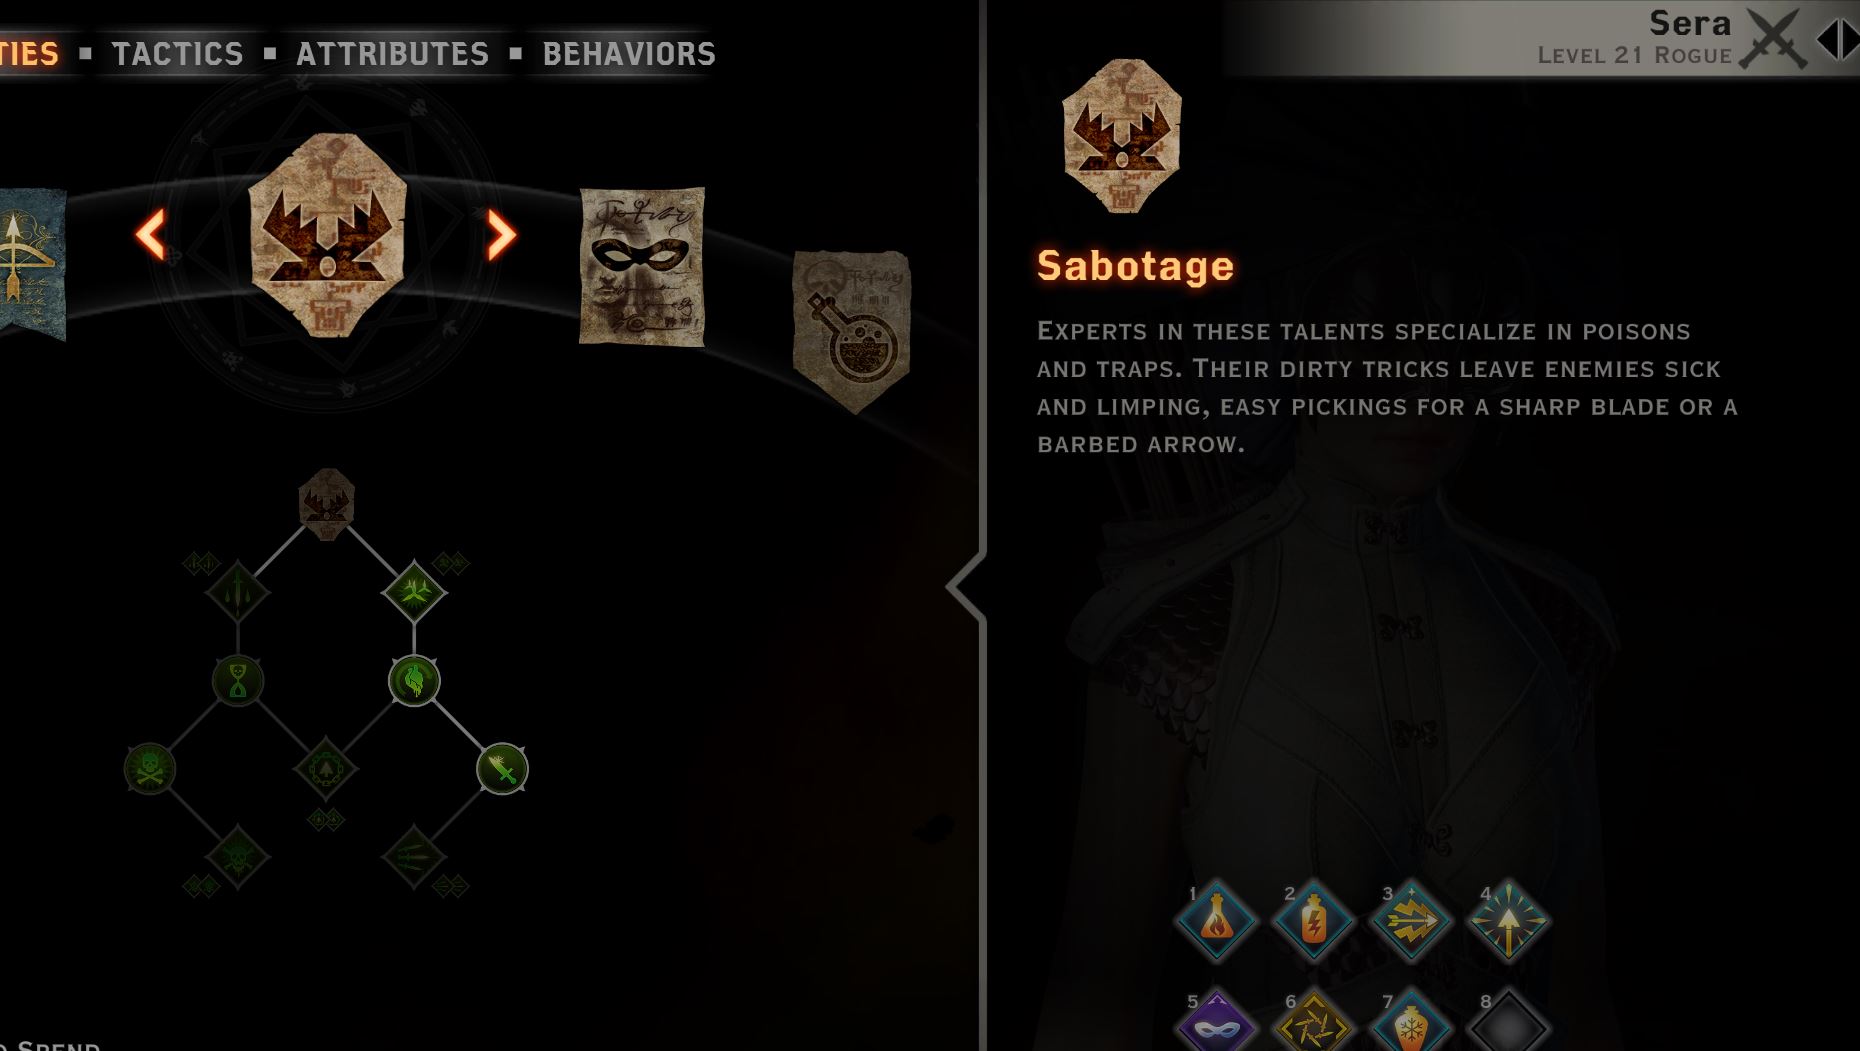
Sabotage Tree
Tactics and Behaviours
This section will cover how you should set up Sera's tactics and behaviors to maximize her efficiency as a companion.
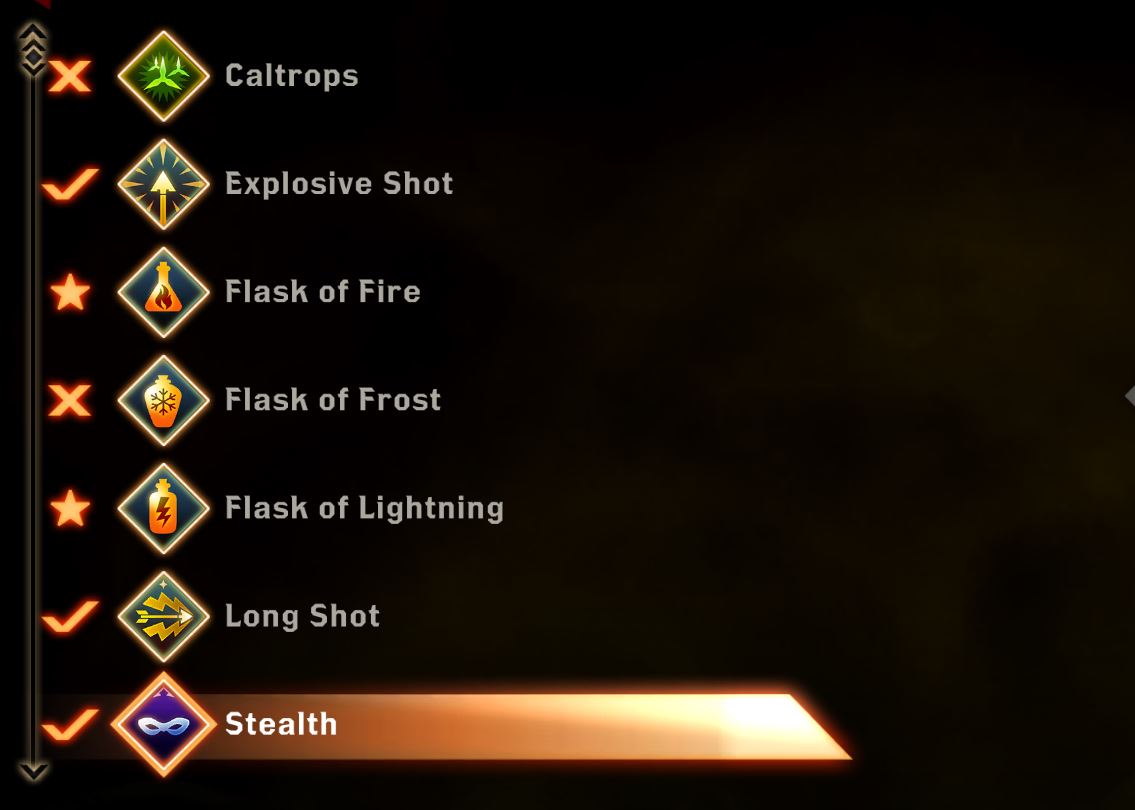
This Sera build relies on auto attacks mostly. However, once Flask of Fire is activated she should use Explosive Shot and Long Shot constantly.
For tactics:
- Set Flask of Fire and Flask of Lightning as preferred
- Disable Caltrops
- To maximize DPS disable Flask of Frost. Leave it active if you want Sera to easier survive enemy encounters
- I preferred a Thousand Cuts disabled
- All other talents can be enabled.
In the behaviors window here are my suggestions:
- Mana/Stamina reserve 0%
- Targeting Behaviour: tank character.
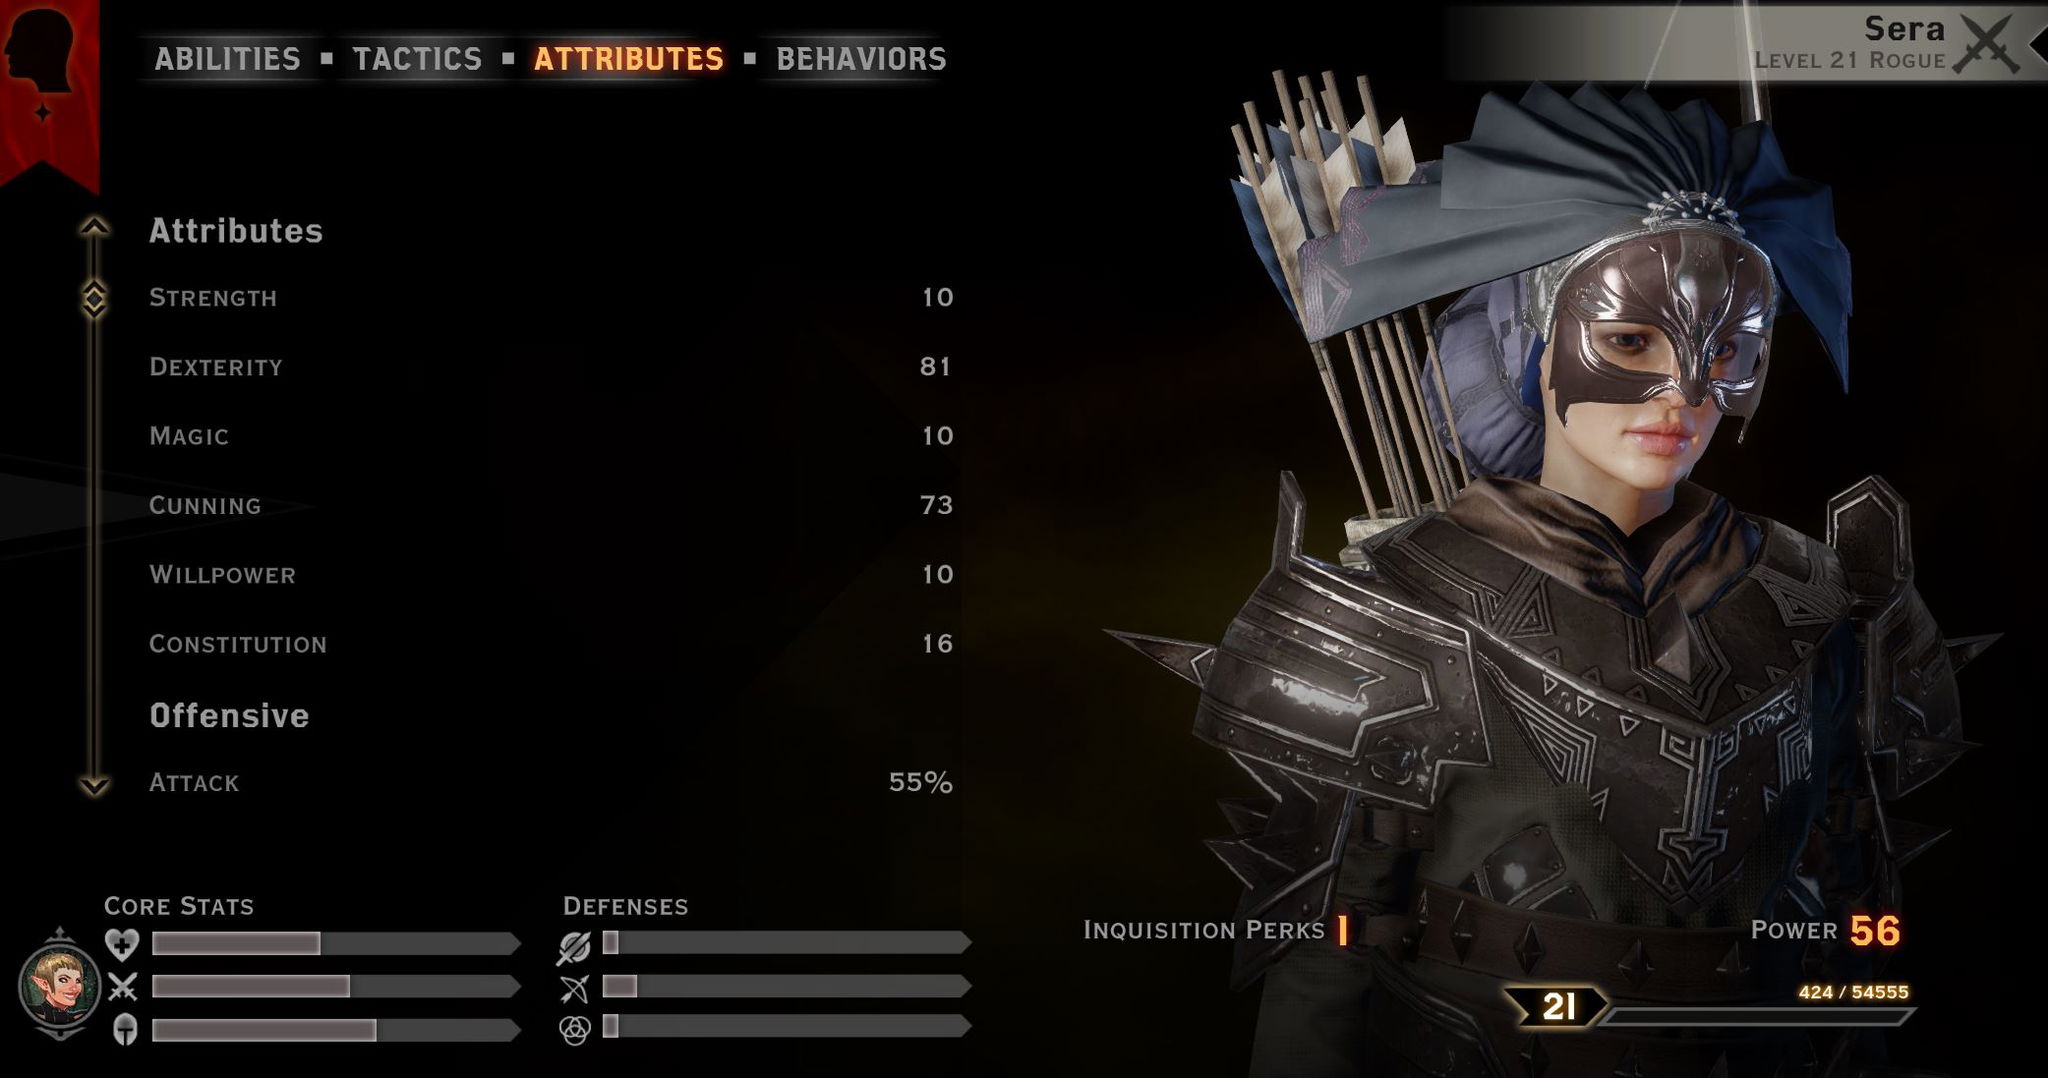
Stats and attributes
Here is how I recommend prioritizing stats when deciding what equipment to wear:
- Critical Chance - I recommend having at least 50%
- Critical damage - once you have sufficient critical chance invest here
- Cunning - boosts critical chance (until 50% critical chance)
- Dexterity - boosts critical damage
- Attack - overall boost to damage
Best items and equipment
In this section, I will go through some decent equipment that you can equip or craft.
Weapons - obtainable
Unfortunately, there are no exceptional options for the bows. If you want to maximize Sera DPS, you should invest in getting a crafted version.
| Priority | Item | Description |
|---|---|---|
| 1 | Extraordinary bow, that provides 41 dexterity resulting in 41% critical damage increase. Moreover, gives an effect that makes enemy bodies explode on kill | |
| 2 | This bow is available during the Trespasser DLC. Gives 95% armor penetration. I think it is an interesting bow to try but you get it quite late in the game. | |
| 3 | Obtained in Frostback Basin and provides adequate stats. |
Weapons - craftable
| Priority | Item | Description |
|---|---|---|
| 1 | Obtained with Trespasser DLC. Has adequate slots and most importantly explosive arrow effect. | |
| 2 | Provides 3 offensive leather slots excellent to maximize either critical chance or critical damage | |
| 3 | Provides leather slots for maximizing critical chance and critical damage. |
Armors - obtainable
| Priority | Item | Description |
|---|---|---|
| 1 | This armor is a perfect match for this build as it provides a large boost to of 45 Cunning resulting in a much higher critical chance | |
| 2 | Obtainable only in the Trespasser DLC. Boosts Critical Damage, Critical Chance, and Attack. | |
| 3 | This armor reduces ability stamina cost by 20% if not attacked for 5 seconds. This should be easy for Sera as she will be avoiding enemies most of the time. |
Armors - craftable
| Priority | Item | Description |
|---|---|---|
| 1 | This armor has 23 utility leather slots if you include upgrades. Feel free to increase either dexterity or cunning based on what Sera needs more. | |
| 2 | This is a cheaper alternative to Superior Prowler Armor Schematic. It also gives less defense and 22 utility leather slots. | |
| 3 | Can be obtained from The Descent DLC. Has decent slots, but is worse compared to the options above. |
Helmets - obtainable
| Priority | Item | Description |
|---|---|---|
| 1 | Has both good bonus stats and armor rating. Can be obtained in The Descent DLC | |
| 2 | A decent mid-game option that gives a good boost to critical damage by increasing Dexterity. | |
| 3 | Alternative to Mask of the Grand Duchess if you have a high critical chance (50%+) | |
| 4 | Alternative to Ambassador's Mask if you have a low critical chance |
Helmets - craftable
| Priority | Item | Description |
|---|---|---|
| 1 | The best craftable helmet that gives 10 leather utility slots and is easy to obtain | |
| 2 | A cheaper alternative of the Superior Skirmisher Hat Schematic. Has only 8 leather utility slots | |
| 3 | Costs only 182 Sovereigns and gives 7 leather utility slots. Get it if you are short on money. |
Amulets
| Priority | Item | Description |
|---|---|---|
| - | Gives Sera a single ability point. It is consumed once you use it. | |
| 1 | As Sera will not concentrate on flanking damage this amulet will greatly increase the overall attack power. | |
| 2 | This amulet will increase dexterity resulting in higher critical damage. | |
| 3 | This amulet will increase both critical chance and critical damage | |
| 4 | The amulet will increase the critical chance, allowing to reduce ability cooldowns. |
Belts
| Priority | Item | Description |
|---|---|---|
| 1 | This belt boosts the critical chance. Only obtainable in the Trespasser DLC. | |
| 2 | This belt will allow Sera to stagger enemies | |
| 3 | Gives a chance to decrease the enemy's armor. |
Rings
| Priority | Item | Description |
|---|---|---|
| 1 | Provides a large boost to critical damage, especially powerful once you have 50%+ critical chance | |
| 2 | Only obtainable in Trespasser DLC. However, provides large offensive bonuses | |
| 3 | Increases Critical chance allowing Opportunity knocks ability to activate more often | |
| 4 | Expensive ring bought in Black Emporium. Boosts your critical damage and critical rate. | |
| 5 | Increases overall Sera damage |
Conclusion
I hope it was interesting for you to read about this Sera build in the Dragon Age Inquisition. It should cover all your needs to fully prepare her as a strong companion.
Feel free to leave a comment below
Like, Dislike, comment, or share!
Join the Discussion
0 commentsNo comments yet.
Be the first one to leave a comment!