
Blaster Tempest Cleric Build - Thunder Apostle - Baldur's Gate 3 (BG3)
Contents
Blaster Tempest Cleric Build - Thunder Apostle
The build at its core is a full-fledged cleric. The Tempest Domain comes with additional lightning and Thunder-themed spells offering a solid start for a strong caster. However, to further empower this setup, I recommend multiclassing into Sorcerer, allowing to create destruction on turn 1.
The build will cover a few main aspects, the first being a Cleric and this opens support spells like ![]() Healing Word,
Healing Word, ![]() Mass Healing Word together with
Mass Healing Word together with ![]() The Whispering Promise. The combo will prove valuable in early and mid-game.
The Whispering Promise. The combo will prove valuable in early and mid-game.
The second aspect is being a controller able to weaken foes with various status effects. This is where ![]() Spirit Guardians and various items like
Spirit Guardians and various items like ![]() Boots of Stormy Clamour and
Boots of Stormy Clamour and ![]() Gloves of Belligerent Skies come in. Moreover, thanks to a few other items most of your offensive spells will also apply Reverbation and Radiant Orbs.
Gloves of Belligerent Skies come in. Moreover, thanks to a few other items most of your offensive spells will also apply Reverbation and Radiant Orbs.
However, the most important part comes from the Sorcerer and being able to access ![]() Metamagic: Quickened Spell. You can cover the whole battlefield in water using
Metamagic: Quickened Spell. You can cover the whole battlefield in water using ![]() Create Water and then follow up with a full spell like
Create Water and then follow up with a full spell like ![]() Call Lightning +
Call Lightning + ![]() Destructive Wrath for maximum damage.
Destructive Wrath for maximum damage.
Using ![]() Haste or Potion of Speed with Bloodlust Elixir will allow you to continue using
Haste or Potion of Speed with Bloodlust Elixir will allow you to continue using ![]() Call Lightning without expending more spell slots. So you can cast a 3 times level 6 lightning spell with maximum damage. After this lightning rush, not many enemies will be able to stand up.
Call Lightning without expending more spell slots. So you can cast a 3 times level 6 lightning spell with maximum damage. After this lightning rush, not many enemies will be able to stand up.
So let's get into the build
Class Contribution
The build mostly goes into Cleric to obtain all the core parts of the Tempest Domain. Sorcerer comes into play to empower the caster parts of the build.
9 Tempest Cleric
- Access to healing and support spells -
 Mass Healing Word and
  Healing Word
 - Can apply wet status for other casters with
 Create or Destroy Water, to empower your Lightning spells.
  Spirit Guardians - the ultimate cleric spell, to debuff enemies, making them miss their attacks. To make the most out of it you will need some gear.
- Tempest Domain offers
 Destructive Wrath, allowing you to deal the maximum possible damage with your spells.
 - Access to various reactions and spells related to the Lightning and Thunder theme -
 Wrath of the Storm,
  Call Lightning,
  Sleet Storm,
  Destructive Wave.
 - Proficiencies with shields and medium armor, allowing to improve defensive capabilities further.
- Your lightning and thunder spell effects can push foes away with the
 Thunderbolt Strike effect. It can easily result in an instant kill if enemies are close to the ledge.
3 Sorcerer
- Provides Constitution Saving Throw proficiency which will help maintain spell
 Concentration.
 - Access to
 Shield, which is an excellent cheap survivability boost if the situation demands it. The +5 Armour Class is a huge boon, allowing you to avoid deadly attacks.
 - Access to a variety of cantrips like
 Friends, which are especially useful if you are the main character, as you can win over some of the dialogues with low charisma.
 - Unique Storm Sorcerer feature -
 Tempestuous Magic, giving a huge boost in mobility.
 - Metamagic mechanic and Sorcery points. You will be able to cast full spells using
 Metamagic: Quickened Spell, giving a unique advantage over normal cleric builds.
Leveling Overview
Here is a concise table with all the main picks during your leveling progression. For more detailed reasoning, I go further in the article. Also, do not forget to check the recommended gear as it is crucial.
| Level | Class | Selection |
|---|---|---|
| 1 | Cleric 1 | STR - 8, DEX - 16, CON - 15, INT - 8, WIS - 17, CHA - 8 |
| Skills: any | ||
| Cantrips: |
||
| Prepared Spells: |
||
| Subclass: Tempest Domain |
||
| 2 | Cleric 2 | - |
| 3 | Cleric 3 | Prepared Spells: |
| Cantrip: |
||
| 4 | Cleric 4 | Feat: Ability Improvement - +1 Wisdom +1 Constitution or +2 Wisdom |
| 5 | Cleric 5 |
Prepared Spells: |
| 6 | Sorcerer 1 (respec as first level) |
Cantrips: |
| Spells: |
||
| Subclass: Storm Sorcery | ||
| 7 | Sorcerer 2 | Spells: any utility spell |
| Metamagic: |
||
| 8 | Sorcerer 3 | Spells: |
| Metamagic: |
||
| 9 | Cleric 6 | - |
| 10 | Cleric 7 | - |
| 11 | Cleric 8 | Feat: |
| 12 | Cleric 9 | Prepared Spells: |
Starting the Game - Level 1
This section covers the creation screen and what would go into the best Races, Abilities, and Skills for the Blaster Cleric build. Some of these choices are impactful as you cannot respec them.
Races
Picking a race provides various benefits - abilities, dialogue options, looks, etc.
| Race | Features | Description |
|---|---|---|
 Wood Half-Elf Wood Half-Elf |
|
The race picks are very similar, the main difference is weapon proficiencies. However, the cleric subclass will already provide everything that you need. The most important aspect is the increased movement speed that you will need when using |
 Wood Elf Wood Elf |
|
|
| High Half-Elf |
|
The High subraces of elves can be useful as they give access to cantrips like |
 High Elf High Elf |
|
|
 Halfling Halfling |
The good thing is that Tempest Domain does not need to be as much on the frontlines and can play as a caster. This opens up options for shorter races. | |
 Blue Dragonborn Blue Dragonborn |
|
Although the race is somewhat disappointing, it still fits the theme pretty well, as it represents lightning elements. |
| Bronze Dragonborn |
|
Class
| Overview | |
|---|---|
 Cleric Cleric |
|
| Clerics are representatives of the gods they worship, wielding potent divine magic for good or ill. | |
| Features | |
 Spell Slots Spell Slots |
These can be used to cast spells and are restored each long rest. |
| Unique spell list accessible based on your cleric subclass. | |
Cantrips
| Cantrips | Description |
|---|---|
| The main damage cantrip of clerics deals radiant damage. Early in the game, it is underwhelming, due to low Spell Save DC, but later it can be a decent option when you are saving spell slots. | |
| It can be used to light the area around you, but also deals 1d8 fire damage. This is a recommended general damage option early in the game | |
| The most important cleric cantrip, which improves various ability rolls, works on yourself and party members. |
Subclass
| Overview | |
|---|---|
 Tempest Domain Tempest Domain |
|
| Features | |
| Especially early in the game, this gives an excellent use for reaction. | |
| A decent spell that can be used to throw off enemies from ledges. | |
| Cover an area in fog, which can be used for pickpocketing or making combat easier. | |
Deity
I would suggest Talos, as it represents thunder and lightning.
Prepare Spells
Clerics get plenty of good level-1 spells. You might not have enough slots to equip them all but don't worry, more will be available as you level up. Choose your preferred ones.
| Spells | Description |
|---|---|
| The main, long-range damage spell for the cleric in the early game. | |
| The core spell of this build will allow your Lightning-based spells to deal double damage. In most cases, you will be able to destroy simple grunt foes. | |
| If enemies are close to you, this is the go-to spell, which a strong damage rolls. It can also crit, inflicting even more damage. | |
| One of the best control spells in the game, if you have a high chance of landing it. What makes it special is that it does not use a |
|
| Use this spell to make the ally untouchable, for example, if they have low HP, or you want to divert the enemy's attention. | |
| The best healing spell, due to its cheap cost and ability to revive downed targets without wasting action points. Moreover, later with |
|
| This is an excellent spell, however, I would only use it before combat and in the early game. It loses value later on, especially with some excellent items you can get in Act 1 like |
|
| Excellent early game spell, that can be used to improve defensive capabilities. I would not use it too much at higher levels as you get better use for concentration slots. |
Background
Backgrounds are mostly for role-playing and you can pick whatever you prefer. If you want to optimize, then it would be good to pick backgrounds that are based on your ability points of Wisdom.
| Background | Skills | Description |
|---|---|---|
| Folk Hero | Animal Handling Survival |
Both wisdom skills, that cleric can cover well. However, may not be the best choice in terms of role-play. |
| Acolyte | Insight Religion |
Insight is a Wisdom skill and Religion although Intelligence fits well with Cleric's theme. |
| Guild Artisan | Insight Persuasion |
Excellent choice for the main character, you get Persuasion skills which help with dialogues. |
| Outlander | Athletics Survival |
Mainly relevant for Survival skill which is wisdom-based. |
Abilities
Now let's take a look at the abilities of the Tempest Cleric build. Correct allocation will allow you to maximize the early gameplay and get good modifier bonuses.
| Ability | Value | Description |
|---|---|---|
 Strength Strength |
8 | Not relevant for the build |
 |
16 (15+1) | The key ability of the build will give increased damage, initiative, and armor class. |
 Constitution Constitution |
15 | The constitution will play a major role in maintaining spell concentration and HP pool. If you will be getting |
 Intelligence Intelligence |
8 | Least important stat for the build. |
 Wisdom Wisdom |
17(15+2) | The main spellcasting ability for clerics. This should be maximized to have success with spells. |
 Charisma Charisma |
8 | If you set Constitution to 14, you can allocate 2 points here. |
Skills and Expertise
Overall, the skills should be impacted by your roleplaying and background decisions. However, you would still want those that will give you the best benefits. My recommendation would be to go for these, most relevant to the theme of the build:
- Animal Handling
- Insight
- Medicine
- Perception
- Survival
Leveling Progression - Levels 2-12
Here is the detailed progression for the Tempest Cleric to get you started. You can use it as a guideline because early games can be daunting and overwhelming. Later on, once you get a feel for the class you can start picking your options
Level 2
This is where you will have left the tutorial area, and will start exploring the world.
| Action | Description |
|---|---|
| Excellent against undead enemies, making them run away. | |
| The main feature of Tempest Domain allows it to deal maximum damage with Thunder and Lightning spells. |
Level 3
At this level the Cleric gets access to Level 2 spells, further expanding the spellbook. Moreover, new always-ready spells are introduced.
| Spells | Description |
|---|---|
| Can be used to push back foes. | |
| Excellent spell to deal with Scrying Eyes that you will encounter in some places. |
Prepared Spells
| Spells | Description |
|---|---|
| I recommend being aware that you have this spell, as there are situations where it might be useful. It does not have to be always in the prepared spell list. | |
| Excellent spell, that you can use to greatly improve the survivability of one of your party members. | |
| Can be situationally useful, especially if you have an 80%+ chance to land it. It can also shine if you start using the |
|
| Gives a good use for bonus action. The weapon deals okay damage and can act as a distraction. | |
| Almost a mandatory spell to have by someone in the group. This can help with various ability checks and turn the tables to your side. |
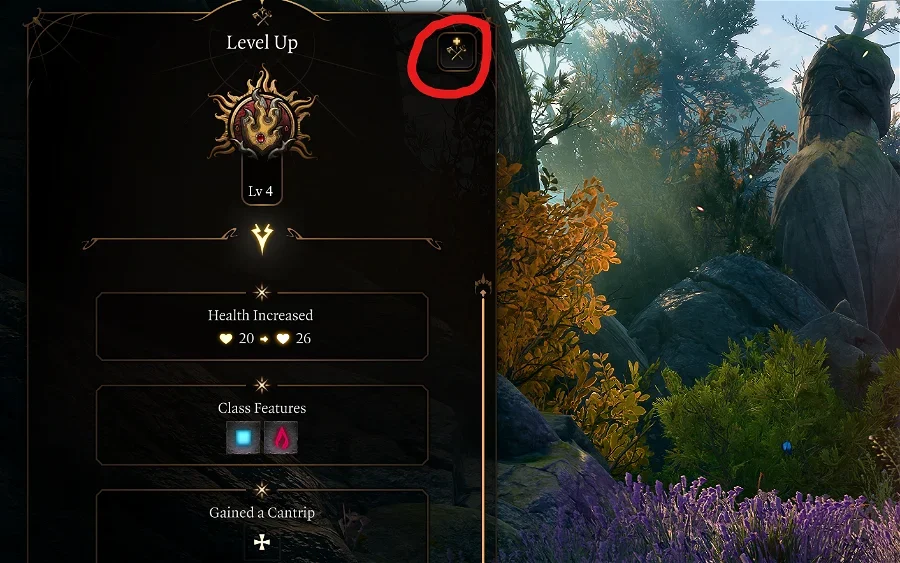
Level 4
Level 4 brings the first feat, it will be a huge improvement.
Cantrips
| Cantrip | Description |
|---|---|
| This cantrip will be useful together with the |
Feat
Here you can select from a few choices, based on your playstyle and what kind of playthrough you are doing.
| Feat | Description |
|---|---|
| Ability Improvement | Depending on whether you picked:
|
Level 5
This level is a huge milestone, and that is why no multiclassing happened before. Access to level 3 spells, provide a big step up in terms of damage and enemy debuffs.
| Feature | Description |
|---|---|
| When you use |
The Tempest Domain subclass also gains special spells:
| Spell | Description |
|---|---|
| This is spell slot efficient spell, especially if you plan on having a longer encounter. For example, in the late game, you can cast it as a level 5 spell, and continue recast it without expending more slots. Add |
|
| Extremely powerful control spell that is usually overlooked, because it does not have any damage. However, you can make enemies prone with it, cancel the concentration of spells, and cover an area in ice. After this, enemies will have to pass Dexterity checks to not get prone and skip their turns. |
Prepared Spells
Now, this is probably the most important section as you will gain some game-changing spells, allowing you to win many encounters.
| Spell | Description |
|---|---|
| This is one of the strongest cleric spells, that will be your bread and butter throughout the game. It will be used to weaken enemies using the Radiating Orb status effect. | |
| This can be useful throughout the game in case you or a party member gets cursed. | |
| You can use this Glyph to apply various damage types and effects. For example - fire, cold, lightning, etc. The main highlight is Sleep, which works on multiple enemies and can outright win you an encounter. | |
| Using this as a bonus action together with |
Level 6 - respec to Sorcerer Lv 1
Now, to further empower Cleric and its capabilities you will have to respec and pick Sorcerer as a first class:
- Get proficiency in Constitution Saving Throws. This is important as it allows you to sustain Concentration on spells while being hit.
- Access to defensive spells like Shield.
- Have the correct spellcasting modifier on items, which depends on the last class taken via multiclassing (it will be Cleric).
- Access to metamagic, specifically for Metamagic: Quickened Spell to enable casting with your bonus action.
Class
| Overview | |
|---|---|
 Sorcerer Sorcerer |
|
| Features | |
| Spell Slots |
These can be used to cast spells and are restored each long rest. |
Cantrips
Take those cantrips that do not rely on damage as they will be using the Charisma modifier, which will be low for Druid.
| Cantrip | Description |
|---|---|
| If you are the main character and do most of the dialogues, this is also a good choice as it gives an |
|
| Can be useful in some situations, where an ally might be in a pinch, and you have no good use for action otherwise. | |
| You can use this cantrip to pull enemies together before an encounter. | |
| Can be used to solve some puzzles and overcome obstacles. |
Spells
| Spells | Description |
|---|---|
| Very good spell that can ensure +5 Armour Class giving a good survivability boost. | |
| I recommend this spell. It is not very powerful, but it can be used to specifically hit a foe, with multiple attacks and using |
Subclass
| Overview | |
|---|---|
 Storm Sorcery Storm Sorcery |
|
| Features | |
| After you cast a Level 1 spell or higher you can Fly as a bonus action until the end of your turn without receiving Opportunity Attacks. | |
Abilities
Reuse the same ones from the 1st level.
Level 7 - Sorcerer Lv 2
This is more of a progression level, giving a glimpse of one of the main mechanics that will be fully utilized after the next level.
| Actions | Description |
|---|---|
| Spend Spell Slots to gain Sorcery Points. Once you get some more metamagic options, you could sacrifice spell slots, to cast two spells in one turn or increase your range | |
| Spend Sorcery Points to unlock a Spell Slot. You could create a higher tier spell slot, to increase the damage over what you can at the current level |
Spells
Because your spellcasting modifier is Wisdom, you should go with any utility spell like ![]() Enhance Leap,
Enhance Leap, ![]() False Life, etc.
False Life, etc.
Metamagic
To be fair, none of these matter, as the goal is level 3 options.
| Metamagic | Description |
|---|---|
| Can be used to twin some of the spells, overall Cleric does not have many of these. | |
| Increases the duration of spells. I would mostly recommend using it on |
Level 8 - Sorcerer Lv 3
You can now pick level 2 spells and additional metamagic options.
Spells
You can only choose two options. I would recommend something that is not offensive and does not rely on a spellcasting modifier:
| Spells | Description |
|---|---|
| Can be used to move around the battlefield. The main drawback is that this effect is similar to |
|
| Can have niche uses when you are standing in the front. |
Metamagic
| Metamagic | Description |
|---|---|
| This is the goal of Sorcerer Multiclass. You will be able to cast full spells using your bonus action. With correct preparation on some turns, you can unleash deadly storms with all your lightning and thunder spells. |
Level 9 - Cleric Lv 6
A new subclass feature is unlocked. Moreover, you can select one more feat.
| Feature | Description |
|---|---|
| With this feature, you will be able to see some silly situations, where enemies are pummeled around from your spells. It does not provide too many practical bonuses and sometimes can even have negative effects, of spreading enemies apart. |
Level 10 - Cleric Lv 7
Level 4 spells are unlocked, also new permanent spells are added:
| Spells | Description |
|---|---|
| An excellent spell that has a few good uses. First, it can cover an area with Ice. Second, each of the hits will apply a separate instance of Radiant damage with |
|
| Has some niche uses, when you would want an ally to freely move on difficult terrains. However, the spell slot cost is quite steep. |
Prepared Spells
Sadly, there is nothing much to recommend. The spells can be situationally good. However, none of them will change the core rotations of Tempest Cleric.
Level 11 - Cleric Lv 8
A new subclass feature is unlocked. Moreover, you can select one more feat.
| Feature | Description |
|---|---|
| The only time this would be used is when I would activate Attack of Opportunity, otherwise it does not serve much purpose. |
Feat
| Feat | Description |
|---|---|
| This will help maintain spell concentration while being hit. Some items give the same effect, but these will most likely go to other characters. | |
| I would only pick this in rare situations where the Cleric is the only cater in the group. This way you can use all the cool staves from Act 3. | |
| If you constantly want to go first and avoid any surprise rounds, this feat guarantees that. | |
| Ability Improvement | Getting +2 Wisdom, especially if you are Shadowheart will alleviate the low Wisdom values due to no access to Mirror of Loss. |
Level 12 - Cleric Lv 9
Level 9 gives access to level 5 spells
| Spell | Description |
|---|---|
| Area control spells, that can impose difficult terrain and apply a decent amount of damage on targets walking through it. | |
| Excellent spell, that can also make foes prone, making them easy targets for your allies. |
Prepare Spells
| Spell | Description |
|---|---|
| Removes negative status effects, that can be useful in some situations. | |
| Deadly spell that creates a pillar of fire dealing both fire and radiant damage. |
Maximizing Ability Scores
Now, as the build progression is covered there are a few aspects and important decisions you will have to make throughout the game. These will decide your final score for abilities.
- Act 1 -
 Auntie Ethel's Hair - you will want to get +1 Wisdom if you pick this choice.
 - Feat - Ability Improvement - +2 Wisdom
- Act 3 - Mirror of Loss - pick +2 Wisdom.
This will allow you to reach 22 natural Wisdom. This is the maximum value. Without ![]() Auntie Ethel's Hair, you will maximize it at 20.
Auntie Ethel's Hair, you will maximize it at 20.
Potions, Elixirs and Consumables
Let's take a look at what consumables you can use to further empower the build.
Potions
These are general consumables, and most of them are activated for a few turns. Potions are separate from Elixirs and can be active together.
| Consumable | Description |
|---|---|
 Potion of Speed Potion of Speed |
In case you or your other casters have a Concentration spell slot taken and cannot cast Haste, use this potion. It acts similarly, but the effect is just for 3 turns. |
 Potion of Animal Speaking Potion of Animal Speaking |
Although not something powerful, it is worth stocking up and saving a spell slot. |
 Potion of Invisibility Potion of Invisibility |
Can be used to get a perfect position before the encounter starts. |
Elixirs
Unfortunately, only one Elixir can be active at a time. However, the good thing is that they last until a long rest, making them very useful and economical.
Be sure to activate them before combat as otherwise, you will need to use Bonus Action.
| Consumable | Description |
|---|---|
 Elixir of Bloodlust Elixir of Bloodlust |
Very effective elixir that gives another action point if you kill an enemy. I would say this is the best one to use to maximize your output through the turn. |
 Elixir of Battlemage's Power Elixir of Battlemage's Power |
Gain 3 stacks of Arcane Acuity. I would say this should be the most used elixir for higher spell success. |
 Elixir of Peerless Focus Elixir of Peerless Focus |
Another good choice that allows to better maintain spell Concentration. |
 Superior Elixir of Arcane Cultivation Superior Elixir of Arcane Cultivation |
Grant's a single level 3 spell slot. Could be useful in case you are preparing for a longer encounter. |
 Supreme Elixir of Arcane Cultivation Supreme Elixir of Arcane Cultivation |
Grant's a single level 4 spell slot. Could be useful in case you are preparing for a longer encounter. |
 Elixir of Vigilance Elixir of Vigilance |
For some encounters, you will want to go first. This elixir will ensure that it overcomes even surprise mechanics. However, if you have |
Illithid Powers
This special mechanic in Baldur's Gate 3 allows you to consume tadpoles and unlock special Illithid Powers.
At first, you can only use the base powers. As you move to Act 3, you will be able to unlock the outer ring powers.
| Illithid Power | Type | Description |
|---|---|---|
| Base | Beneficial power to take as it does not have any costs, and provides only benefits on the first hits. | |
| Base | Guarantees a critical hit, use it on important targets, that you want to make sure are killed. This works well with spells like |
|
| Base | As this is Psychic damage, you will double it to 2d4 thanks to Resonance Stone. | |
| Base | A decent use for reaction to deal some bonus psychic damage. | |
| Base | Can help to kill an enemy faster if it is left with a few HP. | |
| Elite | As you are not a charisma-based character, these proficiencies help with dialogue checks. | |
| Elite | One of the most powerful illithid powers. You can use it to pull enemies together. If you can follow up with |
|
| Elite | Can be used to save yourself from a deadly spell. This is especially relevant as you will have a |
|
| Elite | Remove the cost of spell slots or charges. | |
| Elite | You can now use action and bonus action interchangeably, giving two full spell casts each turn. |
Equipment Recommendations
Now I would like to go through some gear recommendations to maximize the Blaster Tempest Cleric Build. Items are especially important as they take the build to the next level thanks to their unique effects.
Act 1
The core items of the build are obtained in Act 1, so be sure not to miss those items as they will play a crucial role in making the Lightbearer effective.
| Slot | Item | Description |
|---|---|---|
 Melee (One-Handed) Melee (One-Handed) |
If you do not care about the unique effects, this is a go-to choice. The bonus Armour Class will help you avoid enemy hits and activate |
|
| I think this weapon deserves an honorable mention. It looks cool and has satisfying and useful effects. | ||
| This is one of the best weapons in the game for a supporting class like Cleric. If you can precast its Phalar Aluve: Melody before combat, I recommend using it both to improve companion damage or attack rolls. | ||
 Ranged Ranged |
Gives bonus initiative, allowing one to go earlier in combat. | |
| It provides a substantial defensive boost by reducing critical hit damage. | ||
| Gives a bonus to saving throws, easily accessible early in the game. | ||
 Head Head |
A solid helmet that will deal 1d4 radiant damage if the enemy misses you. Moreover, it will also activate any reverbation effects from |
|
| Improves movement speed, allowing one to reach important targets easily, early in the game. | ||
 Cloak Cloak |
- | Nothing relevant for the build |
 Armor Armor |
This is the best armor for the whole game. | |
 Gloves Gloves |
One of the best gloves for builds that apply status effects via various damage sources. This will create Reverbation, increasing the chance of making the enemy Prone. | |
 Boots Boots |
These boots are an interesting choice, especially together with |
|
| The best boots in terms of offensive damage. They will give Reverbation stacks when you apply status effects, for example, |
||
| One of the best boots, giving a total advantage for movement on difficult surfaces. It also gives |
||
| Excellent boots that improve movement capabilities, especially useful when you are running around with |
||
 Amulet Amulet |
The best cleric amulet early in the game. Use the spells together with |
|
 Rings Rings |
The best ring for a cleric early in the game. This will apply |
|
| Makes you resistant to lightning damage and you are immune to electrocution. You can then stand on electrified water surfaces, which works perfectly with |
||
| Excellent ring that will allow you to move around more. This is especially useful before you obtain |
||
| The bonus Armour Class is a great boost for survivability. |
Act 2 - mid-game
| Slot | Item | Description |
|---|---|---|
| Melee (One-Handed) |
- | Sadly, Act 2 doesn't have any caster weapons that would help specifically this build, so continue using the ones from Act 1. |
| Ranged |
In my opinion this still plays a major role, especially in a few encounters in Act 2. | |
| Equipping two of these will allow you to shoot using off-hand and activate |
||
| The best shield for casters as it gives +1 Spell Save DC, increasing spell success. | ||
| What makes this shield amazing is that by wearing it you will be going first most of the time during encounters. This is a great way to apply Radiating Orb and Reverbation on enemies using |
||
| Head |
Adds +1 Spell Save DC improving spell success. | |
| This helmet can be useful to improve your Spell Save DC a little. Still, your thunder spells like |
||
| Cloak |
Because most of the enemies you come across will have Reverbation this cloak will further help to weaken those foes. | |
| Improves survivability and Saving Throw success. You want to equip this cloak to maintain that good Armour Class. | ||
| Armor |
The best armor for clerics using Radiant damage. | |
| Gloves |
Continues to be the best glove option due to the easy way of applying Reverbation from various damage elements. | |
| Alternative option, that will add 2 more Radiating Orb stacks as you inflict damage. | ||
| Boots |
Still the best boots in terms of applying various conditions. | |
| Amulet |
Allows casting a |
|
| Rings |
The ring's bonus radiant damage will help activate |
|
| This will help with building Radiating Orb stacks. However, with all the effects you will be applying, this might be overkill as you will already be proccing |
||
| Excellent ring that can be used to apply Mental Fatigue from failed Saving Throws against your spells. | ||
| Adds another Dazed effect that can be procced after 5 Reverbation stacks are activated and Thunder damage gets applied. |
Act 3 - Final Build setup
Act 3 is where the build will get the best items, to maximize its effectiveness and damage.
| Slot | Item | Description |
|---|---|---|
| Melee (One-Handed) |
I understand that this staff has minimal chance of being used with Tempest Cleric. However, it has an excellent synergy via Kereska's Favour, allowing it to activate Bolts of Doom. This unlocks |
|
| Another staff for casters comes with the |
||
| Ranged |
The bonus initiative is an excellent boost to go early in combat. If it is not a surprise round, it is almost guaranteed. | |
| This is an improved version that you can dual wield with another hand crossbow, for an offensive option using bonus action. | ||
| One of the best shields in the game. Overall, it serves more of a defensive role giving advantages on Spell Saving Throws. | ||
| The best shield for casters as it gives +1 Spell Save DC, increasing spell success. | ||
| Head |
One of the best headwear for spellcasters, giving +2 Spell Save DC. This can be contested by other casters as it is in high demand. | |
| Cloak |
Improves Spell Save DC. However, the main caveat is that this cloak is in demand by all casters. | |
| Provides an increased chance of avoiding enemy attacks with attack rolls. | ||
| Armor |
Still the best armor in the game. | |
| Gloves |
- | Reuse the same gloves from previous acts. |
| Boots |
- | Reuse the same boots from previous acts. |
| Amulet |
Overall, the best amulet for Cleric builds. Gives additional Channel Divinity Charge and improved Spell Save DC. | |
| Rings |
Reuse the same rings from previous Acts. | |
| The ring's bonus radiant damage will help activate |
Build Mechanics
In this section, I would like to dive deep into how to play the Blater Tempest Cleric Build. This will help you utilize it to the fullest and correctly use various actions and spells throughout the game.
Important Mechanics and Combos
Let's go through key mechanics and tips on how to use the build effectively.
Healing and Buffs
The main misunderstanding about clerics is that people assume they should only be healing and supporting. However, this is far from the truth. In general, the best healing mechanic is just throwing potions, which is efficient, and cheap in comparison.
Overall, healing should be limited and in my opinion, used sparingly. My recommended spells are ![]() Healing Word and
Healing Word and ![]() Mass Healing Word. These are cheap to use and cost only bonus action, which does not interfere with your important spells that will be covered later.
Mass Healing Word. These are cheap to use and cost only bonus action, which does not interfere with your important spells that will be covered later.
However, the major highlight is that those healing spells activate ![]() The Whispering Promise ring buffing your allies. This is very valuable early in the game, so that your party has a higher hit chance, making combat easier.
The Whispering Promise ring buffing your allies. This is very valuable early in the game, so that your party has a higher hit chance, making combat easier.
Otherwise, I would leave any other healing spells for out-of-combat.
Spirit Guardians - Cleric's bread and butter
So the most important spell for Cleric is ![]() Spirit Guardians. With the correct gear that I recommend each enemy you touch, will apply various status effects like Reverbation, Prone, and Radiating Orb.
Spirit Guardians. With the correct gear that I recommend each enemy you touch, will apply various status effects like Reverbation, Prone, and Radiating Orb.
So you are like a running Beyblade damaging everything that you touch and also weakening their combat potential. Just remember the core items to make this work - ![]() Luminous Armour,
Luminous Armour, ![]() Boots of Stormy Clamour, and
Boots of Stormy Clamour, and ![]() Gloves of Belligerent Skies. There are some other options, but overall these are the best picks.
Gloves of Belligerent Skies. There are some other options, but overall these are the best picks.
So the idea is to run around and have as many as possible enemies touched by your light. However, this might be limiting in some cases, where enemies might be on higher ground or behind covers. This is where the next step comes in...
Tempestuous Flight
Taking a level 1 dip into Sorcerer unlocked one of the features that will greatly improve Light cleric mobility - ![]() Tempestuous Magic. This will allow you to fly at the cost of bonus action, not use movement speed, and avoid opportunity attacks.
Tempestuous Magic. This will allow you to fly at the cost of bonus action, not use movement speed, and avoid opportunity attacks.
While flying any enemies you touch with ![]() Spirit Guardians, will be affected by it. This is an excellent way to spread Radiating Orbs and debuff most enemies in the combat zone.
Spirit Guardians, will be affected by it. This is an excellent way to spread Radiating Orbs and debuff most enemies in the combat zone.
Sorcery points and Metamagic
One drawback of this build is that to use ![]() Metamagic: Quickened Spell you will need Sorcery points. With 3 levels of Sorcerer, this will result in 3 points, which allows only one use. However, this can be overcome by using
Metamagic: Quickened Spell you will need Sorcery points. With 3 levels of Sorcerer, this will result in 3 points, which allows only one use. However, this can be overcome by using ![]() Create Sorcery Points.
Create Sorcery Points.
This action can consume spell slots, and level 2 ones are perfect as these spells don't offer anything overpowered. So if you consume 3 level 2 spell slots, you can use ![]() Metamagic: Quickened Spell 3 times per long rest, which is not bad, considering you can do that once per short rest (if having Bard).
Metamagic: Quickened Spell 3 times per long rest, which is not bad, considering you can do that once per short rest (if having Bard).
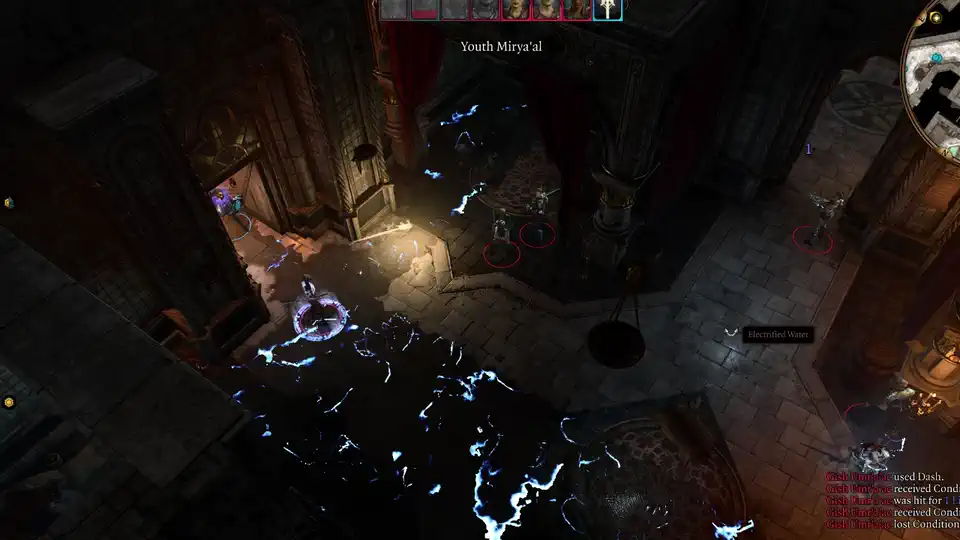
Electrified Water fun
One of the unique features of Tempest Domain that you can do is create a pool of electrified water that debuffs, damages, and pummels foes around. The nice thing is that this combo does not use the Concentration slot. Let's go through the steps of how to create it.
First, the core of this combo can be created using these: ![]() Create Water +
Create Water + ![]() The Watersparkers +
The Watersparkers + ![]() The Sparkswall.
The Sparkswall.
You will cover a huge area in water, electrify it and whoever steps on it gets electrocuted. This might not seem like a big benefit, but remember, these enemies become Wet. After that they can be exploited by you or other casters with either Cold or Lightning spells with double damage.
Still, this is not all. The water can act as a debuffing field, weakening foes. This might be developer oversight or intended mechanic but I will still mention it. Adding these items - ![]() Luminous Armour +
Luminous Armour + ![]() Callous Glow Ring +
Callous Glow Ring + ![]() Gloves of Belligerent Skies/
Gloves of Belligerent Skies/![]() Luminous Gloves with your water field will deal bonus radiant damage and debuff enemies. Crazy right?
Luminous Gloves with your water field will deal bonus radiant damage and debuff enemies. Crazy right?
This is not all, due to how game mechanics work ![]() Thunderbolt Strike will knock back foes with each hit, making them waste their movement speed. This unique tempest feature works with any kind of lightning/thunder damage and various riders.
Thunderbolt Strike will knock back foes with each hit, making them waste their movement speed. This unique tempest feature works with any kind of lightning/thunder damage and various riders.
Easy way to apply wet
If you are in a bind and want to save Action Point without casting ![]() Create Water, there is a cheaper alternative. You can throw Water Bottle from the inventory onto the ground or close to the enemies.
Create Water, there is a cheaper alternative. You can throw Water Bottle from the inventory onto the ground or close to the enemies.
The next step will require some kind of ![]() Hand Crossbow +1 so that you can shoot with offhand. Now hit the bottle with your arrow, and it will break, applying wet to the nearby targets.
Hand Crossbow +1 so that you can shoot with offhand. Now hit the bottle with your arrow, and it will break, applying wet to the nearby targets.
Maximum Lightning Damage
The main highlight of Tempest Domain is what they access at level 2 - ![]() Destructive Wrath. This allows dealing maximum damage with Lightning spells. Now imagine, you use
Destructive Wrath. This allows dealing maximum damage with Lightning spells. Now imagine, you use ![]() Call Lightning, upcast it to level 6, apply Wet on enemies, and activate
Call Lightning, upcast it to level 6, apply Wet on enemies, and activate ![]() Destructive Wrath. This will result in 120 damage per target.
Destructive Wrath. This will result in 120 damage per target.
If you will have ![]() Haste and Elixir of Bloodlust +
Haste and Elixir of Bloodlust + ![]() Metamagic: Quickened Spell you can cast the same spell 3 times. This is 360 damage just on a single target, and many times a few of them will be standing together.
Metamagic: Quickened Spell you can cast the same spell 3 times. This is 360 damage just on a single target, and many times a few of them will be standing together.
Another thing to consider for the Thunder Apostle build is to equip ![]() Markoheshkir and use
Markoheshkir and use ![]() Chain Lightning - the numbers become even more ridiculous.
Chain Lightning - the numbers become even more ridiculous.
Reverbation and status effects
The main highlight of any Cleric build is the sheer amount of status effects you will apply - Reverbation, Prone, Radiating Orb, Daze, etc. This can greatly weaken foes and make them harmless to your group.
The main highlight in my opinion is Reverbation. This at first weakens enemy strength, dexterity, and constitution saving throw proficiencies. As it stacks to 5, the enemy will get damaged with 1d4 thunder. This is finished by making the enemy prone if they fail a saving throw.
Once the enemy is prone they are easy pickings for your melee characters and waste their precious movement speed to stand up. To get these effects consistently be sure to use ![]() Boots of Stormy Clamour and
Boots of Stormy Clamour and ![]() Gloves of Belligerent Skies.
Gloves of Belligerent Skies.
Early Game Combat
Let's cover how you should progress combat levels 1-6. You will be limited by the amount of spell slots you have.
- For early encounters use normal spells like
 Guiding Bolt and,
  Inflict Wounds. To save spell slots I would prioritize
  Produce Flame followed by
  Sacred Flame to inflict damage
 - If you can use
 Bless to buff allies before combat. Once you get
  The Whispering Promise, you can forgo the spell and use Healing Word or Mass Healing Word to buff your allies.
 - Once you obtain Spirit Guardians use these to run around the battlefield and debuff the enemies. Check the equipment section for the items that work the best with it. This should be your main spell for the time being.
- Create or Destroy Water is an excellent spell if you have other casters that use Cold or Lightning spells.
- Your bonus action has plenty of uses. The already mentioned healing spells, but you can also summon
 Spiritual Weapon, which can deal additional damage and distract foes.
  Glyph of Warding can be used to put enemies to sleep without a Concentration slot. It is excellent if you see a few of them grouped up.
- If things are turning for the worse, you can always use
 Sanctuary to save an ally or use it to flee combat.
Late Game Combat
For the late game, there are a few things to consider, but overall you will fall into one of two combat options, depending on the required results:
Nova Round
This should be used when you want to evaporate your foes and win the encounter as fast as possible.
- Be ready to chug Potion of Speed or obtain
 Haste. You can also drink Elixir of Bloodlust as it will give another action point.
 - Apply wet on enemies using the Create or Destroy Water or Water Bottle trick that I mentioned.
- Unleash your spells - Call Lightning with the highest level spell slot. Follow up with recasts, and finish with Metamagic: Quickened Spell. This can result in 3 casts, which should evaporate most of the enemies.
- If you have
 Markoheshkir, use
  Chain Lightning. Just it alone can tear through a group of enemies.
 - Destructive Wave is another option, as it will proc multiple status effects from your items like
 Luminous Armour,
  Callous Glow Ring, etc. damaging and weakening enemies. The spell also has a huge area of effect, that other lightning spells don't have.
Normal Round
I recommend this option when you are worried about spell slots and want to conserve them. This option will use lower-tier ones, saving the higher ones, for bigger encounters:
- If you see the upcoming encounter, precasting Create Water can be useful for other casters. Otherwise don't worry about it.
- Spirit Guardians is your starting spell. After that reach enemies close to you so that they get damaged and debuffed. Tempestuous Magic will allow you to fly into a group of enemies or avoid risky Attacks of Opportunity.
- On the next turn, you can use Sacred Flame, Guiding Bolt, and Inflict Wounds for some decent and cheap damage sources on the next turns. The spells will also activate Tempestuous Magic so you could again damage foes with Spirit Guardians.
- You can also start combat with something like Sleet Storm, especially on melee enemies, as they will get prone, waste their movement speed, and may slip on the ice again.
 Ice Storm can do the same effect, but it will use a Level 4 spell slot.
Build Variations
I don't think the build has many worthwhile variations. You can go with pure Cleric for the third feat, but overall this does not change much, with the build being already very powerful.
| Setup | Description |
|---|---|
Tempest Cleric Build:
|
This build is a base Tempest Domain I recommend. It is a bit different in the sense that it relies less on being a blaster and more on control and area denial. The special mechanic is its water pools that get electrified, knockback, and debuff enemies. |
Conclusion
Thank you for reading the Blaster Tempest Cleric build - Thunder Apostle for Baldur's Gate 3. This caster build can unleash a fiery storm on Nova round and end any kind of encounter with Thunder at it's fingertips. If you want something aggressive with Cleric, this build is for you!
Cheers!
Like, Dislike, comment, or share!
Join the Discussion
0 commentsNo comments yet.
Be the first one to leave a comment!