

Dark Justiciar - Trickery Cleric - Shadowheart Build - Baldur's Gate 3 (BG3)
Contents
Trickery Cleric Build - The Dark Justiciar
The build idea is to create a fully dedicated warrior of Shar - Dark Justiciar. This build is perfect if you want to lead Shadowheart on the evil path, as it utilizes her default class and subclass. In addition, it transitions into a semi-melee build later in the game, once you obtain specific gear with important Act 2 choices in mind.
The build will depend on a few important items. Those that have played the game will know what I am talking about:
 Shar's Spear of Evening - one of the best weapons in the game, offering very powerful bonuses
 Dark Justiciar Half-Plate - one of the best-looking armors in the game. Will give excellent bonuses for the late Act 2 and early Act 3.
 Bhaalist Armour - the best light armor in the game for any character that deals piercing damage type.
The build can work without these, of course, as there are plenty of alternatives. However, these pair extremely well in terms of flavour.
First, this is a cleric build at its core and with ![]() Guidance,
Guidance, ![]() Spirit Guardians,
Spirit Guardians, ![]() Healing Word, and other goodies later in the game. So without a doubt, you can have a powerful, radiant orb lawnmower that applies buffs.
Healing Word, and other goodies later in the game. So without a doubt, you can have a powerful, radiant orb lawnmower that applies buffs.
Trickery Domain comes in when you have a party that can utilize stealth mechanics to their advantage. For example, activating ![]() Pass Without Trace and positioning yourself close to Gloomstalker Assassin or Swords Bard Archer, will allow you to easily take out enemies before they spot you with +10 to stealth checks.
Pass Without Trace and positioning yourself close to Gloomstalker Assassin or Swords Bard Archer, will allow you to easily take out enemies before they spot you with +10 to stealth checks.
There are other ways to use Trickery Domain. You can help your melee combatants to obtain ![]() Advantage using
Advantage using ![]() Invoke Duplicity while also staying invisible thanks to
Invoke Duplicity while also staying invisible thanks to ![]() Cloak of Shadows. If things come to worst, just cast
Cloak of Shadows. If things come to worst, just cast ![]() Fear and see enemies fearful while also dropping their weapons.
Fear and see enemies fearful while also dropping their weapons.
The last part of the build is Way of the Shadows Monk. This will take the build to the next level - ![]() Cloak of Shadows,
Cloak of Shadows, ![]() Shadow Step,
Shadow Step, ![]() Shadow Arts: Darkness, etc. All of these complement the Dark Justiciar theme extremely well. The last piece is
Shadow Arts: Darkness, etc. All of these complement the Dark Justiciar theme extremely well. The last piece is ![]() Stunning Strike (Melee) which can disable enemies with your melee attacks.
Stunning Strike (Melee) which can disable enemies with your melee attacks.
So generally, the subclass is overlooked, but I do think it can play a vital role in correctly setting up the party.
Class Contribution
The build mostly goes into Cleric to obtain all the core parts of the build. The Monk will provide additional proficiencies and better combat capabilities.
6 Trickery Domain Cleric
 Invoke Duplicity to help your allies or yourself gain an
  Advantage on attacks in the early game.
- Stealth-related actions -
 Pass Without Trace and
  Cloak of Shadows to avoid being detected by enemies.
  Fear is a very powerful control spell, to make enemies run and Disarm them. You would use it, once stealth breaks and combat initiates.
- Access to healing and support spells -
 Mass Healing Word and
  Healing Word.
 - Can apply wet status for other casters with
 Create or Destroy Water, helping to make enemies vulnerable to Lightning and Cold damage.
  Spirit Guardians - the ultimate cleric spell, to debuff enemies, making them miss their attacks. To make the most out of it you will need some gear.
- Access to control spells -
 Command,
  Blindness,
  Glyph of Warding,
  Hold Person and others. These can be used depending on the situation.
 - Proficiencies with shields and medium armor, allow for further improvement of defensive capabilities.
6 Way of Shadows Monk
Monks come with plenty of unique features. However, as this build uses medium or light armors, most of these will be skipped. Still, there are plenty of other things that empower this multiclass.
- The main thing that is needed from this multiclass is an
 Extra Attack to improve the martial capabilities.
  Martial Arts: Dextrous Attacks allows you to scale weapon damage with Dexterity instead of strength, saving ability points.
 Stunning Strike (Melee) to disable foes with weapon attacks.
 Evasion - decrease damage from spells that target Dexterity Saving Throws.
 Shadow Arts: Darkness to create a field of Darkness, from which you can safely attack enemies.
  Shadow Arts: Hide allows you to hide with a bonus action.
- One overlooked option is
 Minor Illusion which can be used to control enemy positions, move them to a specific location, or distract while you move around.
 - Cloak of Shadows - one of the best invisibility actions in the game allowing you to leave combat. It can also be used to set up Surprise rounds if you are obscured.
 Shadow Step - move between shadows and gain Advantage with melee attacks.
Build Overview
Here is a concise table with all the main picks during your levelling progression. For more detailed reasoning, I go further in the article. Also, do not forget to check the recommended gear, as it is crucial.
This is a general overview of the build that contains item and leveling choices. I go deeper into the setup, combat approach and gear selection reasons for the progression of each act.
| Level | Class | Selection |
|---|---|---|
| 1 | Cleric 1 | Cantrips: |
| Subclass: Trickery Domain | ||
| Recommended Prepared Spells: |
||
| Abilities: STR - 8, DEX - 16, CON - 15, INT - 8, WIS - 17, CHA - 8 | ||
| Skills: any | ||
| 2 | Cleric 2 | - |
| 3 | Cleric 3 | Recommended Prepared Spells: |
| 4 | Cleric 4 | Cantrips: |
| Feat: Ability Improvement - +1 Wisdom, +1 Constitution |
||
| 5 | Cleric 5 | Recommended Prepared Spells: |
| 6 | Monk 1 | Abilities: STR - 8, DEX - 17, CON - 15, INT - 8, WIS - 16, CHA - 8 |
| Skills: Stealth | ||
| 7 | Monk 2 | - |
| 8 | Monk 3 | Subclass: Way of Shadow |
| 9 | Monk 4 | Feat: |
| 10 | Monk 5 | - |
| 11 | Monk 6 | - |
| 12 | Cleric 6 | - |
Gear Choices
Build ID: 59
Mode: Paper Doll
Sets: All
Level 1 - Character Creation
This section covers the creation screen and what would go into the best Races, Abilities, and Skills for the Dark Justiciar build. If you have already started playing or using this on your companion, feel free to do a respec at Withers and follow along. This will make it easy not to miss out on anything that the build needs.
Origins and Characters
Here are the Origin and character picks that have a slight advantage with this build:
| Origin | Features | Description |
|---|---|---|
|
The build can be used to reflect her support towards Shar |
Races
| Race | Features | Description |
|---|---|---|
 High Half-Elf High Half-Elf |
|
Comes with a selection of cantrips. Here are a few good options, especially if you don't get them from class or multiclass:
|
| Wood Half-Elf |
|
Almost any build can benefit from the extra movement speed. I think the same is here, so I definitely recommend this option |
 Wood Elf Wood Elf |
|
|
 Half-Orc Half-Orc |
|
Comes with |
Class
| Overview | |
|---|---|
 Cleric Cleric |
|
| Clerics are representatives of the gods they worship, wielding potent divine magic for good or ill. | |
| Features | |
 Spell Slots Spell Slots |
These can be used to cast spells and are restored each long rest. |
| Unique spell list accessible based on your cleric subclass. | |
Cantrips
| Cantrips | Description |
|---|---|
| Pretty good option for the early game, where this can provide a slightly higher success chance than using |
|
| Especially recommended if you are the main character, as it will help with Intimidation checks. | |
| A mandatory cantrip to have in the party as it provides easy 1d4 bonus to various skill checks |
Subclass
| Overview | |
|---|---|
 Trickery Domain Trickery Domain |
|
| Features | |
| Gives an |
|
| Gives an |
|
| More of a roleplaying spell that can help avoid various situations or pass racial dialogues. For example, Drows have special choices and an easy way to pass through fights in Act 1. | |
Deity
Shadowheart starts with Shar diety, which cannot be changed. Later on, in the game based on the decisions she can change her allegiance. Otherwise take anything
Background
| Background | Skills | Description |
|---|---|---|
| Folk Hero | Animal Handling Survival |
Both wisdom skills, that cleric can cover well. Fits, the build from a roleplay perspective. |
| Acolyte | Insight Religion |
Insight is a Wisdom skill and Religion although Intelligence fits well with Cleric's theme. |
| Guild Artisan | Insight Persuasion |
Excellent choice for the main character, you get Persuasion skills which help with dialogues. |
| Noble | History Persuasion |
Similar to the above, but gives History skills. |
| Outlander | Athletics Survival |
Mainly relevant for Survival skill which is wisdom-based. |
Abilities
Now, let's take a look at the abilities of the Selune build. Correct allocation will allow you to maximise the early gameplay and get good modifier bonuses.
Here are some key points to know about ability points:
- They give "ability modifiers" that apply to various skill checks. For example, Charisma works on Intimidation and persuasion checks. Wisdom on Survival or Animal Handling, and so on.
- You get a higher ability modifier on even values - 10, 12, 14, etc. So keeping it on odd may be useless. However, there are various +1/2 modifiers in the game, specifically
 Auntie Ethel's Hair or Feats that help round this up.
 - Weapons can benefit from either Dexterity or Strength, depending on their type
- You also have a spellcasting modifier, which can be Wisdom, Charisma, or Intelligence, depending on your class.
Build ID: 59
Skill Proficiencies
Overall, the skills should be impacted by your roleplaying and background decisions. However, you would still want those stats that will give you the best benefits:
- Medicine
- Animal Handling
- Insight
- Medicine
- Perception
- Survival
- Persuasion
Prepare Spells
Clerics get plenty of good level-1 spells. You might not have enough slots to equip them all but don't worry, more will be available as you level up. Choose your preferred ones.
| Spells | Description |
|---|---|
| The main, long-range damage spell for the cleric in the early game. | |
| Excellent spell to keep on hand. It can be useful when allies will cast Cold or Lightning spells to double their damage. | |
| If enemies are close to you, this is the go-to spell, which a strong damage rolls. It can also crit, inflicting even more damage. | |
| One of the best control spells in the game, if you have a high chance of landing it. What makes it special is that it does not use a |
|
| Use this spell to make the ally untouchable, for example, if they have low HP, or you want to divert the enemy's attention. | |
| The best healing spell, due to its cheap cost and ability to revive downed targets without wasting action points. Moreover, later with |
|
| This is an excellent spell, for the very early game, until you obtain |
Leveling Progression
By this time, you should have landed on the ![]() Ravaged beach already and started exploring the initial area. You might need 1 additional encounter if you did not obtain enough XP in the Nautiloid.
Ravaged beach already and started exploring the initial area. You might need 1 additional encounter if you did not obtain enough XP in the Nautiloid.
This part of the progression covers 3 main areas. They are important both from an exploration and experience perspective. This is a huge swath of content, so missing any of the regions can negatively impact the game experience if you especially enjoy finding all the places
- Wilderness that encompasses -
 Druid's Grove, Goblin Camp, Sunlit Wetlands and The Risen Road
 - Underdark - covering Ebonlake Grotto, Arcane Tower, Selûnite Outpost
- Grymforge - Underdark - Duergar Encampment and Adamantite Forge
Again, exploring them will give both awesome gear and a lot of experience, and of course, content with interesting quests.
Level 2
This is where you will have left the tutorial area, and will start exploring the world.
| Action | Description |
|---|---|
| Excellent against undead enemies, making them run away. | |
| A useful talent that can draw enemies' attention but also gives an easy way to obtain an |
Level 3
At this level the Cleric gets access to Level 2 spells, further expanding the spellbook. Moreover, new always-ready spells are introduced.
| Spells | Description |
|---|---|
| A truly powerful spell that can almost guarantee the avoidance of 3 attacks. This is great for improving survivability and maintaining concentration. | |
| This will be one of the core talents to maintain stealth for your party members when engaging with out-of-combat attacks. It can also help you pass various choke points with allies that have no stealth proficiency. |
Prepared Spells
| Spells | Description |
|---|---|
| I recommend being aware that you have this spell, as there are situations where it might be useful. It does not have to be always in the prepared spell list. | |
| Excellent spell, that you can use to greatly improve the survivability of one of your party members. | |
| Can be situationally useful, especially if you have an 80%+ chance to land it. This then opens up an easy way for |
|
| Gives a good use for bonus action. The weapon deals okay damage and can act as a distraction. | |
| Almost a mandatory spell to have by someone in the group. This can help with various ability checks and turn the tables to your side. |
Level 4
Level 4 brings the first feat, it will be a huge improvement.
Cantrips
| Cantrip | Description |
|---|---|
| Useful as a radiant damage source. It gets better as you increase your spellcasting modifier. |
Feat
Here are a few choices I would recommend. Let's go through the options:
| Feat | Description |
|---|---|
| Ability Improvement - +2 Dexterity | For now, this will not be as impactful, but if you don't plan on doing respecs, this is the optimal choice |
| This is another interesting choice, cause until level 9, you can run Shadow Monk and use its bonus actions for |
Level 5
This level is a huge milestone, which is why no multiclassing occurred before. Access to level 3 spells makes the Cleric an extremely powerful build.
| Feature | Description |
|---|---|
| When you use |
The Trickery Domain subclass also gains special spells:
| Spell | Description |
|---|---|
| Can be used to weaken an enemy. However, it targets only a single foe which makes it a weak option most of the game. | |
| A truly powerful control spell that can disarm foes and force them to run away. It has a short range, so you should be close to the foes. |
Prepared Spells
Now, this is probably the most important section as you will gain some game-changing spells, allowing you to win many encounters.
| Spell | Description |
|---|---|
| This is one of the strongest cleric spells, which will be your bread and butter throughout the game. It will be used to weaken enemies using the |
|
| This can be useful throughout the game in case you or a party member gets cursed. | |
| You can use this Glyph to apply various damage types and effects. For example - fire, cold, lightning, etc. The main highlight is Sleep, which works on multiple enemies and can outright win you an encounter. | |
| Using this as a bonus action together with |
Level 6 - Multiclass into Monk Lv 1
So here is the main caveat with this build. The gear to get the "full setup" of the build will be available at about level 9. You have a few progression options:
- Play like Standard Cleric, reach level 9, and then respec into 5 Cleric/4 Monk. This will make sure that you get Extra Attack at level 10, just before one of the most important events in the game.
- Continue as is, and leave Cleric at 5 and slowly transition into 4 Monk. This will limit your spellslots, but kinda unlocks new interesting actions like
 Flurry of Blows (you could take
  Tavern Brawler +
  Elixir of Hill Giant Strength), Shadow Arts: Darkness, and others. This is less "optimal", but much more natural progression for those who care about roleplay.
So let's continue with the second option. First, you will need to multiclass into Monk. Here is how it is done:
Pick Monk:
| Overview | |
|---|---|
 Monk Monk |
|
| Some reach enlightenment by languid meditation - others do so in the heat of battle. Monks manipulate ki to empower their own strikes and debilitate their foes. | |
| Features | |
| Very powerful attack, allowing you to do two hits with bonus action and Ki points. | |
 Ki Ki |
A unique resource for Monk actions. |
| Allows getting armor class from Wisdom modifier. | |
| Similar to how finesse weapons work, Monk attacks scale based on high ability between Strength and Dexterity. | |
| Set the base attack of unarmed attacks to 1d4, later this becomes 1d6 and 1d8. | |
| Gives an option to attack with your fists using bonus action. | |
Level 7 - Monk Lv 2
| Feature | Description |
|---|---|
| Makes it easier to reach and move between enemies. |
That is not all, by using Ki points you can get an improved version of some base actions:
| Action | Description |
|---|---|
| It's not something that I would use, as the bonus action has better uses. | |
| It can be used to reach longer distances or jump on enemies on higher grounds. | |
| A disengage option that you can activate with Bonus action and a Ki Point. |
Level 8 - Monk Lv 3
As a Monk at level 3, you can choose the subclass. It impacts how you play the build and what combat options there are.
| Overview | |
|---|---|
 Way of Shadow Way of Shadow |
|
| Features | |
| Allows hiding with just bonus action instead of action. | |
| Can be useful if you need to pass stealth checks with companions. For example, sneaking through areas where enemies may see you. | |
| Very powerful action that can complement both Shadow Monk and Warlock with |
|
| Not as good as it sounds. Sadly, it does not work with the |
|
| Another powerful action, that you can use to break enemy |
|
| You can use this while being invisible. Group enemies together and let your caster kill them, or cast Darkness to change the playing field. | |
All of these actions can play an important role in the combat based on the situation.
Level 9 - Monk Lv 4
At about this level (or maybe earlier), you should be close to the end of Gauntlet of Shar. After you finish it, Shadowheart will have to make a major decision that will decide whether you become Dark Justiciar. If, for some reason, you decide to take a different path, check another Shadowheart roleplay-friendly build - Selune's Silverstar
| Feat | Description |
|---|---|
| The go-to pick as the build will utilize the iconic |
Level 10 - Monk Lv 5
This is a huge milestone for the Dark Justiciar build as it unlocks a few powerful features.
| Feature | Description |
|---|---|
| With the double attack, the build becomes significantly more powerful. |
The Monk class also gains special action, giving a little bit of crowd control capabilities.
| Actions | Description |
|---|---|
| One of the best actions overall in the game. You will be able to enter combat with invisibility, easily creating Surprise rounds. Moreover, if the situation is dire, you can always use it to disappear and leave combat. | |
| This can be activated when using melee weapons. Stun status makes the foes skip their turn. | |
| It can be activated when using Unarmed attacks. Stun status makes the foes skip their turn. |
Level 11 - Monk Lv 6
This is another major level where you will gain another unique feature.
| Feature | Description |
|---|---|
| You can now overcome physical resistances, as your fists count as magical attacks. | |
| Improved Unarmoured Movement | Significantly increases movement speed by 4.5 meters. |
The highlight of the level:
| Actions | Description |
|---|---|
| This allows you to move freely between shadows. As it costs bonus action, it can be used indefinitely without a spell slot or other limitations. This is a perfect way to reach enemy backlines or set yourself up before the combat starts. It also grants you an |
Level 12 - Cleric Lv 6
The build is finished with Cleric, to unlock an additional spell slot and bonus Channel Divinity. You could also take another level of Shadow Monk, but I think Cleric is much more valuable here, as it gives additional spell slots for better quality of life gameplay.
This level unlocks an additional feature, which I think is a bit better in certain situations than ![]() Cloak of Shadows.
Cloak of Shadows.
| Feature | Description |
|---|---|
| Allows becoming invisible while obscured. This is a great option to be used in combat. The problem with it is that it lasts only 2 turns, so using it while in normal exploration without Turn-based mode is very limited. |
Maximizing Ability Scores
Now, as the build progression is covered there are a few aspects and important decisions you will have to make throughout the game. These will decide your final score for abilities.
- Act 1 - Auntie Ethel's Hair - you will want to get +1 Dexterity if you pick this choice.
- Feat 1 - Ability Improvement - +2 Dexterity
- Act 3 - Mirror of Loss - pick +2 Dexterity.
These will allow you to reach 20-22 natural Dexterity, which is enough for a good Dark Justiciar setup.
Potions, Elixirs and Consumables
Let's take a look at what consumables you can use to further empower the build.
Potions
These are general consumables, and most of them are activated for a few turns. Potions are separate from Elixirs and can be active together.
| Consumable | Description |
|---|---|
 Potion of Speed Potion of Speed |
In case you or your other casters have a Concentration spell slot taken and cannot cast Haste, use this potion. It acts similarly, but the effect is just for 3 turns. |
 Potion of Animal Speaking Potion of Animal Speaking |
Although not something powerful, it is worth stocking up and saving a spell slot. |
 Potion of Invisibility Potion of Invisibility |
Can be used to get a perfect position before the encounter starts or leave the encounter if it comes to worst. |
 Oil of Accuracy Oil of Accuracy |
Gives +2 to attack rolls, which minimizes the negative impact from |
 Diluted Oil of Sharpness Diluted Oil of Sharpness |
Gives a bonus attack roll and damage. It is a good coating if you can apply it before combat. |
Elixirs
Unfortunately, only one Elixir can be active at a time. However, the good thing is that they last until a long rest, making them very useful and economical.
Be sure to activate them before combat as otherwise, you will need to use Bonus Action.
| Consumable | Description |
|---|---|
 Elixir of Bloodlust Elixir of Bloodlust |
Very effective elixir that gives another action point if you kill an enemy. I would say this is the best one to use to maximize your output through the turn. |
 Elixir of Vigilance Elixir of Vigilance |
For some encounters, you will want to go first. This elixir will ensure that it overcomes even surprise mechanics. |
 Elixir of Hill Giant Strength Elixir of Hill Giant Strength |
Sets the strength value to 21 until the Long Rest. With this option, you can easily gimp on strength in the early game. You can put those points in Dexterity or Strength. Here is a farming guide for Elixir of Hill Giant Strength |
| Elixir of Cloud Giant Strength |
An upgraded version that is available mostly in Act 3 via crafting or purchasing. Sets Strength to 27, the highest value possible. |
 Elixir of Battlemage's Power Elixir of Battlemage's Power |
Gain 3 stacks of Arcane Acuity. I would say this should be the most used elixir for higher spell success. |
 Elixir of Peerless Focus Elixir of Peerless Focus |
Another good choice that allows to better maintain spell Concentration, specifically when playing as a Trickery Cleric. |
 Superior Elixir of Arcane Cultivation Superior Elixir of Arcane Cultivation |
Grant's a single level 3 spell slot. Could be useful in case you are preparing for a longer encounter. |
 Supreme Elixir of Arcane Cultivation Supreme Elixir of Arcane Cultivation |
Grant's a single level 4 spell slot. Could be useful in case you are preparing for a longer encounter. |
Illithid Powers
This special mechanic in Baldur's Gate 3 allows you to consume tadpoles and unlock special Illithid Powers.
At first, you can only use the base powers. As you move to Act 3, you will be able to unlock the outer ring powers.
| Illithid Power | Type | Description |
|---|---|---|
| Base | Beneficial power to take as it does not have any costs, and provides only benefits on the first hits. Will be useful once Shadowheart starts using melee attacks. | |
| Base | Guarantees a critical hit, use it on important targets, that you want to make sure are killed. This works well with spells like |
|
| Base | Can weaken enemies ability and result in reduced armour class. | |
| Base | Can help to kill an enemy faster if it is left with a few HP. | |
| Base | A great way to weaponize your reaction before obtaining |
|
| Elite | Can be used to maximize the effectiveness of charisma-based skills, especially relevant for the main character. | |
| Elite | Very powerful spell that can be used to pull enemies together. | |
| Elite | Can be used to save yourself from a deadly spell. | |
| Elite | Remove the cost of spell slots or charges. | |
| Elite | You can now use action and bonus action interchangeably, giving two full spell casts each turn. It's not as important for you, but it will help other casters in the group. |
Equipment Recommendations
Here are some recommendations on how to follow the gear picks:
- I recommend checking the Item Checklists or Interactive Map, depending on which is easier to use for you. This will help you track which items and when you should pick them.
- Gear for each slot is listed Best -> Worst. Generally, this means that you would start with lower gear recommendations (as they are available earlier) and upgrade to higher ones. However, in some cases, the best items can be obtained early, like
 Titanstring Bow, and some others.
 - I mention Stat Sticks in caster and ranged builds. These are items that you do not use directly (like
 Club of Hill Giant Strength,
  Knife of the Undermountain King, The Dead Shot, etc.), but their bonuses still apply to other weapon attacks or actions.
 - If an item is taken by another character, use the one with lower priority or even those from previous acts. If you want to have the best items for all builds, this will require planning, which is not for everyone.
Act 1
Build ID: 59
Mode: Full Equipment
Sets: Act 1
Act 2 - mid-game
Build ID: 59
Mode: Full Equipment
Sets: Act 2 - before Dark Justiciar
Act 2 - becoming Dark Justiciar
This decision with Shadowheart will result in a major equipment shift. She will become more of a spellsword, who engages in melee combat and uses spells in between.
Build ID: 59
Mode: Full Equipment
Sets: Act 2 - becoming Dark Justiciar
Act 3 - Final Build setup
The build goes all in on a melee martial setup and spellcasting using bonus action.
Build ID: 59
Mode: Full Equipment
Sets: Act 3
Build Mechanics
In this section, I would like to dive deep into how to play the Trickery Cleric Build. This will help you utilize it to the fullest and correctly use various actions and spells throughout the game.
Important Mechanics and Combos
Let's go through key mechanics and tips on how to use the build effectively. Shadowheart Dark Justiciar has very interesting combos if you are willing to invest some time in the setup.
Healing and Buffs
The main misunderstanding about clerics is that people assume they should only be healing and supporting. However, this is far from the truth. In general, the best healing mechanic is just throwing potions, which is efficient, and cheap in comparison.
Overall, healing should be limited and in my opinion, used sparingly. My recommended spells are ![]() Healing Word and
Healing Word and ![]() Mass Healing Word. These are cheap to use and cost only bonus action, which does not interfere with your important spells that will be covered later.
Mass Healing Word. These are cheap to use and cost only bonus action, which does not interfere with your important spells that will be covered later.
However, the major highlight is that those healing spells activate ![]() The Whispering Promise ring buffing your allies. This is very valuable early in the game, so that your party has a higher hit chance, making combat easier.
The Whispering Promise ring buffing your allies. This is very valuable early in the game, so that your party has a higher hit chance, making combat easier.
In addition, there are other items that you can use - ![]() Hellrider's Pride or
Hellrider's Pride or ![]() The Reviving Hands later in the game with more defensive bonuses.
The Reviving Hands later in the game with more defensive bonuses.
Spirit Guardians - Cleric's bread and butter
So the most important spell for Cleric is ![]() Spirit Guardians. With the correct gear that I recommend each enemy you touch, will apply various status effects like Reverbation, Prone, and Radiating Orb.
Spirit Guardians. With the correct gear that I recommend each enemy you touch, will apply various status effects like Reverbation, Prone, and Radiating Orb.
So you are like a running Beyblade damaging everything that you touch and also weakening their combat potential. Just remember the core items to make this work - ![]() Luminous Armour,
Luminous Armour, ![]() Boots of Stormy Clamour, and
Boots of Stormy Clamour, and ![]() Gloves of Belligerent Skies. There are some other options, but overall these are the best picks.
Gloves of Belligerent Skies. There are some other options, but overall these are the best picks.
So the idea is to run around and have as many as possible enemies touched by your light. However, this might be limiting in some cases, where enemies might be on higher ground or behind covers. This is where the next step comes in...
Tempestuous Flight
Taking a level 1 dip into Sorcerer unlocked one of the features that will greatly improve Light cleric mobility - ![]() Tempestuous Magic. This will allow you to fly at the cost of bonus action, not use movement speed, and avoid opportunity attacks.
Tempestuous Magic. This will allow you to fly at the cost of bonus action, not use movement speed, and avoid opportunity attacks.
While flying any enemies you touch with ![]() Spirit Guardians, will be affected by it. This is an excellent way to spread Radiating Orbs and debuff most of the enemies in the combat zone.
Spirit Guardians, will be affected by it. This is an excellent way to spread Radiating Orbs and debuff most of the enemies in the combat zone.
Reverbation and status effects
The main highlight of the Light Cleric build is the sheer amount of status effects that you will be applying - Reverbation, Prone, Radiating Orb, Daze, etc. This can greatly weaken foes and make them harmless to your group.
The main highlight in my opinion is Reverbation. This at first weakens enemy strength, dexterity, and constitution saving throw proficiencies. As it stacks to 5, the enemy will get damaged with 1d4 thunder. This is finished by making the enemy prone if they fail a saving throw.
Once the enemy is prone they are easy pickings for your melee characters and waste their precious movement speed to stand up. To get these effects consistently be sure to use ![]() Boots of Stormy Clamour and
Boots of Stormy Clamour and ![]() Gloves of Belligerent Skies.
Gloves of Belligerent Skies.
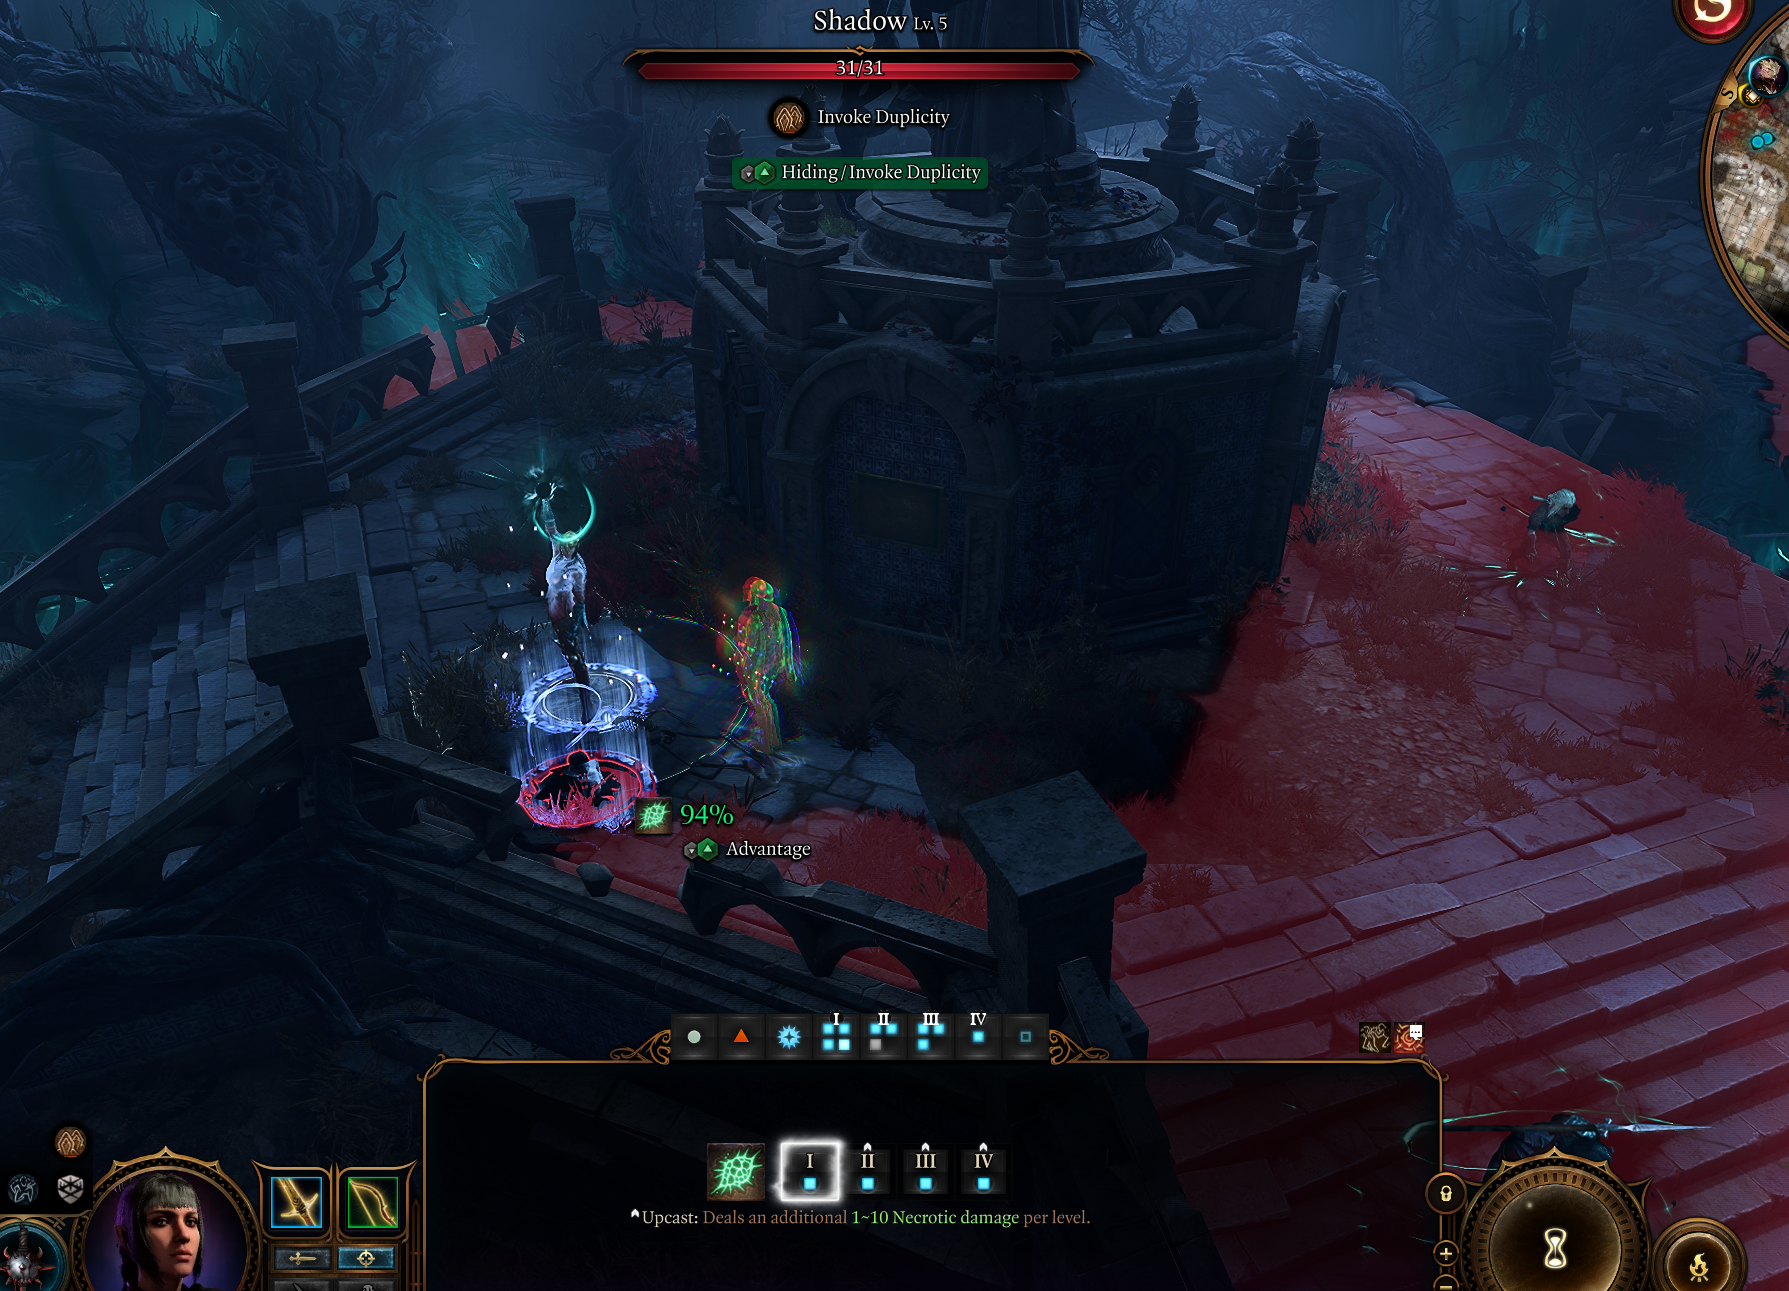
Invoke Duplicity to help with attack rolls
One of the core mechanics that Trickery Domain unlocks is ![]() Invoke Duplicity. This is especially useful in the early game if you have melee martials like Fighter or Paladin. The created illusion enables an easy source of
Invoke Duplicity. This is especially useful in the early game if you have melee martials like Fighter or Paladin. The created illusion enables an easy source of ![]() Advantage on attack rolls. This also works with
Advantage on attack rolls. This also works with ![]() Inflict Wounds spell which is very powerful in the early game.
Inflict Wounds spell which is very powerful in the early game.
It is best to cast before combat (if you know that a combat encounter is coming) and save action points. Then you can attack with an ![]() Advantage on the initial turn.
Advantage on the initial turn.
Stealth Mechanics
This probably requires a separate post so I will try to cover it shortly. The stealth mechanics are kind of confusing. At first, glance you just have to worry about the enemy cone of vision. However, it becomes more complicated when you start attacking from long range or want to initiate a Surprise round.
Overall, the most important thing that Trickery Cleric enables is high stealth rolls using ![]() Pass Without Trace. With some practice, you can use another character to outright destroy enemies. The goal is to attack with a bow or crossbow from long range.
Pass Without Trace. With some practice, you can use another character to outright destroy enemies. The goal is to attack with a bow or crossbow from long range.
What happens is that you either kill the enemy instantly or leave the hidden position and get Stealth ability roll. With high bonuses, you can easily hide again and stay in the position so enemies would start searching for you.
What I like to do, is after releasing arrows enter stealth again. Then you have an option of going into turn-based combat and getting additional free shots. Or if you are confident attack while the enemy is moving.
With some practice, your stealthy character getting bonuses from Trickery cleric can inflict a few hits before the main combat starts greatly weakening foes.
Using Minor Illusion to control enemy positions
One of the interesting actions that Shadow Monk provides you is ![]() Minor Illusion. While invisible or Hiding, you can use it to lure enemies into a specific position. You may wonder why this is needed?
Minor Illusion. While invisible or Hiding, you can use it to lure enemies into a specific position. You may wonder why this is needed?
Well, your ![]() Shar's Spear of Evening has a unique Edge of Darkness effect which would hit multiple enemies with a single attack. Moreover, you have various spells like
Shar's Spear of Evening has a unique Edge of Darkness effect which would hit multiple enemies with a single attack. Moreover, you have various spells like ![]() Fear or
Fear or ![]() Glyph of Warding to follow up with area attacks and disable multiple foes.
Glyph of Warding to follow up with area attacks and disable multiple foes.
Cast Control spells using Bonus Action
Another unique approach of this build is being able to cast some of the control spells using ![]() Helmet of Arcane Acuity +
Helmet of Arcane Acuity + ![]() Band of the Mystic Scoundrel combo. Now Shadowheart can hit enemies using her weapon and cast control spells like
Band of the Mystic Scoundrel combo. Now Shadowheart can hit enemies using her weapon and cast control spells like ![]() Fear,
Fear, ![]() Command, and
Command, and ![]() Hold Person with just a bonus action.
Hold Person with just a bonus action.
This opens up various possibilities where your allies can follow up on harmless foes paralyzed and ready to be destroyed. I think this perfectly fits the Dark Justiciar theme, where you can cast spells and also be very powerful in combat.
Early Game Combat
For most of Acts 1 and 2, you will be playing as a standard Cleric, so its tactics will apply. Trickery Domain does add an additional level of complexity.
- For early encounters, you can use offensive cantrips like
 Toll the Dead or, if you need more damage, spells like
  Inflict Wounds or
  Guiding Bolt.
 - You can use Invoke Duplicity to give an easy Advantage on attacks for your companions, especially valuable in the early game fights.
- If you can use
 Bless to buff allies before combat. Once you get
  The Whispering Promise, you can forgo the spell and use Healing Word or Mass Healing Word to buff your allies.
 - Create or Destroy Water is an excellent spell if you have other casters that use Cold or Lightning spells.
- Glyph of Warding can be used to put enemies to sleep without a Concentration slot. It is excellent if you see a few of the targets grouped up.
- The best option for casting at this stage is Radiating Spirit Guardians +
 Luminous Armour +
  Gloves of Belligerent Skies +
  Boots of Stormy Clamour. This allows for easily debuffing multiple enemies.
 - If things are turning for the worse, you can always use
 Sanctuary to save an ally or use it to flee combat.
  Blessing of the Trickster can be situationally useful, especially if you have something like a Gloom Stalker or other stealthy build in the group.
Late Game Combat
This marks the shift in combat and mainly covers the aspect once you obtain ![]() Shar's Spear of Evening.
Shar's Spear of Evening.
- The goal is to hit as many enemies as you can to activate
 Arcane Acuity via
  Helmet of Arcane Acuity. This will increase your Spell Save DC which will be used for spellcasting.
 - With
 Band of the Mystic Scoundrel you can now use Fear to disable groups of enemies and make them drop their weapons and skip turns.
 - You still have access to Spirit Guardians, so use those when the situation allows. It's especially good when you move close into a group of enemies.
- Try to use Darkness from various sources -
 Arrow of Darkness, Shadow Arts: Darkness, etc. This is your safe place as you safely stay hidden here.
 - Utilize Shadow Step when needed to move around the battlefield.
Conclusion
Thank you for reading the best Shadowheart Trickery Build for Baldur's Gate 3. This offers a lore-friendly setup that reflects her growth and changes throughout the game as a follower of Shar. I tried to optimize as much as possible to make this work not only in terms of role-play but also as a powerful combatant.
Cheers!
Like, Dislike, comment, or share!
Join the Discussion
0 commentsNo comments yet.
Be the first one to leave a comment!