
Sword and Shield - Tank Build - Dragon Age: Origins (DAO)
Contents
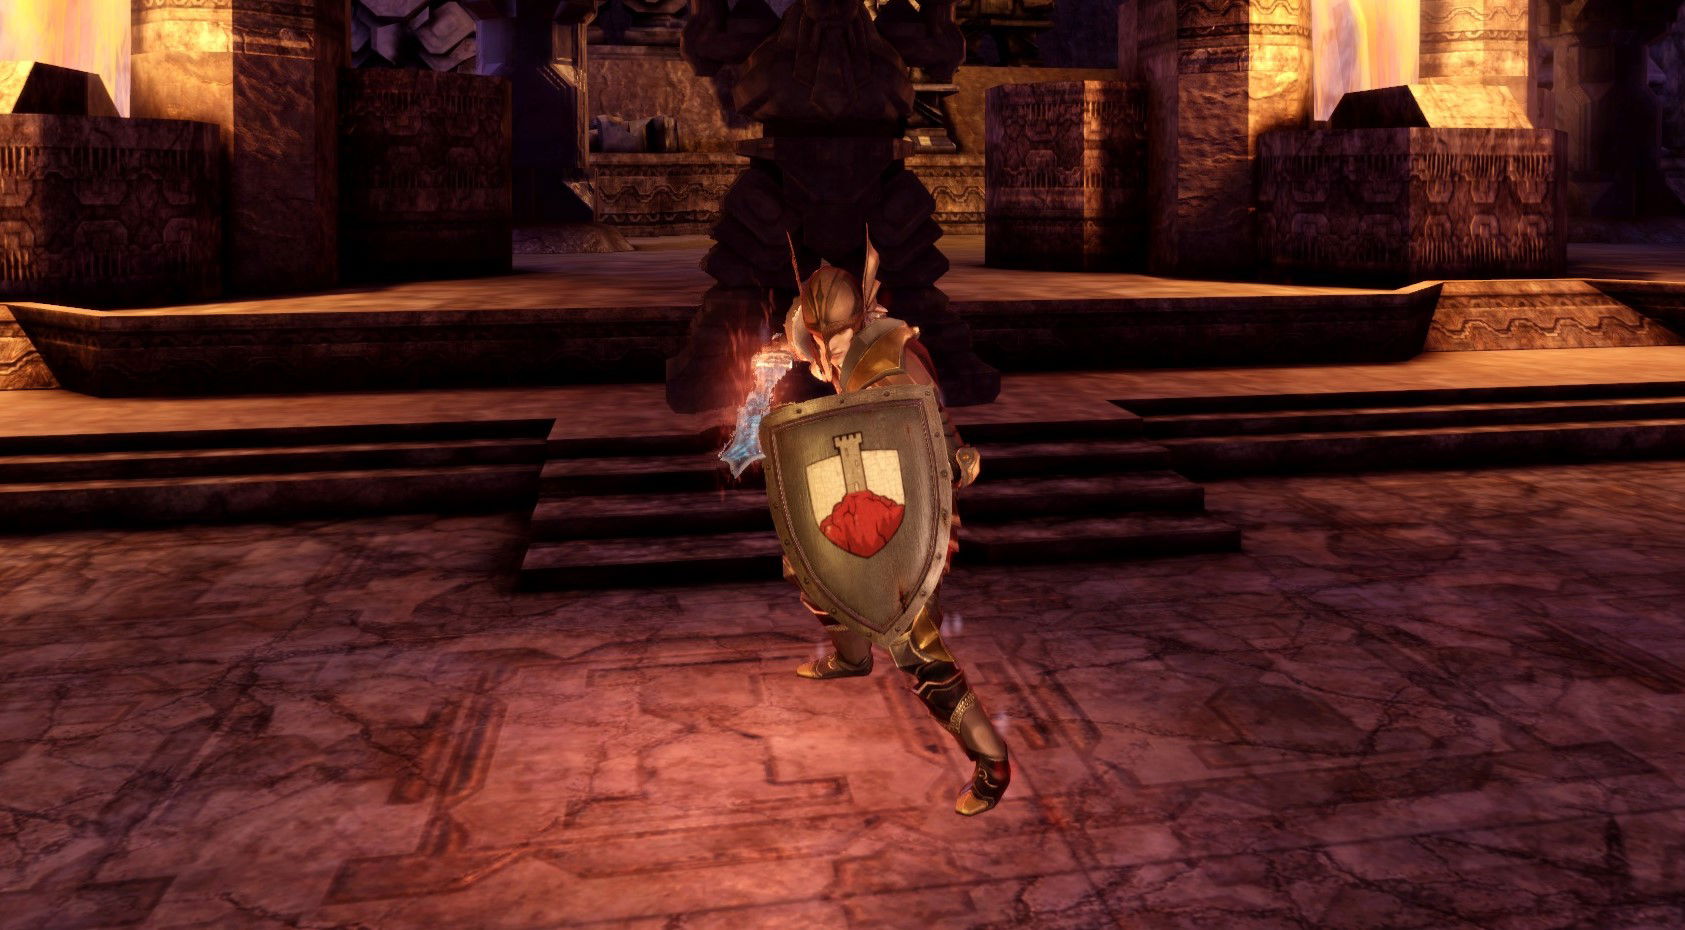
Sword and Shield - Tank Build
This build is for those who are looking for a vanilla tank setup, and be the main tank of the party. You will be using a one-handed weapon with a shield in the offhand. This will utilize the Weapon and Shield talent tree which will unlock various defensive boosts and control options.
There are a few main goals. The first one is to keep the enemy's attention on you. For this, Threaten and Taunt will play a crucial role as this way the harder-hitting allies - dual wielders, 2-hand warriors, and mages, can freely reign supreme.
Second - control. This might seem strange but by going to Champion specialization you will unlock War Cry that can knock back multiple enemies. After that, talents like Shield Bash and Overpower will further enhance single-target control. So that specific enemies would barely have a chance to do anything.
If this sounds like what you are interested in, let's go more into the build!
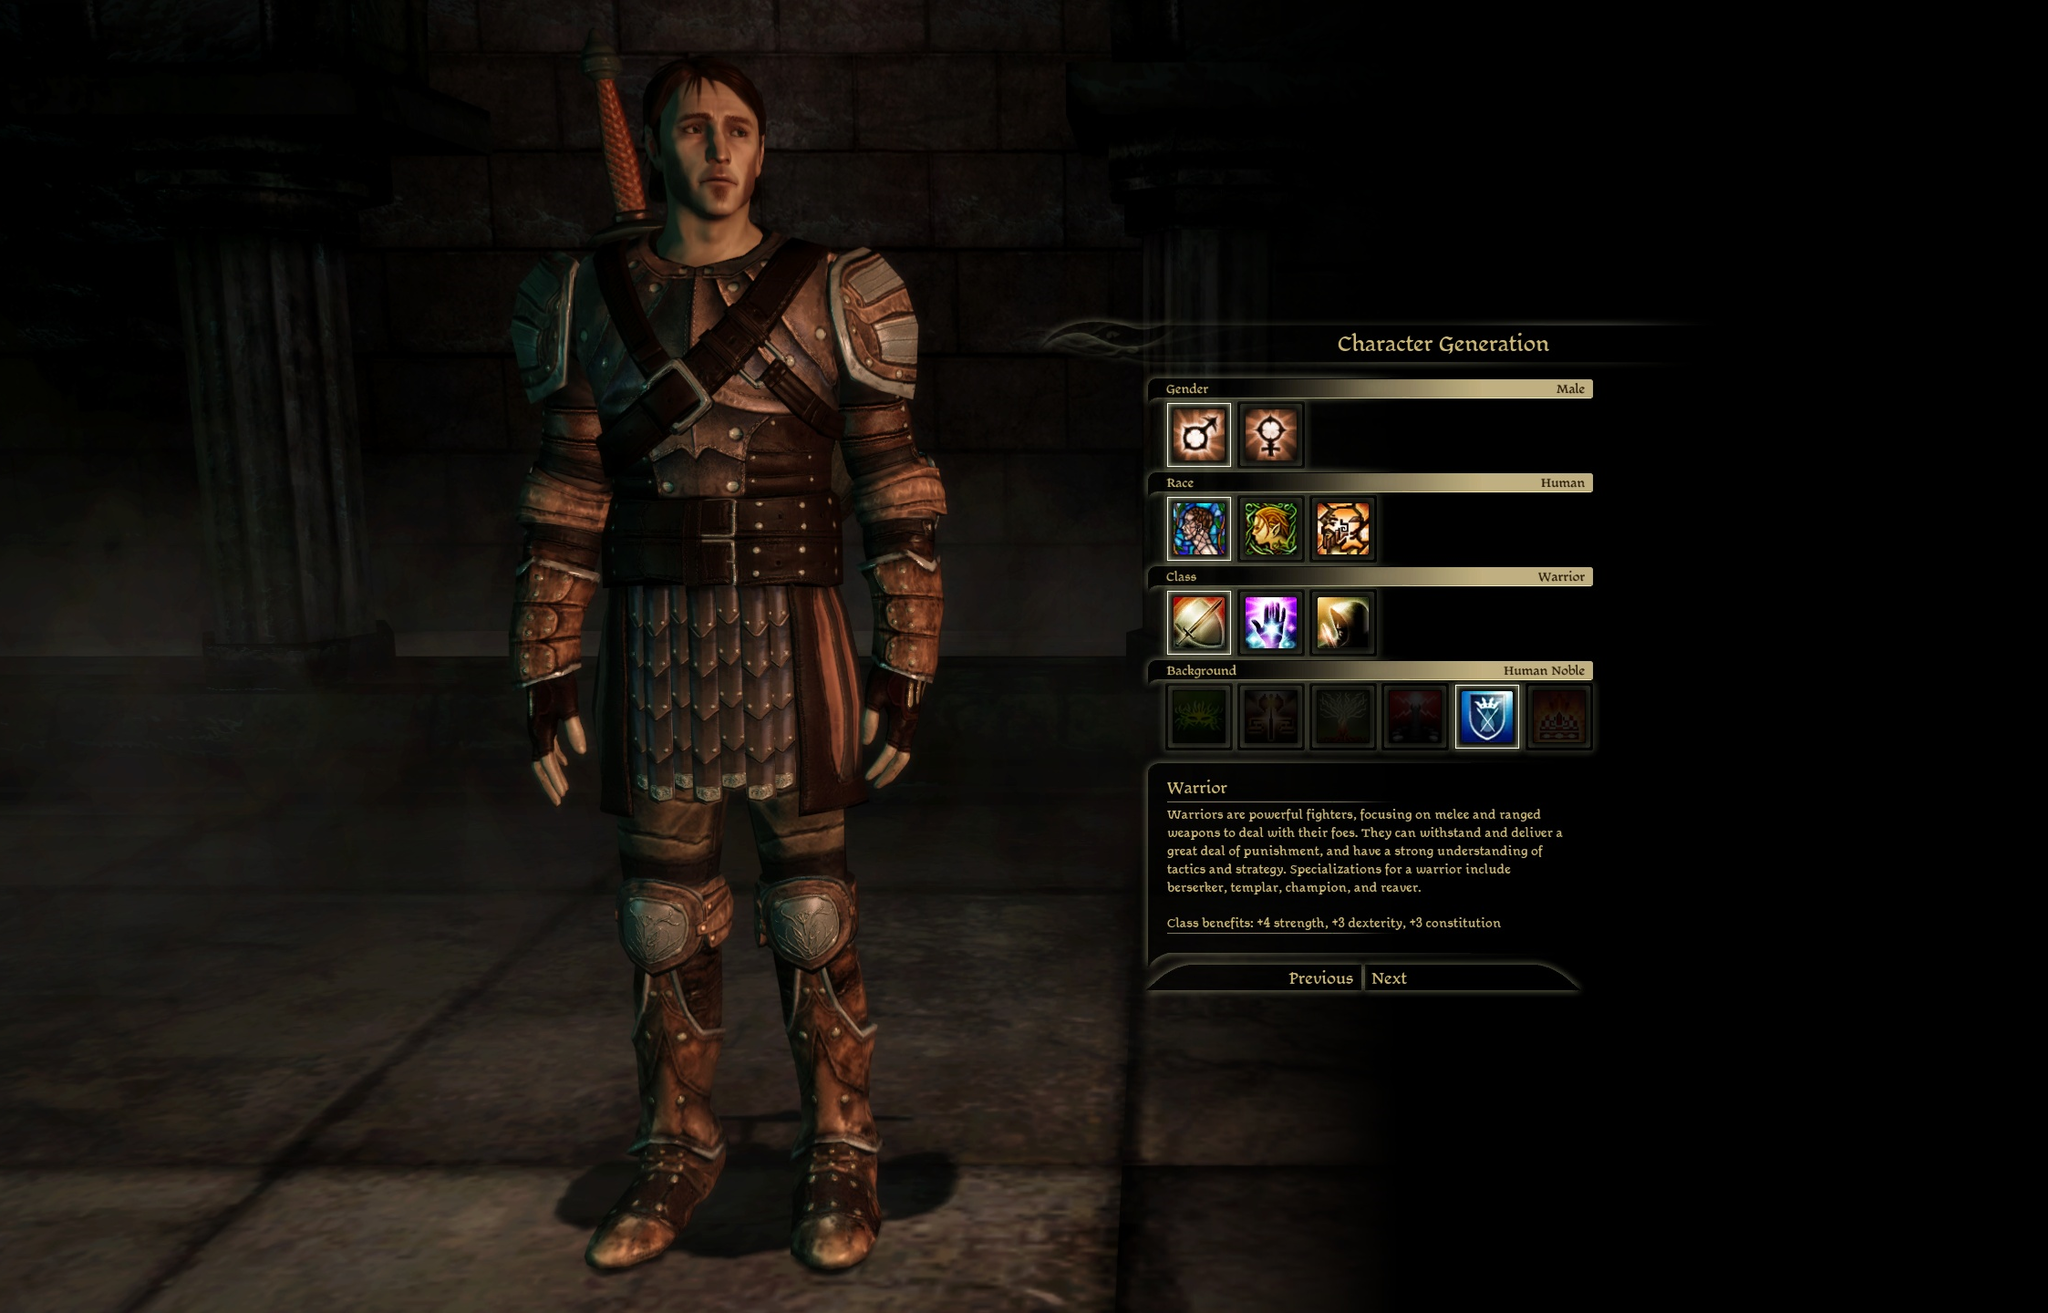
Character Creation
If you are into optimizing there are a few things that you can do to optimize your build a bit.
Race
So, all the races can have warrior classes and have very interesting backstories for that. However, I do think for optimal setup up two of those are better:
| Attribute | Description |
|---|---|
| Human | Comes with bonuses to strength and dexterity, both of the stats which are relevant for the Tank build. |
| Dwarf | I think Dwarves are the best pick for a Tank build. They get bonuses for strength, dexterity, constitution, and extremely important spell resistance. |
Class
The choice here is obvious:
| Class | Description |
|---|---|
| Warrior | The main class will give you access to all the spells mentioned in the build and recommended specializations. |
Background
To be fair there are quite a few background choices. Elves and Dwarves get two of each. Here are my recommendations
| Background | Description |
|---|---|
| Human Noble | The default and the only choice for humans. The good thing is that it offers Sheild Bash by default. |
| City Elf | Gives Coercion skill which is the most relevant for the main character. Moreover, they do get Combat Training for the first-tier talents. |
| Dwarven Noble | Gives Improved Combat Training and unlocks Shield Bash, which is one of the most relevant talents for the build. |
Attributes
For the start of the game, all points should be invested - +5 Strength. Although you will need some dexterity, it can be delayed. Higher strength will improve damage and allow you to wear some heavier items if you have DLCs earlier.
Skills
I recommend one of the below:
| Skill | Description |
|---|---|
| Coercion | 1 level will help unlock some additional dialogue options in the early game. |
| Improved Combat Training | If you already have Coercion, from the background, then I would pick this one to provide the main offensive stat boost. This will make it easier to land hits in early-game encounters. |
Talents
There are 2 main talents that I would prioritize.
| Spells | Description |
|---|---|
| Powerful | I do think this talent is pointless as it does not create any progression value. However, it is important as it unlocks further progression and the bonuses are useful. |
| Shield Defense | One of the best-sustained talents for tank especially if you are using recommended mods. It gives a decent boost to defense and when fully upgraded - no penalties. |
Quest Priority and Locations
Once you have finished Ostagar and Lothering, the world will open up and you can visit multiple areas. Below I will cover some progression recommendations, to obtain a few core items needed.
If you do not have Specializations unlocked:
- I think either Soldier's Peak or Return to Ostagar DLCs are excellent choices for early games. They award good massive armor, that can be worn with mid-strength investment.
- Circle Tower - the additional attributes are awarded via Fade Quest which will make it easier to reach required thresholds.
- Redcliffe and Urn of the Sacred Ashes quests, to unlock Champion specialization from Arl Eamon.
- Your preferred quests
Full Build Setup
In this section, I will go with in-depth explanations of each important selection for attributes, talents, and skills. This will give you a better understanding of what role each decision will have on your overall build. The explanations can also be used to better decide your picks for optimizations.
Attributes
In this section, I would like to review the recommended attributes for Sword and Shield Build. You will be required to pick them every level up, so optimizing and not wasting any of them will prove vital for the build.
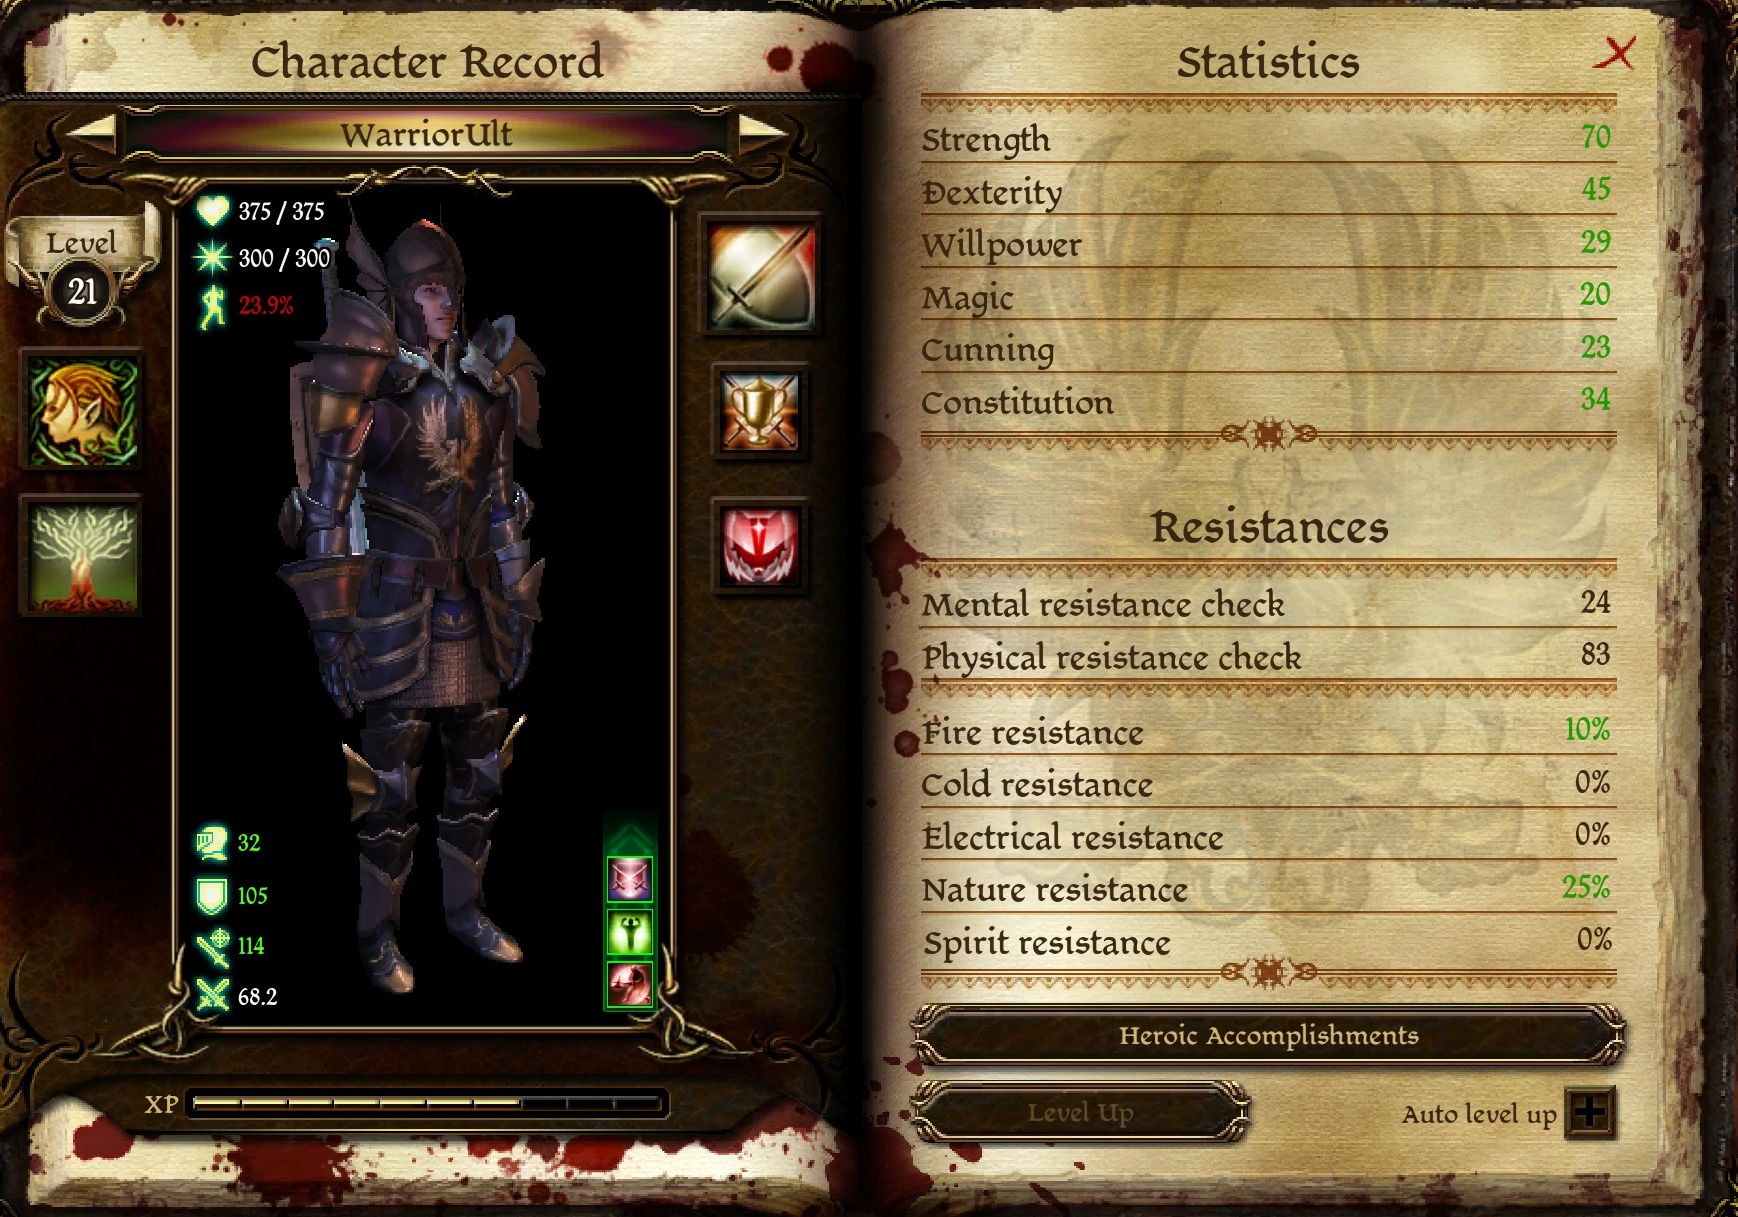
There are a few goals, that you should reach to cover all the talents and equipment requirements.
| Attribute | Description |
|---|---|
| Strength - minimum 38 | For the strongest massive armor, you will need 42. However, you may opt out of Heavy armor or invest less and cover the remainder with items like Andruil’s Blessing or Key to the City. |
| Dexterity - minimum 26 | So the minimum amount that I recommend is 26. This will allow learning Shield Mastery and give some boost to defense. |
| Cunning - 16 | With attribute points from Fade Quest, you will not need a lot of investment here, at most - 1 point. |
Now, what to do next? There are two options in my opinion:
- Lean into Strength - +2 Strength, +1 Dexterity. This will continue improving the damage and also give a slight boost to defense as you level up. With a good party setup, most of the monsters will be under various control effects - stun, sleep, freeze, paralysis, and high survivability are not necessary. If you are okay, you could also go with +3 Strength.
- Leaning into Dexterity - +2 Dexterity, +1 Strength. This will make you better at avoiding enemy hits at the cost of higher damage. It is more of a safe bet, especially if you do not have to some of the items.
Willpower and Constitution are also options, but in terms of "optimal" setup they do not give much, and parts of it can be covered with good item picks.
Skills
The goal in my opinion is to get Combat Training and Coercion to a maximum. This will cover all the aspects that the main character would need.

| Skill | Level | Description |
|---|---|---|
| Coercion | 4 | Allows to overcome various dialogues, finish quests earlier, or avoid unnecessary combat. |
| Pickpocket | 1 | Access to one of the most lucrative quests in the game in terms of gold rewards. |
| Combat Training | 4 | Improves base stats like attack and defense and unlocks higher-tier talents. |
Specializations
The build uses two specializations which both improve the build:
| Specialization | Description |
|---|---|
| Champion | One of the best picks for the build as it gives warriors access to crowd-control talents. |
For the second, option there are two picks in my opinion:
| Specialization | Description |
|---|---|
| Berserker | Gives a pure damage boost, and with all upgrades it will have no negative impact on the tank. |
| Reaver | Provides more of an interesting approach, but also complicates the build unnecessarily. I would recommend this if you are an experienced player. |
Talents
The build has minimal investment into talents. You will mainly concentrate on specialization and class ones.
Champion Tree
| Talent | Description |
|---|---|
| War Cry | At first, this is okay talent, that I would not use much. However, once you unlock the Superiority upgrade it becomes an extremely powerful crowd-control option. |
| Rally | Did not use it much, as I wanted to save the stamina pool. |
| Motivate | Upgrade for Rally. |
| Superiority | Upgrade for War Cry, which causes enemies to be knocked down. This scales with the strength attribute of the warrior. |
Berserker Tree
| Talent | Description |
|---|---|
| Berserk | Improves damage at the cost of stamina regeneration. However, with the next upgrades the penalties will be removed. |
| Resilience | Improves health regeneration giving a little bit better survivability for the character. |
| Constraint | Removes the stamina regeneration penalty. |
Warrior Tree
Powerful Tree
| Talent | Description |
|---|---|
| Powerful | Gives some passive stat boosts. |
| Threaten | A very important talent, as it will give a solid boost to threat generation for the tank build. |
| Bravery | Progression talent. It does give offensive bonuses but they are minor. |
| Death Blow | Extremely good talent as it enables the Warrior to consistently use active abilities if they can land the finishing blow. |
Precise Striking tree
| Talent | Description |
|---|---|
| Precise Striking | This is a decent talent, that gives a slight boost to attack speed and critical chance. I did not use it, as it decreases attack speed. |
| Taunt | One of the core abilities that allows the Tank to consistently keep enemies attention. It has a good area of effect range and makes it easy for allies to freely attack the enemies. |
Power of Blood
These talents are obtained automatically if you drink a blood vial in Soldier's Peak.
| Talent | Description |
|---|---|
| Blood Thirst | Although the offensive bonuses are quite good for this skill, I did not use it much on a tank character |
| Blood Fury | Surprisingly effective talent, but I would only use it on easier encounters without bosses where you can take a risk of losing 40 health. |
Weapon and Shield
Shield Bash tree
| Talent | Description |
|---|---|
| Shield Bash | A decent single-target talent that can knock down the target. It is the bread and butter of the build. |
| Shield Pummel | Inflicts multiple hits in a rapid succession. The main goal of this is to stun the target, which happens if they fail a physical resistance check. |
| Overpower | Another continuous attack, that is great against single targets and deals critical damage. It finished the combo with a knockdown. |
| Assault | A multi-strike attack, that does not apply any negative debuffs but is great for improved damage. |
Shield Defense tree
| Talent | Description |
|---|---|
| Shield Defense | A solid defensive sustained talent, that improves defense bonuses. I would say this is a better pick than Shield Wall if you are running the game with recommended mods as then the damage gets decreased when using the latter talent. I would also start using Shield Defense only when you unlock Shield Balance. |
| Shield Balance | Improves Shield Defense and removes attack penalty. |
| Shield Wall | This is the recommended sustained talent from the tree if you are not using recommended mods. In the vanilla game, the damage reduction does not work, and you get bonuses to armor, missile deflection, and defense with all upgrades. I also recommend it against bosses as you get immunity to direct knockdowns. |
| Shield Expertise | Gives passive improvement to Shield Defense and Shield Wall. |
Shield Block tree
| Talent | Description |
|---|---|
| Shield Block | Gives passive bonuses to shield usage. |
| Shield Cover | Progression talent. |
| Shield Tactics | Improves protection against flanking attacks. |
| Shield Mastery | Improves almost all Weapon and Shield talents with passive bonuses. |
Equipment
The gear you use with the Weapon and Shield Build will play a crucial role in combat. There are various combos that you can go with.
Below, you will find the gear that should be used with the build. Generally, the lower the item is in the table the lower its priority and the earlier you can get it. So the top ones are the best picks.
To be fair there are a lot of armor sets to pick from. Here is my recommended progression that I think is perfect to cover various aspects of the game:
- Warden Commander armor set - pretty easy to obtain and good bonuses for the early game
- Cailan's armor set - okay set, but does take up a helmet slot. An alternative could be Juggernaut armor set if no access to DLCs.
- Wade's Superior Heavy Dragonscale armor set or Wade's Superior Dragonbone Plate armor set
Weapons
There are plenty of single-hand weapons to choose from. So I would not worry about these.
| Item | Description |
|---|---|
| The best single-hand weapon in the game with the highest damage. It also has 3 rune slots which can be filled with damage or paralysis runes. | |
| This weapon would be the best one if excluding Starfang (longsword). It can surpass it, but if you put almost all the points in strength it is hard to achieve with a shield. | |
| A powerful mace with high direct damage and strength improvements. However, it can be sold for a very high amount of gold to vendors. | |
| Use this weapon together with Cailan's Shield for the Cailan's Arm set. With the set, stamina regeneration will increase greatly allowing you to use talents without any reservations. | |
| A late-game weapon that can be obtained from one of the bosses. It is a powerful option, but not as good in my opinion compared to others. | |
| A sword that is a good progression between Oathkeeper and the higher Tier 7 swords. | |
| A decent early-game sword that you can obtain in Lothering. Also comes with 1 rune slot |
Shields
| Item | Description |
|---|---|
| If you are lucky to obtain this one, it is a very powerful shield to use on the tank character. | |
| Can be easily stolen in Orzammar. The +12 Defense boost is significant and the highest in the game. Can be obtained early on. | |
| Use this shield together with Maric’s Blade for the Cailan's Arm set. Will boost stamina regeneration allowing Alistair to use offensive abilities more often. | |
| A well-rounded shield that boosts willpower, stamina regeneration, and defense. Unfortunately, you only obtain it late in the game | |
| A solid shield with very good stats. However, it is not a guaranteed drop. | |
| I would say one of the best shields in the early game, but requires a significant investment into strength before equipping it. | |
| An early game shield that can be obtained in Redcliffe Castle. It boosts both defense and stamina, allowing Alistair to use more offensive abilities. |
Helm
| Item | Description |
|---|---|
| Although this is an extremely good helmet for a tank, you obtain it close to the end of the game. You can use it against the last boss due to the high Spirit Resistance it provides | |
| One of the best helmets in the game giving +2 to all attributes. | |
| Use the helmet together with the Cailan's armor set. The helmet gives bonus armor and mental resistance | |
| Equip together with Juggernaut armor set. The helmet provides +1 bonus armor | |
| I would say these helms are equal. On the one hand, you get some good bonuses to armor and attack. On the other +25 stamina with Executioner’s Helm is a really good boost for additional active ability during an encounter. | |
| Boost to the constitution for a bigger HP pool. A great helmet as you earn it for free early in the game |
Armor
| Item | Description |
|---|---|
| Part of the Wade's Superior Dragonbone Plate armor set. This will increase Alistair's stamina and stamina regeneration. Moreover, it will reduce fatigue with the total set. | |
| The Wade's Superior Heavy Dragonscale armor set is lighter in terms of fatigue stats but has less armor. Still, with Evon the Great’s Mail which can be used instead of Wade's Superior Heavy Dragonscale Armor, you will get additional armor, making it a very close contender, to Wade's Superior Dragonbone Plate Armor but this will cost a lot of gold. | |
| Use the armor together with the Cailan's armor set. The chest piece gives additional armor and physical resistance | |
| The high spell resistances will make you a much better tank, able to withstand various magic effects. | |
| Mid-game armor that comes with significant elemental resistances and some boost to strength and constitution. Part of the Juggernaut armor set. | |
| This armor can be excellent if obtained early. The negative aspect is that it will have lower-tier materials which will be outclassed later on. Equip together with the Warden Commander armor set. |
Gloves
| Item | Description |
|---|---|
| Part of the Wade's Superior Dragonbone Plate armor set. This will increase stamina regeneration. Use it together with the whole set | |
| Part of Wade's Superior Heavy Dragonscale armor set | |
| Part of Cailan's armor set and gives a big boost to critical hits, which are possible with Overpower. | |
| Equip together with Juggernaut armor set. The gloves provide bonus elemental resistance. | |
| Equip together with the Warden Commander armor set. The gloves give a bonus of 10% fire resistance |
Boots
| Item | Description |
|---|---|
| Part of the Wade's Superior Dragonbone Plate armor set. This will increase stamina regeneration. Use it together with the whole set | |
| Part of Wade's Superior Heavy Dragonscale armor set | |
| These boots are an excellent way to reduce the chance for enemies to hit you. I do recommend using it with The Spellward and other items giving bonuses to dodge. | |
| Equip together with Juggernaut armor set. The boots provide bonus elemental resistance | |
| Equip together with the Warden Commander armor set. The boots give a bonus of 50 stamina | |
| Decent early games shoes that give chance to avoid enemy attacks. |
Accessories
| Item | Description |
|---|---|
| Comes with a +2 to all attributes bonus improving all the stats the build needs. | |
| You will need to finish Witch Hunt DLC to unlock this accessory. Gives +1 to all attributes, spell resistance, and improved dodge chance. | |
| Gives +1 strength and armor, a decent early-game belt. | |
| +3 defense boost to slightly improve the chance of avoiding enemy attacks. | |
| +1 strength, simple and cheap belt to help with strength requirements for early game. |
Amulets
| Item | Description |
|---|---|
| Considered one of the best amulets in the game as it gives dodge chances and spell resistance. Still, I am more in favor of offensive stats on amulets for a build using long-range weapons. | |
| The +1 to all attributes is a significant boost, especially at the start of the game. | |
| Comes with a +1 Strength bonus to minimize the gear requirements. | |
| Improves defense and spell resistance. | |
| Provides defense and resistance bonuses. |
Rings
| Item | Description |
|---|---|
| One of the best rings in the game. It will be contested by many builds, so just listing it here as an option. | |
| Gives a significant boost to health. Overall, I recommend using it on the tank or on Blood Mage in the group to improve survivability. | |
 Harvest Festival Ring Harvest Festival Ring |
Improves dexterity and strength. The ring is perfect to gain attributes to wear the best armors in the game and save attribute points. |
| Overall good ring for the Warriors, improving damage, hit chance, and defense. | |
| Significantly improves strength, which results in higher damage. This is a late-game ring, so the loss to cunning will have minimal impact. | |
| +1 to all attributes that improve all the core stats of the build. | |
| Good early-game ring, providing a bonus constitution for higher survivability. |
How to use the Build
In this section, I would like to go through some general tips on how to correctly utilize the build.
Main mechanics
In this part, I would like to go through the core mechanics of the build. Using them you can construct your preferred playstyle and utilize everything that the various talent and equipment picks have to offer.
Sustained Talents
The build does not use many active talents so it's easy to use sustained abilities with minimal impact on the offensive potential of the build.
- Threaten - one of the core talents that enable good threat generation, especially on single targets. However, for the late game, I would try disabling it and see how it goes. Generally, Taunt ability should be enough most of the time.
- Shield Defense or Shield Wall - use the former if you are using recommended mods, as this allows it to work without any penalties. If you are not using mods, go with Shield Wall, as it is bugged and there is no penalty for damage.
Here are some optional ones, that you can try. Remember, having more of these active will eat into your stamina pool:
- Berserk - generally, I would say this is mandatory, but only once you have all the upgrades. Before that, I would not even use it, as it would impede stamina regeneration to some extent.
- Rally - optional sustained that improves the attack value. I would say this is a very low priority and would only use it if you have something like Dual Wield Cunning rogue, which needs some attack bonuses.
- Precise Striking - it improves critical chance and attack values. However, I did not use this at all.
A continuous barrage of attacks
What makes Weapon and Shield build good is that it can consistently overwhelm a single enemy. It may not seem much, but when fighting an Elite or a Boss, you can keep it pinned with your talents:
- Overpower
- Shield Pummel
- Shield Bash
Juggling these three will make the enemy constantly stunned or on the ground, unable to do much. Assault is also great, but it does not impose any negative effects. Still, it is a good way to finish off an enemy so that Deathblow would activate.
Maintaining Threat
The main aspect of tank building is to maintain Threat. This means that enemies select you as the main target. On lower difficulties having Massive or Heavy armor already helps with it. However, on Nightmare this effect is negated.
However, there are two important talents to help here:
- Taunt - draws attention from enemies in a large area. I would say this is the best option and effective.
- Threaten - this is a sustained ability that needs to be activated. It is a decent option, and helps with threat generation on a single target, so perfect for bosses or similar strong foes.
High Dodge chance
To increase the build survivability you can stack Dodge Chance from various items. This is a perfect option to overcome low defense and incoming enemy physical attacks.
- The Lion's Paw - +10% Dodge Chance
- The Spellward - +10% Dodge Chance
- Cinch of Skillful Maneuvering - +10% Dodge Chance.
- Cailan's Greaves - +20% dodge chance
So with a 30-40% dodge chance, you can avoid three out of ten attacks. This does not account for any defense-related avoidance, which would further boost the survivability.
Early Game Combat
- For the early game, I would not worry too much about Threat generation and would play more of a frontliner that deals damage.
- Use Shield Bash, and Shield Pummel to shut down enemies. You want key targets like mages (if they are not taken care of by your own mages), and elite foes, to do as little damage and negative debuffs as possible.
- Be Careful of traps!
- Once you reach about levels 7-9, and have access to good armor I would start concentrating on Threat generation and usage of Taunt.
Late Game Combat
- I love using the combo of Taunt + War Cry. So run into a room and activate Taunt. This will make enemies concentrate on you and come closer. Position yourself so that enemies are close in a circular radius and release upgraded War Cry. This will knock back everyone in the room, making them easy pickings for your party members.
- Use all of the active talents like Shield Pummel, Assault, etc. to concentrate on a single enemy and inflict good damage and some control.
- Try to inflict the killing blow as this will activate Death Blow and fuel the stamina for the next attacks.
Conclusion
Thank you for reading the Best Sword and Shield Tank Build, post for Dragon Age: Origins. So this covers the main idea of the frontliner build with weapon and shield. It has been more enjoyable than I expected mainly due to multiple active talents, that help you to juggle between enemies and pick your next targets. Moreover, being the main character that the party relies on is a satisfying thing in itself.
Feel free to leave feedback below.
Like, Dislike, comment, or share!
Join the Discussion
0 commentsNo comments yet.
Be the first one to leave a comment!