
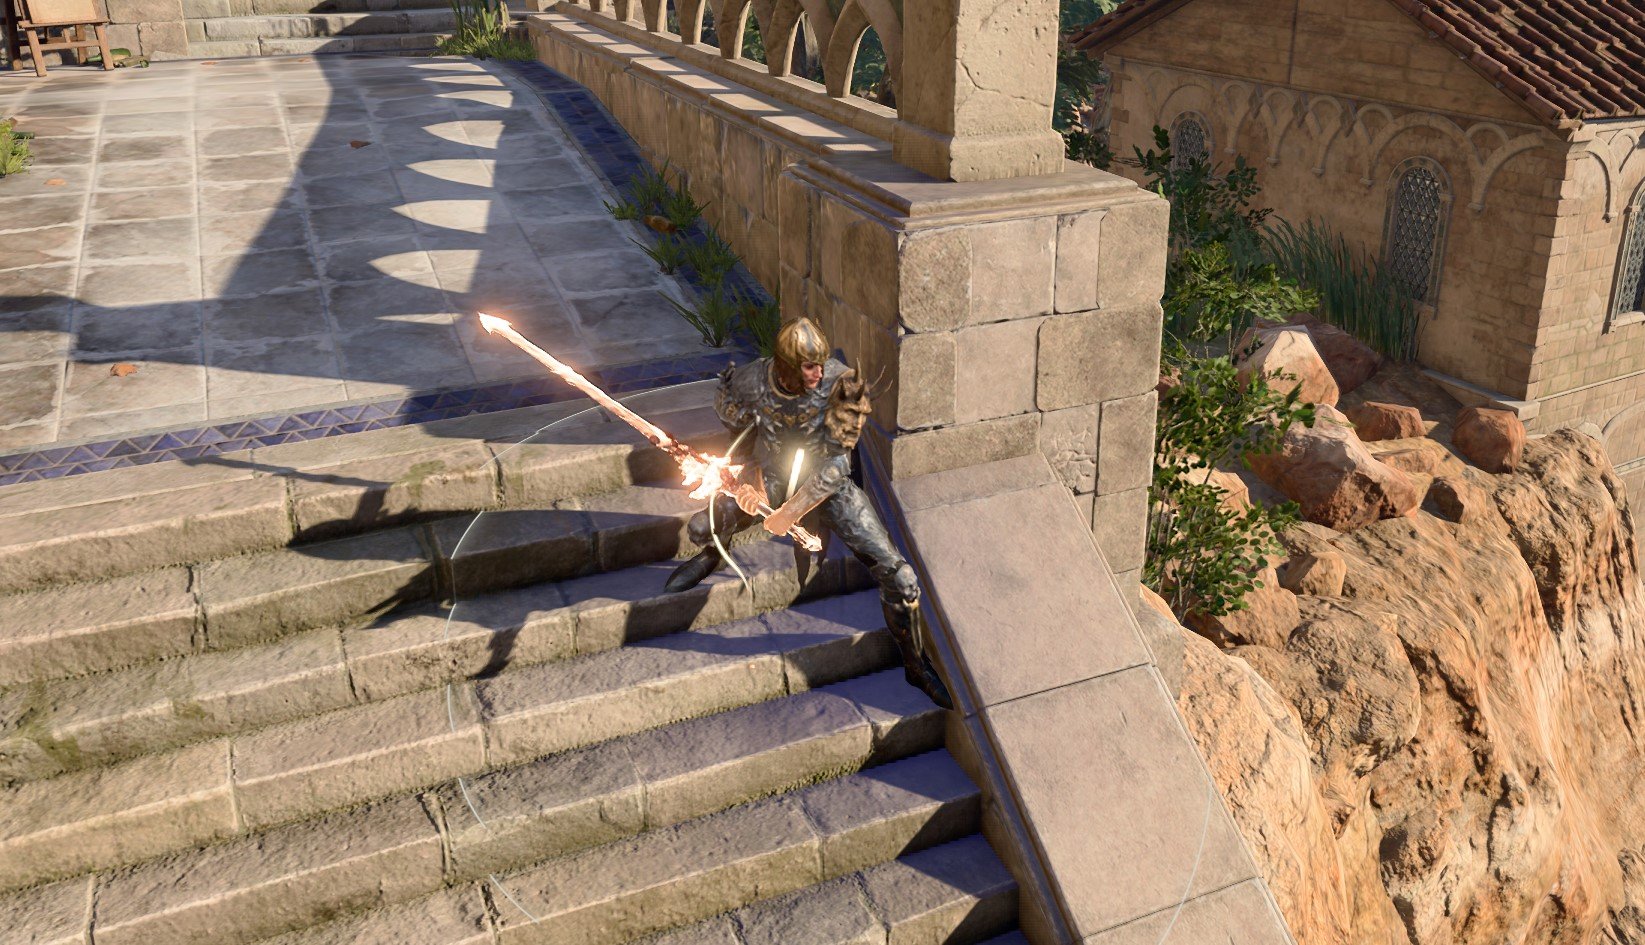
Best Battle Master Fighter Build - Baldur's Gate 3 (BG3)
Contents
Battle Master Build - Tactical Fighter Leader
The build is simple yet effective and plays the role of frontliner. The good thing is that this does not require any special handling and you go straight 12 levels into Fighter. At level 3 you pick Battle Master, which gives special actions called Manoeuvers.
These actions use Superiority Dies, and give you different actions to improve your combat capabilities, here are a few of them:
- Disarming Attack - targets may drop the weapon, pick it up, and leave unarmed.
- Precision Attack - add Superiority die to Attack Rolls, in case you need the attack to hit.
- Pushing Attack - push the target away and deal damage, for those ledge kills.
- Trip Attack - leave target prone, open for bonus hit chance.
- and many more
Each one of them gives a status effect that can impair or disable the enemy in combat. Another good thing is that these Superiority Dice reset each short rest, allowing these to be used in almost every combat encounter. So if this got you interested let's jump into the build
Short overview
This is a short overview and progression of the build. Use it to get a glance if you want to pick the best options without going deep into the explanations. A more detailed description with texts, suggestions, and improvements can be found in the next sections.
Starting the Game
We start with the early game. I would go into what are the best Races, Abilities, and Skills for the build. Some of these choices are impactful as you cannot respec them.
Races
Picking a race provides various benefits - abilities, dialogue options, looks, etc.
| Race | Features | Description |
|---|---|---|
 Half-Orc Half-Orc |
|
A perfect Fighter race gains additional roll for critical hits, but most importantly, can stand up instead of being Downed. |
 Githyanki Githyanki |
|
Very versatile race, that unlocks special items but also gets some spells like Misty Step and Enhance Leap. |
 Duergar Dwarf Duergar Dwarf |
|
Very solid choice, especially as they can enlarge themselves and also become invisible. |
 Wood Half-Elf Wood Half-Elf |
|
One of the more popular options, Wood Subrace gets bonuses to bonus mobility, which you will need a lot. |
 Wood Elf Wood Elf |
|
Similar to Wood Half-Elf, just longer ears. |
| High Half-Elf |
|
I recommend this option for the main character. You could take Friends cantrip for additional luck in the dialogues. Otherwise, nothing special, and opt out for other options. |
Class
The build is going into one class - Fighter. They give all weapon and armor proficiencies, making them extremely versatile front liners - two-handed weapons, swords, scimitars, dual-wielding, etc.
| Overview | |
|---|---|
 Fighter Fighter |
|
| Features | |
| You can use this to heal yourself in tight encounters, to get a little bit more of survivability. | |
Fighting Style
Fighters get a unique choice of different Fighting styles. They give decent bonuses to various stats, pick one based on your preference. With this build, I would recommend going with either a Sword and Shield or a Two-Handed Weapon. For Dual Wielding I would do a different setup and different attribute allocation.
| Fighting Style | Description |
|---|---|
| This works for both Sword and Shield and Two-Handed Weapons. The +1 Armour Class is a solid choice, increasing the survivability of Battle Master. | |
| Take this to optimize damage output and ensure that low-damage rolls are re-rolled. Just remember, that this is a marginal damage improvement, and its not as impactful as it sounds. | |
| This is an option that is useful for sword and shield early in the game with +2 damage. However, 8+ levels I think this falls off and instead, you could take |
Background
Backgrounds are mostly for role-playing and you can pick whatever you prefer. Fighter, mainly benefits from Strength related skills, if you want some optimization there are a few options:
| Background | Skills | Description |
|---|---|---|
| Outlander | Athletics Survival |
Gives a boost to Athletics greatly reducing the chances of Shove's success. Moreover, Survival will help with revealing hidden treasures, but it mostly utilizes the Wisdom ability |
| Soldier | Athletics Intimidation |
Gives a better chance to resist shove, and increases the success of Intimidation dialogues. |
Abilities
Now let's take a look at the abilities of the Battle Master Fighter build. Correct allocation will allow us to maximize the early gameplay and get good modifier bonuses.
| Ability | Value | Description |
|---|---|---|
 |
17 (15+2) | The main damage attribute, especially if going with two-handed weapons. High strength will also increase jumping distance and carry weight. |
 Dexterity Dexterity |
14 | Early in the game, I recommend going with 14 Dexterity. You can use some good medium armor like |
 Constitution Constitution |
16 (15+1) | Important stat for frontlines to ensure that you can survive more hits, but also have successful Constitution Saving Throws. |
 Intelligence Intelligence |
8 | Not an important stat for us |
 Wisdom Wisdom |
10 | We get 10, to not get any negative modifier for Wisdom Saving Throws, as there are many of them. |
 Charisma Charisma |
8 | We gimp this ability as it is not relevant for Fighter Battle Master in combat. However, if you are the main character, you could put a few points here from Wisdom, to get better success in dialogues. |
Skills and Expertise
Overall, the skills should be impacted by your roleplaying and background decisions. However, you would still want those that will give you the best benefits. My recommendations are one of these:
- Athletics - if you did not get it from the background
- Perception - always good to have
- Acrobatics - as you have decent dexterity this will be effective.
However, you may want some other options, especially if you are the main character
- Intimidation
- Perception
Leveling Progression
Here is the detailed progression for the Battle Master to get you started. You can use it as a guideline because early games can be daunting and overwhelming. Later on, once you get the feel for the class you can start picking your options
Level 2
At the second level already fighter gains its most popular action:
| Action | Description |
|---|---|
| For each short rest, you can add additional action points for bonus attacks. As you progress and obtain |
Progressing with Elixir of Hill Giant Strength
Well, there is a trick early in Act 1, after you reach the first settlement - Druid's Grove. There you can stock up on some really powerful potions for Acts 1, 2 - Elixir of Hill Giant Strength.
What do they do? They increase the Strength to 21 until a Long rest. More or less this negates any need to have strength investment if you plan to use them till the late game. This is somewhat gimmicky, however, if you are interested here is a guide on how to farm Elixir of Hill Giant Strength.
So here is the setup once you get these Elixirs and decide to use them. Remember to respec, to get the full utility:
| Ability | Value | Description |
|---|---|---|
|
8 | The potion will raise the strength to 21, meaning that we do not need this ability. |
| Dexterity |
16 (14+2) | With the freed-up points from Strength, dexterity can be maximized for a +3 initiative bonus. |
| Constitution |
16(15+1) | Important stat for any build gives bonus HP and improves the success of Constitution Saving Throws, which ensures your |
| Intelligence |
8 | Not an important stat for us |
| Wisdom |
14 | This will provide +2 bonus for Wisdom Saving Throw and Perception checks. |
| Charisma |
12 | As more abilities become free, you can increase this one. |
Level 3
You get to choose the Fighter subclass which will have a huge impact. The build will be going with Battlemaster.
| Overview | |
|---|---|
 Battle Master Battle Master |
|
| Features | |
 Superiority Dice Superiority Dice |
These dice give bonus 1d8 damage, can be used 4 times, and are reset each short and long rest. Easy damage increase and improved battlefield control. |
Manoeuvres
These are unique actions of Battle Master, that will give you a unique edge in combat. The good thing is that they work together with a sneak attack, meaning you can empower your stealth attack even further. Here are my recommendations, you can choose only 3 of them.
I would recommend picking Menacing Attack and at least one other, as this way you can target different enemies with separate weaknesses.
| Manoeuvres | Description |
|---|---|
 Disarming Attack Disarming Attack |
Makes the enemy waste their next turn picking up the weapon. This is not especially useful on mages, or beasts. Target the enemy's Strength |
 Menacing Attack Menacing Attack |
Frightens your target, disabling movement and imposing a |
 Pushing Attack Pushing Attack |
Gives you an option to push away enemies from ledges all while dealing bonus damage. Target the enemy's Strength |
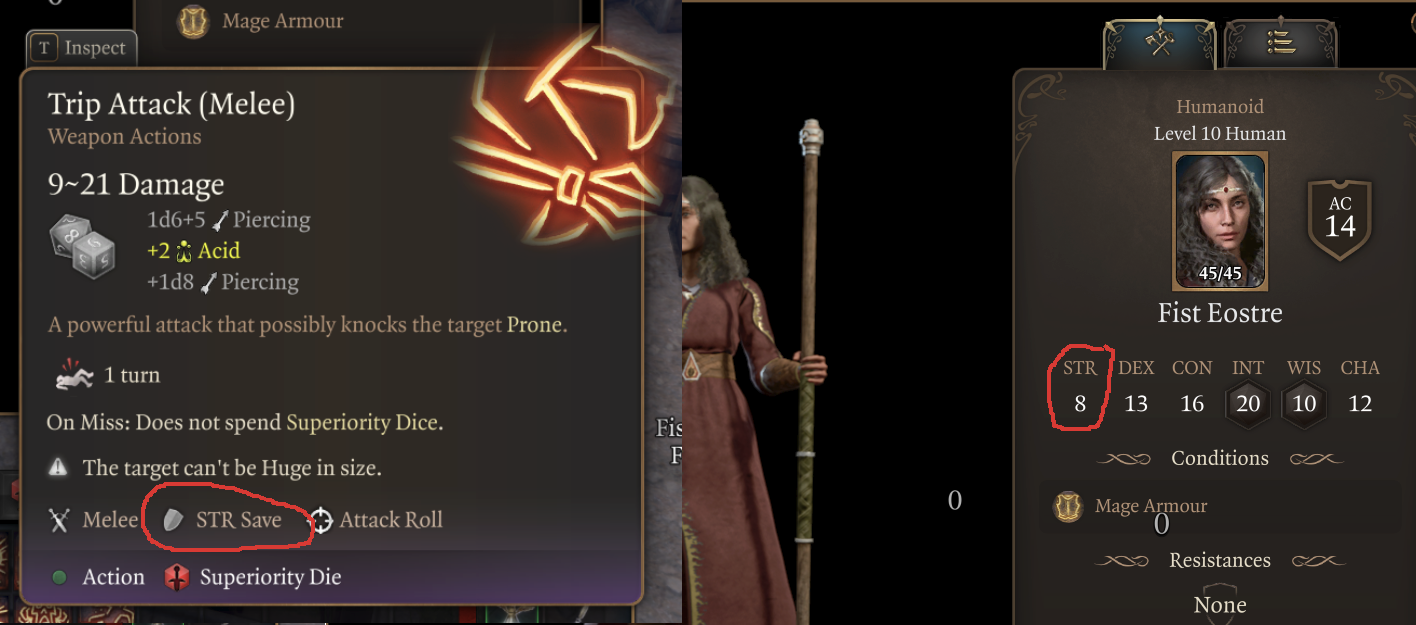
 Trip Attack Trip Attack |
Makes the enemy Prone, opening for Advantages to other group members if attacking from close range. Target the enemy's Strength |
 Precision Attack Precision Attack |
Can be useful for when you need that attack would land, specifically when a boss or particular enemy is close to death. This way you can greatly improve your chance of success. |
Level 4
Level 4 brings the first feat option. There are some options that you can pick so let me give recommendations
Feat
| Feat | Description |
|---|---|
 Ability Improvement Ability Improvement |
Take +2 Strength. However, if you are using Elixir of Hill Giant Strength, look for the option below. Once you stop using them change the level 4 feat to +2 Strength, this way we can easily maximize it in Act 3. |
| This is the strongest feat if you are using two-handed weapons. First, it gives a bonus attack using a bonus action if you kill an enemy or land a critical hit. Second, it gives a big 10 damage boost, that comes with a -5 penalty to attack rolls. This is problematic in the early game but can be overcome in various ways. I recommend checking my guide on Attack Roll Increase, to get ideas on how to mitigate it. |
Level 5
This is a huge milestone for Battle Master Fighter.
| Feature | Description |
|---|---|
| This allows attacking two times instead of one, theoretically doubling the Battle Master's damage output. |
The next big milestone like this will be level 11.
Level 6
And we get another Feat choice
Feats
| Feat | Description |
|---|---|
| Great Weapon Master | Pick this one if you did not take it. It gives additional attack with |
| This is another option if you are still using Elixir of Hill Giant Strength and have Great Weapon Master. It ensures you start most of the encounters first and cannot be surprised, making many fights easier |
Level 7
The Battle Master gets substantial improvements to its subclass.
| Feature | Description |
|---|---|
| Superiority Dice: 1 |
An additional dice is unlocked, allowing even more maneuvers per short rest. |
Manoeuvres
Overall, take any of the suggested options that you skipped on level 3, but one choice is very important, especially as you will have better gear:
| Manoeuvres | Description |
|---|---|
 Riposte Riposte |
Allows you to attack an enemy when they miss you. This is like an additional attack not on your turn, and it does not use a reaction. |
Level 8
The build unlocks the next Feat:
Feats
Overall the goal is to ensure that you have ![]() Alert feat at this level. Moreover, you should already be covered with Ability Improvement and Great Weapon Master.
Alert feat at this level. Moreover, you should already be covered with Ability Improvement and Great Weapon Master.
| Feat | Description |
|---|---|
| This is the perfect time to take this feat if you did not do that before. | |
| Ability Improvement | If you have |
Level 9
Besides the boost in HP, a new class feature of fighter is unlocked:
| Feature | Description |
|---|---|
| Greatly improves chances of succeeding in Saving Throws, minimizing the impact of crowd control actions. |
Unfortunately, it is not as important for a fighter, compared to something like a Caster, which would be using a lot of ![]() Concentration spells.
Concentration spells.
Level 10
This is a major milestone for Battlemaster as one of its main features gets a big improvement
| Feature | Description |
|---|---|
| Makes the Manoeuvres more potent as the additional dice roll now has a higher upper value. |
Manoeuvres
By this time, pick anything that you prefer. More or less everything has been covered that is important for the build. I just suggest avoiding Sweeping Attack due to its low base roll. All other options do not bring much to the table, as they do not offer substantial crowd-control capabilities.
Level 11
This is big, very big. You gain a very important class feature from Fighter
| Feature | Description |
|---|---|
| Now a third attack can be used, tripling your base damage. Especially in the late game, where you have multiple sources of additional damage, this will stack up for easy kills against most foes. |
Level 12
Now the final level of the Battlemaster build is reached? How do you feel? Well, this has been a big journey, and we finish off the build with the final Feat selection.
Feat
This is the final optimization for the build, make sure that you have picked all the previous feats, as this ensures, that you can attack with bonus action, have very high strength, and go first in most of the encounters.
| Feat | Description |
|---|---|
| The final optimization of the build. This will roll damage dice two times, making it more likely that you will deal higher damage. Imagin this as and |
Illithid Powers
This is a special mechanic in Baldur's Gate 3, that allows you to consume tadpoles and unlock special Illithid Powers. These range from somewhat useful, to extremely deadly. I would like to leave a few recommendations:
Base Illithid Powers
| Order | Illithid Power | Description |
|---|---|---|
| 1 |  Favourable Beginnings Favourable Beginnings |
Very useful power to take as it does not have any costs, and provides only benefits on the first hits. |
| 2 |  Luck of the Far Realms Luck of the Far Realms |
Guarantees a critical hit, a very powerful action to have. |
| 3 |  Concentrated Blast Concentrated Blast |
Mainly need this one for progression. |
| 4 |  Cull the Weak Cull the Weak |
It allows you to deal additional psychic damage around the target you kill. Moreover, it can provide an insta-kill if the enemy is very low on HP. |
Potions, Elixirs and Consumables
Let's take a look at what consumables we can use to further empower the build.
Potions
These are general consumables, and most of them are activated for a few turns. Potions are separate from Elixirs and can be active together.
| Consumable | Description |
|---|---|
 Potion of Speed Potion of Speed |
In case you or your other casters have a |
 Potion of Animal Speaking Potion of Animal Speaking |
A good potion to drink for role-playing and additional dialogue options with animals. |
 Potion of Invisibility Potion of Invisibility |
Can be used to get a perfect position before the encounter starts. |
 Potion of Flying Potion of Flying |
Gives bonus mobility for the encounters. |
Elixirs
Unfortunately, only one Elixir can be active at a time. However, the good thing is that they last until a long rest, making them very useful and economical.
Be sure to activate them before combat as otherwise, you will need to use Bonus Action.
| Consumable | Description |
|---|---|
 Elixir of Bloodlust Elixir of Bloodlust |
As you will be able to easily kill at least the weakest foe, this ensures additional attacks per turn. Moreover, in the late game, with a high critical chance and good gear, this is the optimal choice. |
 Elixir of Hill Giant Strength Elixir of Hill Giant Strength |
Sets strength value to 21 until the Long Rest. With this option, you can easily gimp on strength in the early game. You can put those points in Dexterity or Strength. Here is a farming guide for Elixir of Hill Giant Strength |
| Elixir of Cloud Giant Strength |
An upgraded version that is available mostly in Act 3 via crafting. Sets strength to 27, the highest value possible. |
General Tips
Now I would like to cover some general tips on how to play Battlemaster build.
Using Manoeuvers
This is the main selling point and feature of the Battle Master Subclass. The good thing is that you can use them without reservations as you reset Superiority Dice each Short Rest.
For example, use Trip Attack to make the enemy prone on the first attack. This then leaves them lying on the ground, guaranteeing constant advantage. Follow up with attacks from yourself and your allies.
However, you should not use them blindly. Always evaluate what Saving Throw the action targets, and whether the enemy will succeed against it or not. This way you can impose significant crowd control and damage on the foes.
Multiple respecs
The Battlemaster can be respecced multiple times throughout your playthrough, this all depends on the itemization. For example Act 1:
- Elixir of Hill Giant Strength - makes you not need strength investment, and get higher Constitution or Dexterity for better combat.
 Gloves of Dexterity - you can gimp on Dexterity while wearing this, respeccing and leaving it at 8 points.
As you progress you will also get other items in Act 3:
 Gauntlets of Frost Giant Strength - makes Strength 23, allowing to gimp on strength
 Amulet of Greater Health - maximizes Constitution to 23, allowing to skip any investment into this ability.
- Elixir of Cloud Giant Strength - the improved version of the previous elixir that sets Strength to 27.
So as you can see, based on the gear you equip you can then put ability points elsewhere. I would keep this priority:
- Strength
- Constitution
- Dexterity
- Wisdom
- Charisma
- Intelligence
This way you will know where to best allocate points while wearing or using one of the listed items. However, for the late game, I think it's best to minimize the use of these items, as you can get other options that directly improve your damage.
Two-handed vs. One-handed with Shield
One decision you will have to make is what weapons you use. Overall, in early and mid-game, I would say Two-Handed choices are much more powerful. However, in Act 3. Some items are truly powerful like - ![]() Nyrulna (can be used as one-handed or two-handed),
Nyrulna (can be used as one-handed or two-handed), ![]() Belm, etc. These can deal a decent amount of damage.
Belm, etc. These can deal a decent amount of damage.
Another thing is that shields have an edge on Armour Class, making you feel very safe in the frontlines, standing in the enemy's face. Overall, pick what is cooler for you.
Bonus Ability points through Playthrough
During your playthrough you will have two major points in the game, where you can increase the ability points in this case - Charisma:
- Act 1 -
 Auntie Ethel's Hair, by sparing her life and getting her hair. This can be used to increase Strength by 1. This is the reason why we leave it at 17 so that in Act 1 we could have it at 18 (or 20 with Ability Improvement Feat)
 - Potion of Everlasting Vigour - obtained in Act 2, in Moonrise towers, after offering Astarion's blood to the researcher. This gives +2 Strength.
- Mirror of Loss. This also provides bonus ability points based on your decisions. It gives +2 to Strength.
With all of these in Act 3, you will reach 24, the maximum value of Strength, gaining a +7 Proficiency bonus to many of the rolls.
Have an ally with ![]() Phalar Aluve equipped
Phalar Aluve equipped
Currently, this sword provides one of the most powerful buffs in the game. Although it is fixed on Honour Mode, it is still very powerful for classes that do multiple hits. As you can guess I am talking about Phalar Aluve: Shriek.
This decreases enemy Saving Throw rolls of Charisma, Intelligence, and Wisdom. But more importantly, each hit that you or your ally does adds a bonus 1d4 Thunder damage. So multiple attacks that you do, will stack up quite neatly against enemies.
Managing Great Weapon Master
One of the more important feats of the build is ![]() Great Weapon Master: All In. It gives a flat damage boost at the cost of decreased attack rolls. Generally, it is best to take this later in the game at level 8+, when you have higher attack bonuses and better gear.
Great Weapon Master: All In. It gives a flat damage boost at the cost of decreased attack rolls. Generally, it is best to take this later in the game at level 8+, when you have higher attack bonuses and better gear.
However, if you can effectively use it at level 4, you will be able to easily kill most of the enemies you encounter, especially as it is easy to die in Act 1. So if you are up for putting in additional effort the benefits are immense. Here are the main ways to increase your attack rolls:
 Bless from Cleric or Paladin, for a 1d4 bonus.
- Spells like
 Faerie Fire, and
  Blindness give an
  Advantage to attackers.
 - Oil of Accuracy or Diluted Oil of Sharpness, for 1 and 2 attack roll bonus.
 Gloves of the Growling Underdog - can be obtained in Goblin Camp, and gives an Advantage for attack rolls.
 Svartlebee's Woundseeker - early game greatsword that you can get before engaging in any of the major battles of Act 1.
Now, if you want more in-depth information, I have a guide covering how to increase attack rolls, which lists a lot of options and combinations. You can then pick the bonuses based on your party setup.
Equipment Recommendations
Now I would like to go through some gear recommendations to maximize the Battlemaster build effectiveness. Items are especially important as they take the build to the next level thanks to their unique effects.
Act 1
The early game can be hard, as you do not know where to find items. You also should make a decision, about what kind of setup you are going with - Two-Handed or One-Handed.
| Slot | Item | Description |
|---|---|---|
 Melee (One - Handed) Melee (One - Handed) |
The best one-handed weapon option in Acts 1 and 2. Gives +3 Enchantment and very powerful Sunbeam action. | |
| This weapon is also a contender for best one-handed weapon in Act 1, as it has a unique Razor Gale effect, allowing it to hit multiple targets. | ||
| A perfect one-handed option. Its special Shriek ability will also give a huge boost to other party members. However, I would better use this with Cleric as the activation costs an action and the result is two lost attacks. | ||
| A solid weapon, that gives a bonus 1d4 psychic damage each hit. | ||
| Melee (Two-Handed) |
This weapon is mostly useful if you are playing as Githyanki as they gain additional 1d4 psychic damage. Of course, the weapon is good by itself as it gives Soulbreaker action and higher initiative. | |
| Solid choice as it increases the critical chance and provides an |
||
| A very good choice, has +1 Enchantment but most importantly it can use a spell that gives +2 Armour Class. Fighters don't use the Concentration slot for anything else, so the Tyr's Protection is the perfect choice. | ||
| This sword is worth it until you reach Druid's Grove, there it is much better to buy items with +1 Enchantment like |
||
 Ranged Ranged |
The best option in terms of damage. It is relevant to most of the game for Battlemaster. However, I would not rely heavily on this as you are the most powerful while using Melee weapons. | |
| The higher initiative bonus will allow you to start your turn earlier. | ||
| Equipping two of these will allow you to attack with off-hand. This is important as you may not have use for Bonus Action. However, for dedicated ranged weapons check the options above. And it becomes useless once you get Great Weapon Master. | ||
 Shield Shield |
It provides a substantial defensive boost by reducing critical hit damage. | |
| Gives a bonus to saving throws, easily accessible early in the game. | ||
 Head Head |
Gives resistance to critical hits and allows the use of Hunter's Mark, for additional single-target damage. | |
| Great helmet, that can deal bonus damage to attacking targets. Be sure to have a high Armour Class to avoid enemy hits | ||
| Provides increased speed at the start of the combat. | ||
 Cloak Cloak |
The only option in Act 1 that is okay, by providing once-per-turn invisibility. | |
 Armor Armor |
Very powerful armor in Act 1, that is perfect for frontliner and if you have 12 Dexterity or lower. | |
| Another powerful armour from Grymforge, that is best worn with 14 Dexterity, to get Bonus Armour Class, making it equal to Heavy Armour. | ||
| This can be equipped when starting the game by taking it from Lae'zel. Very solid option with a high Armour Class. | ||
 Gloves Gloves |
These gloves set your Dexterity to 18, allowing you to respec and dump it to 8. You can then maximize Constitution and other abilities like Wisdom, and Charisma to work better against spells. | |
| Truly the best option in Act 1, as this will guarantee that your attacks land. | ||
 Boots Boots |
Avoids slipping on various terrains and most importantly unlocks Misty Step each short rest. | |
| Gives additional protection against being Prone. | ||
 Amulet Amulet |
This is a very powerful amulet, that will lead you through most of the game, the 1d6 bonus damage is very good. | |
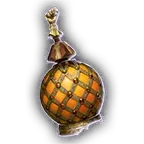
 Rings Rings |
Provides 2 damage increase on each weapon hit, making it a good choice in the Act 1. | |
| Gives defensive bonuses to Armour Class and Saving Throws. | ||
| Bonus thunder damage to thunder spells. |
Act 2 - mid-game
This is the mid-game, where most of the areas will be covered by dark. Radiant equipment will shine here and having ![]() Darkvision is recommended. We also can get some great items, albeit some will stay the same from Act 1.
Darkvision is recommended. We also can get some great items, albeit some will stay the same from Act 1.
| Slot | Item | Description |
|---|---|---|
| Melee (One - Handed) |
This still plays a major role in Act 2, even more so as its light effect helps with combat in the Darkness. | |
| Deals bonus necrotic damage. | ||
| Melee (Two-Handed) |
A late Act 2 weapon, that deals a lot of damage, and has a unique Darkness effect. It also deals 1d6 bonus damage to obscured targets. | |
| Has a passive light effect, making it effective with |
||
| A good choice for Act 2 and can be used till Act 3. Besides its unique benefits, it comes with bonus 1d4 force damage and not many enemies can resist it. | ||
| You can imbue a weapon with any element 1d4 damage and gain a +1 to attack rolls. You can get the bonus elemental damage on any weapon. For example, drop another weapon on the ground, cast the spell with this glaive, and equip the said weapon. This is a very powerful combo, although it may be a bug. | ||
| Ranged |
The best option in terms of damage, is through most of the game for Battlemaster. However, I would not rely heavily on this as you are the most powerful while using Melee weapons. | |
 Bow of Awareness Bow of Awareness |
The higher initiative bonus will allow you to start your turn earlier. | |
| Shield |
The shield provides a bonus initiative that is good for starting the turns earlier. | |
| The shield is still relevant especially as it gives resistance to Critical hits. | ||
| Head |
It increases the critical chance by 5%, and it only requires you to be obscured. Moreover, gives some resistance against spells by providing bonus Saving Throws. | |
| Provides bonus critical chance while obscured. | ||
| Cloak |
Improves survivability and Saving Throw success. | |
| Reflect 1d4 acid damage if somebody hits you in melee range. | ||
| Armor |
This armor is strange and very useful for the build. With it, you are not limited to a +2 Armour Class bonus from Dexterity. So while using it, I recommend respeccing, so that you would have 16 Dexterity. You can lower Constitution to 14 for this as you do not need it for spell concentration. Another benefit is its initiative bonus, allowing you to go earlier in combat. | |
| The armor is still potent in Act 2, but be on the lookout for others with 19 Armour Class like |
||
| Still plays a good role in Act 2, as its 16 Armour Class is plenty. | ||
| Gloves |
Similar to the option below, these provide an |
|
| These gloves are mandatory at least until you get |
||
| Provides bonus fire damage, however, only use it once you get |
||
| A solid option as it gives a bonus 1d4 necrotic damage. But only use it after you get |
||
| Boots |
Bonus armour class for higher survivability. | |
| The boots are still a good option in Act 2. | ||
| Amulet |
Still the best amulet as it provides a substantial damage boost if healed - a cleric can do this easily. | |
| Rings |
Allows dealing guaranteed critical hit per long rest. After this, you can just unequip it. Moreover, it can change an attack that misses and turns it into critical. | |
| Provides an |
||
| Easily get bonus damage if creatures are illuminated, this can be done by casting Light on yourself by an ally. | ||
| Makes you immune to difficult terrain, and you cannot be paralyzed otherwise. | ||
| Makes you immune to being blinded, which can be detrimental in some encounters. |
Act 3 - Final Build setup
This is the last act of the game, where you will get access to the most powerful items. To get them as early as possible you will need some planning, but overall, it should not be a problem.
Act 3 gives so many different items, that the build can be changed multiple times as you explore it. For example you could go with ![]() Nyrulna +
Nyrulna + ![]() Bhaalist Armour for very strong damage, but sacrificing armour class.
Bhaalist Armour for very strong damage, but sacrificing armour class.
On the other hand, you can pick ![]() Balduran's Giantslayer and take armor like
Balduran's Giantslayer and take armor like ![]() Helldusk Armour or
Helldusk Armour or ![]() Armour of Persistence to play a more survivability role. So definitely try out different combinations to find the sweet spot for your playstyle.
Armour of Persistence to play a more survivability role. So definitely try out different combinations to find the sweet spot for your playstyle.
| Slot | Item | Description |
|---|---|---|
| Melee (One - Handed) |
(BiS) |
Although this would technically be a weapon used for Throwing builds, it is perfect as a melee choice. You can still throw it for AOE lightning damage as |
| What makes this one special is that it has a unique Whirlwind attack, that can target all nearby enemies with separate attack rolls. You can easily do three smites on different targets with it. It has another effect when worn in an offhand, you can use it as a bonus action attack which replicates the main hand weapon. |
||
| Although the weapon is aimed at single-wielding without a shield, it is still useful as it allows additional attack using bonus action. | ||
| Deals 1d8 bonus radiant damage and has +3 enchantment to damage and attack rolls. | ||
| Melee (Two-Handed) |
(BiS) |
The best two-handed sword in the game. Gives huge damage bonuses from high strength and is a perfect large monster killer. |
| This weapon can also be used as two-handed, albeit its base damage is not as high. It can be best in slot weapon if you use |
||
| A good choice, specifically for Githyanki due to bonus damage and resistance. Otherwise, it falls short of other options. | ||
| A strong contender for Act 3. The unique Darkness effects make it an easy way to get an |
||
| This gives a bonus of 6 poison damage per hit, which is very high. | ||
| Ranged |
(BiS) |
The best bow for crit fishing builds as it increases the critical chance. |
| Shield |
(BiS) |
The strongest shield in the game. Has a special shield bash reaction that deals force damage. Moreover, gives good resistance to spells. |
| Provides Force Conduit each turn, decreasing the damage that the wielder receives. | ||
| Head |
Optimal choice to ensure high survivability. Gives various bonuses and makes you immune to stuns and criticals. | |
(BiS) |
The best helmet to increase attack chance success when using |
|
| Increases attack rolls and provides a bit more damage with weapons. just be sure to not have your HP at maximum, make an ally hit you before the combat. | ||
| Cloak |
(BiS) |
Improves the chances of attacks missing the wearer until getting hit for that turn. |
| Armor |
(BiS) |
This armor has the highest Armour Class in the game. Moreover, it grants flying and burns enemies in flames when they attack you. |
| This is light armor, so you should be maximizing your Dexterity and have it at least at 16, to get a high Armour Class. Together with |
||
| A solid defensive choice, that comes with damage reduction cantrip effects. | ||
| The armor does not limit the Dexterity bonus to AC. So you can again make sure via respec that it is 16, to get +3 to AC. | ||
| Gloves |
(BiS) |
Gives a solid bonus of 1d6 fire damage on hit, and provides a fire spell with Strength as a casting ability! |
| + 2 bonuses to damage and attack rolls. Which is perfect when using |
||
| Battle Master-specific gloves, that give an enemy |
||
| Boots |
(BiS) |
Allows avaoiding failed Saving Throws, and uses reaction to change the outcome. Moreover, provides bonus actions for mobility and damage. |
| Gives a huge boost to mobility and avoids difficult terrain. | ||
| Amulet |
(BiS) |
The amulet still pulls strong even in the late game. |
| Makes any kind of Constitution ability investment redundant as it maximizes it to 23 points. However, this means that you also sacrifice an amulet slot for something that could be more offensive. | ||
| Rings |
(BiS) |
Provides an |
| Guarantees a critical hit once per Long rest. Moreover, it can change an attack that misses and turns it into critical. |
Conclusion
Thank you for reading the Battle Master Fighter build for Baldur's Gate 3. This is a very solid frontliner build that represents a commander on the battlefield. The special actions called Manoeuvres, give an edge in battle either by support or Crowd Control. Moreover, Battle Master is an effective combatant with good itemization that I cover in deep detail.
Cheers!
Like, Dislike, comment, or share!
Join the Discussion
0 commentsNo comments yet.
Be the first one to leave a comment!