
Best Lore Bard Build - total Control - Baldur's Gate 3 (BG3)
Contents
Lore Bard Build - Overview
The build is the perfect option for those who want to play as a main character but also as a support role. Bard comes with multiple skill proficiencies and the College of Lore gets even more.
The main idea is to utilize ![]() Cutting Words to decide what happens with ally and enemy actions. Moreover, once your turn starts you have a swath of control spells to decide the future of large groups of enemies -
Cutting Words to decide what happens with ally and enemy actions. Moreover, once your turn starts you have a swath of control spells to decide the future of large groups of enemies - ![]() Confusion,
Confusion, ![]() Glyph of Warding, etc.
Glyph of Warding, etc.
Now, one of the setups with this build is the ![]() Mass Healing Word spell that the Bard gets via Magical Secrets. This will allow you to do 3 things (thanks to some items recommended in the gear section) - decrease damage from physical attacks, restore health, and apply Bless for better attack and saving throw rolls.
Mass Healing Word spell that the Bard gets via Magical Secrets. This will allow you to do 3 things (thanks to some items recommended in the gear section) - decrease damage from physical attacks, restore health, and apply Bless for better attack and saving throw rolls.
On the other hand, you could pick like cleric for multiclass and be able to set up some sick combos - Create Water or protect an ally/yourself with Sanctuary. What is fun is that Lore Bard is very effective at a lot of things. Or go Wizard for an expanded spell list.
Let's get into the build!
Leveling Overview
Here is a concise table with all the main picks during your leveling progression. For more detailed reasoning, I go further in the article. Also, do not forget to check the recommended gear as it is crucial.
Starting the Game - Level 1
This section covers the creation screen and what would go into the best Races, Abilities, and Skills for Lore Bard build. Some of these choices are impactful as you cannot respec them.
Races
Picking a race provides various benefits - abilities, dialogue options, looks, etc. Also, keep in mind whether your picked race has Shield proficiency as this can improve survivability especially in the early game.
| Race | Features | Description |
|---|---|---|
 Wood Half-Elf Wood Half-Elf |
|
Amazing choice, thanks to its increased movement speed. Moreover, it gets Shield proficiency, boosts Armour Class. |
 Human Human |
|
This is one of the rare cases where I recommend this race. It complements well Bard's class with more Skill proficiencies and gets Shield Proficiency. It is a big survivability boost in the early game. |
 Githyanki Githyanki |
|
You can wear medium armor and get some good actions very useful for the main character to improve ability check rolls. |
 Halfling Halfling |
|
Any subrace will work. What matters is the |
Class
As I suggested first we go with the Bard. It's not the optimal choice, but multiple skill proficiencies will help from the first steps. Moreover, with correct spell picks, you will empower your allies and disable enemies
 Bard Bard |
|
| Features | |
|---|---|
| Iconic bard feature, that can improve damage, dialogue dice rolls, and saving throws. | |
Cantrips
| Cantrip | Description |
|---|---|
| Although the damage is roll, it has its purpose. The cantrip can be used to impose a |
|
 Friends Friends |
If you are the main character and do most of the dialogues, this is mandatory as it gives an |
Spells
Good spell picks will mean life and death, so let's go through them:
| Spell | Description |
|---|---|
 Healing Word Healing Word |
The spell can be a lifesaver in certain situations where you do not have action. However, it will also serve a different role you can buff your allies if you have equipped |
 Dissonant Whispers Dissonant Whispers |
The only truly offensive level-1 spell. It can also frighten enemies making them unable to move. Use this to inflict ranged damage. |
 Faerie Fire Faerie Fire |
Early game, this spell is wondrous as it makes it easy to get an |
 Sleep Sleep |
Very powerful spell against level 1-2 enemies, as it succeeds without any resistance checks. |
 Tasha's Hideous Laughter Tasha's Hideous Laughter |
Early on this spell could be a lifesaver, moreover, it is effective against low Wisdom enemies, so check their stats. Thanks to it you can disable an enemy and even hit it at the same time with a chance for Saving Throw. |
Starting Instrument
This is a matter of personal taste, so pick your preferred one. Moreover, as you play the game some unique instruments will be unlocked that you can wear.
Background
Backgrounds are mostly for role-playing and you can pick whatever you prefer. If you want to optimize, then it would be good to pick backgrounds that are based on your ability points of Charisma.
Moreover, due to high Dexterity, it is also a good choice to pick Sleight of Hand. This can be a perfect choice especially if you want to be the main lockpicker or trap disarmer.
| Background | Skills | Description |
|---|---|---|
| Guild Artisan | Insight Persuasion |
Gives persuasion proficiency, for better dialogue checks. |
| Entertainer | Acrobatics Performance |
Improves Acrobatics skills and gives bonuses to Performance for some dialogue checks. |
| Charlatan | Deception Sleight of Hand |
A truly great option especially as you can be the one that unlocks and disarms most of the traps with Sleight of Hand proficiency. |
| Noble | History Persuasion |
Although you will have low intelligence the Persuasion check improvement is good. But it's an inferior option to Guild Artisan in my opinion. |
Abilities
Now let's take a look at the abilities of the Lore Bard build. Correct allocation will allow you to maximize the early gameplay and get good modifier bonuses.
| Ability | Value | Description |
|---|---|---|
 Strength Strength |
8 | This build does not need strength. |
 Dexterity Dexterity |
16 (15+1) | This plays an important role in improving armor class and increasing initiative. I think Bard must go first due to low survivability and get some control spells activated. |
 Constitution Constitution |
14 | Enough Constitution for better survivability. |
 Intelligence Intelligence |
8 | Do not need this ability. |
 Wisdom Wisdom |
10 | Additional Wisdom to avoid any negative modifiers as many spells target this ability. |
 |
17 (15+2) | The most important stat for the Bard caster build. It will improve dialogue roll checks, but most importantly spell success chance. If you plan on getting |
Skills and Expertise
Overall, the skills should be impacted by your roleplaying and background decisions. However, you would still want those that will give you the best benefits. My recommendations are to pick those at which you have a high ability modifier and these are Dexterity and Charisma-related.
- Sleight of Hand
For Charisma related:
- Deception
- Intimidation
- Performance
- Persuasion
Leveling Progression - Levels 2-12
Here is the detailed progression for the Lore Bard build to get you started. You can use it as a guideline because early games can be daunting and overwhelming. Later on, once you get the feel for the class you can start picking your options
The early game with Bard can be difficult. I recommend having someone cast ![]() Mage Armour if you can. Otherwise, stay with Light or Medium Armor if proficiencies allow.
Mage Armour if you can. Otherwise, stay with Light or Medium Armor if proficiencies allow.
Level 2
This is where you will have left the tutorial area, and will start exploring the world. From the get-go, Bard gets some useful bonuses.
| Features | Description |
|---|---|
| A truly useful passive throughout the whole game to increase your chances of ability roll success. |
That is not all, there is another surprise waiting:
| Actions | Description |
|---|---|
 Song of Rest Song of Rest |
This is a very important Bard action, and with it, you can use Short Rest a third time before Long Rest. Use it to heal or restore class-specific resources. So do not save those, and use them to your heart's content. Moreover, classes like Warlock, Fighter, and others benefit greatly from instant restoration of their spell slots or special resources. |
Spells and Replace Spell
| Feat | Description |
|---|---|
 Longstrider Longstrider |
In case no one else in the group has it, take it. You can cast it without spell slot cost and it benefits everyone, especially melee combatants. |
 Tasha's Hideous Laughter Tasha's Hideous Laughter |
Can be used to immobilize enemies with low Wisdom. However, later in the game, there will be better options. |
For spell replacement, I don't think there is anything that would be useful yet.
Level 3
The Bard gets to choose its subclass. Moreover, level 2 spells are unlocked, giving some better offensive and control options.
Subclass
| Overview | |
|---|---|
 College of Lore College of Lore |
|
| Features | |
| This is a very powerful feature, you can use |
|
Skills
By picking Lore Bard you get to pick three additional skills in which you gain proficiency. Again I would recommend picking anything that is Charisma related (if not yet picked). After that you can take - Perception, Sleight of Hand, or anything else.
Spells and Replace Spell
Now some good spells are unlocked that will improve your options.
| Spells | Description |
|---|---|
 Enhance Ability Enhance Ability |
I would say this is mandatory on Honour Mode, and optional on lower difficulties. The spell can be a lifesaver as it will give a huge chance of success in case you need a roll |
I would replace ![]() Sleep for:
Sleep for:
| Spells | Description |
|---|---|
 Cloud of Daggers Cloud of Daggers |
The biggest damage spell at level 2. it damages two times - first when you cast, second after it is the enemy's turn. You could also use this as a replacement for any spells you do not use. |
Level 4
Now, you get some other great choice picks - the first feat is unlocked.
Cantrips
| Cantrip | Description |
|---|---|
| This will become useful later in the game once you reach Act 2. Moreover, it can be used to improve the damage of some items. | |
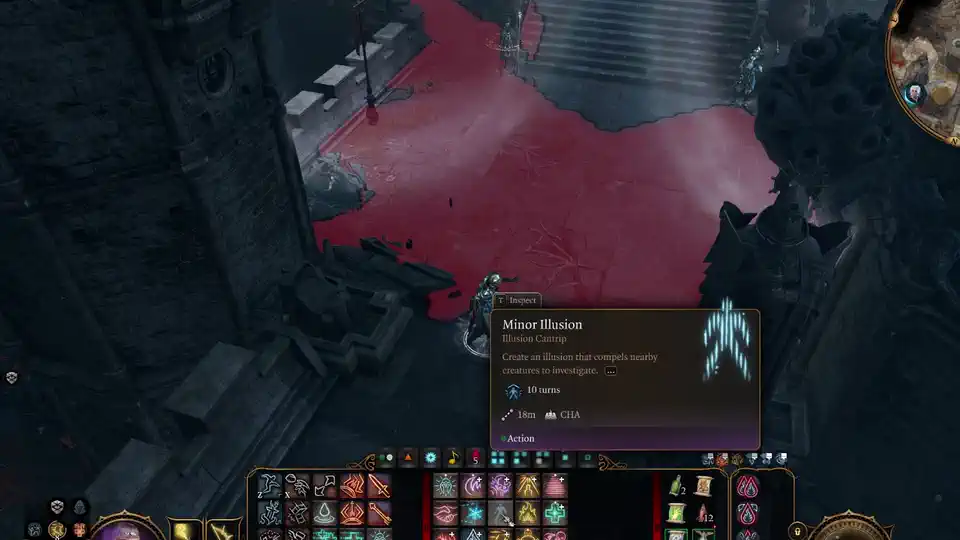
| Another good pick. You can pull enemies together before combat. After that follow up with an area of effect spell on the targets. |
Spells and Replace Spell
| Spells | Description |
|---|---|
| A decent control spell, that you can use to Hold an enemy. be sure to follow up with someone from melee range for guaranteed critical hits. |
Feat
| Feat | Description |
|---|---|
| Ability Improvement | For the first feat, my recommendation is +2 Charisma, to improve spell success chance and better ability rolls. |
Level 5
Boom! The Bard is level 5 and this means the build can finally use some awesome level 3 spells.
Spells and Replace Spell
| Spells | Description |
|---|---|
| The only spell that you need, for now... It can cause damage using most elements, so if the enemy is wet, just use the Lightning/Cold element. However, the most important aspect is that it can put multiple targets to sleep. This can easily invalidate many fights. |
For replacement, I would recommend removing ![]() Faerie Fire and picking:
Faerie Fire and picking:
| Spells | Description |
|---|---|
| An amazing spell, that can drastically reduce enemy movement speed. However, the most important aspect is that it does not use a |
Level 6
Lore Bard gets access to the Magical Secrets feature, allowing you to learn additional spells.
| Action | Description |
|---|---|
 Countercharm Countercharm |
You and any allies within 9m have an |
Spells and Replace Spell
| Spells | Description |
|---|---|
| I recommend getting this spell. It is amazing and works even while you are silenced. |
Magical Secrets
This is the main reason to take Lore Bard. It can now access many of the spells from other caster classes, allowing it to create a few interesting synergies.
| Spells | Description |
|---|---|
| This spell will allow creating unique synergies for buffing your allies using |
Now there are a few options that I would recommend at level 6:
| Spells | Description |
|---|---|
| Extremely effective spell, as it can cancel enemy casters. | |
| Slow down enemies, make them blind and they also incure damage every turn while staying in the fog. This spell can trivialize most of the encounters. |
Level 7
You will get access to level 4 spells. One of those is my personal favorite.
Spells and Replace Spell
| Spells | Description |
|---|---|
| An amazing spell, that can make multiple encounters very easy. Enemies may start attacking each other or even skip their turns. |
If you see that any of the spells are not used, feel free to replace them.
Level 8
This level unlocks the second feat for Lore Bard.
Spells and Replace Spell
Here I have a few recommendations to choose from.
| Spells | Description |
|---|---|
| If you have a rogue (Assassin at that) in your group who specializes in stealth, this spell can make it so that they will attack multiple times before breaking invisibility. The stealth checks become harder after each action. | |
| Another amazing spell that can make multiple enemies drop their weapons. The only caveat is that its range is not long. |
Feat
Here I have two recommendations, and both of them will also be the same for level 12 (if you decide to go with pure Bard). Check the descriptions and decide what to pick based on itemization.
| Feat | Description |
|---|---|
| This perk almost guarantees that you go first most of the time. This way you can buff allies using |
Level 9
The Bard gets access to level 5 spells.
Spells and Replace Spell
| Spells | Description |
|---|---|
| An amazing spell, that is best combined with martials or spellcasters using attack rolls. This way you guarantee critical hits, for a huge damage increase. |
For spell replacement, I don't think it is needed, feel free to try out something if you would like.
Level 10
As Lore Bard, you get access to the second Magical Secrets. This gives two more spells to choose from.
| Features | Description |
|---|---|
| The bonus to ability rolls and checks is increased to 1d10. This also applies to |
Skills
You can pick expertise for two additional skills. My recommendation is if you are the main character, get dialogue-related ones - performance, persuasion, deception, and intimidation.
If not, definitely pick Sleight of Hand or Perception.
Cantrips
Here feel free to pick anything. Here are the ones that I would recommend already having if you did not pick them up before:
| Cantrips | Description |
|---|---|
| Can be used to precast on incoming encounters. This is great if you need to activate the |
|
 Minor Illusion Minor Illusion |
My recommended pick, as you can use this to move enemies together. Once you reach the next level you can follow up with Glyph of Warding for a huge area of effect spell combo. |
Spells
To be honest, I do not think any of the spells are a major improvement. Just pick anything that you would like to try out. Even if it is ![]() Speak with Animals for some utility.
Speak with Animals for some utility.
| Spells | Description |
|---|---|
| The enemy target joins you, however, it may break if succeed in Wisdom Saving Throw when taking damage. |
Magical Secrets
| Spells | Description |
|---|---|
| This is a mandatory spell in my opinion. As you now have a very high Spell Save DC, this spell can disable enemies for one turn. You can make them grovel, so that allies get attack advantage, or flee to trigger opportunity attacks. | |
| A very powerful crowd control spell, that can make enemies prone and cancel |
|
| Very powerful option if you have not taken in at level 6. |
Level 11
Bard gets access to level 6 spells. I do not think they are that impressive, so be sure to check the below sections for some multiclass ideas to get more of the Lore Bard.
Spells and Replace Spell
| Spells | Description |
|---|---|
| Some say this is a "win" button. The spell is truly powerful and guarantees disabling the enemy for one turn. Moreover, the dancing foes always look funny. |
For spell replacement, you can try out any spell or do nothing.
Level 12
This is the final level of Lore Bard. Be sure to check the next section as I will offer some build variations.
Spells and Replace Spell
At this stage, you can pick any spell that you like. You will probably be already very powerful steamrolling through the game.
| Features | Description |
|---|---|
| Interesting spell to have in the arsenal. It's most powerful when used over many turns. So do not waste a spell slot for short encounters. You can disable enemies one by one. | |
| Another spell that is very powerful in a few encounters. |
Feat
Here I will repeat the feats from level 8, as you should be picking one of them.
| Feat | Description |
|---|---|
| This is great Feat, especially if you will not have another caster that uses |
|
| Amazing feat, that gives control on dice rolls via Luck Points. This works for saving throws, ability checks, and attack rolls. |
Maximizing Ability Scores
Now, as the build progression is covered there are a few aspects and important decisions you will have to make throughout the game. These will decide your final score for abilities.
- Act 1 -
 Auntie Ethel's Hair - you will want to get +1 Charisma if you pick this choice.
 - Act 3 - Mirror of Loss - pick +2 Charisma.
- Act 3 -
 Birthright - optional item, but gives +2 Charisma.
This will allow you to reach 24 or 22 natural Charisma, and result in a +6-7 ability modifier on your spells and rolls.
Potions, Elixirs and Consumables
Let's take a look at what consumables we can use to further empower the build.
Potions
These are general consumables, and most of them are activated for a few turns. Potions are separate from Elixirs and can be active together.
| Consumable | Description |
|---|---|
 Potion of Speed Potion of Speed |
In case you or your other casters have a |
 Potion of Animal Speaking Potion of Animal Speaking |
Although not something powerful, it is worth stocking up and saving a spell slot. |
 Potion of Invisibility Potion of Invisibility |
Can be used to get a perfect position before the encounter starts. |
Elixirs
Unfortunately, only one Elixir can be active at a time. However, the good thing is that they last until a long rest, making them very useful and economical.
Be sure to activate them before combat as otherwise, you will need to use Bonus Action.
| Consumable | Description |
|---|---|
 Elixir of Battlemage's Power Elixir of Battlemage's Power |
Gain 3 stacks of Arcane Acuity. I would say this should be the most used Lore Bard elixir for higher spell success. |
 Elixir of Bloodlust Elixir of Bloodlust |
You gain additional action by killing an enemy. This is one of the best options that you can use especially if you plan on striking a single target using Scorching Ray. |
 Elixir of Peerless Focus Elixir of Peerless Focus |
Another good choice, particularly once you start using Spirit Guardians and control spells. |
 Superior Elixir of Arcane Cultivation Superior Elixir of Arcane Cultivation |
Grant's a single level 3 spell slot. Could be useful in case you are preparing for a longer encounter. |
 Supreme Elixir of Arcane Cultivation Supreme Elixir of Arcane Cultivation |
Grant's a single level 4 spell slot. Could be useful in case you are preparing for a longer encounter. |
 Elixir of Vigilance Elixir of Vigilance |
For some encounters, you will want to go first. This elixir will ensure that it overcomes even surprise mechanics. However, if you have |
Illithid Powers
This special mechanic in Baldur's Gate 3 allows you to consume tadpoles and unlock special Illithid Powers. These range from somewhat useful, to extremely deadly. I would like to leave a few recommendations:
Base Illithid Powers
| Order | Illithid Power | Description |
|---|---|---|
| 1 |  Favourable Beginnings Favourable Beginnings |
Very useful power to take as it does not have any costs, and provides only benefits on the first hits. |
| 2 |  Luck of the Far Realms Luck of the Far Realms |
Guarantees a critical hit, a very powerful action to have, and works with Scorching Ray or Witch Bolt. |
| 3 |  Concentrated Blast Concentrated Blast |
Taking only for progression, to unlock the next power. |
| 4 |  Cull the Weak Cull the Weak |
Passive feature that does not cost anything and automatically deals bonus psychic damage around the target, once it is close to death. |
| 5 |  Transfuse Health Transfuse Health |
Taking it for progression |
| 6 |  Shield of Thralls Shield of Thralls |
Taking for progression, to unlock the next power, but it also provides a good bonus as temporary health, that can be cast before combat. |
| 7 |  Force Tunnel Force Tunnel |
Mainly taking for progression |
| 8 |  Displace Displace |
Mainly taking for progression |
Elite Illithid Powers
These become unlocked later in the game as you progress. They are extremely powerful additions to the build.
| Order | Illithid Power | Description |
|---|---|---|
| 1 |  Freecast Freecast |
Removes any cost of spell slots or consumable resources |
| 2 |  Black Hole Black Hole |
Amazing power, that pulls enemies together and slows them. After that, you can follow up with Fireball, Fear, etc. |
| 3 |  Psionic Dominance Psionic Dominance |
You can use this similarly to Counterspell, and disable enemy spell. |
| 4 |  Illithid Expertise Illithid Expertise |
Expertise in bonus skills from this power is not mandatory as Bard already covers most of these. |
| 6 |  Mind Sanctuary Mind Sanctuary |
Extremely valuable power that can also help other casters to use up their Bonus action effectively. |
Equipment Recommendations
Now I would like to go through some gear recommendations to maximize the Lore Bard Build. Items are especially important as they take the build to the next level thanks to their unique effects.
Act 1
This part of the game can be tough for Bard. If you are Githyanki, be sure to get Medium Armour, as it is the best option before you can get one of those mentioned in the list. Another option, be sure to equip a Shield if you can.
Another important aspect, to make the build work early on, is to cast ![]() Mage Armour by an ally. This will give +3 Armour Class if you are wearing a clothing.
Mage Armour by an ally. This will give +3 Armour Class if you are wearing a clothing.
| Slot | Item | Description |
|---|---|---|
 Melee (One - Handed) Melee (One - Handed) |
This is the best item that you can use in Act 1. It improves your spell success chance. | |
 Ranged Ranged |
Gives bonus initiative, allowing one to go earlier in combat | |
| Equip two of these so that you can attack with your bonus action. | ||
 Shield Shield |
It provides a substantial defensive boost by reducing critical hit damage. | |
| Gives a bonus to saving throws, easily accessible early in the game. | ||
 Head Head |
The best headwear in Act 1. Just be sure to be obscured if you can. | |
| The restored health is a good bonus when you use up Bardic Inspiration. | ||
 Cloak Cloak |
The only option in Act 1 that is okay, is by providing once-per-turn invisibility. Only available to Dark Urge origin. | |
 Armor Armor |
Best clothing for caster in Act 1. | |
| Bard item, that gives bonus HP after Bardic Inspiration use. | ||
 Gloves Gloves |
These gloves are amazing for |
|
| Gloves specific for Bard, allowing to gain one more Bardic Inspiration charge. | ||
| These are the best early-game gloves, giving you a +2 Armour class if you are not using a shield. | ||
 Boots Boots |
These will be the best boots you use throughout the game. Each time you apply a condition, Reverbation stacks will apply, for further increased success of melee actions and some spells. 5 stacks will deal thunder damage. | |
 Amulet Amulet |
This is a good amulet before you get some use for bonus action. Use it, to apply vulnerabilities that your martials can exploit. | |
| Restore up to level 3 spell slot. Can be unequipped after use. | ||
| Gives mobility improvement thanks to the |
||
 Rings Rings |
Be sure to get this ring, as it will be an extremely powerful addition once you start using the |
|
| The best option for Act 1. The bonus Armour Class is a great boost for survivability. | ||
| A great ring that gives resistance to lightning damage. | ||
| Improves movement speed, but most likely this will be used by your melee party members. |
Act 2 - mid-game
Act 2 changes the landscape and there will be a lot of dark areas. Moreover, it will provide some amazing items for you to find, that will improve the build setup.
The main change is that once you hit level 6, you can drop ![]() Hand Crossbow +1 and use
Hand Crossbow +1 and use ![]() Mass Healing Word with bonus action. This opens up other ranged item options, so be sure to check them.
Mass Healing Word with bonus action. This opens up other ranged item options, so be sure to check them.
| Slot | Item | Description |
|---|---|---|
 Melee (One-handed) Melee (One-handed) |
The staff is still the best contender for Act 2 as it improves Spell Save DC. | |
 Ranged Ranged |
Amazing bow that allows to precast Haste before combat. This may not seem big as you can use Potion of Speed, but sometimes its short duration is not enough. | |
| Still a solid choice, especially if you only need initiative. | ||
 Shield Shield |
The best shield there is for a caster. | |
| It provides a substantial defensive boost by reducing critical hit damage. | ||
 Head Head |
Improves spell success chance and increases the likelihood of going first. | |
 Cloak Cloak |
As you will be constantly applying Reverbation, this cloak is amazing and allows Dazing enemies who dare to attack you. | |
| Improves survivability and Saving Throw success. | ||
 Armor Armor |
Still the best option even in Act 2. This requires Lightning Charges, to unlock full potential. | |
| Another robe that gives +1 Spell Save DC. | ||
 Gloves Gloves |
These gloves are amazing for |
|
 Boots Boots |
The boots are the best option due to the Reverbation stacking. | |
 Amulet Amulet |
You can use this amulet together with healing items - |
|
| Allows casting Shield spell, can be a lifesaver if attacked heavily for one turn. | ||
 Rings Rings |
Be sure to get this ring, as it will be an extremely powerful addition once you start using the |
|
| Any of your control spells that enemies will fail now also incur Mental Fatigue. | ||
| An easy way to get bonus Armour Class in Act 2. |
Act 3 - Final Build setup
This is the last act of the game, where you will get access to the most powerful items. To get them as early as possible you will need some planning, but overall, it should not be a problem.
The best pick here is taking ![]() Dual Wielder and equipping two staves for improved Spell Save DC.
Dual Wielder and equipping two staves for improved Spell Save DC.
| Slot | Item | Description |
|---|---|---|
 Melee (One - Handed) Melee (One - Handed) |
(BiS) |
The best staff in the game. Of course, better use this on offensive caster if you have. Otherwise, Kereska's Favour is an amazing action. I recommend taking Bone-Shaking Thunder (for Reverbation) or Bolts of Doom (for powerful Lightning Spells). |
| It has an Arcane Battery, allowing you to cast a spell for free. Moreover, it improves spell attack rolls. | ||
| Gives bonus Spell Save DC and spell attack rolls. Moreover, its unique effect allows you to Stun enemies if you succeed in a Saving Throw against their effects. | ||
| Listing this one as an interesting option for synergies with |
||
 Shield Shield |
The best shield there is for a caster with bonus Spell Save DC. | |
| The strongest shield in the game, with plenty of bonuses. | ||
 Ranged Ranged |
(BiS) |
Gives a big boost to the initiative, guaranteeing that you can go first. However, you will need to get Longbow proficiency from race. |
 Head Head |
(BiS) |
The hood gives solid +2 Spell Save DC, greatly improving spell success chance. |
| Perfect helm for caster, if another one has been taken. | ||
 Cloak Cloak |
(BiS) |
Improve Spell Save DC by one, the best option for a direct increase in build effectiveness. |
| Improves the chances of attacks missing the wearer until getting hit for that turn. | ||
| As you will be constantly applying Reverbation, this cloak is amazing and allows Dazing enemies who dare to attack you. | ||
 Armor Armor |
(BiS) |
As a caster that heavily relies on Concentration spells, this is probably the best armor to wear. The Constitution saving throw |
| The best clothing for caster. Not only improves spellcasting but also provides a +2 Armour Class. | ||
 Gloves Gloves |
(BiS) |
Improved version of |
| The gloves are still relevant if you are relying on a |
||
| Another option in Act 3, also gives a level 3 Command spell for each Long Rest. The gloves provide +1 Spell Save DC, | ||
 Boots Boots |
(BiS) |
The best boots to use with the build |
 Amulet Amulet |
(BiS) |
The Best amulet for this build. However, this piece of equipment is the best caster choice, so can be contested by other party members. |
| If you want to maximize the healing amount of your spells, this amulet is one of the options. | ||
| Restores up to level 6 spell slots. After using it, you can unequip it for another amulet. | ||
 Rings Rings |
(BiS) |
Provides an easy way to apply Mental Fatigue with spells. |
| Be sure to get this ring, as it will be an extremely powerful addition once you start using the |
||
| This ring gives an unlisted buff of Spell Save DC +1. |
Build Mechanics
In this section, I would like to dive deep into how to play the Lore Bard. This will help you utilize it to the fullest and correctly use various actions and spells throughout the game.
Important Mechanics and Combos
The build is very versatile, allowing one to take full control of enemy actions.
Healing Word - for buffing
The main highlight of this build is that you can use bonus action to heal allies using ![]() Mass Healing Word or
Mass Healing Word or ![]() Healing Word. This is not all with specific items you can apply very strong buffs -
Healing Word. This is not all with specific items you can apply very strong buffs - ![]() Blade Ward and
Blade Ward and ![]() Bless. This will drastically improve your party's survivability.
Bless. This will drastically improve your party's survivability.
There is not much else to know, besides requiring special equipment - ![]() Hellrider's Pride (or upgraded
Hellrider's Pride (or upgraded ![]() The Reviving Hands),
The Reviving Hands), ![]() The Whispering Promise.
The Whispering Promise.
With this combo, Lore Bard becomes not only a strong controller but a strong support, that can fully replace Cleric.
Counterspell + Cutting Words
This is the ultimate combo that will be able to negate or disable various negative effects the party can receive. ![]() Counterspell is perfect for canceling enemy spells. I just recommend not using it on offensive ones like
Counterspell is perfect for canceling enemy spells. I just recommend not using it on offensive ones like ![]() Fire Bolt,
Fire Bolt, ![]() Eldritch Blast, etc. (unless this means death). It would be better to cancel something like Silence, Confusion, etc. that can break the party.
Eldritch Blast, etc. (unless this means death). It would be better to cancel something like Silence, Confusion, etc. that can break the party.
![]() Cutting Words is similar, but instead of using spell slots, it uses
Cutting Words is similar, but instead of using spell slots, it uses ![]() Bardic Inspiration slots. It can work not only on spells but also on ability checks, saving throws, and attack rolls.
Bardic Inspiration slots. It can work not only on spells but also on ability checks, saving throws, and attack rolls.
There is one item ![]() Duellist's Prerogative that gives another reaction point to use per turn. So you could use both of those actions two times per turn.
Duellist's Prerogative that gives another reaction point to use per turn. So you could use both of those actions two times per turn.
Paralysis effects (Hold Person, Sleep, etc.)
This is a very powerful single-target combo. You need to paralyze an enemy so that you would have a guaranteed critical hit. This can be done using ![]() Hold Person,
Hold Person, ![]() Glyph of Warding, etc.
Glyph of Warding, etc.
After that, your allies can follow up with a guaranteed critical hit. This is a deadly setup, that in most cases ensures the enemy is taken out.
Hunger of Hadar
My favourite spell which works extremely well the moment you can get it at level 6. What it does, is create an environment that causes all targets to become Blinded. They also take damage at the start and the end of their turns.
The good thing is that your group can attack from the outside giving an ![]() Advantage against all of the foes inside. You can also mix this with Command: Hold, to make enemies stay inside to take further damage.
Advantage against all of the foes inside. You can also mix this with Command: Hold, to make enemies stay inside to take further damage.
Early Game Combat
Because the build starts as Bard, and later College of Lore, you do not have many offensive options. Here is what I would do throughout the fight:
- Very early in the game, I would use Faerie Fire, to set up
 Advantage for martials. This way they can guarantee a hit and most likely a kill as enemies have very low HP.
 - Dissonant Whispers does not have attack rolls so it will always deal at least half damage. I would also use it on melee enemies as the Frighten effect does not allow them to move.
- Cloud of Daggers - is a great option if there are at least two enemies close by. This way you can hit them for 2 attacks (one at the start of the turn, a second once they start it)
- I would use Bonus Action for healing or attacking with
 Hand Crossbow +1.
 - Once you have
 The Whispering Promise you can cast
  Healing Word with a level 1 spell slot to buff your frontline character to increase hit chance and have better damage reduction.
 - Hold Person is another wondrous spell. If you have a high chance of 80%+, use it. Your martials can then easily finish off the target. Just use it on the enemy with a decent amount of HP.
- Level 5, you can start using
 Glyph of Warding to put multiple enemies to sleep. After that follow up with party members to take them out one by one. Glyph o Warding can also be selected with different elements. So if the enemy is Wet you can use lightning or Cold elements.
 - At level 6, you can start using the
 Mass Healing Word combo that I covered already.
Late Game Combat
For the late game, the main goal is to buff your allies and follow up with a control spell. This way you utilize effectively both action and bonus action.
- At the start of the turn activate
 Mass Healing Word so that allies get buffs against damage and better attack rolls.
 - Based on the situation you can utilize different control spells. My favorite one, is
 Confusion, making targets fight each other or skip their turns.
 - You could also cast Hold Monster or Hold Person if there is a strong enemy that needs to be dealt with. After that follow up with melee attacks from allies for guaranteed critical hits.
- Another option is casting
 Hunger of Hadar and covering the battlefield in the fog. This again can be exploited by enemies wasting their resources.
 - You also have an option of using Potion of Speed on the first or second turn from bonus action. This is a great way if you need two strong spells in a single turn. For example, there are two groups of enemies, so you could cast
 Glyph of Warding: Sleep to disable both of them.
 - If you see an enemy spellcaster, most likely they will use
 Counterspell. You can try to do two things - either upcast to level 5-6 so that their counterspell fails or use party members to cast fake spells to bait them.
 - You have two sources to make enemies fail their spells or actions -
 Counterspell and
  Cutting Words. However, both of them use reaction, so use them sparingly. I would also disable opportunity attacks so that reaction would not get wasted.
Build Variations
There are a few variations that the build could be changed about. I think it is more for advanced players who are likely doing some deeper optimizations.
| Setup | Description |
|---|---|
|
This is a good choice if you want to go without any clerics in the group. You will be able to cast guidance for various rolls, sanctuary as a bonus action, and a wider array of spells. For example, a Life Cleric can cast |
|
This setup requires some tinkering with Ability points. You will want some intelligence to obtain more spell list slots. However, you can scribe various spells, and you can become the ultimate utility encyclopedia, choosing any support spell at will. |
Lorecerer Build:
|
A very similar build to this one, however, it does sacrifice higher level spells for access to the |
Bardlock Build:
|
Amazing setup with Warlock (particularly Fiend) that saves you a Magical Secrets slot, for Command. Moreover, you get access to Eldritch Invocations like |
Conclusion
Thank you for reading the Lore Bard build for Baldur's Gate 3. It is a strong Control caster and a perfect pick for the main face of the party. The build also includes original optimization with ![]() Mass Healing Word allowing the Lore Bard to buff your group members.
Mass Healing Word allowing the Lore Bard to buff your group members.
Cheers!
Like, Dislike, comment, or share!

Discussion
No comments yet.
Be the first one to leave a comment!