

Eldritch Blast Build - 15+ Beams per Turn - Baldur's Gate 3 (BG3)
Contents
Eldritch Blaster Build
I think many people have heard something related to the "Eldritch" term - Eldritch Blast, Eldritch Knight, etc. With this build, we will go all in on the first one. The cantrip Eldritch Blast is remarkable as it drastically improves as you level up and unlock various boosts from items and class features.
The build allows taking full control of the battlefield. This cantrip is special in the sense, that it can get multiple sources of damage boosts but also has ![]() Repelling Blast invocation that allows you to knock back enemies. On the other hand, you could take
Repelling Blast invocation that allows you to knock back enemies. On the other hand, you could take ![]() Devil's Sight and safely hide in Darkness, making enemy attacks trivial. Moreover, as you level up, the number of rays increases and at level 10 this is 3.
Devil's Sight and safely hide in Darkness, making enemy attacks trivial. Moreover, as you level up, the number of rays increases and at level 10 this is 3.
You will be easily able to reach 15 or more beams per turn with ![]() Haste,
Haste, ![]() Action Surge, and Elixir of Bloodlust. Items like
Action Surge, and Elixir of Bloodlust. Items like ![]() Helmet of Grit can push this even further.
Helmet of Grit can push this even further.
The major downside of this build is that it could become boring as most of the game you will use this one cantrip. However, it will also make you think about how to approach combat encounters to best utilize your best spell. However, if you are interested in a more versatile option that can still Eldritch Blast together with multiple spells, be sure to check Sorlock Build.
Starting the Game
We start with the early game. I would go into what are the best Races, Abilities, and Skills for Sorcerer Warlocks. Some of these choices are impactful as you cannot respec them.
Races
Picking a race provides various benefits - abilities, dialogue options, looks, etc. Also, keep in mind whether your picked race has Shield proficiency as this can improve survivability or give benefits for offensive.
| Race | Features | Description |
|---|---|---|
 Halfling Halfling |
Although they cannot wear a shield, they are the perfect choice for builds that aim to land critical hits. | |
 Drow Half-Elf Drow Half-Elf |
|
This is a very good race, particularly if you decide to take |
| High Half-Elf |
|
High Half-Elfs get a cantrip, Darkvision, and also shield proficiency. These are good options for a safe build |
 Human Human |
This is one of the rare occasions where I would recommend going with a human. You can get Shield proficiency that will be valuable throughout the game for various bonuses and increased Armour class. |
Class
We start the build with Sorcerer. First, it will give us Constitution Saving Throw proficiency. Second, we want to get level 3 spells as soon as possible. They have very powerful options like Fireball, Haste, etc. After that, you can pick Warlock.
We could also go first with Warlock, but in my opinion, it is fairly weak early on, compared to Sorcerer. Moreover, Eldritch Blast will only receive good potential after Level 5.
| Overview | |
|---|---|
 Sorcerer Sorcerer |
|
| Features | |
 Spell Slots Spell Slots |
These can be used to cast spells and are restored each long rest. |
Cantrips
The sorcerer gets 4 cantrips. This is a lot, allowing us to make some good choices:
| Cantrips | Description |
|---|---|
| If you are the main character and do most of the dialogues, this is also a good choice as it gives an |
|
| Use this cantrip to deal moderate damage or light up barrels with oil. Perfect if you want to save spell slots. Note: Take this |
|
| Opposite to Fire Bolt, you can deal ice damage if enemies are resistant to fire damage. | |
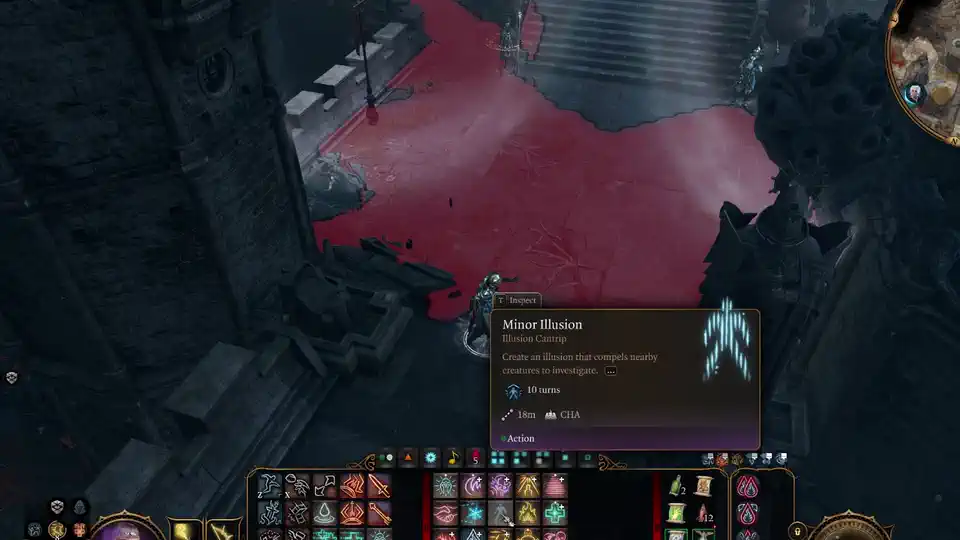
| Lure enemies together from stealth with the cantrip. Then use |
Spells
Sorcerers cannot prepare spells. This means that what they choose during the level-up screen - is what they can use. This can easily cause decision paralysis especially if you are new to the game. Here are my recommendations for what to pick early:
| Spells | Description |
|---|---|
| I recommend this spell. It is not very powerful, but it can hit multiple enemies and does not miss. You can easily finish off a straggler with a few HP and damage the second foe. The missiles scale with higher spell slots, and are useful throughout the game. | |
| This is a versatile spell, that can be used to create various surfaces and deal different elemental damage. | |
| This spell will give us 13 Armour Class. Pair this with a dexterity bonus and we have 16 Armour Class at the start of the game. The same as a heavy armor user. Moreover, getting a shield will also net 18. Only take this with Storm Sorcerer, Draconic Bloodline does not need it |
Subclass
You can generally go for any subclass, here is an overview of what each does:
- Draconic Bloodline - I would mainly recommend this subclass due to
 Draconic Resilience. It will ensure a good Armour Class without needing a Mage Armour spell. Moreover, you can get Fire Draocnic ancestries that will ensure you have fire resistance in the late game.
 - Storm Sorcerer - it has a special Fly mechanic that activates after a spell cast. As you can guess there won't be many of these as you will concentrate on utilizing Eldritch Blast (and it is a cantrip). Moreover, the additional spells the subclass gets are also not too relevant.
| Overview | |
|---|---|
 Draconic Bloodline Draconic Bloodline |
|
| Features | |
| Grants 13 AC, which saves the use of |
|
| Gain bonus maximum HP for each Sorcerer level. | |
Dragon Ancestor
This is a unique choice for the Draconic Bloodline subclass. It is important as a level 6 Sorcerer you will obtain a special ![]() Elemental Affinity: Damage that will increase related element damage. For this build, I would take any that has Fire. My preferred choice would be
Elemental Affinity: Damage that will increase related element damage. For this build, I would take any that has Fire. My preferred choice would be ![]() Draconic Ancestry: Brass (Fire) as it gives
Draconic Ancestry: Brass (Fire) as it gives ![]() Sleep which can be useful early in the game.
Sleep which can be useful early in the game.
Abilities
Now, let's take a look at the abilities of the Eldritch Blaster build. Correct allocation will enable us to maximize early gameplay and obtain good modifier bonuses.
| Ability | Value | Description |
|---|---|---|
 Strength Strength |
8 | We do not need strength as we will not be in close range often. |
 Dexterity Dexterity |
16 (15+1) | High dexterity will give a bonus Armour Class and higher initiative. This can be used to go first during combat encounters and take out a few enemies before they get to do anything. |
 Constitution Constitution |
14 | The constitution will give the build bonus HP and increase the success of Constitution Saving Throws |
 Intelligence Intelligence |
8 | Not an important stat for us |
 Wisdom Wisdom |
10 | We get 10, to not get any negative modifier for Wisdom Saving Throws, as there are many of them. |
 |
17 (15+2) | The main ability of Sorcer build. It determines our spell success, and spell difficulty. Moreover, it is used for many dialogue checks, ensuring that you can trick or persuade NPCs. If you will not use |
Skills and Expertise
Overall, the skills should be impacted by your roleplaying and background decisions. However, you would still want those that will give you the best benefits. My recommendations are to pick those at which you have a high ability modifier and these are Charisma-related:
- Persuasion
- Deception
- Performance
- Intimidation
Leveling Progression
Here is the detailed progression for the Eldritch Blaster build to get you started. You can use it as a guideline because early games can be daunting and overwhelming. Later on, once you get the feel for the class you can start picking your options
Level 2
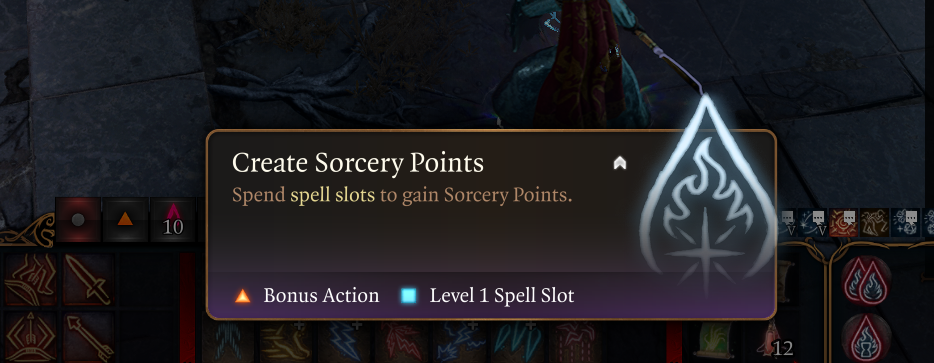
Instantly at level 2, we get a lot of improvements. First, the Sorcerer gets an additional level 1 spell slot, and 2 Sorcery points are added. They can be used for creating spell slots, additional spellcasting, etc.
| Actions | Description |
|---|---|
| Spend Spell Slots to gain Sorcery Points. Once you get some more metamagic options, you could sacrifice spell slots, to cast two spells in one turn or increase your range | |
| Spend Sorcery Points to unlock a Spell Slot. You could create a higher tier spell slot, to increase the damage over what you can at the current level |
Spells
My recommendation for the spells to be included in the spellbook:
| Spells | Description |
|---|---|
 Thunderwave Thunderwave |
Do you see an enemy close to the ledge? Or they are close to you? Use Thunderwave to knock them back and deal thunder damage. It can instantly kill foes that are thrown from the ledge. |
Metamagic
Sorcerers get access to unique actions - metamagic. They allow to consumption of sorcery points to enhance spellcasting. New metamagic options will be unlocked as we level up as you have more and more Sorcery Points. Choose two:
| Passives | Description |
|---|---|
| Spells that only target 1 creature can target an additional creature. Later on, you can use this to apply Haste on two allies or a Command spell to disable two targets. For now, you could use Fire Bolt on two targets, to deal additional damage once you are out of spell slots. | |
| Get a huge distance boost, allowing you to take out enemies before they even see you. |
Level 3
We unlock the level 2 spell slots and spells. We also gain another option for metamagic, this time, much better
Spells and Replace Spell
Because we get level 2 spells it gets interesting. Although there is no "all-powerful" spell at this level, there are multiple ones that are decent. I would like to recommend a few that you can pick from:
| Spells | Description |
|---|---|
| This is a good spell to have in the arsenal. However, it will not play a major role for the build in the late game, as you will mostly utilize Eldritch Blast. | |
| This can be used to target multiple enemies and is very good in passages or choke points. The spell deals damage when it's cast and when the enemy's turn begins. This means you do 2x damage by default. |
I do not recommend replacing any spells yet, as all of them still serve a purpose.
Metamagic
We are getting another metamagic selection. The good thing is that two new options are introduced. Here is my recommendation:
| Passives | Description |
|---|---|
| By consuming 3 Sorcery points a spell can be cast using bonus action instead of action points. You can cast two damage spells one after another. Or after level 5, you could use Haste and then two spells at the same turn. This unlocks multiple tactical possibilities. |
Level 4
We get our first Feat selection that will greatly improve both offense and defense. The Sorcerer also unlocks another level 2 spell slot and can select an additional spell.
Cantrips
We can choose another cantrip. Nothing important here but you can get this one:
| Cantrips | Description |
|---|---|
| A very handy spell, especially in Act 2, where most of the areas will be covered in darkness. | |
| Quality of Life spell, that you can use to summon a hand. It can solve some puzzles, and pick and throw objects. It can also shove enemies from ledges. |
Spells
As now you have a decent amount of spell slots getting this option makes sense:
| Spells | Description |
|---|---|
| I cannot stress enough how powerful this spell is. You can use the level 1 spell slot, to increase your armour class by 5. The result is that you can avoid most of the attacks during the turn. |
Feat
For the first Feat, there is nothing much to recommend. You only want to improve your ability score for a higher spell success chance and more damage
| Feat | Description |
|---|---|
| Ability Improvement - +2 Charisma | The main stat that improves all spellcasting-related damage and success. |
Level 5
And we finally reach level 3 spells. Moreover, we get 2 level 3 spell slots for upcasting.
Spells
There are a lot of good spells at this tier, so it's hard to choose what to pick. You should choose one hard hitter that will be your bread and butter for damage dealing:
| Spells | Description |
|---|---|
| A very powerful and trustworthy fire spell. You can hit enemies in a decent area of effect for 8d6 damage. With Draconic Bloodline Fire ancestry, each enemy hit will get bonus damage based on the charisma modifier. However, once you get two levels of Warlock, I recommend respecing and skipping this spell. Instead, you could take Darkness if using |
Replace Spell
Because we also unlock Haste, I would try getting it as soon as possible. I recommend removing Cloud of Daggers, as we have some powerful options, moreover, ![]() Concentration slot can be used by this spell:
Concentration slot can be used by this spell:
| Spells | Description |
|---|---|
| A very powerful spell that gives an additional action point. In a sense, you can cast two spells. Add |
Level 6 - Warlock Lv 1
This is the first dip into the Warlock multiclass. Unfortunately, we do not get the most important bonuses yet, however, it will still be helpful.
Class
| Overview | |
|---|---|
 Warlock Warlock |
|
| Features | |
 Warlock Spell Slots Warlock Spell Slots |
These spell slots can be used to cast spells and refill each Short Rest. |
Cantrips
| Cantrip | Description |
|---|---|
| One of the cornerstones of this build. We will be using Eldritch Blast to shred enemies to pieces and knock them down. It will become very powerful on the next Warlock level | |
| Any | Take any cantrip, as the core one is |
Subclass
Now for subclasses, each Warlock option brings something to the table. One has more defensive capabilities, another is perfect for controlling, etc. So let's do a short overview of each of them
- The Fiend - can get temporary HP for each enemy killed -
 Dark One's Blessing. Moreover, another attractive option is
  Command. It allows you to crowd-control foes without using a
  Concentration slot, which is very powerful. Add
  Metamagic: Twinned Spell for taking out two enemies
 - The Great Old One - this is a more offensive option. This subclass can apply Freighten to enemies with -
 Mortal Reminder. Because you will be releasing multiple shots per turn from Eldritch Blast or Scorching Ray, it will be easy to land a critical hit. So while you deal damage, you can also crowd control foes. Moreover, if you are going with Draconic Bloodline and Scorching Ray, this fits the theme even better.
 - Archfey - gets the unique spell
 Faerie Fire. It can be useful to get an
  Advantage on attacks. However, this requires Concentration, meaning that you may lose something like Haste. So I do not recommend this one.
| Overview | |
|---|---|
 The Great Old One The Great Old One |
|
| Features | |
| As the build uses spells with multihits, this ensures that you can easily land critical hits and make enemies Frightened. | |
Spells
You will be able to pick 2 spells:
| Spells | Description |
|---|---|
| By using Bonus Action, you can weaken the enemy. Moreover, each hit will deal an additional 1-6 Necrotic damage on top. Use it together with Eldritch Blast and Scorching Ray for a pure boss-killer combo | |
| This is another sleeper spell. Although it looks simple, with some items like |
|
| This spell provides bonus temporary HP that can be useful especially if you are not wearing a shield. | |
| This is a very powerful spell, that we can empower with Sorcerer metamagic. Only can be selected with The Fiend subclass. It works as crowd control without the need for Concentration. Moreover, with |
Level 7 - Warlock 2
Level 2 will unlock the full potential of Eldritch Blast and we can now utilize it in combat for maximum damage. We also gain the second spell slot, which could be used to create sorcery points.
Spells
Take whatever spell you prefer, for this level we are mainly interested in Eldritch Invocations.
| Spell | Description |
|---|---|
 Armour of Agathys Armour of Agathys |
An option if you did not take on the first Warlock level |
 Hellish Rebuke Hellish Rebuke |
an optional spell, that allows additional cast using Reaction. More or less bonus damage when the turn is not yours. However, each spell used decreases your Sorcery Point amount. |
Eldritch Invocations
| Invocation | Description |
|---|---|
| Improves Eldritch Blast damage by including your Charisma ability modifier in the damage calculation. | |
| If you plan on using the Darkness spell combo to make yourself almost untouchable, this is a perfect time. I recommend sacrificing |
|
| Eldritch Blast now knocks back. This is very powerful as you can throw enemies from ledges. The Invocation is useful in early and mid-game but loses its usefulness in Act 3. |
Level 8 - Sorcerer Lv 6
So here there are two ways. You could go for Fighter Lv 1, and access Action Surge on level 9 and Champion Subclass by level 10. However, if you are going with ![]() Devil's Sight you will want an additional Darkness spell as soon as possible. Moreover, you will get some bonuses from your Draconic Bloodline.
Devil's Sight you will want an additional Darkness spell as soon as possible. Moreover, you will get some bonuses from your Draconic Bloodline.
If you do not care about spamming Darkness, then go with 4 levels of Fighter, and leave Sorcerer for level 12. This way you get access to the second feat a level earlier.
Reaching Level 6 Sorcerer gives bonus subclass features. Draconic Bloodline would unlock:
| Features | Description |
|---|---|
| The ability will activate every time we use relevant elemental spells. In your case, this will be bonus Fire damage, when using Scorching Ray or Fireball. | |
| Somewhat situational feature, I have not used it much, but it can be a lifesaver when you need resistance against fire damage in some late-game encounters. |
Spells and Replace Spell
First I would suggest taking some spells that will expand your strategic options:
| Spell | Description |
|---|---|
| Cover an area in Darkness, that is heavily obscured. With |
|
| Another option that allows you to move to better positions to gain higher attack rolls, or get away from problems. |
For spell replacement here is what I would do - remove Thunderwave and take one of these:
| Spell | Description |
|---|---|
| Enemies drop their weapons and become fearful. Very potent spell, for crowd control. | |
| An extremely good crowd-control spell should be used at the start of the combat. It will remove enemies from combat for two turns. Cast it with |
|
| A powerful spell that can counter almost any spell that foe casts. Even if you don't use it often, it is good to have it as it will notify you of what enemies are casting and let you decide the next steps |
Level 9 - Fighter Lv 1
Now we do the last touches of the build and will finish it with Level 4 Fighter. It will give an additional Action Point for more Eldritch Blasts and better critical chances.
Class
| Overview | |
|---|---|
 Fighter Fighter |
|
| Features | |
| Draw on your stamina to heal yourself | |
Fighting Style
Taking a fighter also allows us to choose a fighting style.
| Styles | Description |
|---|---|
| In case you will have some armor this will give +1 armour class. Otherwise it does not matter which option you pick. |
Level 10 - Fighter Lv 2
And the last level of our build. There is nothing to choose here and we only enjoy the default Fighter action we obtain:
| Action | Description |
|---|---|
| This will take the build to the next level as you can gain an action point at the start of the combat. This can be very deadly on the first turn, as you could remove additional enemies. |
Level 11 - Fighter Lv 3
We reach the final level of the build and it will have a substantial impact on the offensive capabilities. We get to choose the Fighter subclass and there are two main options
Subclass
As we are concentrating on high critical chance, we will choose:
| Overview | |
|---|---|
 Champion Champion |
|
| Features | |
| Ensures that it is easier to land critical hits with attack rolls. | |
Level 12 - Fighter Lv 4
Last, we reached the final level of the Eldritch Blast Spammer build. We get access to the final Feat of the build:
Feat
| Feat | Description |
|---|---|
| This feat is especially needed if you plan on using |
|
| Improves critical hit chance, which gives a huge damage boost if using |
|
| This ensures you go first in almost all game encounters. It is a valuable feat as you can take out some enemies before their turn even starts. |
Illithid Powers
This is a special mechanic in Baldur's Gate 3, that allows you to consume tadpoles and unlock special Illithid Powers. These range from somewhat useful, to extremely deadly. I would like to leave a few recommendations:
Base Illithid Powers
| Order | Illithid Power | Description |
|---|---|---|
| 1 |  Favourable Beginnings Favourable Beginnings |
Very useful power to take as it does not have any costs, and provides only benefits on the first hits. |
| 2 |  Luck of the Far Realms Luck of the Far Realms |
Guarantees a critical hit, a very powerful action to have. |
| 3 |  Concentrated Blast Concentrated Blast |
Mainly need this one for progression. |
| 4 |  Cull the Weak Cull the Weak |
It allows you to deal additional psychic damage around the target you kill. Moreover, it can provide an insta-kill if the enemy is very low on HP. |
| 5 |  Psionic Overload Psionic Overload |
A powerful action, that improves the damage of each Eldritch Blast. The downside is that it costs the whole action point. |
| 6 |  Transfuse Health Transfuse Health |
If you are using |
Elite Illithid Powers
These become unlocked later in the game as you progress. They are extremely powerful additions to the build.
| Order | Illithid Power | Description |
|---|---|---|
| 1 |  Freecast Freecast |
Removes any cost of spell slots or charges, allowing you to cast some very powerful spells in case you cannot do that |
Potions, Elixirs and Consumables
Let's take a look at what consumables we can use to further empower the build.
Potions
These are general consumables, and most of them are activated for a few turns. Potions are separate from Elixirs and can be active together.
| Consumable | Description |
|---|---|
 Potion of Speed Potion of Speed |
In case you or your other casters have a Concentration spell slot taken and cannot cast Haste, use this potion. It acts similarly, but the effect is just for 3 turns. |
 Potion of Animal Speaking Potion of Animal Speaking |
A good potion to drink for role-playing and additional dialogue options with animals. |
 Potion of Invisibility Potion of Invisibility |
Can be used to get a perfect position before the encounter starts. |
 Potion of Flying Potion of Flying |
Gives bonus mobility for the encounters. |
Elixirs
Unfortunately, only one Elixir can be active at a time. However, the good thing is that they last until a long rest, making them very useful and economical.
Be sure to activate them before combat as otherwise, you will need to use Bonus Action.
| Consumable | Description |
|---|---|
 Elixir of Bloodlust Elixir of Bloodlust |
As you will be able to easily kill at least the weakest foe, this ensures additional Eldritch Blast per turn. Moreover, in the late game, with a high critical chance and good gear, this is the optimal choice. |
 Elixir of Viciousness Elixir of Viciousness |
Further decreases the rolls needed to land a critical hit. I would say it is useful before you obtain the endgame items, while your crit chance is not as high or until you get |
General Tips
Now I would like to cover some general tips on how to play Eldritch Blast Build.
Dual Wielding or One-Handed with a Shield
This is an important aspect of this build as you can go both ways. The general rule of thumb would be that if race does not have Shield proficiency go with dual wielding. This will give an edge in offensive spell casting by giving good bonuses or increasing attack roll success.
However, shields can also be a good option, especially if other group members have equipped the most powerful items. Moreover, the bonus Armour Class is a great addition to survivability. However, as the build concentrates on the highest possible critical chance, dual-wielding ![]() Knife of the Undermountain King and
Knife of the Undermountain King and ![]() Blade of the First Blood will ensure the highest number of critical hits.
Blade of the First Blood will ensure the highest number of critical hits.
 Auntie Ethel's Hair and Mirror of Loss
During your playthrough you will have two major points in the game, where you can increase the ability points in this case - Charisma:
- Act 1 - Auntie Ethel's Hair, by sparing her life and getting her hair. This can be used to increase Charisma by 1. This is the reason why we leave it at 17 so that in Act 1 we could have it at 18 (or 20 with Feat)
- Mirror of Loss. This also provides bonus ability points based on your decisions. It gives +2 to Charisma, but with specific choices, this can be +3. Overall the result should be 24 Charisma (maximum) if you also equip
 Birthright.
Use Spell slots to create Sorcery Points
Once you expend your Sorcerer Spell slots, you still have Warlock ones. They can be used to cast spells, but more importantly, you can use them to make Sorcery Points. For example, using constant Eldritch Blasts will easily drain them with ![]() Metamagic: Quickened Spell.
Metamagic: Quickened Spell.
Moreover, this can be useful in boss fights, where a level 1 or level 2 spell slot is not that useful, but it can be used to activate ![]() Metamagic: Twinned Spell or
Metamagic: Twinned Spell or ![]() Metamagic: Heightened Spell to finish off minions or stragglers.
Metamagic: Heightened Spell to finish off minions or stragglers.
Twinned Spell and Haste
Even if you did not plan this, Sorcerer can be extremely powerful support. At level 5 you gain access to level 3 spell slots and Haste. This spell gives 2 action points per turn, meaning you could double your damage output.
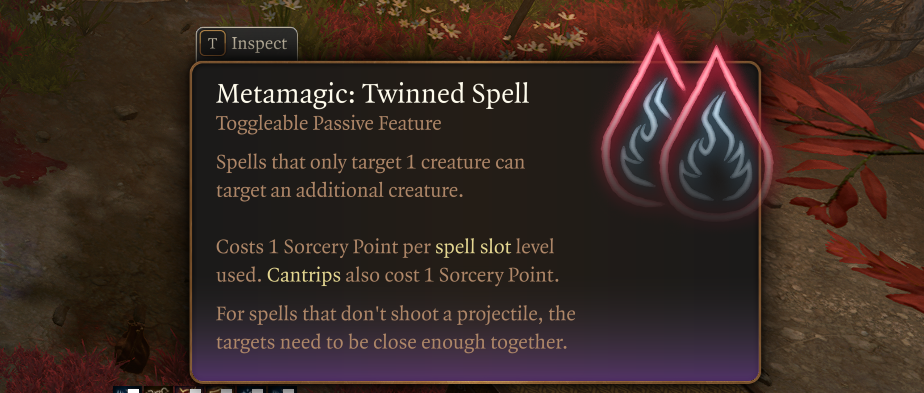
To do this you need to activate ![]() Metamagic: Twinned Spell and then cast Haste. You can now target two targets. I recommend doing this on yourself and another group member. This way two members in your party have double amount of actions. This will make your combat encounters much easier.
Metamagic: Twinned Spell and then cast Haste. You can now target two targets. I recommend doing this on yourself and another group member. This way two members in your party have double amount of actions. This will make your combat encounters much easier.
Reverbation and making enemies Prone
Once you obtain ![]() Boots of Stormy Clamour or
Boots of Stormy Clamour or ![]() Spineshudder Amulet and have consistent ways to apply statuses (for example
Spineshudder Amulet and have consistent ways to apply statuses (for example ![]() Mortal Reminder), you can easily apply multiple stacks of Reverbation. This is a deadly effect, as 5 stacks of these (meaning you need two Beams to hit), deal 1d4 damage and make enemy Prone.
Mortal Reminder), you can easily apply multiple stacks of Reverbation. This is a deadly effect, as 5 stacks of these (meaning you need two Beams to hit), deal 1d4 damage and make enemy Prone.
Now you can either exploit them with more Eldritch Blasts or let your allies attack them with ![]() Advantage.
Advantage.
Darkness with Devil's Sight
What makes this build awesome, is that you can take this invocation and freely see in magical darkness. Moreover, by taking the Darkness spell, it can be cast at will. The spell is also available to Drows and Half-Elf Drows, making it fairly accessible.
As you can see, multiple enemies managed to land only one hit, and those that enter it have an even harder time. Some of the AI will just stand still and don't do anything, making them easy pickings for your Eldritch Blasts.
Have an ally with Phalar Aluve
Currently (if you are not paying Honour Mode) this sword provides one of the most powerful buffs in the game. Even if it is fixed, the "normal" effect is still very powerful. As you can guess I am talking about Phalar Aluve: Shriek. In the video below, I'm using Shadowheart, to activate this action and stand close to the enemies - the results speak for themselves:
This decreases enemy Saving Throw rolls of Charisma, Intelligence, and Wisdom. But more importantly, each hit that you or your ally does adds a bonus 1d4 Thunder damage. So something like Eldritch Blast can make this stack like crazy. Moreover, it does not use a Concentration slot.
Maximize the number of attacks
The build does want as many attacks as possible (well all of them do), this allows to maximize the number of rays when casting ![]() Eldritch Blast. Although this is hard to reach here are the maximum values:
Eldritch Blast. Although this is hard to reach here are the maximum values:
- Base Action Point - 1
- Haste Action:
 Haste/Potion of Speed - 1
 - Base bonus action +
 Metamagic: Quickened Spell - 1
 - Additional bonus action from
 Helmet of Grit + Metamagic: Quickened Spell - 1
 - Exliri of Bloodlust - 1
 Action Surge - 1
So the result is whooping 6 casts of ![]() Eldritch Blast, and this results in 18 rays. Of course, this requires some ridicilous optimizations, but just using this in one round enables to pulverize the battlefield.
Eldritch Blast, and this results in 18 rays. Of course, this requires some ridicilous optimizations, but just using this in one round enables to pulverize the battlefield.
Equipment Recommendations
Now I would like to go through some gear recommendations to maximize the Eldritch Blast build effectiveness. Items are especially important as they take the build to the next level thanks to their unique effects.
Act 1
The early game can be hard, as you do not know where to find items. Picking the correct spells should cover most of the needs. So, as you progress feel free to equip the needed items.
| Slot | Item | Description |
|---|---|---|
 Melee Melee |
Each hit generates Lightning Charges that later detonate for bonus lightning damage. This staff should also support you in Act 2. | |
| Gives +1 to spell attack rolls or DC. An alternative to |
||
 Ranged Ranged |
The higher initiative bonus will allow you to start your turn earlier. | |
| A good option as it gives |
||
| Equipping two of these will allow you to attack with off-hand. This is important as you may not have used for bonus action if your Sorcery points have been expended, so this will allow some bonus damage. | ||
 Shield Shield |
It provides a substantial defensive boost by reducing critical hit damage. | |
| Gives a bonus to saving throws, easily accessible early in the game. | ||
 Head Head |
Increases Spell Save Difficulty Counter, while obscured. Very easy to activate, use Shift, to see the sun icon, it should be half or full empty. | |
| The best defensive option in Act 1. Works well with |
||
 Cloak Cloak |
Any | Anything will work as Act 1 does not have any good options. |
 Armor Armor |
Works well with |
|
 Gloves Gloves |
Applies Reverbation when dealing thunder or lightning damage. With 5 stacks, this will deal a bonus 1d4 damage and can make enemies Prone. This can be easily achieved once you have |
|
| Gives bonus spell attack rolls, making Scorching Ray and later Eldritch Blast succeed better. | ||
| Gives whooping +2 Armour Class. This is the perfect option especially if you do not have shield proficiency. | ||
| Defensive gloves that allow to negate enemy ranged attack. | ||
 Boots Boots |
Avoids slipping on various terrains and most importantly unlocks Misty Step each short rest. | |
| Allows to easily avoid opportunity attacks and keep distance from enemies iwth it's special action. | ||
 Amulet Amulet |
A good amulet that allows restoring level 3 or lower spell slots. This way you could get additional sorcery points. | |
 Rings Rings |
Gives defensive bonuses to Armour Class and Saving Throws. | |
| Allows Casting invisibility for free once per long rest. | ||
| Bonus thunder damage to thunder spells. |
Act 2 - mid-game
This is the mid-game, where most of the areas will be covered by dark. Radiant equipment will shine here and having ![]() Darkvision is recommended. We also can get some great items, albeit some will stay the same from Act 1.
Darkvision is recommended. We also can get some great items, albeit some will stay the same from Act 1.
| Slot | Item | Description |
|---|---|---|
| Melee |
These items are still relevant in Act 2 and provide very good bonuses. | |
| Ranged |
This bow allows casting Haste without using a spell slot. However, if you do not care about that, continue using the items from Act 1. | |
| Shield |
The only shield that improves the Spell Difficulty class and attack rolls. | |
| The extra level 1 spell slot can be used for Sorcery Points. | ||
| Head |
As you can easily become obscured it is an easy way to obtain increased critical chance. | |
| Cloak |
Improves survivability and Saving Throw success. | |
| Use this Cloak if you will still be using Reverbation items like |
||
| Armor |
One of the main items that makes the build as powerful as it is. This requires to make some specific decisions during Act 1. However, the boost to Eldritch Blast damage is worth it. | |
| Gloves |
You can continue using the same items from Act 1. | |
| Boots |
The boots will be more and more powerful as you release more Eldritch Blast rays to stack Reverbation with |
|
| Gives armor class an increase. Best choice if you are not using Shield | ||
| These boots can be a great way to increase damage. However, I found the mechanic a bit too tedious to be used effectively. | ||
| Amulet |
You can use this amulet to get more bonuses for Reverbation activation. | |
| Rings |
When creatures are illuminated you deal bonus damage to them, this should not be hard, as your cleric will probably be carrying something like |
|
| It is fairly easy to cast any light spell on yourself or have an ally do that. The Radiating Orb effect will debuff enemies, making it harder for them to hit targets. | ||
| Because it is easy to be obscured this allows to gain bonus armour class. Very useful in Act 2. |
Act 3 - Final Build setup
This is the last act of the game, where you will get access to the most powerful items. To get them as early as possible you will need some planning, but overall, it should not be a problem.
I recommend Dual-wielding the suggested weapons as their bonuses stack, enabling the highest possible critical rate.
| Slot | Item | Description |
|---|---|---|
| Melee |
(BiS) |
The strongest caster weapon in the game. You can use |
(BiS) |
The unique effect that gives +1 damage for each Scarlet Remittance stack. This requires you to kill enemies (previously you could destroy barrels), but this should be easy in late game where normal grunts will be dead from your blasts in a few hits. | |
| The weapon offers a 1d4 Thunder damage rider via its special action - |
||
| The weapon offers increased critical chance and provides bonus armour class. Excellent choice both for offense and defense. | ||
| A great choice for this build as it improves critical chance and provides other bonuses. | ||
| Ranged |
(BiS) |
The best bow for crit fishing builds as it increases the critical chance. |
| Shield |
This is still the top contender for the build if you will opt out for a shield. | |
| Head |
To maximize the critical chance, this helm is a very good option. Moreover, it gives additional bonuses like +1 to Constitution Saving Throw. | |
| Provides +2 Charisma, allowing to maximize the bonus damage to each Eldritch Blast beam. | ||
(BiS) |
You can now release another Eldritch Blast with |
|
| Cloak |
(BiS) |
This is the best cloak for this build as it gives a direct boost to attack rolls. The result is more successful spells. |
| This item increases the critical chance, but it only activates while hiding, which can be difficult to achieve mid-combat. | ||
| Improves the chances of attacks missing the wearer until getting hit for that turn. | ||
| Armor |
(BiS) |
This continues to be the best robe in the game for Eldritch Blast build. |
| Gloves |
(BiS) |
These gloves are ridiculously bugged making you release a second Blast if the the beam crits. So if all three crit, this will result in 6 beams. Crazy right? I am assuming this will be patched someday, but for now, they are very powerful. |
| Amazing gloves, that work with spells that use attack rolls. If they are taken by other characters, use the ones from previous acts. However, they will lower attack rolls, so be sure to have |
||
| Boots |
(BiS) |
The boots become even more powerful as your critical chance increases and you can apply Freighten more easily from |
| Optimal choice if you are wearing a robe and go all in on the dual-wielding, this way you get bonus armor class. | ||
| Amulet |
(BiS) |
You can use this amulet to get more bonuses for Reverbation activation. |
| Allows to paralyze an enemy when landing a critical hit once per Long Rest | ||
| Rings |
(BiS) |
Provides an |
(BiS) |
Deals bonus 2 damage against illuminated enemies. Although it is not much, this also works with spells. Just be sure to cast Light on yourself. |
Build Variations
Here are some variations that work similarly and utilize the same classes at their core.
| Setup | Description |
|---|---|
Vanilla Sorlock:
|
The vanilla option gets access to |
Fighter dip Sorlock:
|
|
Lore Bard Sorlock:
|
Credits to Salmonaru from BG3 Discord. The build gets access to |
First-turn Eldritch Spammer:
|
This is the minmaxed setup, to release the ultimate number of |
Conclusion
Thank you for reading the Eldritch Blast Spammer multiclass build for Baldur's Gate 3. I hope you enjoyed reading about this one cantrip wonder build, that can take full control of the battlefield on the first turn.
You can now easily pick the correct items, progression, and support to make Eldritch Blast spamming work.
Cheers!
Like, Dislike, comment, or share!
Join the Discussion
0 commentsNo comments yet.
Be the first one to leave a comment!