
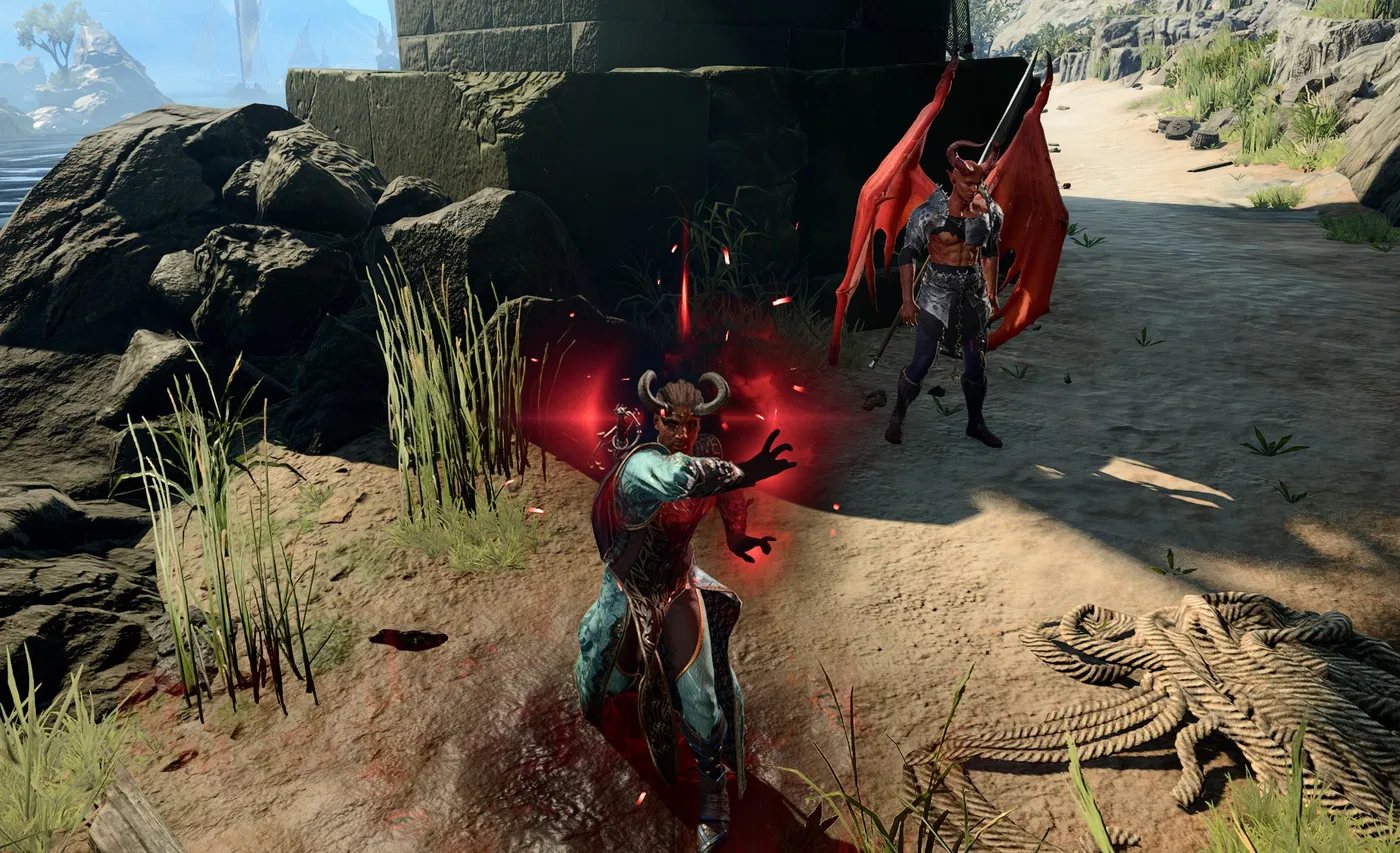
Wyll Warlock Build - Blade of Frontiers - Baldur's Gate 3 (BG3)
Contents
Wyll Build - Blade of Frontiers
As the build name suggests Wyll has a special feature Blade of Frontiers that enables him to use Rapiers. This is a minor detail as generally these are considered decent, but not overpowered weapons.
Still, they are an interesting choice - first, they look cool, second, some of the later options in the game do provide unique bonuses and one of them also comes with having Wyll in your party - ![]() Infernal Rapier. This is a great weapon as you move into the late game, where you will get access to even a better weapon choice.
Infernal Rapier. This is a great weapon as you move into the late game, where you will get access to even a better weapon choice.
Wyll being a warlock offers a unique playstyle of Bladelock. This means you can effectively use melee attacks, spells like ![]() Darkness,
Darkness, ![]() Hunger of Hadar,
Hunger of Hadar, ![]() and Fireball, or just spam the trusty
and Fireball, or just spam the trusty ![]() Eldritch Blast when resources are limited. Of course, this does require some optimizations and specific gear in the late game to be competitive with other builds.
Eldritch Blast when resources are limited. Of course, this does require some optimizations and specific gear in the late game to be competitive with other builds.
With this in mind, you will have a tool for almost every situation.
So let's go into the build!
Class Contribution
The build goes into a single Warlock class. This offers a good progression throughout the whole game and worthwhile power spikes.
12 Warlock Fiend
- The Blade of Frontiers feature from Wyll allows using Rapiers effectively. This is what the build will revolve around
- Access to the strongest cantrip in the game -
 Eldritch Blast and
  Booming Blade which scales with level and gains damage bonuses throughout the game.
  Armour of Shadows gives flat 13 AC when wearing robes, enabling effective close-range combat.
- A vast array of control spells -
 Darkness,
  Hunger of Hadar,
  Command, etc.
 - Fire offensive spells from Fiend subclass -
 Scorching Ray,
  Fireball, and
  Wall of Fire.
 - Effectively utilize Charisma for melee weapon damage using
 Pact of the Blade and later obtain extra attack with
  Deepened Pact.
 - Enhance melee attacks based on Charisma modifier with
 Lifedrinker invocation.
 - Access a vast array of Eldritch Invocations giving a unique spin on your setup
 Devil's Sight,
  Dreadful Word,
  Repelling Blast, etc.
Leveling Overview
Here is a concise table with all the main picks during your leveling progression. For more detailed reasoning, I go further in the article. Also, do not forget to check the recommended gear as it is crucial.
| Level | Class | Selection |
|---|---|---|
| 1 | Warlock 1 | Cantrips: |
| Subclass: The Fiend | ||
| Spells: |
||
| STR - 8, DEX - 16, CON - 14, INT - 8, WIS - 10, CHA - 17 | ||
| Skills: Deception, Intimidation | ||
| 2 | Warlock 2 | Spells: |
| Eldritch Invocations: |
||
| 3 | Warlock 3 | Spells: |
| Pact Boon: |
||
| 4 | Warlock 4 | Cantrips: |
| Spells: |
||
| Feat: |
||
| 5 | Warlock 5 | Spells: |
| Eldritch Invocations: |
||
| Replace Spell: |
||
| 6 | Warlock 6 | Spells: |
| Replace Spell: |
||
| 7 | Warlock 7 | Spells: |
| Eldritch Invocations: |
||
| 8 | Warlock 8 | Spells: |
| Feat: Ability Improvement +2 Charisma or |
||
| Replace Spell: |
||
| 9 | Warlock 9 | Spells: |
| Eldritch Invocations: |
||
| 10 | Warlock 10 | Cantrips: |
| Spells: |
||
| Respec at Withers | Change: |
|
| 11 | Warlock 11 | Mystic Arcanum: |
| Spells: |
||
| 12 | Warlock 12 | Spells: |
| Eldritch Invocations: |
||
| Feat: |
Starting the Game - Level 1
This section covers the creation screen and what would go into the best Races, Abilities, and Skills for the Wyll Warlock build. If you have Wyll as a companion I recommend doing a respec at Withers and following along. This will fix the initial ability allocation which is not optimal and misses some important thresholds.
Origin
So the obvious pick for this build is Wyll. The whole setup is aimed at Bladelock Build with rapier weapons and Warlock features.
Races
As this is Wyll setup, the race is picked by default:
| Race | Features | Description |
|---|---|---|
|
Humans come with additional proficiencies and higher carry weight, otherwise nothing special. |
Class
| Overview | |
|---|---|
 Warlock Warlock |
|
| Features | |
 Warlock Spell Slots Warlock Spell Slots |
These spell slots can be used to cast spells and refill each Short Rest. |
Cantrips
You can pick two. One of them is mandatory:
| Cantrips | Description |
|---|---|
| The iconic cantrip of Warlock gets significantly more powerful as you level up and unlock new features. | |
| Very good cantrip for melee builds, scales well throughout the game, and inflicts extra damage if the enemy moves. It has no additional costs to use, so it can be activated every turn. |
Subclass
I think there are a few options that you can pick here, specifically when going for the Bladelock build. I would like to suggest those that would mostly fit a melee warlock setup.
For this build progression, I will be going with:
| Overview | |
|---|---|
 The Fiend The Fiend |
|
| Features | |
| When you reduce a hostile creature to 0 hit points, this gift from your patron grants you temporary hit points | |
Spells
| Cantrips | Description |
|---|---|
| This is a great spell early on where your actions are limited. With it you can attack using reaction, meaning it can be done on the enemy's turn. | |
| You can increase your damage with each hit and utilize bonus action in effective way early in the game. Later on, this spell loses its value. |
Background
Backgrounds are mostly for role-playing, and you can pick whatever you prefer. However, as Wyl,l you will start with a specific one that cannot be changed:
| Background | Skills | Description |
|---|---|---|
| Folk Hero | Animal Handling Survival |
Wisdom-related skill proficiencies which I think are kind of irrelevant for the Warlock build. |
Abilities
Now let's take a look at the abilities of the Wyll Warlock build. Correct allocation will allow you to maximize the early gameplay and get good modifier bonuses.
| Ability | Value | Description |
|---|---|---|
 Strength Strength |
8 | This build does not need strength. |
 Dexterity Dexterity |
16 (15+1) | This ability is important as it will ensure you can effectively use Finesse weapons before getting |
 Constitution Constitution |
14 | It is important to ensure sufficient HP and good survivability by having a decent Constitution ability score. |
 Intelligence Intelligence |
8 | Not needed for the build |
 Wisdom Wisdom |
10 | Overall, leaving it at 10 is a good choice as you will not get a negative modifier on Wisdom Saving Throws. Wisdom is targeted by many spells. |
 |
17 (15+2) | The main ability of the build. It will ensure a good spellcasting modifier, improved weapon damage with attack rolls, and better dialogue outcomes. |
Skills and Expertise
Overall, the skills should be impacted by your roleplaying and background decisions. However, you would still want those that will give you the best benefits. My recommendations are to pick those at which you have a high ability modifier and these are Charisma-related.
- Intimidation
- Deception
- Persuasion
- Performance
Leveling Progression - Levels 2-12
Here is the detailed progression for the Wyll build to get you started. You can use it as a guideline because early games can be daunting and overwhelming. Later on, once you get a feel for the class you can start picking your options
Level 2
This is where you will have left the tutorial area, and will start exploring the world.
Spells
| Spell | Description |
|---|---|
| Very useful and effective control spell throughout the game. It does not use a |
Eldritch Invocations
Here, you can make a few important choices, that depend on your playstyle:
| Invocation | Description |
|---|---|
| One of the most important invocations to make |
|
| For Wyll I recommend this pick as he does not have medium armor proficiency so Robes will be the best option. |
Replace Spell
Nothing to replace yet.
Level 3
First level 2 spells are unlocked and you can pick a pact boon
Spells
| Spell | Description |
|---|---|
| This is a very effective offensive spell in my opinion, and can help immensely in multiple early-game fights. Later on, you would be switching it out. |
Pact Boon
| Boon | Description |
|---|---|
| Once you get this, you can start wearing Two-Handed weapons and bind them to your character. This way you will be using Charisma instead of Strength/Dexterity to decide damage. |
Replace Spell
Nothing to replace yet.
Level 4
The first feat is unlocked, and you get some great choices to pick.
Cantrips
| Cantrips | Description |
|---|---|
| My recommendation, especially if you are the main character. Gives an easy |
Spells
| Spell | Description |
|---|---|
| Be sure to take this if you did not get it. It can help you gain an edge on enemies by imposing a |
If you do not need the spell above, pick what you prefer—some good options - ![]() Mirror Image,
Mirror Image, ![]() Scorching Ray,
Scorching Ray, ![]() Misty Step, etc.
Misty Step, etc.
Replace Spell
Nothing to replace.
Feat
| Feat | Description |
|---|---|
| For the early game, I do recommend using Two-Handed weapons, as rapiers are just disappointing. This will change in the later part of Act 2, where you can get |
|
| Ability Improvement - +2 Charisma | Improved Charisma will help with landing spells, increased hit chance, and a slight damage boost. |
Level 5
This is a huge milestone and improvement to the Wyll build, as you will get some nice features.
| Feature | Description |
|---|---|
| Unlock the |
Spells
The new spell level tier is unlocked, and there are many great picks, however, I would recommend picking one for now:
| Spell | Description |
|---|---|
| This is one of the strongest control spells in the game. It covers a large area and makes enemies blind. Moreover, it inflicts damage per turn and slows them down. This is an extremely strong setup that makes multiple encounters a cakewalk. |
Eldritch Invocations
| Invocation | Description |
|---|---|
| If you have not taken this one yet, and have |
|
| If you are interested in improving the |
Replace Spells
I recommend removing - ![]() Hellish Rebuke and picking:
Hellish Rebuke and picking:
| Spell | Description |
|---|---|
| This is a very powerful spell, that is simple and effective - deals a lot of damage in a big area. It is perfect for when enemies are grouped up. |
Level 6
You are continuing further with incremental improvements to the Bladelock setup
| Feature | Description |
|---|---|
| A great passive feature, that can be used to improve your chances of a particular roll. |
Spells
| Spell | Description |
|---|---|
| I recommend having this spell if no one in your group can cast it. Although you have limited spell slots, it could save you from certain death if the enemy could land a strong spell. | |
| A good spell for spellsword-type builds where you engage in close combat. It gives a significant boost to Armour Class, especially for builds that don't get access to |
|
| A good spell to have on hand, particularly if you are not a Githyanki. |
Replace Spell
I recommend removing ![]() Cloud of Daggers as I think it has served its purpose.
Cloud of Daggers as I think it has served its purpose.
| Spell | Description |
|---|---|
| This spell is extremely useful if you will be using |
Level 7
Level 4 spells are unlocked!
Spells
| Spell | Description |
|---|---|
| Nothing is better than a wall of tall flames. Use this to cover choke points and force enemies to damage themselves by walking through it. |
Eldritch Invocations
| Invocations | Description |
|---|---|
| Take this if you wish to improve the |
Replace Spell
Feel free to replace a spell that you are not using.
Level 8
More spells and a second feat are waiting for you. This level should be mid-Act 2, so you already will have access to some of the gear.
Spells
Overall, you could take any spell that you are curious to try with the build. My recommendation:
| Spell | Description |
|---|---|
| Force enemies to become fearful, drop their weapons, and run. If you will be using |
Replace Spell
| Remove Spell | Add Spell | Description |
|---|---|---|
| As the build gets various options on how to use the bonus action the |
Feat
There are plenty of options to take for the second feat, let's go through them
| Feature | Description |
|---|---|
| Ability Improvement - +2 Charisma | If the feat was not taken this is the perfect time. |
| A powerful feat that is an option, or could be delayed for level 12. |
Level 9
The Wyll warlock build can now access level 5 spells.
Spells
| Spells | Description |
|---|---|
| For this level, I would do one thing differently and get access to a cold spell. This will give some variety to your damage, in case enemies are resistant to fire. Moreover, you can double the damage of this spell by making enemies wet. |
Eldritch Invocations
For now, I think the build has everything covered. So feel free to pick anything of interest:
| Invocations | Description |
|---|---|
| If you have read my builds, you know I have a weak spot for |
|
| Get bonus temporary HP, for bonus survivability. | |
| Get |
Replace Spell
Feel free to replace anything you do not use.
Level 10
A new subclass feature and more spell picks.
| Feature | Description |
|---|---|
| A good action, that can be useful in Act 3. There will be a few fights where getting resistance to something like Fire can mean life or death. |
Cantrips
At this stage in the game, it won't matter much what you pick.
| Cantrip | Description |
|---|---|
| It can be used to pull enemies together before the combat even starts. This is perfect for landing area spells. |
Spells
| Spells | Description |
|---|---|
| A very powerful hold spell. I also recommend this if you will be using |
|
| A spell option if you want some more varied damage. |
End of Act 2 - doing a respec
So once you finish Act 2, and fight the boss, you should have obtained the ![]() Infernal Rapier. If not, I would delay this step until you get
Infernal Rapier. If not, I would delay this step until you get ![]() Duellist's Prerogative. What is the purpose of this respec?
Duellist's Prerogative. What is the purpose of this respec?
You will want to remove the ![]() Great Weapon Master: All In feat and concentrate on Rapier weapons as the true Blade of Frontiers. So, go through levels 1-10 and take these feats:
Great Weapon Master: All In feat and concentrate on Rapier weapons as the true Blade of Frontiers. So, go through levels 1-10 and take these feats:
- Ability Improvement +2 Charisma
 Savage Attacker
That's it. This is everything that the respec is about and you can continue to the last levels.
Level 11
This is where Warlock gets access to level 6 spells. Sadly, the options are fairly limited, but they do not use your spell slots. Warlock also gets access toa 3rd spell slot each short rest.
Mystic Arcanum
| Spells | Description |
|---|---|
| Debilitate and control creatures. This can be recast without costing a spell slot as long as you maintain |
|
| As this gets a free use per Long Rest I do not see a reason not to take it. |
Spells
| Spells | Description |
|---|---|
| The ultimate fire spell for Fiend Warlock. It deals both fire and radiant damage, making it effective even if enemies have resistance to fire. |
Replace Spell
For spell replacement, I don't think it is needed; feel free to try out something if you would like.
Level 12
This is the final level of the build. Some good options give a power-up to the Wyll Build.
Spells
To be honest, pick anything that you prefer; the core of the build is covered. For example, need more mobility? Get ![]() Misty Step. Want more defensiveness?
Misty Step. Want more defensiveness? ![]() Mirror Image is there for you. And so on.
Mirror Image is there for you. And so on.
Eldritch Invocations
The final Invocation is something that will give a big boost to damage.
| Invocations | Description |
|---|---|
| Improves your damage by the charisma modifier when using melee attacks. At level 12 this should be 6-7 damage per hit which is a good amount for a melee build. |
Replace Spell
You can replace any of the spells, I leave this to your discretion.
Feat
I will list some options that will give a little edge to the build:
| Feats | Description |
|---|---|
| Ability Improvement - +2 Dexterity | As you will be wearing light armor or robe the additional dexterity will improve Armor Class and initiative. |
| If you did not take this, you can get it for an increased initiative and being able to take a turn on Surprise rounds. | |
| A useful feat to help with attack rolls and saving throws to help turn the tide of combat. | |
| A decent feat that would allow you to have better concentration on spells. |
Maximizing Ability Scores
Now, as the build progression is covered, there are a few aspects and important decisions you will have to make throughout the game. These will decide your final score for abilities.
- 17 Charisma - the base from character creation.
- Act 1 -
 Auntie Ethel's Hair - you will want to get +1 Charisma if you pick this choice.
 - Feat - Ability Improvement - +2 Charisma.
- Act 3 - Mirror of Loss - pick +2 Charisma.
- Act 3 - Mirror of Loss - Patriar's Memory, additional +1 Charisma, to counteract Auntie Ethel's Hair if it was skipped in Act 1.
These will allow you to reach 22 natural Charisma, which results in a +6 spellcasting modifier and improved Spell Save DC. You can reach 24 if you wear ![]() Birthright.
Birthright.
Potions, Elixirs, and Consumables
Let's take a look at what consumables you can use to further empower the build.
Potions
These are general consumables, and most of them are activated for a few turns. Potions are separate from Elixirs and can be active together.
| Consumable | Description |
|---|---|
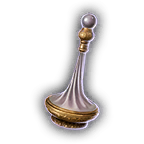
 Potion of Speed Potion of Speed |
In case you or your other casters have a Concentration spell slot taken and cannot cast Haste, use this potion. It acts similarly, but the effect is just for 3 turns. |
 Potion of Animal Speaking Potion of Animal Speaking |
Although not something powerful, it is worth stocking up and saving a spell slot. |
 Potion of Invisibility Potion of Invisibility |
Can be used to get a perfect position before the encounter starts or leave the encounter if it comes to worst. |
 Oil of Accuracy Oil of Accuracy |
Gives +2 to attack rolls, which minimizes the negative impact from |
 Diluted Oil of Sharpness Diluted Oil of Sharpness |
Gives a bonus attack roll and damage. It is a good coating if you can apply it before combat. |
Elixirs
Unfortunately, only one Elixir can be active at a time. However, the good thing is that they last until a long rest, making them very useful and economical.
Be sure to activate them before combat, as otherwise, you will need to use Bonus Action.
| Consumable | Description |
|---|---|
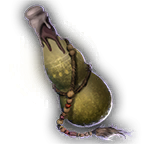
 Elixir of Bloodlust Elixir of Bloodlust |
Very effective elixir that gives another action point if you kill an enemy. I would say this is the best one to use to maximize your output through the turn. |
 Elixir of Heroism Elixir of Heroism |
Very valuable elixir especially in the early game to counteract the |
 Elixir of the Colossus Elixir of the Colossus |
Makes you bigger, and a bit stronger with a 1d4 damage boost. |
 Elixir of Vigilance Elixir of Vigilance |
For some encounters, you will want to go first. This elixir will ensure that it overcomes even surprise mechanics. |
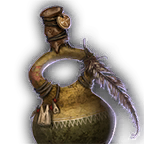
 Elixir of Battlemage's Power Elixir of Battlemage's Power |
Gain 3 stacks of Arcane Acuity. I would say this should be the most used elixir for higher spell success. |
 Elixir of Peerless Focus Elixir of Peerless Focus |
Can be used to better maintain spell concentration, especially in early-to-mid games when using |
 Superior Elixir of Arcane Cultivation Superior Elixir of Arcane Cultivation |
Grant's a single level 3 spell slot. Could be useful in case you are preparing for a longer encounter. |
 Supreme Elixir of Arcane Cultivation Supreme Elixir of Arcane Cultivation |
Grant's a single level 4 spell slot. Could be useful in case you are preparing for a longer encounter. |
Illithid Powers
This special mechanic in Baldur's Gate 3 allows you to consume tadpoles and unlock special Illithid Powers.
At first, you can only use the base powers. As you move to Act 3, you will be able to unlock the outer ring powers also called Elite.
| Illithid Power | Type | Description |
|---|---|---|
| Base | Beneficial power to take as it does not have any costs, and provides only benefits on the first hits with attack rolls. | |
| Base | An easy way to ensure you land critical hits. | |
| Base | Can help to kill an enemy faster if it is left with a few HP. | |
| Base | A great way to weaponize your reaction before obtaining |
|
| Elite | Can be used to maximize the effectiveness of charisma-based skills, especially relevant to the main character. | |
| Elite | Very powerful spell that can be used to pull enemies together. You can then follow up with area-of-effect spells or attacks. In general it is very effective action in the hands of any character. | |
| Elite | Can be used to save yourself from a deadly spell. This is especially relevant as you will have a |
|
| Elite | Remove the cost of spell slots or charges. | |
| Elite | You can now use action and bonus action interchangeably, giving two full spell casts each turn. It's not as important for you, but it will help other casters in the group. | |
| Elite | Excellent attack that targets enemy intelligence and can stun them. Not good for damage, but great for disabling foes. |
Equipment Recommendations
Now I would like to go through some gear recommendations to maximize the Wyll Warlock Build. Items are especially important as they take the build to the next level thanks to their unique effects.
For Act 1 and most of Act 2, I recommend going with 2-handed weapons. Late in Act 2, when you obtain ![]() Infernal Rapier this is when you can do a switch into more of a duelist playstyle with a rapier and shield.
Infernal Rapier this is when you can do a switch into more of a duelist playstyle with a rapier and shield.
Act 1
Before reaching level 3, use any Finesse weapon that you have proficiency with. After that, you can switch to two-handed weapons and use ![]() Bind Pact Weapon.
Bind Pact Weapon.
| Slot | Item | Description |
|---|---|---|
 Melee (Two-Handed) Melee (Two-Handed) |
Solid choice as it increases the critical chance and provides an |
|
| One of the best greatswords that you can get in Act 1. The bonus to attack rolls is great for counteracting |
||
| A solid greatsword, that gives bonus armour class with |
||
 Ranged Ranged |
Gives bonus initiative, allowing one to go earlier in combat. I recommend this for the early games, as you will have low dexterity. | |
| Equip two of these so that you can attack with your bonus action. | ||
 Head Head |
This is the best helmet in terms of damage improvements. It requires you to inflict a condition, which sometimes happens from a simple attack or avoiding hits. | |
| I think the melee aspect of the build greatly benefits from this helmet, so I recommend it. | ||
 Cloak Cloak |
- | Nothing really of note here. |
 Armor Armor |
I think this is extremely cool-looking armor that also comes with good bonuses. Sadly, it does require some questionable decisions. | |
| I would only wear this robe if you do not have other casters in the group. They would benefit much more from it. | ||
 Gloves Gloves |
These gloves can be useful after you obtain |
|
| Very strong gloves as they give |
||
| These are the best early-game gloves, giving you a +2 Armour class if you are not using a shield. | ||
| Defensive gloves to reduce the damage of incoming ranged attacks. | ||
 Boots Boots |
One of the best boots, giving a total advantage for movement on difficult surfaces. It also gives |
|
| Gives a good use for bonus action, especially if |
||
| Good boots that allow moving without slowing down on difficult terrain. | ||
 Amulet Amulet |
This is a good amulet that can double your damage with a cost of bonus action. For example, it would work perfectly against bosses where |
|
| The only amulet in the game that gives direct damage increase, can be activated with a single health potion before combat. | ||
| Gives mobility improvement thanks to the |
||
 Rings Rings |
Be sure to pick this up. You will use it later. | |
| As you have some concentration spells, this ring can be easily activated for a little bonus damage. | ||
| The best option for Act 1. The bonus Armour Class is a great boost for survivability. | ||
| A solid ring with a +2 acid damage bonus on your weapon attacks. | ||
| A good movement boost makes it easier to reach those targets. |
Act 2 - mid-game
There are a few options here, to fit what you can pick for Wyll:
Two-Handed Weapons
These are the best options for maximum damage potential, and should be used most of Act 2:
| Slot | Item | Description |
|---|---|---|
| Melee (Two-Handed) |
A really strong weapon, that is good for most of Act 2. It gives bonus damage and attack rolls specifically to those who use |
|
| Comes with +2 enchantment and bonus force damage. | ||
| You can imbue a weapon with any element 1d4 damage and gain a +1 to attack rolls. You can get the bonus elemental damage on any weapon. For example, drop another weapon on the ground, cast the spell with this glaive, and equip the said weapon. This is a very powerful combo, although it may be a bug. |
Rapier Weapon
So late into Act 2, you will be able to obtain a specific rapier, that becomes available if you have Wyll in the party (based on your decisions). If you pick it, here is the setup I would recommend:
| Slot | Item | Description |
|---|---|---|
| Melee (Two-Handed) |
If you are going specifically for the best rapier to fit the Wyll theme, this weapon is the go-to option. It allows using |
|
| Obtained fairly late into Act 2, this shield is perfect for spellsword-type builds. | ||
| The big initiative boost should ensure that you move first. |
Other Items
| Slot | Item | Description |
|---|---|---|
| Ranged |
It is an amazing bow that allows you to precast |
|
| Head |
This is great headwear that you can use to enable bonus damage. However, this requires you to inflict a condition on the enemy. This is an alternative to |
|
| Be sure to pick this one up. It might be useful later in Act 3. | ||
| It's pretty easy to be obscured in Act 2, so this helmet can be a decent option if other picks are not available. | ||
| Cloak |
Improves survivability and Saving Throw success. You want to equip this cloak to maintain that good Armour Class. | |
| Armor |
This is the best robe, for Bladelock build. It will improve |
|
| Gloves |
It gives a bonus of 1d4 damage, which is a good boost to melee damage. | |
| These gloves can be used until you get |
||
| Boots |
The boots are still the best ones you can equip. | |
| Optional boots if you need a little bit more Armour Class. | ||
| Amulet |
Allows casting a |
|
| Rings |
I would say this is the best Ring, that you can get, to eliminate the effect of |
|
| The ring enables |
||
| Still a good ring to use, for easy +2 damage. | ||
| If you are using Concentration spells, this would give slightly more damage than |
Act 3 - Final Build setup
This is the last act of the game, where you will get access to the most powerful items. To get them as early as possible you will need some planning, but overall, it should not be a problem.
| Slot | Item | Description |
|---|---|---|
| Melee (Two-Handed) |
This ultimate rapier gives an option to attack with bonus action and additional reaction. I would say this weapon looks cool and fits the best to be used on Wyll. For its full potential your off-hand should be left empty. | |
| Ranged |
Improves critical range for attack rolls. | |
| I would pick this bow if you are using Heavy Armour. The bonus initiative would be a huge boost to do some damage early in the turn. | ||
| Very powerful bow, that gives additional damage on critical hits with weapon attacks. I would use this if you often use effects like |
||
| Head |
This helmet is perfect if you plan on using spells in your arsenal. Be sure to use it together with |
|
| A very good headwear especially with |
||
| +2 Charisma boost is significant for Warlock and ensures better spellcasting and melee attacks. | ||
| This helmet synergizes well with |
||
| Cloak |
Great way to avoid attacks and reduce the chance of enemy attacks landing. | |
| The bonus armor class is great for better survivability. | ||
| Armor |
The best offensive armor in the game. |
|
| Gives a solid boost to |
||
| A great robe that gives improved Saving Throws based on the spellcasting modifier. It is perfect if you like using a lot of concentration spells like |
||
| Gloves |
Very good gloves, but might be contested by other builds. Overall these would be a bit more powerful than |
|
| The best gloves in terms of melee damage potential. However, they do require medium armor proficiency. | ||
| These are great if you are using |
||
| I did not use them in the build, but these could be excellent for casting |
||
| Boots |
An alternative boot to |
|
| I would say this is an upgraded version of |
||
| - | Items from previous acts | |
| Amulet |
The only amulet that gives a direct damage boost. | |
| It could be used to improve the survivability of the build. If using it remember to set your constitution to 8 using respec. | ||
| Rings |
With |
|
| An easy way to activate |
||
| Gives a slight armor class boost. | ||
| You can use this together with |
Build Mechanics
In this section, I would like to dive deep into how to play the Wyll Build. This will help you utilize it to the fullest and correctly use various actions and spells throughout the game.
Important Mechanics and Combos
Let's go through key mechanics and tips on how to use the build effectively. Warlock has very interesting combos if you are willing to invest some time in the setup.
Using any melee Weapon - Bind Pact Weapon
The main mechanic of Bladelock that allows it to be effective in weapon combat is the ![]() Bind Pact Weapon. This allows you to be proficient with any melee weapon and use Charisma as the main modifier instead of Strength or Dexterity.
Bind Pact Weapon. This allows you to be proficient with any melee weapon and use Charisma as the main modifier instead of Strength or Dexterity.
So this is why with 8 strength you will use Two-Handed weapons for he first half of the game, and later switch to Rapiers.
Managing Great Weapon Master
One of the more important feats of the build is ![]() Great Weapon Master: All In. It gives a flat damage boost at the cost of decreased attack rolls. Generally, it is best to take this later in the game at level 8+, when you have higher attack bonuses and better gear.
Great Weapon Master: All In. It gives a flat damage boost at the cost of decreased attack rolls. Generally, it is best to take this later in the game at level 8+, when you have higher attack bonuses and better gear.
However, if you can effectively use it at level 4, you will be able to easily kill most of the enemies you encounter, especially as it is easy to die in Act 1. So if you are up for putting in additional effort the benefits are immense. Here are the main ways to increase your attack rolls:
 Bless from Cleric or Paladin, for a 1d4 bonus.
- Spells like
 Faerie Fire, and
  Blindness give an
  Advantage to attackers.
 - Oil of Accuracy or Diluted Oil of Sharpness, for 1 and 2 attack roll bonus.
 Gloves of the Growling Underdog - can be obtained in Goblin Camp, and gives an Advantage for attack rolls.
 Svartlebee's Woundseeker - early game greatsword that you can get before engaging in any of the major battles of Act 1.
Now, if you want more in-depth information, I have a guide covering how to increase attack rolls, which lists a lot of options and combinations. You can then pick the bonuses based on your party setup.
When to attack with melee
This is the main dilemma with Bladelock. As Warlock, you have access to some good actions like ![]() Eldritch Blast,
Eldritch Blast, ![]() Fireball, etc. So why even go into melee range? There is a coolness factor of course.
Fireball, etc. So why even go into melee range? There is a coolness factor of course.
But the main reason is that with the correct setup, your damage will skyrocket. Remember at level 5 you unlock ![]() Deepened Pact, which gives a second attack. Then you get various buffs from
Deepened Pact, which gives a second attack. Then you get various buffs from ![]() Great Weapon Master: All In, weapon modifiers,
Great Weapon Master: All In, weapon modifiers, ![]() Lifedrinker, etc.
Lifedrinker, etc.
So the melee damage will deal substantially more at least for single targets. However, if you see a group of enemies. Don't risk yourself either use something like ![]() Hunger of Hadar,
Hunger of Hadar, ![]() Confusion, or
Confusion, or ![]() Fireball, and use melee to finish them off.
Fireball, and use melee to finish them off.
Darkness with Devils Sight
Using ![]() Darkness spells with Warlock is one of the ways to guarantee success. You will of course need
Darkness spells with Warlock is one of the ways to guarantee success. You will of course need ![]() Devil's Sight Eldritch Invocation. Once you have it, you can stay inside and either attack with
Devil's Sight Eldritch Invocation. Once you have it, you can stay inside and either attack with ![]() Eldritch Blast, cast spells, or wait for enemies to come and hit them with
Eldritch Blast, cast spells, or wait for enemies to come and hit them with ![]() Advantage, while they are blind.
Advantage, while they are blind.
Managing Armour Class
This is an important topic for Bladelock. As a caster, you may think that being on the frontlines will put you at high risk, and you are right. However, there are options to get a good Armour Class and feel safe when battling foes face to face.
First, if you can, early on use Medium Armour. This requires proficiency and is a decent protection without many worries. This is of course, not mandatory, and the robe can be as strong:
- Cast Mage Armour with other characters or Armour of Shadows Eldritch Invocation.
- Having 16 dexterity gives +3 Armour Class.
 Bracers of Defence, early game +2 Armour Class.
So this is 18 Armour Class, which is better than any Heavy Armor for most of Act 1. As you progress, you will get some better robes, more items with Armour Class, and stronger spells to control your foes.
Eldritch Blast usage
This is one of the most iconic actions that Warlock can do. When playing, I recommend using ![]() Eldritch Blast in these situations:
Eldritch Blast in these situations:
- When you are not able to reach the enemy by running
- You are in the Darkness field and want to snipe your foes.
- You are playing Honour Mode, are Hasted (have two action points), and have
 Potent Robe equipped.
The last one is important, as it will make it so that your ![]() Eldritch Blast uses the "Hasted" action, and the primary one which results in two attacks left. For the difficulties below, you will want to concentrate on Melee attacks most of the time.
Eldritch Blast uses the "Hasted" action, and the primary one which results in two attacks left. For the difficulties below, you will want to concentrate on Melee attacks most of the time.
With ![]() Bhaalist Armour the balance shifts towards melee attacks as they become very powerful and
Bhaalist Armour the balance shifts towards melee attacks as they become very powerful and ![]() Eldritch Blast is only there for when you want to save spell slots.
Eldritch Blast is only there for when you want to save spell slots.
Cast Control spells using Bonus Action
Another unique approach of this build is being able to cast some of the control spells using ![]() Helmet of Arcane Acuity +
Helmet of Arcane Acuity + ![]() Band of the Mystic Scoundrel combo. Now you can hit enemies using her weapon and cast control spells like
Band of the Mystic Scoundrel combo. Now you can hit enemies using her weapon and cast control spells like ![]() Confusion,
Confusion, ![]() Command, and
Command, and ![]() Hold Person with just bonus action.
Hold Person with just bonus action.
This opens up various possibilities where your allies can follow up on harmless foes paralyzed and ready to be destroyed. You do need to land a few melee hits to improve your Spell Save DC, so that Arcane Acuity stacks and your spells have a higher chance to land.
Better Resource Management with Bard
One of the unique aspects of Warlock is that their Spell slots get reset each short rest. On one hand, this can be a ![]() Disadvantage as you are pretty limited. However, looking at this from a different perspective at level 5, you can have something like
Disadvantage as you are pretty limited. However, looking at this from a different perspective at level 5, you can have something like ![]() Fireball cast 6 times per long rest. No other caster can do this.
Fireball cast 6 times per long rest. No other caster can do this.
But for even better improvements I do recommend using Bard Build with ![]() Song of Rest to give another short rest to the party, to extend the offensive capabilities of this build. So now if we take the previous example you will be able to cast 8
Song of Rest to give another short rest to the party, to extend the offensive capabilities of this build. So now if we take the previous example you will be able to cast 8 ![]() Fireball which is nuts.
Fireball which is nuts.
Early Game Combat
Let's cover how you should progress combat levels 1-6.
 Hex is a great way to get use of your bonus action until you unlock
  Great Weapon Master: All In.
- Try to maintain a 75%+ hit chance with two-handed weapons once you get Great Weapon Master: All In. This can be done by getting an Advantage. This is when your weapon damage will surpass other damage options for now.
- Use Eldritch Blast when you cannot reach your foe.
- Booming Blade should be used on the first attack of the turn. This way,
 Arcane Synergy gets easily activated (if you have relevant items), and you also don't skip this cantrip's activation.
 - Cast area-of-effect spells like
 Cloud of Daggers or Fireball when enemies are stuck together.
 - Use Darkness + Devil's Sight for some difficult combat encounters like Githyanki's, or Orc Camp.
- Once you get Hunger of Hadar it can be a game changer in many of the encoutners, greatly diminishing the potential of enemies, leaving them slowed and blinded.
Late Game Combat
- When wearing Potent Robe your Eldritch Blast is a strong option and should be used with the Hasted action (it is generally better than 1 melee attack). For this, I do recommend getting
 Haste or drinking
  Potion of Speed.
 - Cast Eldritch Blast or Booming Blade to activate the
 Ring of Arcane Synergy. This will give bonus weapon damage based on the Charisma modifier.
  Bhaalist Armour enables a simpler playstyle where you first engage in melee hits and improve your Spell Save DC while wearing
  Helmet of Arcane Acuity. Now, you can use bonus action for attacks with
  Duellist's Prerogative or land a spell using
  Band of the Mystic Scoundrel which can disable multiple targets.
- If you see 4-5 enemies stack together, just cast Fireball, Wall of Fire, and see them burn. There is nothing more satisfying than these spells.
Conclusion
Thank you for reading the best Wyll Warlock Build for Baldur's Gate 3. Being one of the Origin characters he offers a unique and long companion story. Moreover, he is presented as a somewhat righteous person holding a pact with a demon. Warlock represents this commitment and offers a good spellswords-type playstyle.
Cheers!
Like, Dislike, comment, or share!
Join the Discussion
0 commentsNo comments yet.
Be the first one to leave a comment!