
Circle of Stars Druid Build - Nature's Lightbearer - Baldur's Gate 3 (BG3)
Contents
- Circle of Stars Druid Build
- Synergy with other builds
- Leveling Overview
- Starting the Game - Level 1
- Leveling Progression - Levels 2-12
- Maximizing Ability Scores
- Potions, Elixirs, and Consumables
- Illithid Powers
- Equipment Recommendations
- Build Mechanics and Interactions
- Build Combat loop
- Conclusion
- Credits
Circle of Stars Druid Build - Nature's Lightbearer
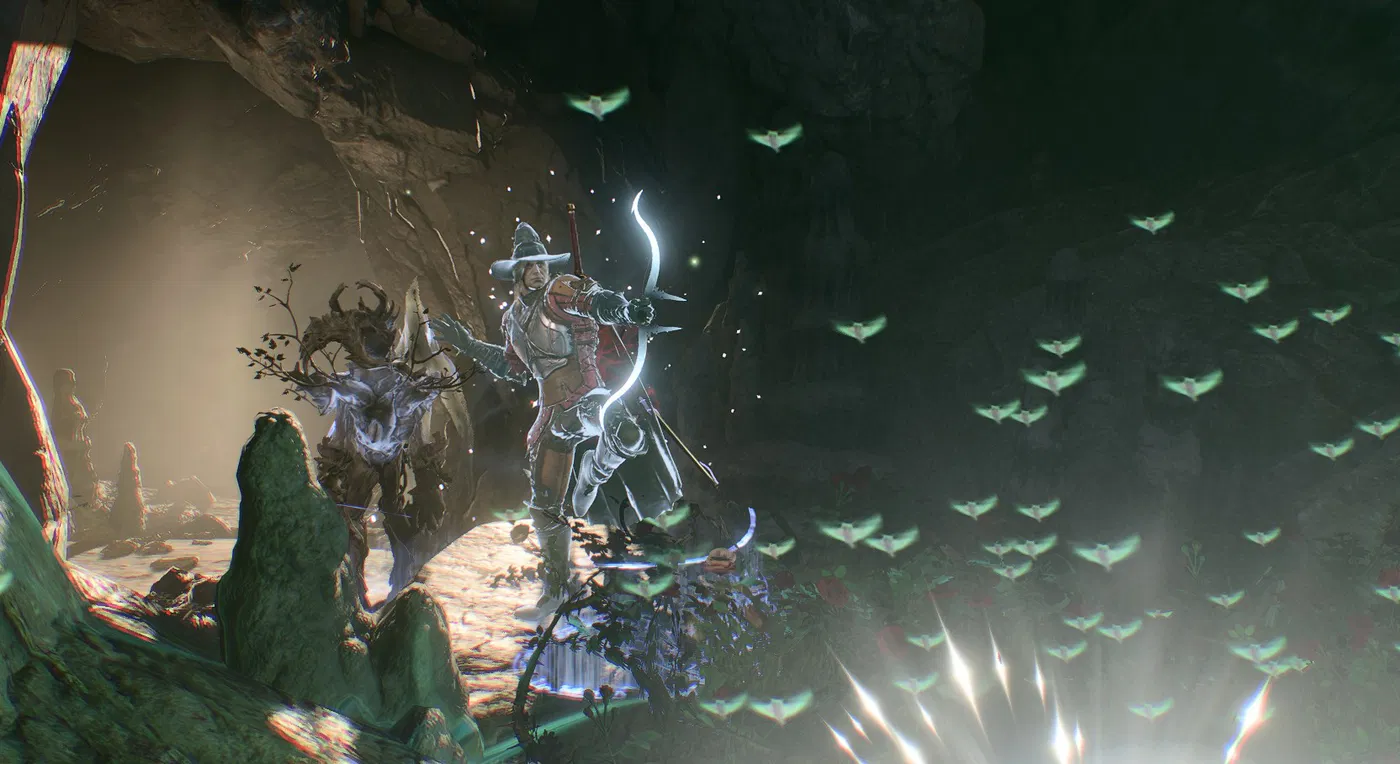
Generally, the Star Druid is used as a 2-level dip for its ![]() Starry Form: Dragon, which you could say, offers a very powerful feature till the end of the game. However, I did want to make a build where the Stars subclass is the core, and the result is an effective area controller with support capabilities.
Starry Form: Dragon, which you could say, offers a very powerful feature till the end of the game. However, I did want to make a build where the Stars subclass is the core, and the result is an effective area controller with support capabilities.
They will have capabilities to utilise different ![]() Starry Form options, depending on what is needed. This means you can be both a support and a controller character in one, often replacing your party cleric. The interesting part is
Starry Form options, depending on what is needed. This means you can be both a support and a controller character in one, often replacing your party cleric. The interesting part is ![]() Twinkling Constellations, which gives a free change for the form during combat. So you can play around with
Twinkling Constellations, which gives a free change for the form during combat. So you can play around with ![]() Dazzling Breath and
Dazzling Breath and ![]() Luminous Arrow when the situation requires.
Luminous Arrow when the situation requires.
Still, at the core, you are a druid, and all the cool stuff like - ![]() Spike Growth,
Spike Growth, ![]() Sleet Storm,
Sleet Storm, ![]() Call Lightning,
Call Lightning, ![]() Conjure Woodland Being,
Conjure Woodland Being, ![]() Heroes' Feast will be accessible. Not to mention the fun
Heroes' Feast will be accessible. Not to mention the fun ![]() Wild Shape options. Your kit is very powerful, and with correct gear usage (
Wild Shape options. Your kit is very powerful, and with correct gear usage (![]() Luminous Armour,
Luminous Armour, ![]() Gloves of Battlemage's Power), you can destroy enemy action economy.
Gloves of Battlemage's Power), you can destroy enemy action economy.
So the goal is to cover large areas in spells, and then with some interesting mechanics, build you Spell Save DC and push enemies back into them, if they leave. This is why ![]() Spike Growth will be the ever-improving spell, and
Spike Growth will be the ever-improving spell, and ![]() Thunderwave +
Thunderwave + ![]() Command will give force pushes whenever needed
Command will give force pushes whenever needed
I recommend checking the mechanics section to better understand the intricacies and nuances the build has, and better understand how to use it well.
I would say, if you are looking for a new spin for your cleric role, this is the option I would try to use.
So let's jump into the build!
Class Contribution
Here are what contributions and benefits you get from the class picks:
11 Stars Druid
- Prepared spells that can be added and removed outside of combat, without needing any character changes. There are solid healing options like -
 Healing Word,
  Heroes' Feast, etc., control spells -
  Sleet Storm,
  Spike Growth,
  Confusion, etc. and offensive options -
  Ice Storm,
  Call Lightning, etc.
  Wild Shape - the iconic feature of Druids, allowing them to change into different animals, with a separate HP bar, ability scores and special actions.
- Extra attacks for Wild Shape with
 Wild Strike and Improved Wild Strike, resulting in 3 attacks for the base action.
  Starry Form - new wild shape forms -
  Starry Form: Archer,
  Starry Form: Chalice and
  Starry Form: Dragon. Each of these comes with special actions and features, giving an additional layer of combat capabilities. The most attractive form is Dragon, giving
  Dazzling Breath and a minimum roll of 10 on constitution saving throws.
- Free
 Star Map: Guiding Bolt, which does not consume a spell slot (instead uses Star Map), and can deal respectable damage.
 - Gives
 Create Water, which can apply
  Wet and deal double damage with cold and lightning spells.
 - Summons like
 Conjure Woodland Being offer additional free Spike Growth, which damages enemies and slows them down.
  Cosmic Omen - enables Druid to increase rolls of saving throws or attack rolls.
 Twinkling Constellations - allows to freely change the Starry Form, and use its effect a second time without waiting for the next turn.
1 Cleric
- You get access to
 Command, which can be used to force enemies to move into your debuff fields.
 - Situation spells like
 Sanctuary can ensure survivability when being overwhelmed by enemies.
 - The subclass feature, depending on what you choose -
 Warding Flare,
  Wrath of the Storm, etc.
 - Deity selection for new dialogue options
Build Variations
Here are some variations that work similarly and utilise the same classes at their core.
| Setup | Description |
|---|---|
|
This is the base build, that gets access to the third feat. I think a 1-level dip into cleric or sorcerer is slightly better, as 2 feats are enough to cover all the aspects. |
|
The Sorcerer is a viable option with a few key benefits, like |
|
This still retains the core Star Druid feature, |
Synergy with other builds
The build is a solid contender for many party compositions.
Cleric Choice
The Star Druid can somewhat replace standard cleric setups, which run ![]() Spirit Guardians,
Spirit Guardians, ![]() Luminous Armour,
Luminous Armour, ![]() Gloves of Belligerent Skies, etc. Moreover, they have access to
Gloves of Belligerent Skies, etc. Moreover, they have access to ![]() Healing Word, which makes it easy to apply
Healing Word, which makes it easy to apply ![]() The Whispering Promise ring. Sadly, there is no
The Whispering Promise ring. Sadly, there is no ![]() Mass Healing Word that clerics have made it easier to activate the buffs on the whole party. Another important aspect, which is useful throughout the whole game, is access to
Mass Healing Word that clerics have made it easier to activate the buffs on the whole party. Another important aspect, which is useful throughout the whole game, is access to ![]() Guidance, which the druid also gets.
Guidance, which the druid also gets.
So yeah, standard cleric setups can be fully replaced.
Lightning/Cold themed
With access to spells ![]() Call Lightning,
Call Lightning, ![]() Ice Storm and
Ice Storm and ![]() Create or Destroy Water you can be in full synergy with other similar element builds:
Create or Destroy Water you can be in full synergy with other similar element builds:
- Generally, any standard Cleric build will work as they can cast Create Water. However, for maximum efficiency, Tempest Cleric is the best pick. They get Call Lightning and more theme-related spells.
- Sorcadin with access to
 Lightning Bolt.
 - And.... Many of the Sorcerer variations - Storm Sorcerer, Talos Dragonling Build, etc. Bladesinger is another option, as it has access to all standard caster spells.
- My personal favourite - Abjuration Wizard Tank. It will be responsible for Create Water, and dealing cold damage with
 Armour of Agathys. Of course, as a wizard, it can still cast all the Cold/Lightning spells.
Terrain manipulation
Another aspect to keep in mind is that you can combine this build with other builds which effectively use area spells - ![]() Hunger of Hadar,
Hunger of Hadar, ![]() Ice Storm,
Ice Storm, ![]() Sleet Storm, etc. Here are the straightforward combos to keep in mind:
Sleet Storm, etc. Here are the straightforward combos to keep in mind:
- Spike Growth +
 Hunger of Hadar - use Hexblade, Bladelock, Lore Bard, Lorecerer to create a total shutdown of enemies
  Insect Plague + Sleet Storm/Ice Storm - any of the standard casters - Sorcerers and Wizards have access to these spells, which have excellent synergy for shutting down foes and covering both air and ground.
In addition, you can add spells like ![]() Wall of Fire,
Wall of Fire, ![]() Wall of Thorns to the mix and create truly powerful combos.
Wall of Thorns to the mix and create truly powerful combos.
Leveling Overview
Here is a concise table with all the main picks during your levelling progression. For more detailed reasoning, I go further in the article. Also, do not forget to check the recommended gear, as it is crucial and can drastically change how the build works.
| Level | Class | Selection |
|---|---|---|
| 1 | Druid 1 | Cantrips: |
| Abilities: STR - 8, DEX - 16 (15+1), CON - 14, INT - 8, WIS - 17 (15+2), CHA - 10 | ||
| Skills: Any | ||
| 2 | Druid 2 | Subclass: Circle of the Stars |
| 3 | Druid 3 | - |
| 4 | Druid 4 | Cantrips: |
| Feat: |
||
| 5 | Druid 5 | - |
| 6 | Druid 6 | - |
| 7 | Druid 7 | - |
| 8 | Druid 8 | Feat: Ability Improvement +2 Wisdom or |
| 9 | Druid 9 | - |
| 10 | Druid 10 | Cantrips: any |
| 11 | Cleric 1 | Cantrips: |
| Subclass: Light Domain | ||
| Deity: any | ||
| 12 | Druid 11 | - |
Starting the Game - Level 1
This section covers the creation screen and what would go into the best Races, Abilities, and Skills for the Stars Druid build. If you have already started playing, feel free to do a respec at Withers and follow along. This will make it easy to follow the build step by step.
Races
Picking a race provides various benefits - abilities, dialogue options, looks, etc.
| Race | Features | Description |
|---|---|---|
 Wood Half-Elf Wood Half-Elf |
|
Gives a movement speed increase, which improves your overall positioning capabilities during combat. This isn't as important for ranged builds, but still relevant. |
 Wood Elf Wood Elf |
|
|
 Lightfoot Halfling Lightfoot Halfling |
|
One of the best races overall, as it rerolls 1s. This gives a very high chance of avoiding critical failures and greatly improves almost all aspects of gameplay. |
 Zariel Tiefling Zariel Tiefling |
|
A great race that offers unique looks and a few standout features. I recommend |
 Githyanki Githyanki |
|
A very versatile race that unlocks useful actions for combat and world interactions. |
Class
| Overview | |
|---|---|
 Druid Druid |
|
| Druids channel the elemental forces of nature and share a deep kinship with animals. Mastery of Wild Shape allows them to transform into beasts from all over the Realms. | |
| Features | |
 Spell Slots Spell Slots |
These can be used to cast spells and are restored each long rest. |
Cantrips
| Spells | Description |
|---|---|
| Enables you to effectively use stave weapons using your Wisdom modifier. | |
| A decent cantrip that you can use to both light an area and inflict fire damage. |
Background
Backgrounds serve a few purposes:
- They give a role-playing option of your previous history, if you are into that.
- It gives skill proficiencies, meaning that you get an additional bonus when you roll that skill check in which you are proficient. This depends on your proficiency bonus, which increases as you level up.
Here are my recommendations based on this build
| Background | Skills | Description |
|---|---|---|
| Folk Hero | Animal Handling Survival |
Probably one of the most relevant picks for Druid, both in terms of roleplay and the skill proficiencies aimed at Wisdom. |
| Charlatan | Deception Sleight of Hand |
This has been one of my favourite picks recently. Even though this background is more aimed at "rougueish" builds, in many situations, my group does not have a dedicated lockpicker. This can help with increasing lockpick chances and demanding fewer rerolls. |
| Acolyte | Insight Religion |
All of these are good picks, as they give one Wisdom-based skill proficiency, which is the most relevant for a Druid. Outlander could be a bit more useful as it would help resist |
| Guild Artisan | Insight Persuasion |
|
| Outlander | Athletics Survival |
Abilities
Now, let's take a look at the abilities of the Star Druid build. Correct allocation will allow you to maximize the early gameplay and get good modifier bonuses.
Here are some key points to know about ability points:
- They give "ability modifiers" that apply to various skill checks. For example, Charisma works on Intimidation and persuasion checks. Wisdom on Survival or Animal Handling, and so on.
- You get a higher ability modifier on even values - 10, 12, 14, etc. So keeping it on odd may be useless. However, there are various +1/2 modifiers in the game, specifically
 Auntie Ethel's Hair or Feats that help round this up.
 - Weapons can benefit from either Dexterity or Strength, depending on their type
- You also have a spellcasting modifier, which can be Wisdom, Charisma, or Intelligence, depending on your class.
| Abilities | Description |
|---|---|
| Recommended Setup: Strength - 8 Dexterity - 16 (15+1) Constitution - 14 Intelligence - 8 Wisdom - 17 (15+2) Charisma - 10 |
The idea here is that you get |
Skills and Expertise
Overall, the skills should be impacted by your role-playing and background decisions. However, you would still want those who will give you the best benefits. My recommendations are to pick those at which you have a high ability modifier or are useful in general:
- Animal Handling
- Insight
- Medicine
- Perception
- Survival
Prepare Spells - Level 1 Recommendations
Druids can pick up a wide variety of level 1 spells into their prepared list. Here are my recommendations on what can be useful:
| Spell | Description |
|---|---|
| One of the greatest spells, it is free to cast, so you can buff all the allies with improved movement speed. Only 1 party member needs to have this spell. | |
| This is what allows you to effectively do most of the healer's role, with a very cheap bonus action heal. Excellent when you need an instant pick up for |
|
| A solid spell that can be used to push enemies off the ledges. Later, it will serve as one of the cornerstones of controlling enemy positions to force them into the area of your spells. | |
| A decent early game damage spell that creates icy surfaces and can force enemies to slip. | |
| This spell can be extremely powerful, combined with Ice and Lightning spells. It applies a |
|
| This can be a very powerful early game spell, which gives an easy |
|
| A solid exploration spell, which helps when you need to jump long distances. Can be removed from spell list when not in use. | |
| It can help to interact with animals, but generally, it's easy to obtain |
Leveling Progression - Levels 2-12
Here is the detailed progression for the Stars Druid build to get you started. You can use it as a guideline because early games can be daunting and overwhelming. Later on, once you get a feel for the class, you can start picking your options.
Level 2
By this time, you should have landed on the ![]() Ravaged beach already and started exploring the initial area. You might need 1 additional encounter if you did not obtain enough XP in the Nautiloid.
Ravaged beach already and started exploring the initial area. You might need 1 additional encounter if you did not obtain enough XP in the Nautiloid.
| Features | Description |
|---|---|
| Take the form of an animal. Gives starting forms, and unlocks more options as you increase the Druid level. |
Subclass
| Overview | |
|---|---|
| Features | |
| This includes |
|
| Excellent utility cantrip that improves ability check rolls. | |
| Uses spell slots to cast the spell. It deals decent radiant damage against a single target. | |
| You can consume Star Maps and use this version of |
|
Level 3
This level mainly unlocks new spells that you can add to the prepared spell list.
Level 2 Spells Recommendations
Here are recommendations for spells, which can be useful.
Core spells:
| Spell | Description |
|---|---|
| A very powerful area of control spell, that will work extremely well for controlling and weakening enemies. It will synergise well with various gear options - |
Optional Spells:
| Spell | Description |
|---|---|
| I think this spell should be accessible at least by 1 party member to cast it in situations when you need an easy |
|
| The |
|
| A powerful spell that I recommend casting on targets which have a decent amount of HP, and you have a success chance of 80%+. This paralyses them and gives a guaranteed source of critical hits. | |
| A situationally useful spell, to remove debilitating effects, which can be added/removed when needed. |
Level 4
| Feature | Description |
|---|---|
| A solid wild shape form which offers an easy source of |
Cantrips
| Cantrip | Description |
|---|---|
| A perfect option to force enemies to come close, especially in the |
Feat
| Feat | Description |
|---|---|
| Ability Improvement - +2 Wisdom | The goal is to improve the spellcasting stat of the Druid, which will make it easier to land spells. |
| A very powerful option as it would allow you to dual wield |
Level 5
| Feature | Description |
|---|---|
| Allows making a second attack with the |
Level 3 Spells Recommendations
The spell options here are pretty good, so here are my recommendations.
Core spells:
| Spell | Description |
|---|---|
| This will prove useful when working together with other area spells like |
Optional Spells:
| Spell | Description |
|---|---|
| A truly great spell that can cancel out enemy |
|
| A powerful offensive spell, which can deal huge damage to multiple targets, especially if they are |
Level 6
| Features | Description |
|---|---|
| A powerful reaction that can change the outcome of an attack roll and a saving throw. | |
| A stealth-related wild shape form that mainly deals piercing damage. | |
| The iconic wild shape form, which allows for crazy tricks, of crushing enemies. |
Level 7
Level 4 Spells Recommendations
The spell options here are pretty good, so here are my recommendations.
Core spells:
| Spell | Description |
|---|---|
| This is one of the best spells accessible to Druid. This summons a Dryad that can create |
Optional Spells:
| Spell | Description |
|---|---|
| A solid alternative to |
|
| An additional area of control effect, which can help pull enemies and control their positioning. | |
| One of my favourite control spells, which covers a large area and can disable groups of enemies. | |
| It can be used to cover the field in Fire. It also has interactions with other items like |
Level 8
Feat
| Feat | Description |
|---|---|
| Ability Improvement - +2 Wisdom | Increase the Wisdom stat by 2 to increase the spellcasting modifier bonus. |
| Gives proficiency in Constitution Saving Throws. This helps maintain spell concentration. If you would take 1 level sorcerer dip (as first level), you could obtain this, but this means sacrificing the |
Level 9
Level 5 Spells Recommendations
The spell options here are pretty good, so here are my recommendations.
Core spells:
| Spell | Description |
|---|---|
| A very powerful area control spell, which can inherit damage from |
Optional Spells:
| Spell | Description |
|---|---|
| This is a powerful spell. First, it gives additional summons, which can be great for just acting as meat shields. But most importantly, |
Level 10
| Feature | Description |
|---|---|
| Gives your wild shape forms a third attack, which is a huge improvement. Not many other classes get access to this. | |
| Another Wild Shape form to pick from. | |
| Improves the |
Level 11 - Cleric 1
Here, the goal is to get access to the Cleric spell list, which gives a few very powerful spells to empower the combat rotation of the Star Druid. You will need to multiclass via levelling screen:

Here pick the cleric class:
| Overview | |
|---|---|
 Cleric Cleric |
|
| Clerics are representatives of the gods they worship, wielding potent divine magic for good or ill. | |
| Features | |
| Spell Slots |
These can be used to cast spells and are restored each long rest. |
| Unique spell list accessible based on your cleric subclass. | |
Cantrips
| Cantrip | Description |
|---|---|
| Gives an easy source of light, making it easier to activate |
|
| Gives an easy |
|
| Free radiant damage spell to activate various debuffs. |
Subclass
To be fair, here you can run any of the subclasses. All of them provide something useful. My pick, with 1 level dip would be:
| Overview | |
|---|---|
 Light Domain Light Domain |
|
| Features | |
| Allows you to impose a |
|
| Excellent cantrip that will be useful in dark areas, especially Act 2. | |
| A situationally useful spell, however, it's nothing fancy. | |
| Excellent spell that you can use to enable attack roll |
|
Deity
Pick anything that suits you
Abilities
Again, pick anything. I would recommend Persuasion
Prepared Spells
Prioritise these two spells:
| Spells | Description |
|---|---|
| One of the best control spells in the game, if you have a high chance of landing it. What makes it special is that it does not use a concentration slot. | |
| Use this spell to make the ally untouchable, for example, if they have low HP, or you want to divert the enemy's attention. |
For other slots, pick anything.
Level 12 - Druid Lv 11
This is the last level of the build, and it comes with pretty good level 6 spells
Level 6 Spells Recommendations
The spell options here are pretty good, so here are my recommendations.
Core spells:
| Spell | Description |
|---|---|
| Great spell, that buffs the whole party, by increasing its max HP (including summons) and giving |
Optional Spells:
| Spell | Description |
|---|---|
| It can act as an alternative to |
That's it, the build is done!
Maximizing Ability Scores
Now, as the build progression is covered, there are a few aspects and important decisions you will have to make throughout the game. These will decide your final score for abilities.
Wisdom
This ability is the main spellcasting stat for Druids. Here is how to maximise it:
- 17 Wisdom - the base from the character creation.
- Act 1 - Auntie Ethel's Hair - you will want to get +1 Wisdom if you pick this choice.
- Feat - Ability Improvement - +2 Wisdom.
 Khalid's Gift - alternative option for +1 to round up the Wisdom value.
 - Act 3 - Mirror of Loss - pick +2 Wisdom.
This results in 22 Wisdom, with a +6 modifier.
Potions, Elixirs, and Consumables
Let's take a look at what consumables you can use to further empower the build.
Potions
These have short-term effects for a few turns.
| Consumable | Description |
|---|---|
| This is a very powerful potion. It gives an additional action point, which can be used to cast a spell or attack. The activation is generally by drinking using a bonus action. However, you can stack together with party members and make one member |
|
| It can be used in two ways - the first one is to enter combat with a |
|
| An easy way to get the |
|
| Gives |
Elixirs
Unfortunately, only one Elixir can be active at a time. However, the good thing is that they last for the whole day, before making a long rest. This makes exlixirs very useful and economical.
Be sure to activate them before combat, as otherwise, you will need to use Bonus Action.
| Consumable | Description |
|---|---|
| Improves Spell Save DC, making it easier to land spells. This can be a perfect alternative to wearing |
|
| As you will be able to easily kill at least the weakest foe, this ensures additional attacks per turn. This is the strongest elixir option in most cases. | |
| Makes it easier to maintain spell Concentration | |
| For some encounters, you will want to go first. This elixir will ensure that it overcomes even surprise mechanics. However, if you have |
Illithid Powers
This special mechanic in Baldur's Gate 3 allows you to consume tadpoles and unlock special Illithid Powers.
At first, you can only use the base powers. As you move to Act 3, you will be able to unlock the outer ring powers, also called Elite.
| Illithid Power | Type | Description |
|---|---|---|
| Base | Beneficial power to take as it does not have any costs, and provides only benefits on the first hits with attack rolls. | |
| Base | It's an easy way to ensure you land critical hits, especially good when you need an instant damage boost. | |
| Base | It can help to kill an enemy faster if it is left with a few HP. | |
| Base | Excellent way to deal additional damage with reaction, early and mid game. | |
| Base | Decreases enemy ability score, free use, so worth getting. | |
| Base | Excellent option for bonus temporary HP. It can also apply |
|
| Elite | Allows for easily pulling enemies together for effective use of the area of attacks. It can also force them back on specific surfaces in case they try to leave it. | |
| Elite | A powerful action that can enable free use between bonus action and action. | |
| Elite | Allows for freely casting a spell without resource limitation. | |
| Elite | It can be used to maximize the effectiveness of charisma-based skills, especially those relevant to the main character. | |
| Elite | It can be used to save yourself from a deadly spell. | |
| Elite | A powerful ability that can force targets |
Equipment Recommendations
Now I would like to go through some gear recommendations to maximize the Stars Druid Build. Items are especially important as they take the build to the next level thanks to their unique effects.
Here are some recommendations on how to follow the gear picks:
- I recommend checking the Item Checklists or Interactive Map, depending on which is easier to use for you. This will help you track which items and when you should pick them.
- Gear for each slot is listed Best -> Worst. Generally, this means that you would start with lower gear recommendations (as they are available earlier) and upgrade to higher ones. However, in some cases, the best items can be obtained early, like
 Titanstring Bow, and some others.
 - I mention Stat Sticks in caster and ranged builds. These are items that you do not use directly (like
 Club of Hill Giant Strength,
  Knife of the Undermountain King, The Dead Shot, etc.), but their bonuses still apply to other weapon attacks or actions.
 - BiS - means best in slot item
- If an item is taken by another character, use the one with lower priority or even those from previous acts. If you want to have the best items for all builds, this will require planning, which is not for everyone.
Act 1
Dual Wield options
This potion is here if you decide to use ![]() Dual Wielder feat from level 4. The setup is truly powerful, especially if you can
Dual Wielder feat from level 4. The setup is truly powerful, especially if you can
| Slot | Item | Description |
|---|---|---|
 Melee (One-Handed) Melee (One-Handed) |
The sword is so good that it would be a crime not to get it. It works on your |
|
| The best option, as it will give an easy way to activate |
Single Hand options
In case ![]() Phalar Aluve is taken, you can go for this kind of setup, where you only use a main-hand weapon.
Phalar Aluve is taken, you can go for this kind of setup, where you only use a main-hand weapon.
| Slot | Item | Description |
|---|---|---|
| Melee (One-Handed) |
The best option, as it will give an easy way to activate |
|
| The best staff for caster in Act 1 as it gives bonus Spell Save DC, improving spell success. | ||
| With the |
||
| It provides a substantial defensive boost by reducing critical hit damage. It also applies a |
||
| Decent shield if you got Absolute's Brand from |
||
| Gives a bonus to saving throws, easily accessible early in the game. |
Other Equipment
| Slot | Item | Description |
|---|---|---|
 Ranged Ranged |
Gives bonus initiative, allowing one to go earlier in combat. I recommend this for the early games, as you will have low dexterity. | |
| Equip two of these so that you can attack with your bonus action. This is a great way to get some bonus damage, especially if you cannot reach the target. Only works if you are a Drow. | ||
 Head Head |
One of the best headwear options, giving an easy way to reflect damage and activate conditions. | |
| The only truly relevant headwear for Act 1. There are other options, but they are just side bonuses. | ||
 Cloak Cloak |
- | Nothing really of note here. |
 Armor Armor |
The best armour that you can use throughout the game. Gives an easy way to apply |
|
| The most relevant early-game armour, that you can take from Lae'zel | ||
 Gloves Gloves |
A powerful glove option that will give easy |
|
| Solid glove option for a support role, to easily apply |
||
 Boots Boots |
The best boots option for the rest of the game. | |
| One of the best boots, giving a total advantage for movement on difficult surfaces. It also gives |
||
| Excellent shoes, as you will be casting Concentration spells left and right. This will reduce your chance of getting the spell canceled. | ||
| Excellent boots, although I would leave them for a frontline character if their slots are free. It can be used to avoid getting hit while running away. | ||
 Amulet Amulet |
Gives access to |
|
| Can be used to restore spell slots, after that it can be unequipped | ||
| Gives mobility improvement thanks to the |
||
 Rings Rings |
The best ring for Act 1, as it gives an easy way to apply |
|
| The best option for Act 1. The bonus Armour Class is a great boost for survivability. | ||
| The ring can be useful if you are running with a dual-wield |
Act 2 - mid-game
The goal here is to get ![]() Callous Glow Ring and
Callous Glow Ring and ![]() Gloves of Battlemage's Power.
Gloves of Battlemage's Power.
| Slot | Item | Description |
|---|---|---|
| Melee (Two-Handed) |
- | Same Weapons as the previous Act. |
| Ranged |
Although not mandatory, this bow is useful as it can apply |
|
| Head |
Works well with |
|
| With |
||
| Cloak |
Improves survivability and Saving Throw success. | |
| Helps to absorb elemental damage, which can then improve your weapon attacks. | ||
| As many enemies will get |
||
| Armor |
The best armour in terms of applying conditions and debuffs. Wear it, use it, love it. | |
| Gloves |
These gloves unlock a very easy |
|
| A solid alternative if you want to trigger the |
||
| Boots |
Continues to be the best boots option for easy |
|
| Amulet |
I would say this continues to be the best amulet option if you continue using |
|
| Can be used to restore spell slots. After that, you can switch to another amulet. | ||
| Rings |
One of the most important items for the build. The radiant damage rider will activate |
|
| The ring gives access to |
||
| Continues to be a decent ring option, especially if you continue using healing spells. | ||
| Gives an additional source of |
Act 3 - Final Build setup
I urge having a ![]() Dual Wielder, which will significantly improve the combat capabilities with two weapons.
Dual Wielder, which will significantly improve the combat capabilities with two weapons.
| Slot | Item | Description |
|---|---|---|
| Melee (One-Handed) |
This is the best staff for any caster, with access to |
|
| If dual-wielding and precasting |
||
| Still a solid option for a source of |
||
| Ranged |
Gives a significant initiative boost, helping to go earlier in combat. | |
| - | Any of the previous Act weapons. | |
| Head |
(BiS) |
Continues to be a powerful option if you are using the recommended item combinations to activate conditions. |
| Allows for obtaining additional bonus action for more attacks. This requires being at 50% HP or lower, so feel free to use something like |
||
| Headwear alternative for stacking |
||
| Cloak |
The strongest cloak in the game, with a significant boost to defensive capabilities. | |
| Armor |
(BiS) |
Continues to be the top armour choice. |
| This armour is also an option, but probably best worn by another party member. It will double the damage of |
||
| Gloves |
(BiS) |
The best gloves which ensure a high Spell Save DC. |
| Solid glove alternative. | ||
| Boots |
Continues to be the best boot choice for the build. | |
| Amulet |
Probably one of the best amulets for a caster, with a significant +2 Spell Save DC boost. | |
| This amulet can be used to round up the Wisdom value and increase spellcasting modifier bonus. | ||
| I would say this amulet is mandatory if you plan on using |
||
| Great defensive amulet that gives |
||
| Rings |
The core ring makes the build work. | |
| Easy source of improved spell success chance via |
Build Mechanics and Interactions
In this section, I would like to dive deep into how to play the Stars Druid Build mechanics and interactions. These will help you understand what is happening and why, and maybe give you ideas on your own playstyle.
Core Mechanics and Combos
Let's go through key mechanics and tips on how to use the build effectively.
Starry Forms
The highlight of Circle of the Stars druid is his special ![]() Starry Form. This will be the cornerstone of this build, and give a huge versatility to the build. Here is a short overview of their use cases, and how powerful they are:
Starry Form. This will be the cornerstone of this build, and give a huge versatility to the build. Here is a short overview of their use cases, and how powerful they are:
| Starry Form | Uses | Description |
|---|---|---|
| Close-range debuffing Concentration spell sustain |
First, the most powerful and the most used one is |
|
| Long-range debuffing | This form is perfect for situations where you want to maintain long-distance pressure. It gives |
|
| Support and Buffs Early Game |
This is perfect to be used with |
As you can see, this offers various combat options. Moreover, with ![]() Twinkling Constellations at level 10, you can switch between these for free. For example, you start combat with
Twinkling Constellations at level 10, you can switch between these for free. For example, you start combat with ![]() Luminous Arrow, cast
Luminous Arrow, cast ![]() Insect Plague and then switch to
Insect Plague and then switch to ![]() Starry Form: Dragon to ensure that your concentration is not broken when getting close to the enemies.
Starry Form: Dragon to ensure that your concentration is not broken when getting close to the enemies.
Healing and Support Capabilities
As I mentioned a few times, the Druid can somewhat replace the Cleric role in terms of support, especially Circle of the Stars. The core of this is using ![]() The Whispering Promise ring, as it gives a non-concentration
The Whispering Promise ring, as it gives a non-concentration ![]() Bless. This is such a huge boost that it can make your melee and ranged martials shred enemies from early levels.
Bless. This is such a huge boost that it can make your melee and ranged martials shred enemies from early levels.
This is possible in general with ![]() Healing Word (which also gives a very cheap resurrection). After that, you can specifically activate
Healing Word (which also gives a very cheap resurrection). After that, you can specifically activate ![]() Starry Form: Chalice for additional target heal. Moreover, late in the game, you get access to
Starry Form: Chalice for additional target heal. Moreover, late in the game, you get access to ![]() Heroes' Feast, which further improves party capabilities.
Heroes' Feast, which further improves party capabilities.
Generally, you would expect that you need "powerful" healing spells, but in reality, healing stops from utilizing the full party potential.
Wild Shapes forms
As Druid you have access to various forms - ![]() Wild Shape: Deep Rothé,
Wild Shape: Deep Rothé, ![]() Wild Shape: Owlbear, being my favourite. The main benefit is that they give a separate layer of HP, which immensely increases your survivability, especially in the early game.
Wild Shape: Owlbear, being my favourite. The main benefit is that they give a separate layer of HP, which immensely increases your survivability, especially in the early game.
After that, each form gives various benefits, which, when utilised effectively, can totally change the combat. Let's go through my favourite ones:
| Form | Description |
|---|---|
| Excellent early game form, which can make enemies |
|
| Another great form that you can utilize early in the game. Spider can apply |
|
| Excellent option for early games, as it can hit multiple enemies and make them |
|
| One of my favourite options. This is a very sturdy beast accessible at level 6. It can jump around, dealing damage and making enemies |
These froms overlap with ![]() Starry Form shapes, so you have to choose one or the other. In many cases, your
Starry Form shapes, so you have to choose one or the other. In many cases, your ![]() Starry Form: Archer or
Starry Form: Archer or ![]() Starry Form: Dragon will provide better benefits, as you concentrate on spellcasting.
Starry Form: Dragon will provide better benefits, as you concentrate on spellcasting.
Maximising the Companion amount
Druid can summon plenty of minions that result in a small army. This can become tedious to manage, but they do offer plenty of bonuses and distractions for enemies.
 Conjure Minor Elemental - either Mud or Ice Mephits. They are good in a few encounters, where you might need a distraction.
- Conjure Woodland Being - summons a Dryad that has free Spike Growth, making this almost a mandatory summon.
- Drayd's special action,
 Fallen Lover, summons a Wood Woad to fight by your side.
  Conjure Elemental - is great. You can summon a Water Elemental, which can apply
  Brittle on
  Burning targets. Just combine this with
  Wall of Fire. Otherwise, the summons are great distractions, as they have a huge chunk of HP.
The area control capabilities
So here is one of the core aspects of the build, which makes it a formidable combatant on the field. It probably warrants a separate guide, but I will try to cover the mechanics.
So the first aspect is that you can stack various area effects:
- Air - Insect Plague, Hunger of Hadar (obtained from other builds)
- Ground -
 Plant Growth, Spike Growth,
  Wall of Thorns, Sleet Storm, etc.
So any of these can be combined. Of course, as a Druid, you will be limited to these: ![]() Insect Plague +
Insect Plague + ![]() Plant Growth,
Plant Growth, ![]() Insect Plague +
Insect Plague + ![]() Spike Growth (from Dryad) or just
Spike Growth (from Dryad) or just ![]() Spike Growth. The limitation is that you can only have 1 concentration spell active, and only
Spike Growth. The limitation is that you can only have 1 concentration spell active, and only ![]() Plant Growth can be activated without limitations. It also totally disables the foe if they get
Plant Growth can be activated without limitations. It also totally disables the foe if they get ![]() Prone.
Prone.
If you can activate 2 of these, the enemies inside will be destroyed. What makes these special is that ![]() Spike Growth also triggers
Spike Growth also triggers ![]() Callous Glow Ring and
Callous Glow Ring and ![]() Lightning Charges. This leads to multiple stacks of
Lightning Charges. This leads to multiple stacks of ![]() Reverberation and
Reverberation and ![]() Radiating Orb, totally immobilising enemies. Now you know the reason why
Radiating Orb, totally immobilising enemies. Now you know the reason why ![]() Luminous Armour,
Luminous Armour, ![]() Boots of Stormy Clamour and
Boots of Stormy Clamour and ![]() The Spellsparkler are so important.
The Spellsparkler are so important.
Same for ![]() Insect Plague, just that it activates once per turn, and on initial cast.
Insect Plague, just that it activates once per turn, and on initial cast.
![]() Spike Growth is overall the strongest option in my opinion, and should be used in most cases, with all debuffing from various items.
Spike Growth is overall the strongest option in my opinion, and should be used in most cases, with all debuffing from various items.
Maintain pressure by pushing enemies
Here comes the second part of the build, and the reason for some of the multiclass choices. Enemies will leave the area, as they want to reach you, while also maximising their survivability. Here you have a few options:
 Thunderwave - a simple spell that pushes enemies back
 Thorn Whip - can be used to pull enemies toward your direction
- Command - gives
 Command: Approach and
  Command: Flee, to force enemies to move in the desired direction.
With these, you can have them totally under your control, so that they would not escape the plaguing effects.
Various conditions and status controls
So here is where you get a crazy amount of effects:
 Radiating Orb - reduces the accuracy of affected targets and also provides illumination in proximity.
 Lightning Charges - this affects you and provides bonus lightning damage, which is transferred via the spells.
 Reverberation - decreases the enemy's success of physical saving throws, and multiple stacks create a detonation.
 Prone - results from the Reverberation detonation, if enemies fail the saving throw.
- Mental Fatigue - this is a very powerful debuff, as it enables you to have a higher success chance for spells that target mental saving throws, for example, Command or Confusion.
 Phalar Aluve: Shriek - A very powerful debuff on enemies, that weakens their saving throw rolls, and gives thunder damage rider, which pairs well with
  Hat of Storm Scion's Power.
 Arcane Acuity - Improves your Spell Save DC, increasing the chance that spells will be successful.
As you can see, the build applies various buffs, conditions on yourself and enemies, creating a total chaos, and ensuring you get more powerful as combat continues.
Maximising spell success
The build becomes a powerhouse controller once you get ![]() Gloves of Battlemage's Power. It allows to easily build
Gloves of Battlemage's Power. It allows to easily build ![]() Arcane Acuity, while even on the enemy's turn. The result is almost 100% spell success chance. The tech behind it is that area spells like
Arcane Acuity, while even on the enemy's turn. The result is almost 100% spell success chance. The tech behind it is that area spells like ![]() Spike Growth,
Spike Growth, ![]() Wall of Fire, etc. trigger the gloves and they get activated.
Wall of Fire, etc. trigger the gloves and they get activated.
Further, your ![]() Reverberation stacks and
Reverberation stacks and ![]() Mental Fatigue will help you even more with making spells land successfully.
Mental Fatigue will help you even more with making spells land successfully.
So with this in mind, once enemies are weakened, you can follow up with almighty ![]() Confusion,
Confusion, ![]() Hold Person, or any other spell. Even your
Hold Person, or any other spell. Even your ![]() Thunderwave can push enemies back into the spell area of effect, saving you higher-level spell slots.
Thunderwave can push enemies back into the spell area of effect, saving you higher-level spell slots.
Moonbeam + Sanctuary
The simplest mechanic to utilise with a druid is the ![]() Sanctuary +
Sanctuary + ![]() Moonbeam combo. It's pretty easy to pull off and allows you to avoid being attacked while still damaging enemies with
Moonbeam combo. It's pretty easy to pull off and allows you to avoid being attacked while still damaging enemies with ![]() Moonbeam. For some reason, the spell acts as a separate entity, and you can use it in situations where you are close to being overwhelmed.
Moonbeam. For some reason, the spell acts as a separate entity, and you can use it in situations where you are close to being overwhelmed.
The main problem is that the build takes Cleric late into the game, but if you want to enjoy this combo earlier, feel free to multiclass into cleric earlier.
Build Combat loop
This section covers the main steps on how to use the build. I do recommend reading the mechanics section before, as it will give more insights on how everything works, and why things are as they are.
Act 1
This covers the early parts of the game, mostly Act 1 levels 1-5:
- Remember to buff everyone with
 Longstrider.
 - If using
 Torch, also activate
  Shillelagh for better damage
 - Use Wild Shape form to get a separate HP bar, but also utilize the unique interactions,
 Wild Shape: Spider -
  Web,
Web,  Wild Shape: Deep Rothé -
  Charge,
  Wild Shape: Owlbear - for
  Crushing Flight. All of these will give various options to weaken foes.
 - Spike Growth is an almighty spell that will get better as the game progresses. For now, it mainly slows down foes and inflicts damage. Use Thorn Whip, Thunderwave to push or pull enemies into the spiky ground.
- Use Starry Form to switch between the forms. I would prioritize Starry Form: Archer and Starry Form: Dragon. The latter is especially deadly once you get
 Luminous Armour and cast Dazzling Breath.
 - Once you get
 The Spellsparkler, you can use Starry Form: Archer to launch
  Luminous Arrow and activate Lightning Charges.
 - If you can, precast Phalar Aluve: Shriek with
 Phalar Aluve. This will save you an action point and greatly empower yourself and your party with additional damage and debuffs.
 - Star Map: Guiding Bolt is an excellent single-target spell with radiant damage.
Once you reach Level 5, you get slightly improved spells:
- Plant Growth is a safe spell to cast when you wish to slow down foes without using a concentration slot.
- Sleet Storm is another great addition; enemies get instant Prone check, and if they slip, they skip their turns. It also cancels enemy spell concentration.
 Daylight is situationally useful. Later, when you get
  Callous Glow Ring and fight in dark areas, it can help to activate the ring effects.
- Once you get
 Gloves of Belligerent Skies, make sure to have Lightning Charges while Spike Growth is active. It will proc Reverberation.
Act 2
Here, there is one key item that will play a major role in boosting your area spells, mainly ![]() Spike Growth - the
Spike Growth - the ![]() Callous Glow Ring.
Callous Glow Ring.
- At level 7, make sure to always use Conjure Woodland Being; it gives free Spike Growth to cover a larger area of the field. Dryad can also summon Fallen Lover to act as a meat shield.
- Ice Storm is a very powerful spell; it can cover the field in ice without using your concentration slot. This means you can both inflict damage and disable foes. Later, you can pair it with Insect Plague.
- Wall of Fire is another great addition, but again, it is more situational. It is perfect in corridors, through which you force enemies and let them burn. Later, you can use
 Conjure Elemental: Water Elemental and its ice attack to apply Brittle on Burning targets.
 - Once you get Hat of Storm Scion's Power you can use it to push enemies into your area spells with Thunderwave, which will also generate Arcane Acuity.
- Another, and stronger alternative is
 Gloves of Battlemage's Power, which allows building Arcane Acuity on the enemy's turn, as they walk through spikes of Spike Growth. On the next turn, you can follow up with an almost guaranteed control spell.
Act 3 - the final form
With ![]() Twinkling Constellations unlocked and a few additional features, the final build shape takes place. I also think
Twinkling Constellations unlocked and a few additional features, the final build shape takes place. I also think ![]() Starry Form: Chalice becomes irrelevant at this stage, and only the 2 others are relevant:
Starry Form: Chalice becomes irrelevant at this stage, and only the 2 others are relevant:
- You can switch between Starry Form for free, mid-combat. Start with Starry Form: Archer, cast Luminous Arrow, activate Lightning Charges, cast Spike Growth and switch to Starry Form: Dragon.
- For the second turn you can come in close, use Dazzling Breath, debuff enemies, cast Thunderwave or Command to force enemies into the spikes, so that they would incur more damage.
Another option:
- Use Insect Plague and follow up with Plant Growth. This creates a slow-moving field, which damages targets each turn.
- Again, use the various spells to force enemies into your fields - Command, Thorn Whip, etc.
Also, remember to buff allies - ![]() Heroes' Feast,
Heroes' Feast, ![]() Longstrider, to greatly improve your combat capabilities.
Longstrider, to greatly improve your combat capabilities.
Conclusion
Thank you for reading the Stars Druid build for Baldur's Gate 3. This took a long time to write, as I was looking into different setups and how to best utilise its features. In the end, I think I got a pretty powerful build that does satisfy those looking for "fun" experience and something new!
Cheers!
Credits
- tchy1956, aka floormanifold - suggesting to use Gloves of Battlemage's Power with Spike Growth for Arcane Acuity stacking
- Lots of stuff and tech about Gloves of Battlemage's Power - https://www.reddit.com/r/BG3Builds/comments/1nchxz7/understanding_the_gloves_of_battlemages_power/
Like, Dislike, comment, or share!
Join the Discussion
0 commentsNo comments yet.
Be the first one to leave a comment!