
Necromancer Build - The Necrotic Archivist - Baldur's Gate 3 (BG3)
Contents
- Necromancer Build - The Necrotic Archivist
- Leveling Overview
- Synergy with other builds
- Level 1 - Character Creation
- Act 1 - Levels 2-6 - Wilderness
- Act 1.5 - Level 7 - Rosymorn Monastery
- Act 2 - Level 8-10 - Shadow Lands
- Act 3 - Level 11-12 - Rivington and Lower City
- Maximizing - Abilities, Illithid Powers, Consumables
- Conclusion
Necromancer Build - The Necrotic Archivist
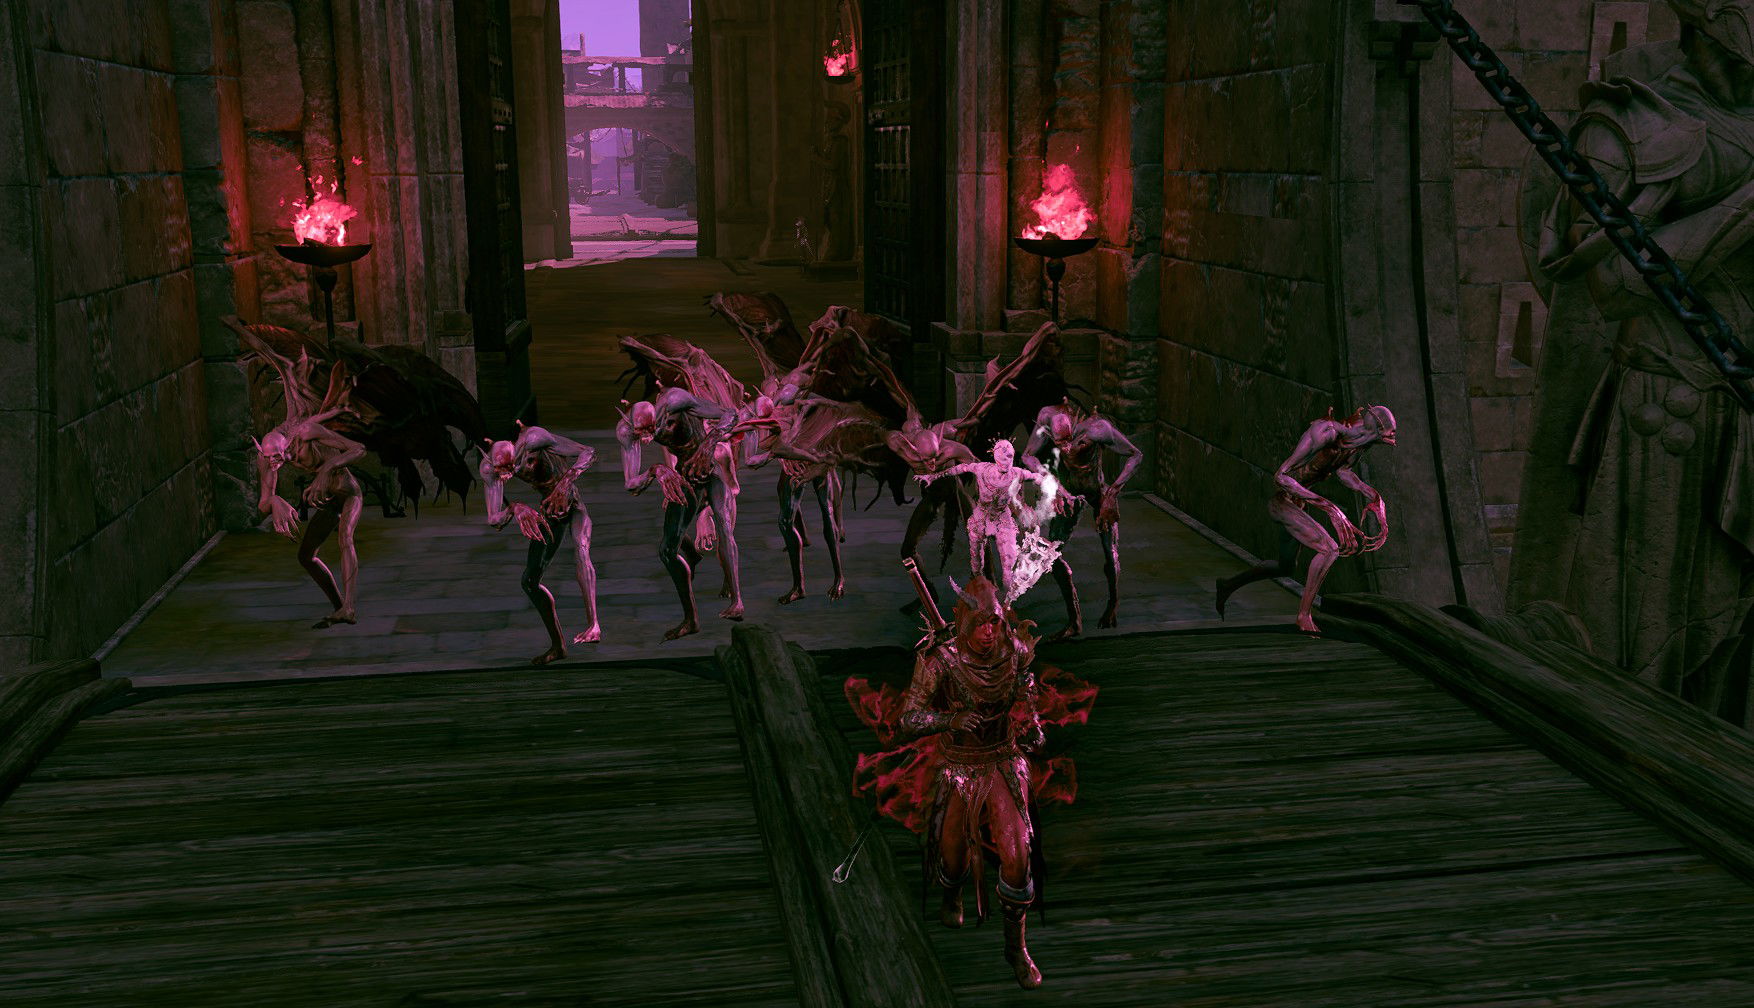
For a long time now, I have wanted to create a Necro-themed build. There were a few limitations, with how the summons work. But I think the build reaches its goals. It is a flavourful build for those who want to have an army of undead and use various necromancy spells.
I will mix two classes - wizard and cleric. The former comes with the "Necromancer" subclass, which we will obviously want both for flavour and its feature set, namely - ![]() Undead Thralls: Additional Undead and
Undead Thralls: Additional Undead and ![]() Undead Thralls: Better Summons, which will drastically improve summon combat capabilities.
Undead Thralls: Better Summons, which will drastically improve summon combat capabilities.
Wizard will also enable you to scribe the majority of spells in the game as you unlock higher-level spell slots, so even level 5 and 6 spells will be at your fingertips.
The Cleric is where some interesting stuff will happen - it will give the Death Domain subclass, which provides ![]() Reaper for double necro cantrips and
Reaper for double necro cantrips and ![]() Inescapable Destruction for being able to circumvent enemy necrotic damage resistance. There is also a big boon -
Inescapable Destruction for being able to circumvent enemy necrotic damage resistance. There is also a big boon - ![]() Aid, which gives a significant health boost to all allies - including your summons.
Aid, which gives a significant health boost to all allies - including your summons.
Talking about summons, they have problems - low stats. I will show some tricks where you can feed them various potions, debuff enemies and enable them to become significant combat contributors in your Party. The result - they will become a direct improvement to your combat rotation, offering a very fun and unique experience.
How do you like this build layout? If you are a long-time reader of the website, feel free to share that in the comments :)
Class Contribution
The build consists mainly of 2 classes:
6 Necromancer Wizard
- Spell Scribing is the main highlight of Wizards, allowing them to learn any spell from scrolls and put it into their spellbook. Later, it can be assigned to Prepared spells and used during exploration or combat.
 Arcane Recovery - a special feature that allows restoring spell slots and prolongs your combat potential until long rest.
 Grim Harvest - okayish feature, that helps restore hit points. It's nothing fancy, just a good addition when it is activated.
 Undead Thralls: Additional Undead,
  Undead Thralls: Animate Dead, and
  Undead Thralls: Better Summons - these give a significant improvement to summons, but most importantly, you get additional ghouls.
6 Death Cleric
- Proficiencies in a wide array of armors and weapons.
- Access to support spells like
 Healing Word,
  Mass Healing Word,
  Sanctuary, etc.
  Aid to empower the ally's survivability with a solid HP boost each long rest.
- Can apply
 Wet status for other casters with
  Create or Destroy Water, helping to make enemies vulnerable to Lightning and Cold damage.
  Spirit Guardians - the ultimate cleric spell, to debuff enemies, making them miss their attacks. The necrotic version is also powerful when using
  Callous Glow Ring.
- A solid list of cantrips -
 Thaumaturgy,
  Toll the Dead, etc.
 - The
 Reaper feature allows hitting two enemies with the same cantrip.
  Channel Divinity: Touch of Death is a very powerful feature, giving a flat damage boost on melee weapons and spell attacks.
 Inescapable Destruction helps to maintain the power of your necrotic damage sources, circumventing enemy resistances.
Build Variations
Here are some variations that work similarly and utilise the same classes at their core.
| Setup | Description |
|---|---|
|
This is a good option as it gets a unique spell which you cannot obtain otherwise - |
|
This is another equally cool option. It gets Moreover, you can use |
Leveling Overview
Here is a concise table with all the main picks during your levelling progression. For more detailed reasoning, I go further in the article. Also, do not forget to check the recommended gear, as it is crucial.
| Level | Class | Selection |
|---|---|---|
| 1 | Cleric 1 | Cantrips: |
| Deity: Kelemvor | ||
| Subclass: Death Domain | ||
| Abilities: +1 Intelligence from No |
||
| Skills: History, Religion | ||
| 2 | Wizard 1 | Cantrips: |
| Spells: |
||
| 3 | Wizard 2 | Subclass: Necromancy |
| Spells: |
||
| 4 | Wizard 3 | Spells: |
| 5 | Wizard 4 | Cantrips: |
| Spells: |
||
| Feat: |
||
| 6 | Wizard 5 | Spells: |
| 7 | Wizard 6 | Spells: |
| 8 | Cleric 2 | - |
| 9 | Cleric 3 | - |
| 10 | Cleric 4 | Feat: Ability Improvement - +2 Intelligence, |
| 11 | Cleric 5 | - |
| 12 | Cleric 6 | - |
Synergy with other builds
The build is really versatile; it can work both solo and in various groups. You need to be aware that the summons will prolong your combat significantly. In general, you can use different summons based on the composition:
- Using stuff like electrified water or a few lightning casters?
 Animate Dead: Skeleton will use bows, which will make them excellent options to hit from afar.
 - Doing a standard composition party - zombies, ghouls, flying ghouls, you name it - all of them can greatly contribute both as meat shields and damage options.
Having a Cleric in the party
A dedicated Cleric build, especially with ![]() Aid +
Aid + ![]() Heroes' Feast, can go a long way, as they will drastically increase the survivability of the summons. Moreover, with
Heroes' Feast, can go a long way, as they will drastically increase the survivability of the summons. Moreover, with ![]() Spirit Guardians, they can debuff enemies using
Spirit Guardians, they can debuff enemies using ![]() Gloves of Belligerent Skies +
Gloves of Belligerent Skies + ![]() Luminous Armour +
Luminous Armour + ![]() Boots of Stormy Clamour. This results in lots of
Boots of Stormy Clamour. This results in lots of ![]() Radiating Orb and, most importantly,
Radiating Orb and, most importantly, ![]() Prone. This gives an easy
Prone. This gives an easy ![]() Advantage and greatly increases undead hit chance. Here are some build recommendations:
Advantage and greatly increases undead hit chance. Here are some build recommendations:
- Light Cleric
- Tempest Cleric
- Revorb Blender - cleric-like build
- War Domain Cleric
- etc.
Characters with high Strength
The build relies on corpses, and one strategy of getting bodies is to pick them up and store them in your stash for later use. The main caveat is that they are quite heavy, and in many cases, without something like ![]() Elixir of Hill Giant Strength, you will not be able to pick them up. An alternative solution is to use another build that has high strength. Here are a few recommendations:
Elixir of Hill Giant Strength, you will not be able to pick them up. An alternative solution is to use another build that has high strength. Here are a few recommendations:
- Wildheart Barbarian
- Thrower builds - EK Thrower, Berserker or Giant Barb
- Standard frontliner builds - Eldritch Knight, Battle Master, Paladin Builds, etc.
Combatants that can Prone or Sleep enemies
To make summons hit as hard as they can, you need either ![]() Advantage or ensuring they can crit. I already covered clerics. Here are the builds that I recommend keeping in mind:
Advantage or ensuring they can crit. I already covered clerics. Here are the builds that I recommend keeping in mind:
- Clerics - for
 Prone and
  Sleeping via
  Glyph of Warding: Sleep.
 - Wildheart Barbarian, Berserker Thrower - can Prone enemies and greatly weaken them
- Casters like Bards and Wizards with access to Glyph of Warding: Sleep
- Casters with access to
 Hold Person and
  Hold Monster. These are, namely, Fire Sorcerer, Storm Sorcerer, Bardadin and others.
Level 1 - Character Creation
This section covers the creation screen and what would go into the best Races, Abilities, and Skills for the Necromancer build. If you have already started playing, feel free to do a respec at Withers and follow along. This will make it easy to follow the build step by step.
Races
Picking a race provides various benefits - abilities, dialogue options, looks, etc.
| Race | Features | Description |
|---|---|---|
 High Half-Elf High Half-Elf |
|
Comes with a selection of additional cantrips and shield proficiency. Overall good benefits. |
 Dwarf Duergar Dwarf Duergar |
|
Ridiculously powerful race choice if you want to abuse the level 5 |
 Human Human |
|
You will need to pick up dead bodies, so having extra inventory capacity is definitely great. |
| Wood Half-Elf |
|
Almost any build can benefit from the extra movement speed. I think the same is here, so I definitely recommend this option |
 Wood Elf Wood Elf |
|
|
 Halfling Halfling |
General good race, with multiple rerolls helping to avoid failing various checks, spells and saving throws. | |
 Deep Gnome Deep Gnome |
|
With a general |
Class Choices
This section will cover what class-related choices you should pick for the optimal setup
Class
| Overview | |
|---|---|
 Cleric Cleric |
|
| Clerics are representatives of the gods they worship, wielding potent divine magic for good or ill. | |
| Features | |
 Spell Slots Spell Slots |
These can be used to cast spells and are restored each long rest. |
| Unique spell list accessible based on your cleric subclass. | |
Cantrips
Take any non-damaging cantrips, as we will not use wisdom as a spellcasting modifier:
| Cantrips | Description |
|---|---|
| Excellent cantrip that helps activate some items like |
|
| Especially recommended if you are the main character, as it will help with Intimidation checks. | |
| The most important cleric cantrip, which improves various ability rolls, works on yourself and party members. |
Deity
Feel free to pick any; my recommendation is Kelemvor.
Subclass
| Overview | |
|---|---|
| Features | |
| Martial Weapon Proficiency | Improves weapon options, especially when multiclassing. |
| Enables you to double-cast necromancy cantrips. This gives a significant damage boost in the early game, compared to other clerics. | |
Cantrips - Death Domain Subclass
As we will take the core cantrips from the Wizard class later on, I recommend taking the one which will not be used at all - ![]() Bursting Sinew, just so that you do not mix up cantrips between classes and different spellcasting modifiers.
Bursting Sinew, just so that you do not mix up cantrips between classes and different spellcasting modifiers.
Level 1 Prepared Spells
| Spells | Description |
|---|---|
| Use this spell to make the ally untouchable, for example, if they have low HP, or you want to divert the enemy's attention. | |
| A decent healing spell that you can have and cast when needed to help |
|
| Excellent spell to keep on hand. It can be useful when allies cast Cold or Lightning spells to double their damage. | |
| This is an excellent spell, however, I would only use it before combat and in the early game. It loses value later on, especially with some excellent items you can get in Act 1 like |
|
| Excellent early game spell, that can be used to improve defensive capabilities. I would not use it too much at higher levels as you get better use for |
Background
Backgrounds serve a few purposes:
- They give a role-playing option of your previous history, if you are into that.
- It gives skill proficiencies, meaning that you get an additional bonus when you roll that skill check in which you are proficient. This depends on your proficiency bonus, which increases as you level up.
Here are my recommendations based on this build
| Background | Skills | Description |
|---|---|---|
| Sage | Arcana History |
The best pick in terms of skill efficiency, as both of them are intelligence-based. |
| Noble | History Persuasion |
Although you will have low intelligence, the Persuasion check improvement is good. But it's an inferior option to Guild Artisan in my opinion. |
| Acolyte | Insight Religion |
Gives one intelligence-based skill |
Abilities
Now, let's take a look at the abilities of the Necromancer build. Correct allocation will allow you to maximise the early gameplay and get good modifier bonuses.
Here are some key points to know about ability points:
- They give "ability modifiers" that apply to various skill checks. For example, Charisma works on Intimidation and persuasion checks. Wisdom on Survival or Animal Handling, and so on.
- You get a higher ability modifier on even values - 10, 12, 14, etc. So keeping it on odd may be useless. However, there are various +1/2 modifiers in the game, specifically
 Auntie Ethel's Hair or Feats that help round this up.
 - Weapons can benefit from either Dexterity or Strength, depending on their type
- You also have a spellcasting modifier, which can be Wisdom, Charisma, or Intelligence, depending on your class.
The setup covers core aspects of the build. The main aspect is ![]() Auntie Ethel's Hair, which is taken for +1 Intelligence, to round it up to 18.
Auntie Ethel's Hair, which is taken for +1 Intelligence, to round it up to 18.
The setup does not use the ![]() Auntie Ethel's Hair; the other aspects remain the same as for any other caster build.
Auntie Ethel's Hair; the other aspects remain the same as for any other caster build.
Skill Proficiencies
Overall, skill selection should be influenced by your role-playing and background decisions. However, you generally still want options that offer the best benefits. I recommend picking skills for which you have a high ability modifier or those that are useful in general:
- History
- Religion
Act 1 - Levels 2-6 - Wilderness
By this time, you should have landed on the ![]() Ravaged beach already and started exploring the initial area. You might need 1 additional encounter if you did not obtain enough XP in the Nautiloid.
Ravaged beach already and started exploring the initial area. You might need 1 additional encounter if you did not obtain enough XP in the Nautiloid.
Leveling Progression
Level 2 - Multiclass into Wizard Lv 1
Right from the get-go, we multiclass into Wizard. This will allow you to enjoy the Death Cleric feature ![]() Reaper on wizard necrotic cantrips. The result is very high damage in the early game:
Reaper on wizard necrotic cantrips. The result is very high damage in the early game:
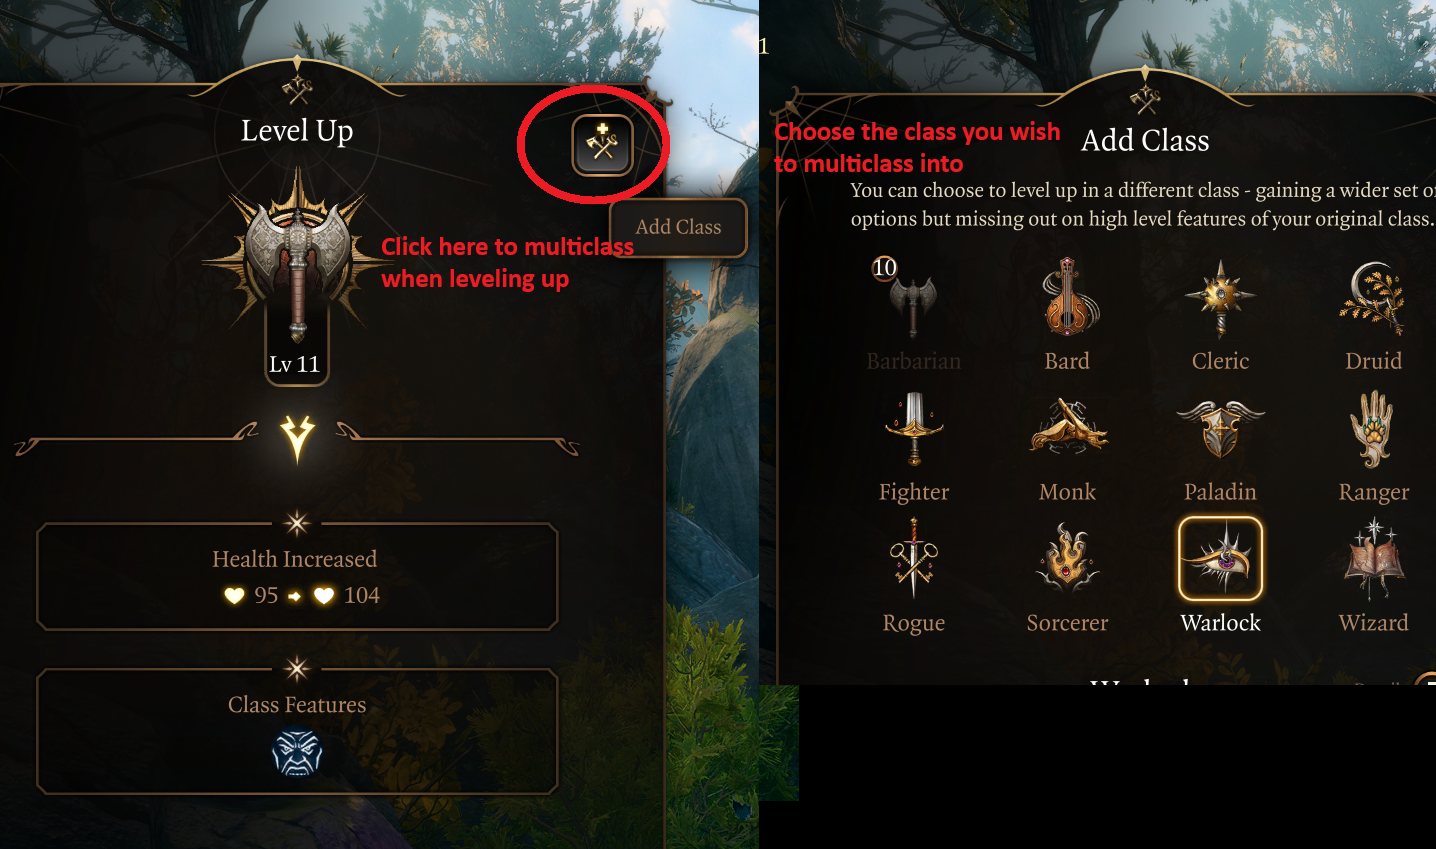
With the class, choose Wizard:
| Overview | |
|---|---|
 Wizard Wizard |
|
| Features | |
| Provides a way to restore spell slots with Arcane Recovery Charges. | |
| Spell Slots |
These can be used to cast spells and are restored each long rest. |
Now here are the selections for the first level:
| Selection | Description |
|---|---|
| Cantrips: |
The goal is to get necromancy cantrips, as they will work well with |
Spells:
|
So Wizard gets to choose plenty of spells, but they are only added to the spellbook, which later need to be prepared. Overall, all of these serve different situations. |
| Prepare Spells: 4 spells | Prepare 4 of your preferred spells that you have learnt |
Spell Scribing and Preparing
This is probably the most important mechanic that you should know about the wizard, so I recommend reading through this section
Wizard is the only class in the game that can learn spells from scrolls. This means that even if you don't choose something through leveling, you can still get it. This consumes a scroll and some additional gold. As a result, the spell is added to the spellbook:
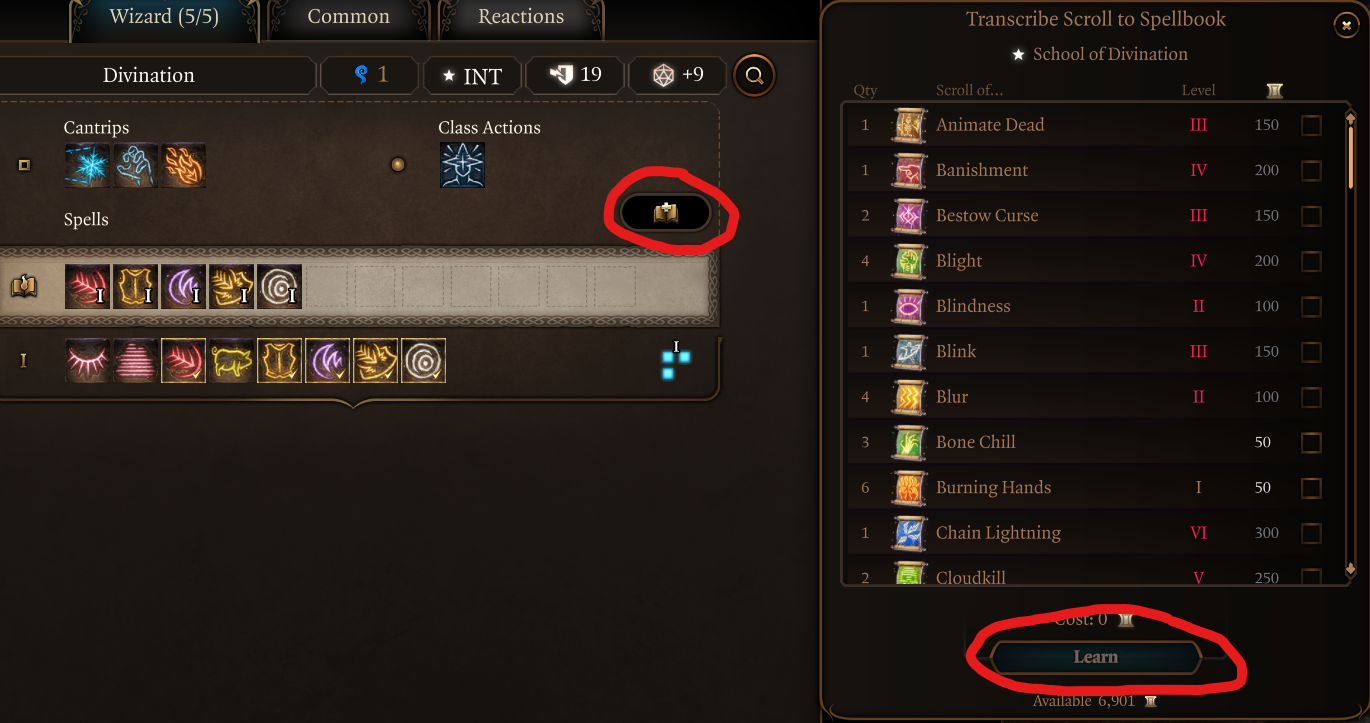
You can only learn spells that you have spellslot access to. So, for example, with a Level 3 wizard, you can scribe up to Level 2 spells. With 3 levels of Wizard + 2 levels of cleric, you can scribe 3rd level spells.
Does this mean the Wizard is the ultimate caster pick? Not really, you can still use a limited amount of spells, and most of them are useful situationally. Moreover, spells learned via Spell Scribing will use Intelligence, and many builds have really low ability scores on this one.
The second stage, after you learn or scribe spells, is that you can then "prepare" them. This means that you can have a limited number of spells active at a time.
This is a good thing, as you can change them based on the situation outside of combat. For example, you will be fighting enemies that are weak to Fire. Just add ![]() Fireball or
Fireball or ![]() Wall of Fire. Fighting a large group of enemies, maybe include
Wall of Fire. Fighting a large group of enemies, maybe include ![]() Glyph of Warding or
Glyph of Warding or ![]() Confusion to disable them.
Confusion to disable them.
With this in mind, I will now give a spell recommendation list each time a new spell slot is unlocked. So caster levels 3, 5, 7, etc.
Learning how to use Minor Illusion
I mentioned that ![]() Minor Illusion can be one of the strongest spells in the game. I think it is intended more for those who really want to break the game's action economy or do runs with limitations. So here's why it is so good:
Minor Illusion can be one of the strongest spells in the game. I think it is intended more for those who really want to break the game's action economy or do runs with limitations. So here's why it is so good:
- It does not break Invisibility or stealth (unless you get seen).
- Enemies, when not in combat, will chase the illusion, meaning they will change their vision direction.
- On most occasions, they will come closer to investigate the illusion.
This creates various opportunities like landing a powerful Area of Effect spell from a caster or scrolls or hitting with wide attacks, even before combat starts. You can also activate ![]() Invisibility on yourself and cast
Invisibility on yourself and cast ![]() Minor Illusion without breaking it.
Minor Illusion without breaking it.
Picking up Dead Bodies
As a necromancer, you will really like dead people a lot. The spells in the first levels can be easily cast using spell slots. The problem arises later on, once you get ![]() Animate Dead and want to use various zombies and skeletons - each of them will require a dead body.
Animate Dead and want to use various zombies and skeletons - each of them will require a dead body.
You might encounter a problem where the body weighs too much. What to do then? Either have a companion with high strength, equip ![]() Club of Hill Giant Strength, or drinkthe
Club of Hill Giant Strength, or drinkthe ![]() Elixir of Hill Giant Strength, which I will cover next
Elixir of Hill Giant Strength, which I will cover next
Good thing, this game allows you to pick up these and stash them in your storage chest (they weigh a lot). So once you see a dead body, and you have looted it, right-click on it, and pick it up
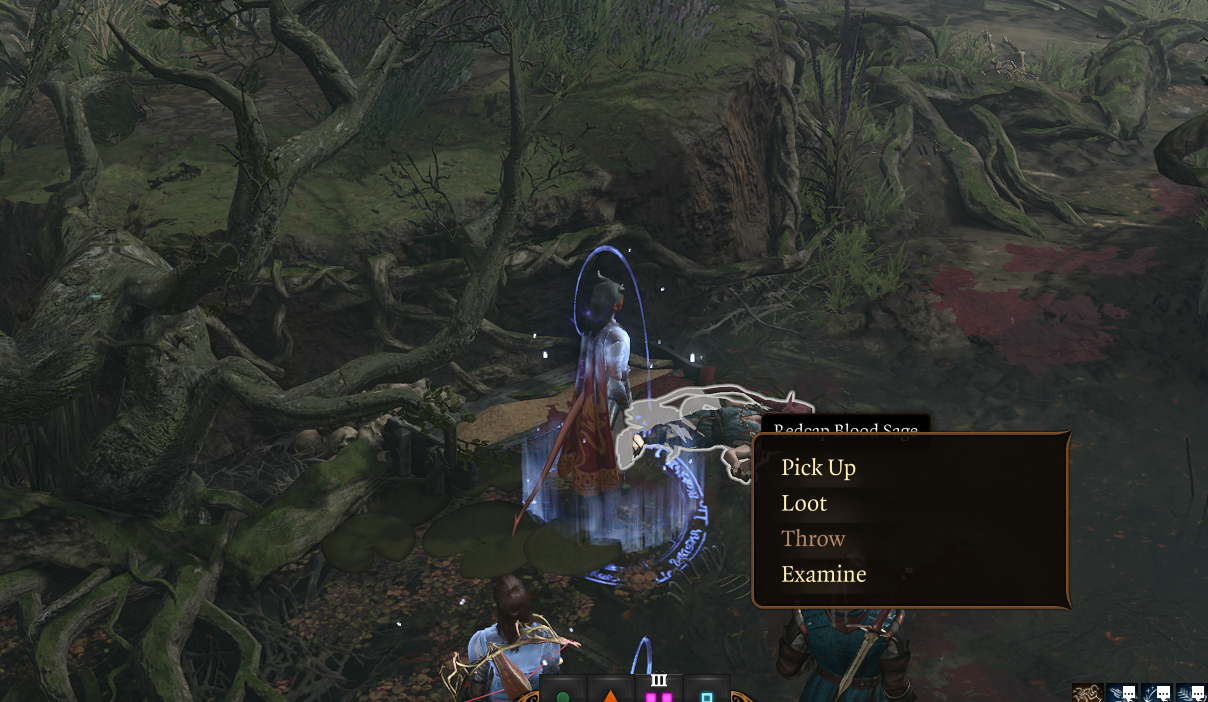
They weigh a lot so instantly transport them to your storage chest:
- Go to camp
- Store in the
 Traveller's Chest
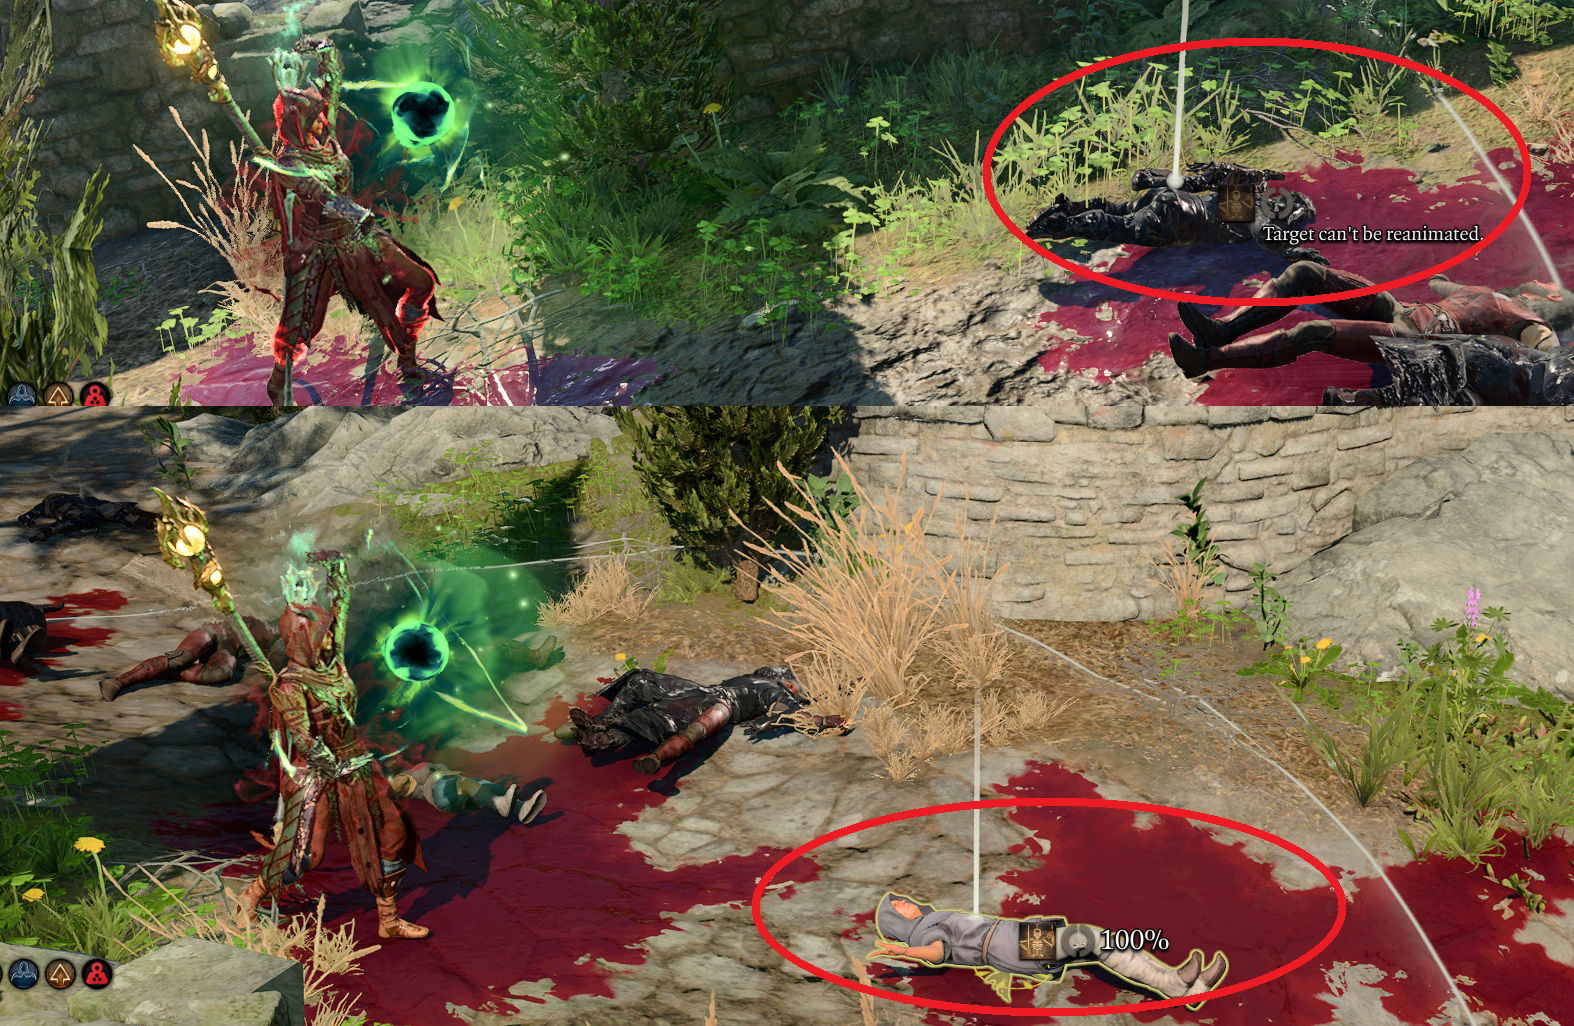
There is a caveat. If the body is burned or killed via necrotic damage, you will not be able to resurrect the undead from it. Try to pick up "clean bodies" (as crazy as it sounds)
Stacking on Strength Elixirs
The ![]() Elixir of Hill Giant Strength can serve you extremely well, not just for carrying bodies but also later on, empowering your undead buddies summoned with
Elixir of Hill Giant Strength can serve you extremely well, not just for carrying bodies but also later on, empowering your undead buddies summoned with ![]() Animate Dead. These summons can drink the potions (When they are dropped on the ground), to have their strength value increased, making them much stronger.
Animate Dead. These summons can drink the potions (When they are dropped on the ground), to have their strength value increased, making them much stronger.
I recommend checking the Strength Elixir farming guide on how to stock up on these really easily, as there is a perfect spot in ![]() Druid's Grove in Act 1 for that.
Druid's Grove in Act 1 for that.
Level 3 - Wizard Lv 2
Now here are the choices:
| Selection | Description |
|---|---|
| Subclass: Necromancy | For now, you only get the |
| Spells: any spells | Pick two additional spells that will be added to your spellbook. I would recommend utility ones - |
Recommended Level 2 spells for Wizard Scribing and learning
Now you get access to level 2 spell slots, meaning that you will be able to learn new spells via scribing and consuming scrolls. Moreover, you will still be able to learn spells via the levelling screen. So I will just provide a list of generally good level 2 spells that I think you should learn in one of the two ways, I covered.
Necro Theme spells:
| Spell | Description |
|---|---|
| A very powerful spell, that greatly diminishes enemy combat capacity without using your |
Additional Spells
| Spell | Description |
|---|---|
| Excellent spell, that hits two times (on cast and on enemy turn). There are multiple early game encounters where you can hit grouped enemies for heavy damage. | |
| Extremely valuable spell to have on hand. Gives an easy way to move around the battlefield, to reach an enemy or escape. | |
| Excellent early game control spell that can give an easy |
|
| Very powerful spell that can paralyse an enemy and force critical hits on them. | |
| A very powerful spell that can be combined with |
Level 4 - Wizard Lv 3
| Selection | Description |
|---|---|
| Spells: choose 2 spells | Add any of the recommended level 2 spells. |
Level 5 - Wizard Lv 4
Level 3 spells are unlocked
| Selection | Description |
|---|---|
| Cantrips: choose any | You have various options here to select from:
|
| Spells: 2 spells | Pick any 2 spells that you think might be relevant for your setup |
Feat:
|
My recommendation would be to go for |
Recommended Level 3 spells for Wizard Scribing and learning
Now you get access to level 3 spell slots, meaning that you will be able to learn new spells via scribing and consuming scrolls. Moreover, you will still be able to learn spells via the levelling screen.
Necro Theme spells:
| Spell | Description |
|---|---|
| This will be your bread and butter spell throughout the game. It will enable you to summon undead that will help in battle. I will give a section on the best uses of them. | |
| Overall, the spell is nothing fancy, but you can activate the |
|
| It's a nice flavourful spell. I would not say it is mandatory to use it. But later on, you will get |
Additional Spells
| Spell | Description |
|---|---|
| A versatile spell that can apply different elemental damage. The main problem is that its range is somewhat short. |
|
| The spell is generally overlooked cause it doesn't deal any damage. But do not be fooled, it instantly |
|
| On one hand, this is a very powerful spell, on the other hand, it does have problems, like using |
|
| Another powerful control spell that is especially effective against foes that use weapons. This leaves them outright defenceless and makes them flee. | |
| One of the strongest control spells in the game. Sadly, it does target allies, but if enemies are grouped together it can give an easy win. | |
| A very powerful offensive spell. If you have another caster that can apply |
Summoning and using Undead
So your priority is to unlock ![]() Animate Dead, get a scroll of
Animate Dead, get a scroll of ![]() Scroll of Animate Dead and scribe the spell. Now you can start using those dead bodies that you were saving and summon your first undead.
Scroll of Animate Dead and scribe the spell. Now you can start using those dead bodies that you were saving and summon your first undead.
You will have to do this after each long rest, which can be somewhat irritating. You will also need to continue picking up bodies - the number of dead you can raise will increase with each upcast level.
- The summoned undead can drink your
 Elixir of Hill Giant Strength. Just drop the item on the ground, change to the zombie, and right-click on the elixir to drink it.
 - Skeletons can use coatings like
 Drow Poison. Similar to the elixirs, drop them on the ground and use the skelly to consume it.
 - Skeletons can also be empowered using
 Mage Armour spell for additional Armour Class.
Level 6 - Wizard Lv 5
Level Selection:
| Selection | Description |
|---|---|
| Spells: |
Be sure to get |
Gear Recommendations
Here are some recommendations on how to follow the gear picks:
- I recommend checking the Item Checklists or Interactive Map, depending on which is easier to use for you. This will help you track which items and when you should pick them.
- Gear for each slot is listed Best -> Worst. Generally, this means that you would start with lower gear recommendations (as they are available earlier) and upgrade to higher ones. However, in some cases, the best items can be obtained early, like
 Titanstring Bow, and some others.
 - I mention Stat Sticks in caster and ranged builds. These are items that you do not use directly (like
 Club of Hill Giant Strength,
  Knife of the Undermountain King, The Dead Shot, etc.), but their bonuses still apply to other weapon attacks or actions.
 - BiS - means best in slot item
- If an item is taken by another character, use the one with lower priority or even those from previous acts. If you want to have the best items for all builds, this will require planning, which is not for everyone.
| Slot | Item | Description |
|---|---|---|
 Melee (Main-Handed) Melee (Main-Handed) |
It can be used to apply damage and attack roll buffs in various combat encounters. Wearing it together with other staves will require |
|
| When used with |
||
| Melee (Off-Handed) |
Gives +1 to spell attack rolls or DC. Excellent addition to improve spellcasting success. | |
| Can be used to carry dead bodies to the stash. This means you will not need to drink the |
||
 Ranged Ranged |
The higher initiative bonus will allow you to start your turn earlier. | |
| Equipping two of these will allow you to attack with off-hand, which uses a bonus action. This can give a slight bonus damage. | ||
| It provides a substantial defensive boost by disabling critical hits. | ||
| Gives a bonus to saving throws, easily accessible early in the game. | ||
 Head Head |
Increases Spell Save DC, while obscured. Very easy to activate, use Shift to see the sun icon, it should be half or fully empty. | |
| The best defensive option in Act 1. Works well with |
||
 Cloak Cloak |
- | Nothing relevant for the build |
 Armor Armor |
The best spellcaster robe in Act 1. Works well with |
|
| A powerful robe option, but it requires an evil decision against Karlach. | ||
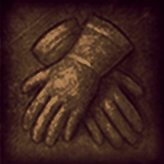 Gloves Gloves |
Pick up these gloves as they will be useful for improving your undead minion survivability. I found this choice a good option for Act 1 and Act 2. Later on, there are better options. | |
| Gives whooping +2 Armour Class. This is the perfect option, especially if you do not have shield proficiency. | ||
| Defensive gloves that allow you to negate enemy ranged attacks. | ||
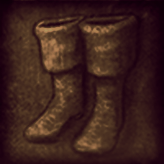 Boots Boots |
If you are not running a cleric in the party, I recommend these boots. | |
| One of the best boots, giving a total advantage for movement on difficult surfaces. It also gives |
||
| Can help with avoiding opportunity attacks when enemies are close. | ||
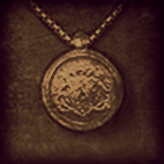 Amulet Amulet |
Excellent amulet which improves |
|
| A good amulet that allows restoring level 3 or lower spell slots. | ||
| A good amulet to obtain mobility via Misty Step. | ||
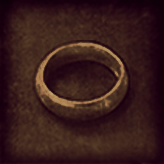 Rings Rings |
Gives defensive bonuses to Armour Class and Saving Throws. | |
| Can be activated using |
||
| Allows Casting invisibility for free once per long rest. |
Gameplay and mechanics
Use offensive spells from the Wizard spell list
One of the nuances with this build is that you have two classes which give access to spells. This creates a minor but impactful problem when not being careful. Wizard uses Intelligence as spellcasting modifier and Cleric wisdom. Cleric does have plenty of spells and features that benefit you even with low wisdom, so that's why it was selected.
So when using control or offensive spells, use the ones from the Wizard spell list. This way, you avoid lowering your success chance unnecessarily. Of course, in the late game, with all the Spell Save DC gear, this might not matter.
Getting Necromancy of Thay
Later in Act 3, you will be able to obtain a pretty nice, thematic spell - ![]() Danse Macabre, which will give free undead minions. They are not that powerful and cannot be controlled by the player. However, to get these, you need to do some steps in Act 1.
Danse Macabre, which will give free undead minions. They are not that powerful and cannot be controlled by the player. However, to get these, you need to do some steps in Act 1.
- Get the Necromancy of Thay from the Apothecary's Cellar
- Pick up Dark Amethyst near the Phase Spirder Matriarch (Lv. 5) boss. Be careful, this is a somewhat difficult encounter.
With these items picked up, you can interact with the book.
Obtaining a Second Marriage
After you take care of boss in ![]() Ancient Abode, you will be able to enter the room which has
Ancient Abode, you will be able to enter the room which has ![]() Bitter Divorce. With it you can now leave the area via
Bitter Divorce. With it you can now leave the area via ![]() Mushroom Circle. This is an important item as it will allow you to resolve one of the quests related to Mayrina.
Mushroom Circle. This is an important item as it will allow you to resolve one of the quests related to Mayrina.
Now, when talking with her, tell her of the wand, resurrect the undead, and keep the wand. That's it - you now have a nice summon on your side. It's not very powerful, but it can take in a hit or two from enemies.
The item changes to Second Marriage from Bitter Divorce if you decide to keep it.
The recommended combat loop
- As you have Reaper feature, use
 Bone Chill or Toll the Dead to hit two targets and inflict serious damage.
  Magic Missile is one of the best picks for early games. You get a 100% hit chance and get bonus damage via
  The Spellsparkler +
  Psychic Spark.
 Shield is perfect for avoiding early-game wipes. Just make sure to have a free level 1 spell slot to activate it.
- Cast Mage Armour to ensure you have a good Armour Class. If possible, wear a shield.
- Once you unlock level 2 spell slots,
 Cloud of Daggers can be used to hit enemies that are stacked together. There are a few encounters where you can hit up to 3 enemies in one turn.
  Minor Illusion can be used to lure enemies into one place before combat. This works extremely well with Cloud of Daggers and other area-of-effect spells.
From level 5:
- Use
 Animate Dead to summon zombies. They are better in this stage of the game. Force them to drink Elixir of Hill Giant Strength from the ground to increase their strength.
 - Use
 Bless or
  Phalar Aluve: Melody to buff the summons for more damage or a higher hit chance.
 - Use various control spells like
 Blindness, Hold Person, Glyph of Warding: Sleep, etc., to weaken enemies and give eaan sy
  Advantage on attack rolls for your undead.
 - Once you get
 Lightning Bolt, use it together with Wet status (
 Water or Create Water) to inflict huge amounts of damage.
Act 1.5 - Level 7 - Rosymorn Monastery
I will assume that you have reached level 7 as you reach the ![]() Rosymorn Monastery Trail. It has plenty of stuff to explore and some important story bits. The whole map also contains significant gear that you should be on the lookout for.
Rosymorn Monastery Trail. It has plenty of stuff to explore and some important story bits. The whole map also contains significant gear that you should be on the lookout for.
Leveling Progression
Level 7 - Wizard Lv 6
You get the most important necromancer features, which give significant improvements for your undead:
| Features | Description |
|---|---|
| All of these nice features will give a significant boost to your capabilities as the summoner of the dead. Additional undead will make your combat potential stronger, while the boost to the stats is a nice addition. | |
Level Selection:
| Selection | Description |
|---|---|
| Spells: any 2 spells | Check the previous level 3 spell list, of which ones to pick |
Level 4 Spells
Recommended Level 4 spells for Wizard Scribing and learning
Now you get access to level 4 spell slots, meaning that you will be able to learn new spells via scribing and consuming scrolls. Moreover, you will still be able to learn spells via the levelling screen.
Necro Theme spells:
| Spell | Description |
|---|---|
| This is the only necro spell that you get at this stage. It's pretty good with respectable necrotic damage. As it hits a constitution saving throw, try to target enemies with low CON. |
Other spells:
| Spell | Description |
|---|---|
| This spell is a hidden gem, especially if you have a few ranged party members. If enemies fail a saving throw, they receive bludgeoning damage and are unable to move. Moreover, your allies get an |
|
| One of my favourite control spells. Covers a decent area, avoids allies, and makes enemies skip their turns, attack allies, or greatly diminishes their combat potential. | |
| Want more summons? Well, here you go. I do not include this in "general build setup" as these are not necrotic summons, but feel free to use them. | |
| Really great area of effect spell that creates ice surfaces. It also does decent damage both of bludgeoning and cold. | |
| Great area spell, that can cover a choke point, for enemies to slowly burn themselves up |
Skeletons
So with a level 4 spellslot and upcasting ![]() Animate Dead +
Animate Dead + ![]() Undead Thralls: Additional Undead, you can now summon 4 skeletons. This is a significant army, and they can be pretty good at combat, especially if you give them
Undead Thralls: Additional Undead, you can now summon 4 skeletons. This is a significant army, and they can be pretty good at combat, especially if you give them ![]() Bless.
Bless.
However, you can take a step further and enhance their combat potential with ![]() Evard's Black Tentacles. These will slow down enemies and make it very easy for skellies to hit them (as they will have
Evard's Black Tentacles. These will slow down enemies and make it very easy for skellies to hit them (as they will have ![]() Advantage). This creates a perfect synergy between your spells and undead summons.
Advantage). This creates a perfect synergy between your spells and undead summons.
Gear Recommendations
There are a couple of items that I would take a look here; otherwise, the previous Act ones are already enough
| Slot | Item | Description |
|---|---|---|
| Gloves |
Pretty powerful gloves if you decide to use them. They can help stack |
|
| Amulet |
Can be used to give enemies vulnerability against slashing or piercing damage. | |
| Can help you stand up in case you are downed. |
Gameplay and mechanics
The recommended combat loop
Overall, the gameplay stays the same as in Act 1. You do unlock new spells, which give you these options:
- You can now summon more undead via upcasting Animate Dead.
- Skellies also become a powerful tool if you add
 Evard's Black Tentacles - enemies are sitting ducks for ranged attackers. Moreover, you can use various coatings for them to consume form the ground to give a decent boost via various effects.
  Confusion can be great for disabling a group of enemies, as is
  Ice Storm, which creates an icy area where enemies might fall off.
Act 2 - Level 8-10 - Shadow Lands
Depending on your choices, you might even reach Act 2 at level 7, so check the previous recommendations. In most cases, people will enter Act 2 via ![]() Path to Rosymorn Monastery Trail
Path to Rosymorn Monastery Trail
Leveling Progression
Level 8 - back to Cleric Lv 2
With the Wizard levels covered, now we can jump back into Cleric and gain additional things to empower the build further.
| Feature | Description |
|---|---|
| Excellent against undead enemies, making them run away. | |
| A nice addition of damage, especially if you land a melee attack on Attack of Opportunity. It also synergises well with |
Level 9 - Cleric Lv 3
This now unlocks level 2 spells from cleric, and it's one of the reasons why we went for this multiclass
| Selection | Description |
|---|---|
| Prepare Spells: |
Make sure to add |
Recommended Level 5 spells for Wizard Scribing and learning
Now you get access to level 4 spell slots, meaning that you will be able to learn new spells via scribing and consuming scrolls. Moreover, you will still be able to learn spells via the levelling screen.
| Spell | Description |
|---|---|
| Very powerful spell, that works great against multiple strong late-game enemies. This will be an easy way to guarantee critical hits for your undead horde. | |
| As undead are immune to poison, this spell can create a powerful and deadly field that chips away at the enemy's health points. Just check if they are not immune to poison. | |
| Another summon source, mentioning them, in case you would want to have more. | |
| A powerful cold spell can be used on enemies that are |
Level 10 - Cleric Lv 4
| Selection | Description |
|---|---|
| Cantrips: any | Feel free to take any cantrips |
Feat options:
|
Make sure to have |
Gear Recommendations
Overall, you continue to use standard caster gear, improve your Spell Save DC and get other useful bonuses
| Slot | Item | Description |
|---|---|---|
| Melee (One-Handed) |
- | Continue using the Act 1 weapon setup |
| Ranged |
Gives an additional cast of level 3 |
|
| Still the best bow, as initiative plays a vital role for first-mover |
||
| Can be useful to precast |
||
| The best shield for casters as it gives +1 Spell Save DC, increasing spell success. | ||
| What makes this shield amazing is that by wearing it you will be going first most of the time during encounters. | ||
| Head |
Pretty good headwear with +1 to Spell Save DC. | |
| This is an alternative to |
||
| Cloak |
Improves survivability and Saving Throw success. You want to equip this cloak to maintain that good Armour Class. | |
| Armor |
It does require an evil decision, but it comes with nice bonuses | |
| Alternative to |
||
| Gloves |
- | Continue using the ones from the previous Acts. |
| Boots |
They are still the best boots for applying to various conditions. | |
| Slightly improves Armour Class, resulting in higher survivability. | ||
| Amulet |
Gives a way to apply |
|
| - | Previous Act Amulets. | |
| An amazing amulet that proves valuable in the late game for restoring level 5 and 6 spell slots. Can be worn off after use. | ||
| Rings |
Allows to weaken foes via |
|
| Gives a slight damage boost on various damage sources. | ||
| It is fairly easy to cast any |
Gameplay and mechanics
This is an important section, as the build gains major changes in how it plays, thanks to various unlocked items.
The recommended combat loop
With access to Level 5 spells, the build now unlocks better undead.
- Upcast Animate Dead to summon Ghouls/Flying Ghouls. They are more powerful and can deal significant damage against enemies that are Sleeping/Prone.
- This is where Glyph of Warding: Sleep becomes an excellent spell, as it will force enemies to skip turns, but also make your Ghouls deal more serious damage with
 Devour.
 - For now, Prone is best activated by stacking
 Reverberation from either your spells or with another cleric, who uses revorb setup. This also enables Devour.
 - When you can utilise
 Cloudkill for significant poison damage. The good thing is that your Ghouls are immune to this, so they can go inside the cloud and fight.
 - If you have a high activation chance, use Hold Monster/Hold Person against the target. The guaranteed critical hits make your undead hit much harder.
Act 3 - Level 11-12 - Rivington and Lower City
You are close to reaching the game finale, or so you think. The last part of the game is huge and can be both intimidating and overwhelming.
Here are some recommendations from me:
- You don't need to do all the side quests here; they can take up to 40 hours or more, depending on what you decide to do
- Leave some stuff for other runs. As you reach the maximum level, the game might become less satisfying. Leave some of the stuff for your next playthroughs, to find novelty and discovery.
- There is a lot of good gear that improves the build, so be sure to get it.
Leveling Progression
Level 11 - Cleric Lv 5
Now, level 3 spells from the cleric are unlocked. These are nothing fancy; only one spell stands out, which might be good if you decide to use the relevant items.
| Feature | Description |
|---|---|
| When you use |
And the main selection:
| Selection | Description |
|---|---|
| Prepare Spell: |
You can add this spell, as it can be a pretty powerful option with necrotic setup + |
Recommended Level 6 spells for Wizard Scribing and learning
Now you get access to level 4 spell slots, meaning that you will be able to learn new spells via scribing and consuming scrolls. Moreover, you will still be able to learn spells via the levelling screen.
Necro theme:
| Spell | Description |
|---|---|
| Enjoyable spell to use, that can hit multiple targets in a wide area with necrotic damage. | |
| This is a very fun spell to use, as it gives easy access to |
Other spells:
| Spell | Description |
|---|---|
| I always recommend having this spell on hand by someone in the party, or at least having a |
|
| One of the strongest spells in the game in its raw power. Definitely use it against |
Level 12 - Cleric Lv 6
This is the last level for the build, and you do get some sweet features:
| Features | Description |
|---|---|
| Enables you to ignore necrotic resistance. Overall, this is a decent buff that helps against a few specific enemies in Act 3. |
That's it! The build is done with full progression and various recommendations.
Gear Recommendations
This will unlock a few better items, but overall, the core of the setup will not change much.
Necrotic Spirit Guardians setup
If you are not running a cleric or another party member that uses these two items - ![]() Luminous Armour and
Luminous Armour and ![]() Callous Glow Ring, you can create a pretty powerful setup that debuffs enemies and makes it easy for your summons to help.
Callous Glow Ring, you can create a pretty powerful setup that debuffs enemies and makes it easy for your summons to help.
When using ![]() Spirit Guardians necrotic version, generally stuff like
Spirit Guardians necrotic version, generally stuff like ![]() Radiating Orb or
Radiating Orb or ![]() Reverberation is almost impossible to activate. But everything changes once you equip
Reverberation is almost impossible to activate. But everything changes once you equip ![]() Callous Glow Ring, as this gives an easy radiant damage source. Of course,
Callous Glow Ring, as this gives an easy radiant damage source. Of course, ![]() Spirit Guardians uses Wisdom as spellcasting stat, but even then, your goal is not damage but just applying debuffs.
Spirit Guardians uses Wisdom as spellcasting stat, but even then, your goal is not damage but just applying debuffs.
So if you want to try out this setup here is what you can equip:
| Slot | Item | Description |
|---|---|---|
| Head |
Pretty neat helmet, that gives a source of |
|
| This could be used to set Intelligence to 17, which would then enable 16 Wisdom, for a higher |
||
| Armor |
With the |
|
| Gloves |
Will give stacks of |
|
| Rings |
Use this together with necrotic |
I am not saying this is the best setup, as I personally prefer being a base spellcaster with necrotic offensive spells, which also helps your undead. However, if you have these items available, feel free to try out this setup.
Standard Setup
| Slot | Item | Description |
|---|---|---|
| Melee (Main-Hand) |
The strongest spellcaster weapon in the game. It comes with |
|
| Very powerful weapon that continues to be relevant in Act 3, with the crazy amount of summons that you can get. Both the buffs from |
||
| Very good weapon with access to |
||
| Melee (Off-Hand) |
(BiS) |
The most necro weapon in the game. As you kill foes, you gain |
| A potent weapon that improves damage and attack rolls with each killed foe up to +3. | ||
| Ranged |
The bonus initiative is an excellent boost to go early in combat. If it is not a surprise round, it is almost guaranteed. | |
| Head |
Gives a whooping +2 Spell Save DC, which greatly improves your spell success chance. | |
| Pretty okay headwear that gives immunity to critical hits. | ||
| Cloak |
Improves Spell Save DC, a pretty straightforward item. | |
| Armor |
Light armour that gives |
|
| Boosts armour class, enables using |
||
| Gives bonuses to saving throws, making it easier to maintain spell concentration. | ||
| Gloves |
Both gloves come with +1 Spell Save DC. One caveat is that |
|
| Boots |
(BiS) |
Extremely powerful shoes, that can |
| Powerful boots, which give a source of |
||
| Amulet |
Simple and effective spellcaster amulet. However, I would prioritise this on the cleric due to its Channel Divinity bonus. | |
| In terms of offensive potential, this amulet is an excellent choice | ||
| Allows restoring any level of spell slot, which can be used for another spell or Sorcery points | ||
| Rings |
The only ring that provides +1 Spell Save DC (it's not listed) | |
| The ring gives access to |
||
| This ring can help with debuffing foes when you scroll cast, and they fail saving throws. |
Gameplay and mechanics
In general, Act 3 does not bring much in terms of how the gameplay changes. It's just optimisations to your gear and higher-level spell unlocks
Constantly Proning targets
Your ghouls shine when enemies are lying on the ground, either from ![]() Prone or from
Prone or from ![]() Sleeping. Act 3 gives access to very powerful boots -
Sleeping. Act 3 gives access to very powerful boots - ![]() Bonespike Boots. They have
Bonespike Boots. They have ![]() Brutal Leap action, which at first glance would not seem very special. However, it does use your Spell Save DC. So it means you have a very high chance of inflicting
Brutal Leap action, which at first glance would not seem very special. However, it does use your Spell Save DC. So it means you have a very high chance of inflicting ![]() Prone. Moreover, this effect is for 2 turns, so enemies still have to waste their movement speed to stand up.
Prone. Moreover, this effect is for 2 turns, so enemies still have to waste their movement speed to stand up.
Once they are on the ground, your summons have additional attack options like ![]() Devour and get an easy attack roll
Devour and get an easy attack roll ![]() Advantage.
Advantage.
Unlocking Danse Macabre
As we talked previously, in Act 1 you obtain the book - ![]() Necromancy of Thay. Well, in Act 3, you can read a special book found in
Necromancy of Thay. Well, in Act 3, you can read a special book found in ![]() Sorcerous Sundries called
Sorcerous Sundries called ![]() The Tharchiate Codex. Once you read it, you can now further open Necromancy of Thay and read the last page. This will reward the
The Tharchiate Codex. Once you read it, you can now further open Necromancy of Thay and read the last page. This will reward the ![]() Danse Macabre spell.
Danse Macabre spell.
Why is the spell special? Well, it isn't, but it's a nice addition for the Necromancer theme:
- The spell is free to cast
- You get 4 summons, which also benefit from Undead Thralls: Additional Undead and Undead Thralls: Better Summons
- They can deal decent damage, but also act as meat shields
- Sadly, you can't control them, so sometimes they will make suboptimal decisions.
Maximise the amount of the level 6 spell slots.
In the late game, you have multiple sources of level 6 spells from ![]() Aid to
Aid to ![]() Animate Dead and offensive spells like
Animate Dead and offensive spells like ![]() Circle of Death or
Circle of Death or ![]() Eyebite. Thankfully, you do have various ways to get plenty of level 6 spellslots:
Eyebite. Thankfully, you do have various ways to get plenty of level 6 spellslots:
 Arcane Battery from either
  Markoheshkir or
  Staff of Spell Power
 Spellcrux Amulet to restore a level 6 spell slot
 Consume Life Essence from the
  Staff of Cherished Necromancy for a free level 6 spell
As you see, you have plenty of ways to cast the most powerful spells in the game between each long rest.
The amount of summons
 Crypt Lord Ring - allows the use of
  Create Undead to summon a mummy
 Danse Macabre - 5 ghouls
- Animate Dead with its 4 flying ghouls
- Second Marriage - to summon Connor
This results in plenty of allies to have on your side (how effective they are will be based on your combat strategy). I also did not count elementals and other unique summons, as I don't think they fit thematically.
The recommended combat loop
As I mentioned, the combat loop stays more or less the same from the previous Act 2 (check that out if you missed it).
- Be sure to activate
 Kereska's Favour from Markoheshkir -
  Bolts of Doom or
  Bone-Shaking Thunder. These will give free spells to cast and additional improvements.
 - Use
 Bonespike Boots on every turn, you can use
  Brutal Leap to force enemies Prone. This is a huge enabler for your ghouls as they get an easy Advantage and can use Devour for a significant damage boost.
 - Try to kill an enemy either at the start or at the end of the encounter when using Staff of Cherished Necromancy. This will enable Consume Life Essence, giving a free spell cast.
- Utilise control spells that weaken enemies or enable your summons - Hold Person/Hold Monster,
 Eyebite, Confusion, Glyph of Warding: Sleep, etc.
 - If you decide to use the Necrotic Spirit Guardians setup, get close to enemies to debuff them with Reverberation and
 Radiating Orb
 - You can also get some
 Elixir of Cloud Giant Strength and use these to empower your undead with higher strength values.
  Phalar Aluve is still the top-tier weapon option, as it can empower undead with Phalar Aluve: Melody
- Overall, the goal is to weaken enemies so that your summons would have an easier way of hitting them.
Maximizing - Abilities, Illithid Powers, Consumables
Maximising Ability Scores
Now, as the build progression is covered, there are a few aspects and important decisions you will have to make throughout the game. These will decide your final score for abilities.
Intelligence
- 17 Intelligence - the base for character creation.
- Act 1 - Auntie Ethel's Hair - you will want to get +1 Intelligence if you pick this choice.
- Feat- Ability Improvement - +2 Intelligence.
- Act 3 - Mirror of Loss - pick +2 Intelligence.
These will allow you to reach 22 natural Intelligence, depending on the various choices. This results in a +6 spellcasting modifier and improved Spell Save DC.
Illithid Powers
This special mechanic in Baldur's Gate 3 allows you to consume tadpoles and unlock special Illithid Powers.
At first, you can only use the base powers. As you move to Act 3, you will be able to unlock the outer ring powers, also called Elite.
| Illithid Power | Type | Description |
|---|---|---|
| Base | Beneficial power to take as it does not have any costs, and provides only benefits on the first hits with attack rolls. | |
| Base | An easy way to ensure you land critical hits. | |
| Base | Can help to kill an enemy faster if it is left with a few HP. | |
| Base | A great way to weaponize your reaction before obtaining |
|
| Base | Excellent option for bonus temporary HP. It can also apply |
|
| Elite | Can be used to maximize the effectiveness of charisma-based skills, especially relevant to the main character. | |
| Elite | Very powerful spell that can be used to pull enemies together. You can then follow up with area-of-effect spells or attacks. In general, it is a very effective action in the hands of any character. | |
| Elite | Can be used to save yourself from a deadly spell. This is especially relevant as you will have a |
|
| Elite | Remove the cost of spell slots or charges. | |
| Elite | You can now use action and bonus action interchangeably, giving two full spell casts each turn. It's not as important for you, but it will help other casters in the group. | |
| Elite | Weakens enemies by reducing their Armour Class. Now it's easier to hit them. |
Potions, Elixirs and other Consumables
Let's take a look at what consumables you can use to further empower the build.
Potions
These are general consumables, and most of them are activated for a few turns. Potions are separate from Elixirs and can be active together.
| Consumable | Description |
|---|---|
| This is a very powerful potion. It gives an additional action point, which can be used to cast a spell or attack. The activation is generally by drinking using a bonus action. However, you can stack together with party members and make one member |
|
| It can be used in two ways - the first one is to enter combat with a |
|
| An easy way to get the |
|
| Gives |
Elixirs
Unfortunately, only one Elixir can be active at a time. However, the good thing is that they last until a long rest, making them very useful and economical.
Be sure to activate them before combat, as otherwise, you will need to use Bonus Action.
| Consumable | Description |
|---|---|
| The elixir gives an easy option to get an additional action point - just kill a foe. This can then be used to attack one more time or cast a full spell. | |
| Improves Spell Save DC, making it easier to land spells. | |
| Makes it easier to maintain spell Concentration | |
| For some encounters, you will want to go first. This elixir will ensure that it overcomes even |
Scrolls
This is one of the most overpowered mechanics in the game. At first, it might seem that you earn those old, boring spells that you can learn yourself. However, as you play more and more, and get higher-level spells, you can see - wait, I can save a spell slot casting this.
Yeah, and this is where their power comes. During the whole playthrough, you will probably collect a lot of these, so I recommend using them whenever you can.
Conclusion
Thank you for reading the Necromancer Build for Baldur's Gate 3. This build has been a feast, and I really enjoyed writing it. It offers both a powerful caster and a flavourful setup that you can use both in party play and solo. Glad you read it!
Cheers!
Credits
- Friendly Lich - the ultimate solo run player, with vast experience in the game. Shared insights and experiences of his Nercomancer build run.
- David - for review of the build and suggestions
- Captain_ET - sharing some draft ideas on how to approach the build
Like, Dislike, comment, or share!
Join the Discussion
0 commentsNo comments yet.
Be the first one to leave a comment!