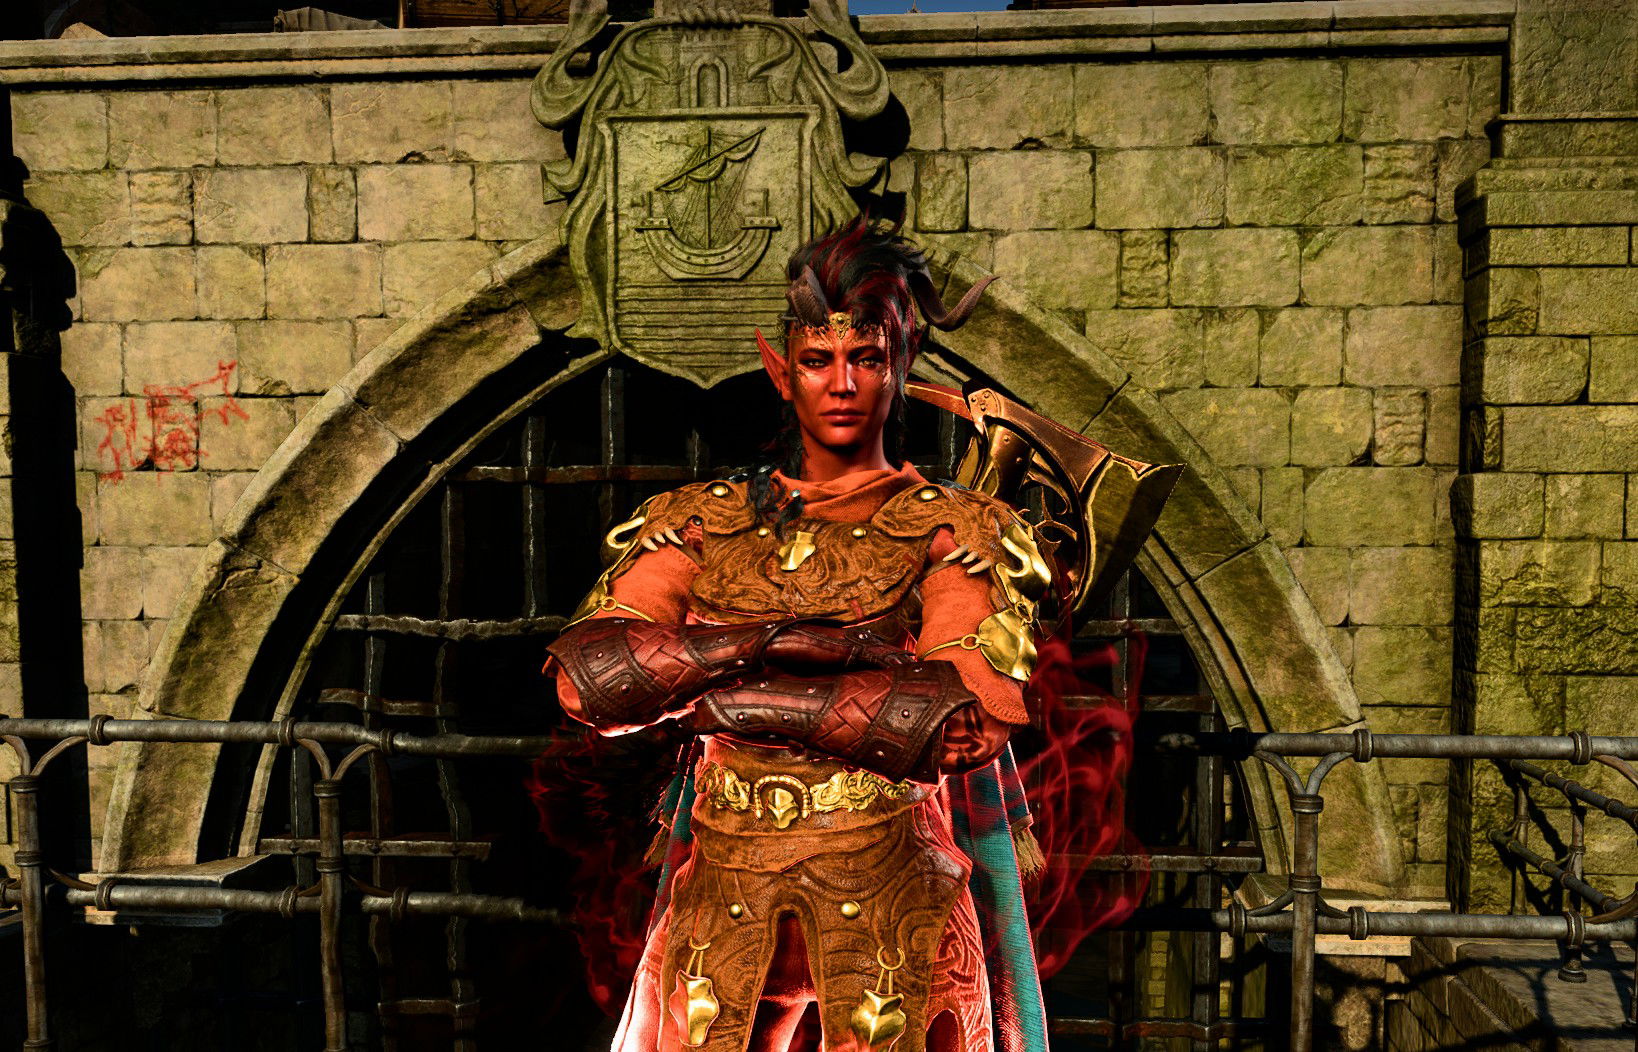
Karlach Build - Avernus Avenger - Baldur's Gate 3 (BG3)
Contents
- Karlach Build - The Avernus Avenger
- Synergy with other builds
- Leveling Overview
- Starting the Game - Level 1
- Leveling Progression - Levels 2-12
- Maximizing Ability Scores
- Potions, Elixirs, and Consumables
- Illithid Powers
- Equipment Recommendations
- Build Mechanics and Interactions
- Build Combat loop
- Conclusion
Karlach Build - The Avernus Avenger
Karlach is probably one of the most favoured companions in the game. Although at first she presents herself as a cruel and hotheaded fighter, getting to know her reveals a softer side. The build aims to cover and use her backstory to create a functional and truly strong build. You can freely use this one even on the hardest difficulties
The main choices I made here are to pick these classes and subclasses:
- Rogue with Thief subclass - represents her early year,s where she did odd jobs to help her family. This does not mean that she was a pickpocket, but being versatile in various things helped her earn
 Fast Hands. The additional bonus action will be extremely useful for
  Frenzy. Otherwise, Berserker (her default subclass) becomes irrelevant.
 - Fighter with Battlemaster - shows her experience of serving Gortash as a bodyguard, but also general experience in combat situations. This will give
 Action Surge and other goodies to greatly improve combat capacity.
 - The Barbarian Berserker - is there for when she was in Avernus with her Infernal Engine. It somewhat represents the insanity of prolonged war and combat, and what she had to go through to live with this mechanical thing in her body.
 Frenzy will be the core feature
So this allows us to build not just lore-friendly Karlach, but also an effective frontliner, with lots of tools under her belt. This means you will constantly unlock new features as you progress through the game.
I would say this build is aimed more at those who play the game for the first time and want a simpler experience without difficult mechanics.
I recommend checking the mechanics section to better understand the intricacies and nuances the build has, and better understand how to use it well.
So let's jump into the build!
Class Contribution
Here are what contributions and benefits you get from the class picks:
5 Barbarian Berserker
 Rage and its upgrade
  Frenzy, for resistances, slight damage boost and a few other minor improvements.
 Unarmoured Defence - gives an armour class boost based on Constitution modifier, while not wearing armour.
 Reckless Attack - both a reaction and action, giving an easy
  Advantage on attack rolls, greatly improving the early game combat capabilities
 Danger Sense - is a cool free upgrade that helps resist a lot of spells, especially those targeting ground effects.
- Unlocks a bonus action attack -
 Frenzied Strike. Sadly, it inflicts
  Frenzied Strain on each hit, and competes with
  Great Weapon Master: Bonus Attack. Still, it's a good option to have as a fallback for additional attacks per turn.
  Extra Attack for one more hit using the main action point.
 Fast Movement is a totally free upgrade, giving a significant mobility improvement.
4 Rogue Thief
- Use a
 Sneak Attack (Melee) for a slight damage boost, once per turn.
 - Additional
 Expertise, which will be used to improve Sleight of Hand.
 - Special bonus action use -
 Cunning Action: Dash,
  Cunning Action: Hide, which help with engaging and running away for pickpocketing.
  Fast Hands is a very important feature, giving an additional bonus action. This can also be used to leave combat, improve mobility, or attack one more time.
3 Fighter Battlemaster
 Second Wind for a slight HP restoration, although most of the time it is more economical to use healing potions.
- Fighting style, to give a slight stat boost.
 Action Surge for an additional full action point, for a larger number of attacks.
- Access to Battlemaster manoeuvres, my favourite ones -
 Precision Attack,
  Disarming Attack (Melee) and
  Pushing Attack. There are many others to choose from, but these are my top 3.
Build Variations
Here are some variations that work similarly and utilise the same classes at their core.
| Setup | Description |
|---|---|
Throwzerker:
|
The thrower variant also fits her. It's also technically stronger in the early game, and continues to be effective most of the game. |
Synergy with other builds
As the build takes the role of vanilla frontline combatant, it has a few niches where it can fit very well. Otherwise, I would not worry too much about how it is used:
Piercing Setup
A powerful melee weapon option for the late game, the piercing damage type, namely, ![]() Nyrulna,
Nyrulna, ![]() Shar's Spear of Evening, etc. They can have their damage doubled in Act 3 thanks to the
Shar's Spear of Evening, etc. They can have their damage doubled in Act 3 thanks to the ![]() Bhaalist Armour and its special passive effect -
Bhaalist Armour and its special passive effect - ![]() Aura Of Murder. With this in mind, you can build your party around to significantly increase the damage output and trivialise many of the game fights
Aura Of Murder. With this in mind, you can build your party around to significantly increase the damage output and trivialise many of the game fights
- Melee martials with piercing weapons - Bardadin, Battle Master, Sorcadin, Bladelock, or any other melee option. They can go in close range with
 Bhaalist Armour equipped and apply
  Aura Of Murder. This way other party members can enjoy the benefits of piercing vulnerability.
 - Ranged builds can also benefit from
 Aura Of Murder, as their weapons deal piercing damage - Hunter Ranger, Arcane Archer, Sword Bard Archer, Gloomstalker Assassin, etc. Of course, they can also have
  Bhaalist Armour equipped, but this increases their risk, and also applies
  Threatened, which reduces attack rolls.
Controllers
Almost any party can benefit from good controllers that use ![]() Hold Person,
Hold Person, ![]() Glyph of Warding: Sleep, or
Glyph of Warding: Sleep, or ![]() Hold Monster. They guarantee a 100% critical chance and allow you to maximise the whole group's damage.
Hold Monster. They guarantee a 100% critical chance and allow you to maximise the whole group's damage.
- Fire Sorcerer - one of the most reliable builds for this type of setup, with
 Hat of Fire Acuity +
  Scorching Ray to build
  Arcane Acuity. After that, use the control spell with a 100% success chance.
 - Spellsword build - Sorcadin, Bardadin, Swords Bard Archer is the standard option for gish controllers, as they get access to
 Band of the Mystic Scoundrel +
  Helmet of Arcane Acuity for a very high spell success chance, and the already mentioned spell options.
 - Lorecerer - similar to Fire Sorcerer, can use the same combo and can easily apply total control. Sadly, it is just limited to
 Hold Person and
  Glyph of Warding.
 - Other caster-related builds - Lore Bard or even Arcane Trickster with access to unlimited scrolls. They get nice features that help them improve their spell success chance.
Leveling Overview
Here is a concise table with all the main picks during your levelling progression. For more detailed reasoning, I go further in the article. Also, do not forget to check the recommended gear, as it is crucial and can drastically change how the build works.
| Level | Class | Selection |
|---|---|---|
| 1 | Barbarian 1 | Abilities: Natural Strength setup: STR - 16 (14+2), DEX - 16 (15+1), CON - 12, INT - 8, WIS - 8, CHA - 14 Strength Elixir setup: STR - 8, DEX - 16 (15+1), CON - 14, INT - 8, WIS - 10, CHA - 17 (15+2) |
| Skills: Any | ||
| 2 | Barbarian 2 | - |
| 3 | Barbarian 3 | Subclass: Berserker |
| 4 | Barbarian 4 | Feat: |
| 5 | Barbarian 5 | - |
| 6 | Rogue 1 | Abilities: any |
| 7 | Rogue 2 | - |
| 8 | Rogue 3 | Subclass: Thief |
| 9 | Rogue 4 | Feat: |
| 10 | Fighter 1 | Fighting Style: |
| 11 | Fighter 2 | - |
| 12 | Fighter 3 | Subclass: Battlemaster |
| Manoeuvre: |
Starting the Game - Level 1
This section covers the creation screen and what would go into the best Races, Abilities, and Skills for the Karlach build. If you have already started playing, feel free to do a respec at Withers and follow along. This will make it easy to follow the build step by step.
Origin
If you want to play Karlach as the main character, you would choose her in character creation
Races
Picking a race provides various benefits - abilities, dialogue options, looks, etc.
| Race | Features | Description |
|---|---|---|
 Zariel Tiefling Zariel Tiefling |
|
Karlach's race is Zariel Tiefling. They come with a wide variety of features, and as the level increases, unlock special smites - |
Class
| Overview | |
|---|---|
 Barbarian Barbarian |
|
| Features | |
| Unique action to Barbarians that boosts damage and gives physical resistance. Make sure to attack each turn to sustain the bonuses. | |
| Gives some utility to the Constitution when going with Barbarian. Sadly, the build relies on various armors so this will not be utilized to the full extent. | |
Background
Backgrounds serve a few purposes:
- They give a role-playing option of your previous history, if you are into that.
- It gives skill proficiencies, meaning that you get an additional bonus when you roll that skill check in which you are proficient. This depends on your proficiency bonus, which increases as you level up.
Here are my recommendations based on this build
| Background | Skills | Description |
|---|---|---|
| Outlander | Athletics Survival |
The default choice for Karlach. |
Abilities
Now, let's take a look at the abilities of the Karlach Berserker build. Correct allocation will allow you to maximise the early gameplay and get good modifier bonuses.
Here are some key points to know about ability points:
- They give "ability modifiers" that apply to various skill checks. For example, Charisma works on Intimidation and persuasion checks. Wisdom on Survival or Animal Handling, and so on.
- You get a higher ability modifier on even values - 10, 12, 14, etc. So keeping it on odd may be useless. However, there are various +1/2 modifiers in the game, specifically
 Auntie Ethel's Hair or Feats that help round this up.
 - Weapons can benefit from either Dexterity or Strength, depending on their type
- You also have a spellcasting modifier, which can be Wisdom, Charisma, or Intelligence, depending on your class.
| Abilities | Description |
|---|---|
| Recommended Setup: Strength - 16 (14+2) Dexterity - 16 (15+1) Constitution - 12 Intelligence - 8 Wisdom - 8 Charisma - 14 |
This is what I would recommend, for base setup, for those that do not want to use |
| Strength Elixir setup: Strength - 8 Dexterity - 16 (15+1) Constitution - 14 Intelligence - 8 Wisdom - 8 Charisma - 17 (15+2) |
For minmaxers, this is the way to go. |
Skills and Expertise
Overall, the skills should be impacted by your role-playing and background decisions. However, you would still want those who will give you the best benefits. My recommendations are to pick those at which you have a high ability modifier or are useful in general:
- Intimidation
- Perception
- Animal Handling
Leveling Progression - Levels 2-12
Here is the detailed progression for the Karlach build to get you started. You can use it as a guideline because early games can be daunting and overwhelming. Later on, once you get a feel for the class, you can start picking your options.
Level 2
By this time, you should have landed on the ![]() Ravaged beach already and started exploring the initial area. You might need 1 additional encounter if you did not obtain enough XP in the Nautiloid.
Ravaged beach already and started exploring the initial area. You might need 1 additional encounter if you did not obtain enough XP in the Nautiloid.
| Features | Description |
|---|---|
| Gives an |
|
| Pretty good melee attack option, giving an easy |
Level 3
Subclass
| Overview | |
|---|---|
 Berserker Berserker |
|
| Features | |
| An upgraded version of Rage. It unlocks two new attacks that can be used with your bonus action. | |
| A melee attack with a bonus action | |
| Throw an attack with a bonus action. | |
Level 4
Feat
| Feat | Description |
|---|---|
| A very powerful feat, that greatly improves combat capabilities. The main problem is the penalty to attack rolls. However, this can be negated by disabling the effect or getting various bonuses. I recommend checking the Attack Roll Guide on how to maximise your hit chance. | |
| Ability Improvement - +2 Strength | Going for +2 Strength is a safer option, as you don't have to manage attack rolls extensively. Still with |
Level 5
| Feature | Description |
|---|---|
| This allows attacking two times instead of one, theoretically doubling the build's damage output. | |
| An amazing feature of Barbarian, it will make it easier to get a better position for higher ground. |
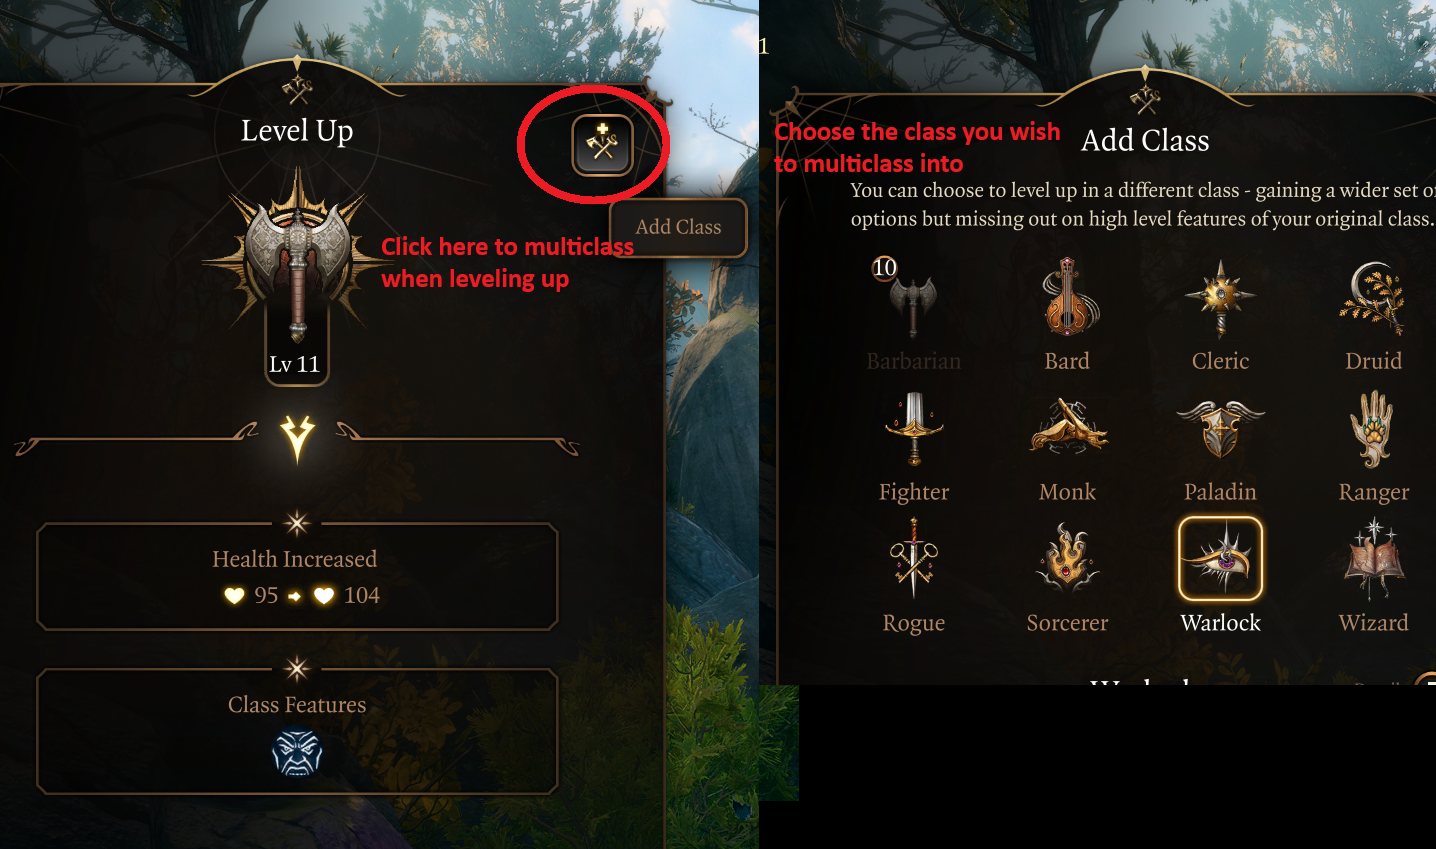
Level 6 - Rogue Lv 1
As mentioned in the introduction, Rogue plays a pivotal role. It reflects part of Karlach's background, but also gives "purpose" to Berserker, as the subclass really suffers with only a bonus action, which Thief will give via ![]() Fast Hands.
Fast Hands.
Class
| Overview | |
|---|---|
 Rogue Rogue |
|
| Features | |
| This can be exploited with weapon attacks for an additional 1d6 damage once per turn. Be sure to have an |
|
| This can be exploited with weapon attacks for an additional 1d6 damage once per turn. Be sure to have an |
|
Abilities
To be fair, any picks are okay, but I would emphasise two:
- Sleight of Hand - if you need a dedicated lockpicker or trap disarmer
- Charisma-based - Persuasion, Deception, Intimidation, etc.
Level 7 - Rogue Lv 2
| Action | Description |
|---|---|
| Bonus action hide, which the Berserker build will not care about. | |
| Cover more distance this turn: double your movement speed. | |
| Retreat safely: moving won't provoke Opportunity Attacks. |
Level 8 - Rogue Lv 3
Subclass
| Overview | |
|---|---|
 Thief Thief |
|
| Features | |
| Allows another bonus action, in Monk's case this will be Flurry of Blows, for more damage per turn. | |
| Reduces fall damage. | |
Level 9 - Rogue Lv 4
| Feat | Description |
|---|---|
| Ability Improvement - +2 Strength | If doing the Natural Strength setup, this is my recommended pick |
| If not yet taken. | |
| A solid feat option, which rerolls damage dice, providing a significant damage boost. | |
| Can be used with correct positioning to get an additional attack when a nearby ally is attacked. |
Level 10 - Fighter Lv 1
Class
| Overview | |
|---|---|
 Fighter Fighter |
|
| Features | |
| You can use this to heal yourself in tight encounters, to get a little bit more of survivability. | |
Fighting Style
| Style | Description |
|---|---|
| Effective stat boost compared to other fighting style options, as a result, improving armour class. |
Level 11 - Fighter Lv 2
| Feature | Description |
|---|---|
| The iconic action of a fighter is extremely popular for its simplicity and effectiveness. You get additional action with full bonuses from |
Level 12 - Fighter Lv 3
The level unlocks a subclass, which will give improved capabilities for single-target damage and conditions
Subclass
| Overview | |
|---|---|
 Battle Master Battle Master |
|
| Features | |
 Superiority Dice Superiority Dice |
These dice give bonus 1d8 damage, can be used 4 times, and are reset each short and long rest. Easy damage increase and improved battlefield control. |
Manoeuvre
Choose 3:
| Manoeuvre | Description |
|---|---|
| One of the key options to make a fighter very powerful in early games. Once you obtain the |
|
| Very powerful action, which allows them to disarm foes and force them to drop their weapons. | |
| Excellent option, for when you need to push off an enemy from a ledge, or into a difficult area like |
|
| Only the ranged option is worthwhile, which gives infinite |
That's it, the build is done!
Maximizing Ability Scores
Now, as the build progression is covered, there are a few aspects and important decisions you will have to make throughout the game. These will decide your final score for abilities.
Strength - natural setup
So this ability score is quite important, and as we talked already, there are a few main ways to maximize it:
- 16 Strength - the base from character creation.
- Feat - Ability Improvement - +2 Strength.
- Act 2 - Potion of Everlasting Vigour - +2 Strength.
- Act 3 - Mirror of Loss - pick +2 Strength.
This results in 22 Strength, with a +6 modifier to attacks.
Potions, Elixirs, and Consumables
Let's take a look at what consumables you can use to further empower the build.
Potions
These have short-term effects for a few turns.
| Consumable | Description |
|---|---|
| This is a very powerful potion. It gives an additional action point, which can be used to cast a spell or attack. The activation is generally by drinking using a bonus action. However, you can stack together with party members and make one member |
|
| It can be used in two ways - the first one is to enter combat with a |
|
| An easy way to get the |
|
| Gives |
Coatings
These are short-term coatings, used on the weapon. Only one can be activated at a time:
| Consumable | Description |
|---|---|
| The attack roll bonus is pretty good, which improves your chances of hitting. | |
| Helps with attack and damage rolls. | |
| Can put foes |
|
| Can apply |
Elixirs
Unfortunately, only one Elixir can be active at a time. However, the good thing is that they last for the whole day, before making a long rest. This makes exlixirs very useful and economical.
Be sure to activate them before combat, as otherwise, you will need to use Bonus Action.
| Consumable | Description |
|---|---|
| As you will be able to easily kill at least the weakest foe, this ensures additional attacks per turn. This is the strongest elixir option in most cases. | |
| Sets the strength value to 21 until the Long Rest. This is a perfect option for the early game, while you are limited to 17 Strength. Here is a farming guide for Elixir of Hill Giant Strength. You can then set the strength to 8 and put those points elsewhere. | |
| Available later in the game, the elixir sets the strength to 27. Excellent option to be used in case, |
|
| Provides bonus damage of 1d4 and some other good bonuses. | |
| Reduces the requirement for critical hit rolls. | |
| For some encounters, you will want to go first. This elixir will ensure that it overcomes even surprise mechanics. However, if you have |
Illithid Powers
This special mechanic in Baldur's Gate 3 allows you to consume tadpoles and unlock special Illithid Powers.
At first, you can only use the base powers. As you move to Act 3, you will be able to unlock the outer ring powers, also called Elite.
| Illithid Power | Type | Description |
|---|---|---|
| Base | Beneficial power to take as it does not have any costs, and provides only benefits on the first hits with attack rolls. | |
| Base | It's an easy way to ensure you land critical hits, especially good when you need an instant damage boost. | |
| Base | It can help to kill an enemy faster if it is left with a few HP. | |
| Base | It can help give a slight damage boost. The main issue is that this cannot be activated outside of combat, so you will have to use an action point. | |
| Base | Excellent way to deal additional damage with reaction, early and mid game. | |
| Base | Decreases enemy ability score, free use, so worth getting. | |
| Base | Excellent option for bonus temporary HP. It can also apply |
|
| Elite | It can be used to maximize the effectiveness of charisma-based skills, especially those relevant to the main character. | |
| Elite | It can be used to save yourself from a deadly spell. |
Equipment Recommendations
Now I would like to go through some gear recommendations to maximize the Karlach Build. Items are especially important as they take the build to the next level thanks to their unique effects.
Here are some recommendations on how to follow the gear picks:
- I recommend checking the Item Checklists or Interactive Map, depending on which is easier to use for you. This will help you track which items and when you should pick them.
- Gear for each slot is listed Best -> Worst. Generally, this means that you would start with lower gear recommendations (as they are available earlier) and upgrade to higher ones. However, in some cases, the best items can be obtained early, like
 Titanstring Bow, and some others.
 - I mention Stat Sticks in caster and ranged builds. These are items that you do not use directly (like
 Club of Hill Giant Strength,
  Knife of the Undermountain King,
  The Dead Shot, etc.), but their bonuses still apply to other weapon attacks or actions.
 - BiS - means best in slot item
- If an item is taken by another character, use the one with lower priority or even those from previous acts. If you want to have the best items for all builds, this will require planning, which is not for everyone.
Act 1
| Slot | Item | Description |
|---|---|---|
 Melee (Two-Handed) Melee (Two-Handed) |
Gives a very easy |
|
| One of the best early game weapons with a boost to attack rolls against enemies that have already received damage. | ||
| Excellent sword, which has a powerful |
||
| A solid greatsword option with special shield action. | ||
 Ranged Ranged |
Gives bonus initiative, allowing one to go earlier in combat. | |
| Gives easy |
||
 Head Head |
One of the best headwear for pure weapon damage increase. | |
| Improves movement speed, allowing one to reach important targets easily, early in the game. | ||
 Cloak Cloak |
- | Nothing really of note here. |
 Armor Armor |
A solid armour option, with |
|
| Grants |
||
| The most relevant early-game armour, that you can take from Lae'zel | ||
 Gloves Gloves |
Gives easy |
|
| One of the best picks if you are doing a Natural Strength setup. This allows for a reduction of Dexterity investment to 8, and puts other points into Constitution or Wisdom. | ||
| Applies the |
||
 Boots Boots |
One of the best boots in the game for walking on |
|
| Excellent boots to help move through |
||
| Gives |
||
 Amulet Amulet |
If you can acquire it, this can be the best amulet option for most of the game. | |
| Excellent amulet that gives an easy vulnerability source, for the mid-game. | ||
| Gives a free |
||
 Rings Rings |
Bonus armour for survivability. | |
| Improves damage on each hit. | ||
| Movement speed boost, which is especially important in some big area fights in Act 1. |
Act 2 - mid-game
| Slot | Item | Description |
|---|---|---|
 Melee (Two-Handed) Melee (Two-Handed) |
Depending on your decision on Nightsong, you will obtain one of these. The |
|
| A decent weapon that comes with a |
||
| One of the first weapons with a +2 enchantment comes with a Force damage rider. | ||
| The weapon is used to enchant other weapons with |
||
 Ranged Ranged |
Although not mandatory, this bow is useful as it can apply |
|
 Head Head |
- | Previous Act headwear |
 Cloak Cloak |
Improves survivability and Saving Throw success. | |
| Helps to absorb elemental damage, which can then improve your weapon attacks. | ||
 Armor Armor |
Both of these armours are excellent choices. The evil one is slightly better as it also reflects damage, but overall, the free |
|
| I would only wear this if you have 16 dexterity, to make it a competitive armour. | ||
 Gloves Gloves |
Thematically, these are one of the most interesting gloves. Similar to |
|
| Solid gloves for weapon damage boost. | ||
| The gloves are an option for enabling you to run 8 Dexterity investment and maximising other abilities - strength, constitution or charisma. | ||
 Boots Boots |
Gives +1 Armour Class, which is a significant survivability boost. | |
| - | Boots from Act 1 are still perfect. | |
 Amulet Amulet |
Continues to be the best amulet in terms of damage boost. | |
| Excellent pick with |
||
| Excellent amulet that can help in tight situations when you are |
||
 Rings Rings |
Gives additional damage boost while the target is at least |
|
| Improves armour class, making it easier to avoid enemy attacks. |
Act 3 - Final Build setup
Piercing Setup
If you are okay, with Karlach wearing "evil" items, you can create a very powerful setup, that destroys enemies easily with ![]() Bhaalist Armour:
Bhaalist Armour:
| Slot | Item | Description |
|---|---|---|
 Melee (Two-Handed) Melee (Two-Handed) |
Listed the weapons in terms of being "powerful". |
|
 Armor Armor |
One of the best armours in the game, offering |
Standard Items
If you want to opt out of wearing ![]() Bhaalist Armour, or it will be used by other companions, here are all gear recommendations:
Bhaalist Armour, or it will be used by other companions, here are all gear recommendations:
| Slot | Item | Description |
|---|---|---|
 Melee (Two-Handed) Melee (Two-Handed) |
Even if you don't use |
|
| The best slashing-type damage two hander in the game, giving bonus damage based on the strength modifier. | ||
| Going with the fire theme, this weapon fits perfectly as it generates |
||
 Ranged Ranged |
In terms of pure damage boost, this is the best bow, especially as you can easily guarantee critical hits via |
|
| Gives a whooping +3 to initiative, I would only use it without the |
||
| Reduces the critical roll requirements, giving a slight average damage boost. | ||
 Head Head |
Gives |
|
| A good helmet with a flat necrotic damage rider on weapon attacks. | ||
| The helmet is made for Barbarian as its main effect triggers when entering |
||
| Gives critical immunity and |
||
| The headwear comes with Critical hit immunity and auto-healing. This is a perfect combo with |
||
| Allows for obtaining additional bonus action for more attacks using |
||
 Cloak Cloak |
The strongest cloak in the game, with a significant boost to defensive capabilities. | |
 Armor Armor |
Gives a boost in temporary HP and reflects damage to the attackers. It's a nice free bonus, especially if you have |
|
| One of the best medium armours in the game, with a solid armour class boost. | ||
 Gloves Gloves |
If you dumped strength and used |
|
| Powerful glove option, which improves both attack rolls and damage. This helps reduce |
||
| Gives 1d6 fire damage boost to all weapon attacks. | ||
| If your party has a way to guarantee critical hits via |
||
 Boots Boots |
A straight upgrade to |
|
| The boots are pretty good, but the main problem is that their action, |
||
 Amulet Amulet |
Continues to be a powerful amulet choice for direct damage boost. You can now get something like |
|
| I would say this amulet is mandatory if you plan on using |
||
 Rings Rings |
Gives a decent damage boost that inherits the weapon damage type. The target needs to be at least |
|
| A direct armour class boost. | ||
| Allows you to see through |
||
| Although the ring is in high demand by other builds, this could be used to both improve melee weapon damage and the reflection damage from |
||
| Can be equipped to automatically activate |
Build Mechanics and Interactions
In this section, I would like to dive deep into how to play the Karlach Build mechanics and interactions. These will help you understand what is happening and why, and maybe give you ideas on your own playstyle.
Core Mechanics and Combos
Let's go through key mechanics and tips on how to use the build effectively.
Raging as Berserker
Berserker comes with an improved version of ![]() Rage called
Rage called ![]() Frenzy. It gives the same stat benefits and resistances. So what is the purpose? You unlock
Frenzy. It gives the same stat benefits and resistances. So what is the purpose? You unlock ![]() Frenzied Strike and
Frenzied Strike and ![]() Enraged Throw. The latter is best used on the Throwzerker build.
Enraged Throw. The latter is best used on the Throwzerker build.
![]() Frenzied Strike is what we are interested in, as the build mainly uses melee weapons. To be honest, it kinda sucks. Each hit will apply
Frenzied Strike is what we are interested in, as the build mainly uses melee weapons. To be honest, it kinda sucks. Each hit will apply ![]() Frenzied Strain, reducing your hit chance, and it uses a bonus action, which competes with
Frenzied Strain, reducing your hit chance, and it uses a bonus action, which competes with ![]() Great Weapon Master: Bonus Attack.
Great Weapon Master: Bonus Attack.
Still, when you have a free bonus action, attacking, instead of doing nothing, is much better, as it might end the enemy. Later, once you get Thief level 3, two bonus actions make this a slightly better proposition
Managing Great Weapon Master
The most important aspect of most two-handed builds is correctly utilizing ![]() Great Weapon Master: All In and its -5 attack roll penalty. By putting effort into minimising the debuff, from level 4, you can get 10 flat damage boosts, making most of the enemies a cakewalk.
Great Weapon Master: All In and its -5 attack roll penalty. By putting effort into minimising the debuff, from level 4, you can get 10 flat damage boosts, making most of the enemies a cakewalk.
You can also disable the ![]() Great Weapon Master: All In effect in the "Passives" section of the hotbar, in case you have a very low hit chance.
Great Weapon Master: All In effect in the "Passives" section of the hotbar, in case you have a very low hit chance.
 Bless from a Cleric, Paladin, or
  The Whispering Promise ring for a 1d4 bonus.
- Spells like
 Faerie Fire, and
  Blindness give an
  Advantage to attackers.
  Oil of Accuracy or
  Diluted Oil of Sharpness, for a 1 and 2 attack roll bonus.
 Gloves of the Growling Underdog - can be obtained in Goblin Camp and give an
  Advantage for attack rolls.
 Phalar Aluve: Sing gives 1d4 to attack rolls.
Now, if you want more in-depth information, I have a guide covering how to increase attack rolls, which lists a lot of options and combinations. You can then pick the bonuses based on your party setup.
Soul Coins
Karlach comes with a special mechanic; she can consume ![]() Soul Coin to gain +1d4 fire damage until long rest. There are about 15-20 coins throughout the game, so to be fair, you can use them whenever you find them.
Soul Coin to gain +1d4 fire damage until long rest. There are about 15-20 coins throughout the game, so to be fair, you can use them whenever you find them.
Why is this important? Well, the additional damage is always welcome, but this gives an easy source of activating ![]() Thermoarcanic Gloves and generating
Thermoarcanic Gloves and generating ![]() Heat.
Heat.
Of course, this mechanic is not a game-changer mechanic, and many people totally skip or forget it. However, it's a nice interaction specifically for Karlach, without requiring much effort or preparation from the player.
Heat Mechanic
This is a pretty simple mechanic. You accumulate stacks of ![]() Heat. This is available if you use
Heat. This is available if you use ![]() Thermoarcanic Gloves,
Thermoarcanic Gloves, ![]() Thermodynamo Axe or
Thermodynamo Axe or ![]() Hellfire Greataxe. Once you have a stack, a new icon appears with the
Hellfire Greataxe. Once you have a stack, a new icon appears with the ![]() Heat Convergence passive. You can activate it, and it will make your next attack or spell consume the
Heat Convergence passive. You can activate it, and it will make your next attack or spell consume the ![]() Heat and give increased damage.
Heat and give increased damage.
The trick here is to use something like ![]() Cleave from your weapon action to hit multiple enemies. This way, the bonus damage will apply to each hit, making the effect really powerful. Using it on one target is kind of disappointing in terms of inflicting damage.
Cleave from your weapon action to hit multiple enemies. This way, the bonus damage will apply to each hit, making the effect really powerful. Using it on one target is kind of disappointing in terms of inflicting damage.
The one downside of ![]() Heat is that you receive fire damage each turn. In my opinion, it's a small problem, so I would not worry too much.
Heat is that you receive fire damage each turn. In my opinion, it's a small problem, so I would not worry too much.
Battlemaster Manoeuvres
Once you unlock Battlemaster, you can use manoeuvres to get various effects and a slight damage boost on your weapon attacks. You get a few attacks each short rest, so it should be plenty to gain a significant advantage in the combat encounter:
 Precision Attack - is a very powerful option, especially when you need that attack to land, for example enemy is on low HP, and killing them is essential.
 Disarming Attack - greatly weakens foes which rely on weapons. I would not rely too much on this against casters, but melee martials or ranged combatants will become almost harmless.
 Pushing Attack - can help you force enemies to specific areas, like
  Difficult Terrain or special effects of
  Spike Growth,
  Darkness, etc. You can also push enemies off the ledges.
 Trip Attack (Melee) can be useful if the enemy's turn has passed and you and your allies will go after that. The main problem is that this is a 1-turn
  Prone effect, meaning that they will be able to stand up on their turn, even if the movement speed is reduced. But it's still valuable as an easy
  Advantage source.
 Menacing Attack (Melee) - can be used as a way to force an enemy in place.
Build Combat loop
This section covers the main steps on how to use the build. I do recommend reading the mechanics section before, as it will give more insights into how everything works and why things are as they are.
Act 1
This covers the early parts of the game, mostly Act 1 levels 1-6:
- The build is truly simple, and the goal is to hit as much as possible.
 Rage and later
  Frenzy are your go-to options, especially on more difficult encounters, as they give physical damage resistance.
- The
 Frenzied Strike does compete with
  Great Weapon Master: Bonus Attack for usage. What would I recommend? Prioritise the latter, and use the former, in case
  Great Weapon Master: Bonus Attack does not activate.
Act 2
Act 2 will finally unlock Thief, with additional bonus action:
- Now you can activate
 Frenzy and use another bonus action to attack either with
  Frenzied Strike or
  Great Weapon Master: Bonus Attack.
Act 3
Here, Battlemaster will give some tactical opportunities on how you can approach combat:
 Action Surge will be a significant boost for damage each short rest. It will allow you to hit enemies 2x times with
  Extra Attack.
- Use various manoeuvres depending on the situation. Need to land a hit -
 Precision Attack. Is the enemy using weapons?
  Disarming Attack (Melee). Close to a ledge?
  Pushing Attack (Melee), and so on...
Conclusion
Thank you for reading the Karlach build for Baldur's Gate 3. This is a pretty straightforward setup for the red companion. It enables solid frontline performance and damage absorption thanks to ![]() Frenzy.
Frenzy.
Cheers!
Like, Dislike, comment, or share!

Discussion
No comments yet.
Be the first one to leave a comment!